Logitech M325 Wireless Mouse User Manual

In the Box
- Mouse
- Logitech Unifying receiver
- 1 AA battery (pre-installed)
- User documentation


Plug the Unifying receiver into a computer USB port. Your mouse is now ready for use.
Mac® OS X Users: When plugging in the Unifying receiver, the Keyboard Assistant window may appear. Please close this window.

Features
- Scroll wheel
- Middle button. The function of this button depends on your operating system and the application being used. For example, if you are browsing the Internet in Windows® and click on a link using the Middle button, typically the link opens in a new tab.
- Internet back/forward. Tilt the scroll wheel right to move forward one page. Tilt the scroll wheel left to move back one page.*
- On/Off slider switch
- Battery door release
- Unifying receiver storage. When the mouse is not in use, you can store the Unifying receiver inside the mouse.
* On a Mac® the Internet back/forward feature is not supported. You can assign Dashboard, Exposé, or Spaces to the tilt wheel features within System Preferences.

Help with setup: Mouse is not working
- Is the mouse powered on?
- Is the Unifying receiver securely plugged into a computer USB port?
Try changing USB ports. - If the Unifying receiver is plugged into a USB hub, try plugging it directly into a USB port on your computer.
- Check the orientation of the batteries inside the mouse. To check battery power, turn the mouse OFF and then ON. If the battery indicator light glows red or does not glow at all, replace the batteries.
- Try using the mouse on a different surface. Remove metallic objects between the mouse and the Unifying receiver.
- Try moving the Unifying receiver to a USB port closer to the mouse.
If you are using a tower PC, go to www.logitech.com/usbextender for a USB extender. - Try reconnecting the mouse and Unifying receiver using the Logitech Unifying software (refer to the Unifying section of this guide).

The Logitech® Unifying receiver
Plug it. Forget it. Add to it.
Your new Logitech product ships with a Logitech® Unifying receiver. Did you know you can add a compatible Logitech wireless device that uses the same receiver as your current Logitech Unifying product?
Are you Unifying-ready?
If you have a Logitech wireless device that’s Unifying-ready, you can pair it with additional Unifying devices. Just look for the orange Unifying logo on the new device or its packaging.
Build your ideal combo. Add something. Replace something. It’s easy, and you’ll use only one USB port for up to six devices.
Getting started is easy
If you’re ready to pair your device(s) via Unifying, here’s what you need to do:
- Make sure your Unifying receiver is plugged in.
- If you haven’t already, download the Logitech® Unifying software from www.logitech.com/unifying.
- Start the Unifying software* and follow the onscreen instructions to pair the new wireless device with your existing Unifying receiver.
Go to Start / All Programs / Logitech / Unifying / Logitech Unifying Software

What do you think?
Please take a minute to tell us. Thank you for purchasing our product.
www.logitech.com
© 2013 Logitech. All rights reserved. Logitech, the Logitech logo, and other Logitech marks are owned by
Logitech and may be registered. Microsoft, Windows Vista, Windows, and the Windows logo are trademarks of
the Microsoft group of companies. Mac and the Mac logo are trademarks of Apple Inc., registered in the U.S.
and other countries. All other trademarks are the property of their respective owners. Logitech assumes no
responsibility for any errors that may appear in this manual. Information contained herein is subject to change without notice.
Specs & Details
Dimensions
Mouse
- Height: 3.73 in (94.7 mm)
- Width: 2.24 in (57 mm)
- Depth: 1.54 in (39.1 mm)
- Weight (with batteries): 3.28 oz (93 g)
USB Receiver
- Height: 0.57 in (14.4 mm)
- Width: 0.74 in (18.7 mm)
- Depth: 0.24 in (6.1 mm)
- Weight: 0.06 oz (1.8 g)
Technical Specifications
Sensor Technology
- Smooth optical tracking
- DPI (Min/Max): 1000±
Buttons
- Number of buttons: 5
Scrolling
- Micro-Precision Scrolling
- Scroll Wheel: Yes, rubber, 4D
- Tilt scroll function: Yes
Battery
- Battery: 18 months
- Battery Details: 1 x AA (included)
Connectivity
- Connection Type: 2.4 GHz wireless connection
- Wireless range: 10 m (33ft)
Optional software: Logitech Options
Warranty Information
3-year limited hardware warranty
Part Number
- Red : 910-002651
- Blue : 910-002650
- Violet : 910-003120
- Brilliant Rose : 910-003121
FAQ- Frequently Asked Questions
Unifying Receiver & Software – Pairing and Troubleshooting
Your Unifying USB receiver can be paired with up to six Unifying devices at a time. You can determine if your Logitech devices are Unifying by this logo: ![]()

![]()
What do you want to try today?
Connecting your device to a Unifying receiver
Connect your Logitech keyboard or mouse with the Unifying receiver
You can use Logitech Unifying software to connect your keyboard or mouse to your computer.
NOTE: If you don’t already have it installed, you can download Unifying software from the Software Downloads page.
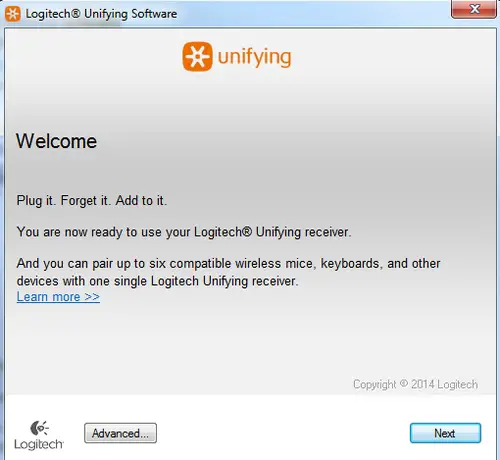
1. Launch the Logitech Unifying software.Windows:
– Start > Programs > Logitech > Unifying > Logitech Unifying Software
– Macintosh: Application / Utilities / Logitech Unifying Software
2. At the bottom of the Welcome screen, click Next.
NOTE: These instructions use Windows screenshots for a keyboard. Macintosh will look slightly different, but the instructions are the same for keyboard or mouse.
3. When you see the “Restart the device…” window, follow the on-screen instructions to turn your device off and then back on.

4. When your device is detected, you’ll see a “We have detected your…” confirmation screen. Type a test message in the field provided to make sure it works.
5. If your device connected successfully, click Yes and then Next. 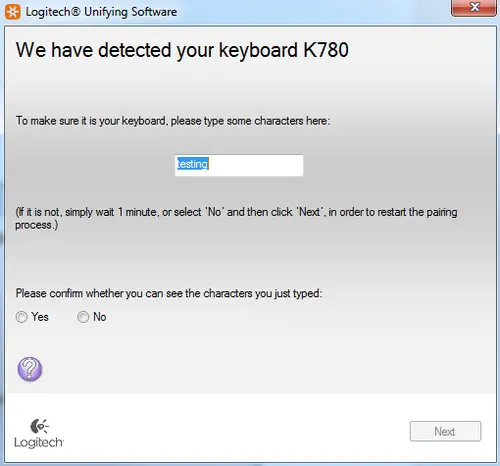
6. If your device doesn’t work right away, wait a minute to see if it connects. If it doesn’t, select No and then click Next to restart the pairing process from Step 1 above.
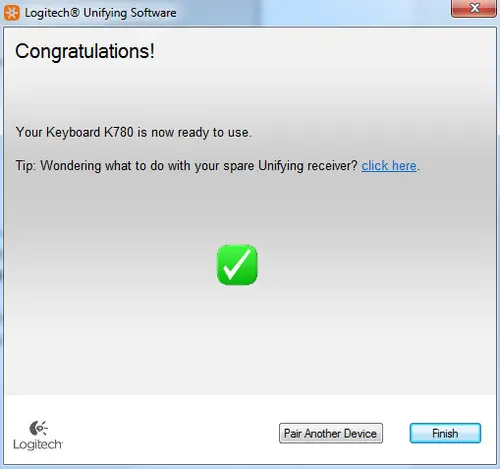
7. Click Finish to exit the Logitech Unifying Software (or Pair Another Device to pair additional devices). Your device should now be connected.
Connecting a Unifying-ready device to a Unifying receiver
If your device is marked with the Unifying logo, you can use it with any Unifying receiver. Unifying receivers can be paired with up to six Unifying devices at a time.
Unifying logo on product Unifying receiver ![]()

1. To connect a Unifying device to your Unifying receiver:
Launch the Logitech Unifying software.
NOTE: If you don’t already have it installed, you can download Unifying software from the Software Downloads page.
– Windows: Start > Programs > Logitech > Unifying > Logitech Unifying Software
– Macintosh: Application / Utilities / Logitech Unifying Software
2. At the bottom of the Welcome screen, click Next. 
NOTE: These instructions use Windows screenshots. Macintosh will look slightly different, but the instructions are the same.
3. Follow the on-screen instructions to turn your device off and then back on. 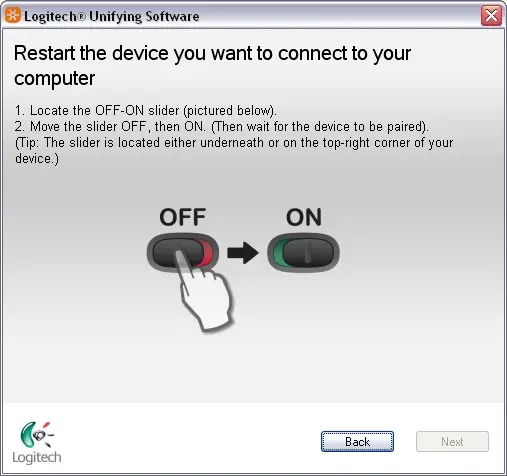
4. When your device is detected, you’ll see a confirmation message. If you connected a:
– Keyboard: Type a test message in the field provided to make sure it works.
– Mouse: Move it around to see if the cursor moves with it.
If your device connected successfully, click Yes and then Next. 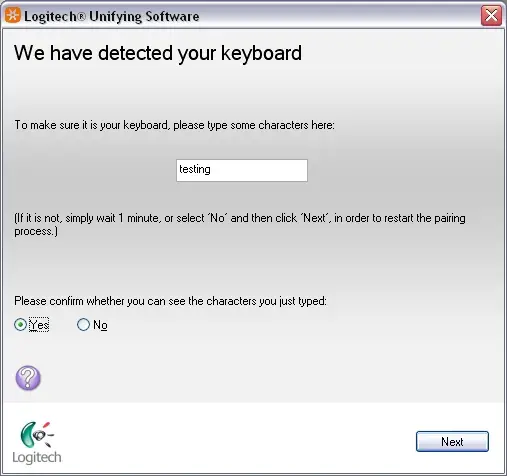
If your additional device doesn’t work right away, wait a minute to see if it connects. If it doesn’t, select No and then click Next to restart the pairing process from Step 5. Click Finish to exit the Logitech Unifying Software. Your device should now be connected.
Connecting a second Unifying device to a Unifying receiver
Your Unifying USB receiver can be connected to up to six Unifying devices. You can determine if your Logitech devices are Unifying by this logo: ![]()
To connect additional Unifying devices to your Unifying USB receiver:
1. Launch the Logitech Unifying software.
NOTE: If you don’t already have it installed, you can download SetPoint from the M515 Downloads Page, which contains the Unifying software.
– Windows: Start > Programs > Logitech > Unifying > Logitech Unifying Software
– Macintosh: Application / Utilities / Logitech Unifying Software
2. At the bottom of the Welcome window, click Next. 
NOTE: These instructions use Windows screenshots. Macintosh will look slightly different, but the instructions are the same.
3. When you see the “Restart the device…” screen (shown below), follow the on-screen instructions to turn your device off and then back on. 
4. When your device is detected, you’ll see a “We have detected your…” confirmation screen. If you connected a:
– Keyboard: Type a test message in the field provided to make sure it works.
– Mouse: Move it around to see if the cursor moves with it.
If your device connected successfully, click Yes and then Next. 
f your additional device doesn’t work right away, wait a minute to see if it connects. If it doesn’t, select No and then click Next to restart the pairing process from Step 1 above.
5. Click Finish to exit the Logitech Unifying Software. Your device should now be connected.
Pairing multiple devices to a Unifying receiver
A Logitech Unifying receiver can pair up to 6 compatible devices.
To pair multiple devices to a Unifying receiver, the Unifying software requires installation on your computer.
To get the Logitech Unifying software, go to www.logitech.com
Use a different USB receiver with my Unifying product
You can use any Unifying receiver to connect up to six Unifying devices. 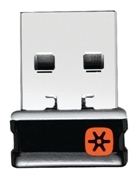
Look for this Unifying logo on both your product and the receiver: ![]()
Each time you switch a device to a different receiver, you need to reconnect it using the Logitech Unifying software. See answer 23116 for instructions.
NOTE: Although a device may be supported by the Unifying receiver, Logitech Keyboard and Mouse software support will depend on the specific product.
Change connection type from Unifying to Bluetooth or Bluetooth to Unifying
You can change your connection type from Unifying to Bluetooth or Bluetooth to Unifying at any time. Here’s how:
How to change from Bluetooth to Unifying receiver:
1. Press and hold the Easy-Switch button for 3 seconds to delete the previous setting and add a new one. If you haven’t used all of the available Easy-Switch channels, switch to the next one.
2. Plug the Unifying receiver into your computer.
3. Open the Unifying software if you purchased the receiver separately. If you don’t have the Unifying software installed, you can get it here.
4. Follow the on-screen instructions to complete the connection. See Connect your Logitech Bluetooth device for more help.
How to change from Unifying receiver to Bluetooth:
1. Press and hold the Easy-Switch button for 3 seconds to delete the previous setting and add a new one. If you haven’t used all of the available easy-switch channels, switch to the next one.
2. Open Bluetooth settings and follow the on-screen instructions.
3. Upon pairing, the LED light on your Logitech device stops blinking and glows steadily for 5 seconds. The light then turns off to save energy.
4. If you are setting up your device for the first time, please refer to the Getting Started section for additional help.
Gaming mouse compatibility with Logitech Unifying receivers
The Logitech G403 Wireless, G304, G305, G603, G703, G903 are built on the LIGHTSPEED architecture and connect to proprietary LIGHTSPEED receivers. They are not compatible and cannot be paired with the Unifying receiver.
Connectivity range of the Unifying receiver
The connectivity range for your mouse is 10 meters (33 feet) from the Unifying receiver. Moving the mouse closer will improve connectivity.
Operating distance between the mouse or keyboard and USB receiver
In an ideal environment, a Unifying or non-Unifying device can operate up to 30 feet (10 meters) away from its receiver (shown below) in a clear line of sight. 
If you’re not getting this distance, try these suggestions:
– Replace the battery/batteries or make sure your mouse or keyboard is fully charged
– Move devices that emit radio waves or could cause radio interference away from your work area (Examples: cell phones, radios, wireless routers, microwaves)
To determine if your environment is shortening your operating range, try using your device in a different environment to see if the distance improves. If it does, look for other possible sources of interference you can remove from your work area.
Re-pair or Troubleshoot
Unable to pair to Unifying receiver
If you’re unable to pair your device to the Unifying receiver, please do the following:
STEP A:
1. Make sure the device is found in Devices and Printers. If the device is not there, follow steps 2 and 3.
2. If connected to a USB HUB, USB Extender or to the PC case, try connecting to a port directly on the computer motherboard.
3. Try a different USB port; if a USB 3.0 port was used previously, try a USB 2.0 port instead.
STEP B:
– Open Unifying Software and see if your device is listed there. If not, follow the steps to connect the device to a Unifying receiver.
Can I pair one channel to the Unifying receiver after connecting both to Bluetooth?
If you’ve previously connected both channels using Bluetooth and want to reassign the connection type, do the following:
1. Download Logitech Options® software.
2. Open Logitech Options and on the home screen, click ADD DEVICE. 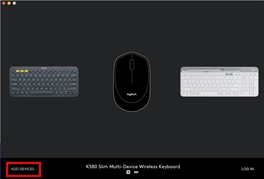
3. In the next window, on the left, select ADD UNIFYING DEVICE. A Logitech Unifying Software window will appear. 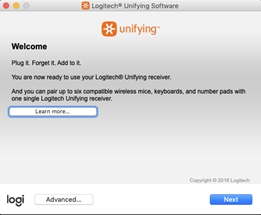
4. Put any channel you want to reassign connectivity in pairing mode (long press for three seconds until the LED starts to blink) and connect the USB Unifying receiver to your computer.
5. Follow the on-screen instructions in the Logitech Unifying Software. Once you complete the steps, your device will be successfully paired to your Unifying receiver.
Unpair a mouse or keyboard from the Unifying receiver
Your Unifying receiver can be paired with up to six Unifying devices at a time. If you need to unpair a device for any reason, you can use Logitech Unifying software. If you don’t already have it installed, you can download Unifying software from the Software Downloads page.
NOTE: Before proceeding, please make sure you have either a wired mouse connected to the computer, or a second mouse connected to the receiver.
1. To unpair your device:Open the Unifying software:
Start > All Programs > Logitech > Unifying > Logitech Unifying Software
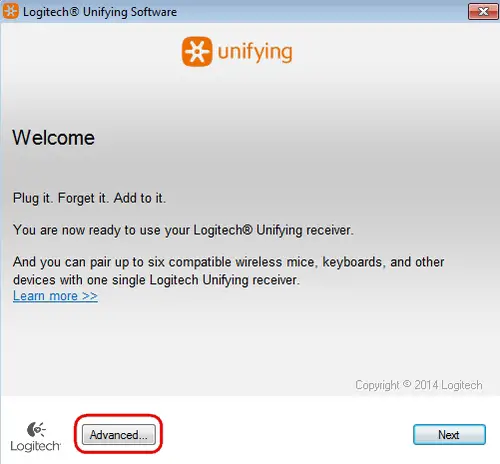
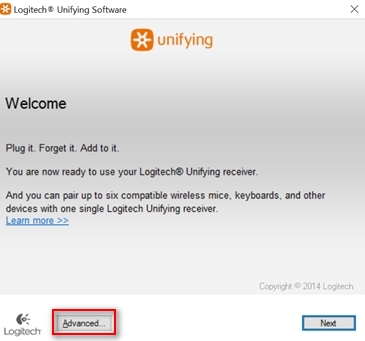
2. On the Welcome window, click Advanced…
3. In the left pane, select the device you wish to unpair.
4. On the right side of the window, click Un-pair, and then click Close. This will remove your mouse or keyboard from the list of Unifying devices and it will no longer work with your computer. 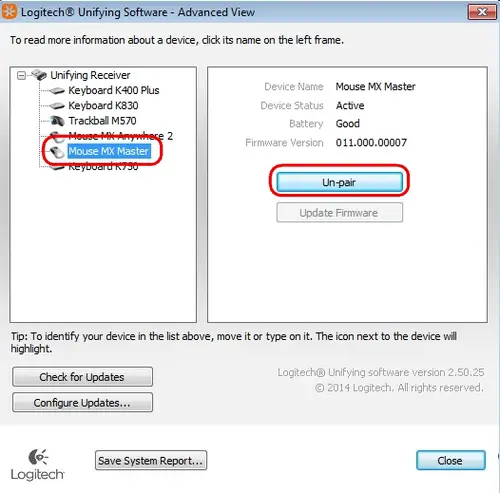
5. To make your device work again, you will need to re-pair it with the Unifying receiver. See Connecting a device to a Unifying receiver for more information.
My Unifying mouse or keyboard wakes the computer even when it is set not to
Symptom
After disabling the ability to wake-up the system in Windows Device Manager, the Unifying mouse or keyboard still brings the system out of sleep mode.
Solution
Even if you bought a mouse-only or keyboard-only product, the Unifying receiver that came with it still enumerates for both the mouse and keyboard interfaces.
Example
If you have two mice attached, then you would need to uncheck the “Allow this device to wake the computer” option for both mice plus a keyboard in the Windows Device Manager.
Use the process below to identify and configure the Unifying devices to not wake up the system in Windows Device Manager.
Changing wake-up settings in the Device Manager
To change the wake-up settings in Windows Device Manager, you’ll need to launch it through Computer Management and then make your selections. Here’s how:
1. Click Start, right-click Computer, and then click Manage.
2. Click Device Manager in the navigation pane on the left. 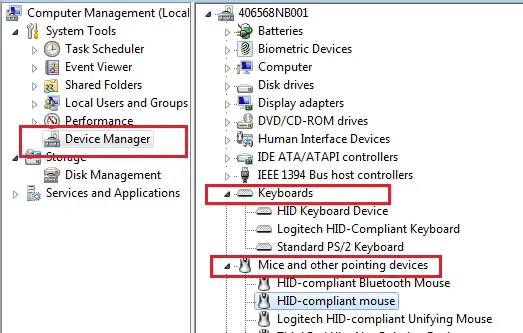
3. Select and expand either the “Keyboards” or “Mice and other pointing devices” category.
4. Right-click on the first entry and go to Properties > Details tab > Hardware IDs under the Property section.
5. Make sure the Value section contains: HID\VID_046D&PID_C52B. If it doesn’t, click Cancel and open the next mouse or keyboard entry in the list. 
6. Select the “Power Management” tab and uncheck the “Allow this device to wake the computer” check box. 
7. Repeat the same steps for all entries in both the “Keyboards” and “Mice and other pointing devices” categories.
Purchasing a replacement USB receiver
To ensure you are purchasing the right receiver for your device, identify your receiver from below:
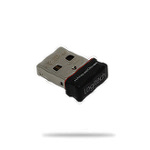
Unifying Receiver
If you’ve lost or damaged the Unifying receiver for your keyboard or mouse, you can purchase a replacement from here.
A Unifying receiver looks like the image below, and it does not work with products that are not Unifying compatible. 
To determine if your Logitech device is Unifying compatible, look for this Unifying logo on your device. ![]()
![]()
Logi Bolt Receiver
If your receiver and product have the below logo, you have the Logi Bolt receiver and a Logi Bolt compatible product. 
To learn more about Logi Bolt, click here.
To purchase a replacement receiver, click here.
Other Receiver
If your device used a receiver other than Unifying or Logi Bolt, or if you are unable to purchase a receiver from the above links, please reach out to our Customer Support team.
Unifying Software (Download)
Unifying software does not detect device
Try the suggestions below if your Logitech device isn’t detected in the Unifying software:
1. Make sure your device is not paired to your laptop using Bluetooth.
2. It may take several minutes for the Unifying software to detect your peripherals — give the software a few minutes to detect the peripherals.
3. Try manually pairing your devices — click Advanced on the bottom left of the Unifying screen, then click Pair a New Device. 
Unifying software does not detect mouse or keyboard
Try the suggestions below If your mouse and/or keyboard isn’t detected in the Unifying software
1. Make sure your mouse and/or keyboard are not paired to your laptop using Bluetooth.
2. It may take several minutes for the Unifying software to detect your peripherals — give the software a few minutes to detect the peripherals.
3. Try manually pairing your devices — click Advanced on the bottom left of the Unifying screen, then click Pair a New Device.
Unifying Software does not go to the next page after Next is pressed
If the Unifying software doesn’t proceed when you click Next, try the following:
1. Close the Unifying software.
2. Disconnect then reconnect the receiver.
3. Launch the Unifying software.
Scrolling issues with Windows 8.1 Consumer Preview version
Initial testing with Windows 8.1 Consumer Preview version reveals a scrolling issue with IE11 and Windows 8 apps, as well as on the Windows Start screen itself:
– Moderate to fast scrolling can become unresponsive until you stop scrolling. Then, the page will jump a long distance, usually to either the beginning or the end.
We’re working with Microsoft to resolve this issue.
As a workaround, you can modify your scrolling settings in IE11. Here’s how:
1. Launch IE11.
2. Open Internet Options and select the Advanced tab.
3. In the Browsing section, clear “Use smooth scrolling”. 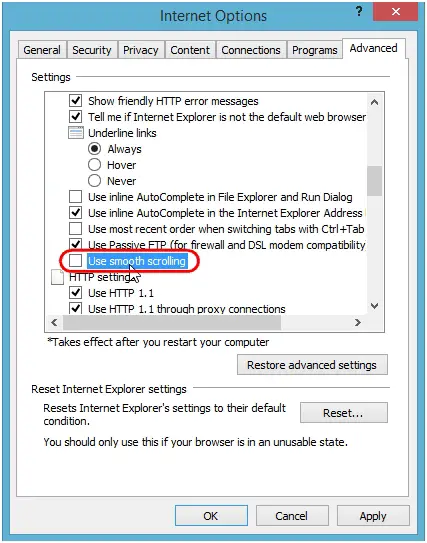
4. In the Security section, clear “Enable Enhanced Protected Mode”, and then click OK.
IMPORTANT:
Disabling Enhanced Protected Mode degrades the security settings in IE11. Please consider this before you make this change.
5. Restart your computer.
Cleaning your Logitech device
In the event your Logitech device needs cleaning we have some recommendations:
Before You Clean
– If your device is cabled, please unplug your device from your computer first.
– If your device has user-replaceable batteries, please remove the batteries.
– Be sure to switch off your device and then wait 5-10 seconds before starting to clean.
– Don’t put cleaning liquids directly on your device.
– For devices that are not waterproof, please keep moisture to a minimum and avoid any liquid dripping or seeping into the device
– When using cleaning sprays, spray the cloth and wipe — do not spray the device directly. Never submerge the device in a liquid, cleaning or otherwise.
– Don’t use bleach, acetone/nail polish remover, strong solvents, or abrasives.
Cleaning Keyboards
– To clean the keys, use regular tap water to lightly moisten a soft, lint-free cloth and gently wipe down the keys.
– Use compressed air to remove any loose debris and dust between the keys. If you do not have compressed air available, you could also use cold-air from a hair-dryer.
– You can also use fragrance-free disinfecting wipes, fragrance-free anti-bacterial wet wipes, makeup removing tissue, or alcohol swabs containing less than 25% concentration of alcohol.
– Don’t use bleach, acetone/nail polish remover, strong solvents, or abrasives.
Cleaning Mice or Presentation Devices
– Use tap water to lightly moisten a soft, lint-free cloth and gently wipe down the device.
– Use lens cleaner to lightly moisten a soft, lint-free cloth and gently wipe down your device.
– You can also use fragrance-free disinfecting wipes, fragrance-free anti-bacterial wet wipes, makeup removing tissue, or alcohol swabs containing less than 25% concentration of alcohol.
– Don’t use bleach, acetone/nail polish remover, strong solvents, or abrasives.
Cleaning Headsets
– Plastic parts (headband, mic boom, etc.): it is recommended to use fragrance-free disinfecting wipes, fragrance-free anti-bacterial wet wipes, makeup-removing tissue, or alcohol swabs containing less than 25% concentration of alcohol.
– Leatherette earpads: it is recommended to use fragrance-free disinfecting wipes, fragrance-free anti-bacterial wet wipes, or make-up removal tissue. Alcohol wipes can be used on a limited basis.
– For the braided cable: it is recommended to use anti-bacterial wet wipes. When wiping cables and cords, grip the cord mid-way and pull towards the product. Don’t forcefully pull the cable away from the product or away from the computer.
– Don’t use bleach, acetone/nail polish remover, strong solvents, or abrasives.
Cleaning Webcams
– Use tap water to lightly moisten a soft, lint-free cloth and gently wipe down the device.
– Use lens cleaner to lightly moisten a soft, lint-free cloth and gently wipe down the webcam lens.
– Don’t use bleach, acetone/nail polish remover, strong solvents, or abrasives.
If Your Device Still Isn’t Clean
– In most cases, you can use isopropyl alcohol (rubbing alcohol) or fragrance-free anti-bacterial wipes and apply more pressure when cleaning. Before using rubbing alcohol or wipes, we suggest you test it first in an inconspicuous area to make sure it doesn’t cause discoloration or remove any printing on your device.
– If you’re still not able to get your device clean, please consider contacting us.
COVID-19
Logitech encourages users to properly sanitize their products in accordance with guidelines put out by the World Health Organization and the Centers for Disease Control guidelines.
Erratic scrolling with SetPoint when using Chrome, Internet Explorer, or Windows 8 Start screen apps
SetPoint versions 6.50 and later include a smooth scrolling plug-in for Google Chrome and Internet Explorer. If you’re having problems with erratic scrolling, please upgrade to SetPoint 6.52 or later, which improves scrolling for these browsers.
After upgrading to SetPoint version 6.52 or later, you may still experience erratic scrolling on individual web sites or pages that implement technologies differently. If you’re using Start screen apps in Windows 8, it’s also possible that the app you’re using can’t properly interpret the smooth scrolling function. In this case, you can also disable the SetPoint smooth scrolling plug-in.
NOTE: You can disable the SetPoint plug-in for the Internet Explorer and Chrome browsers individually, but if you disable smooth scrolling in SetPoint, it will be disabled for everything: Chrome, Internet Explorer, and the Windows 8 Start screen apps.
Google Chrome
1. To disable the Logitech SetPoint smooth scrolling plug-in for Google Chrome:
Launch Chrome.
2. Click the icon on the upper-right corner and select Settings. 
3. Select Extensions > Logitech SetPoint and clear Enabled. 
NOTE: To enable the smooth scrolling plug-in, follow the steps above, and in step 3, click Enable.
4. Close and re-open your browser for the settings to take effect.
Internet Explorer
1. To disable the Logitech SetPoint smooth scrolling plug-in for Internet Explorer:
Select Control Panel > Network and Internet > Internet Options.
2. On the Programs tab, click Manage add-ons. 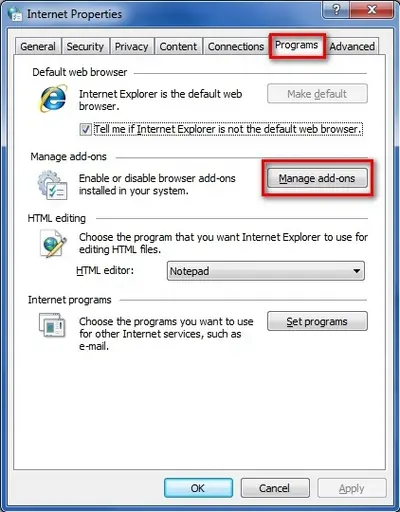
3. Select Logitech SetPoint and then click Disable.
NOTE: If the plug-in is currently disabled, the Enable button will appear instead. 
4. Click Close to close the dialog box.
NOTE: To enable the smooth scrolling plug-in, follow the steps above, and in step 4, click Enable.
5. Close and re-open your browser for the settings to take effect.
Windows 8 Start screen apps
If scrolling is too fast or too slow with some of your Windows 8 Start screen apps, try the following:
– If your mouse has a Scroll Left and Scroll Right function, use that instead of the scroll wheel.
– Disable Smooth Scrolling in SetPoint:
1. Launch SetPoint by clicking the SetPoint icon ![]() in the Notification area and select Mouse and Keyboard Settings.
in the Notification area and select Mouse and Keyboard Settings.
2. Click on Pointer Settings, and clear Enable Smooth Scrolling.

3. Click Apply and then OK to exit the SetPoint User Interface.
NOTE: When you disable smooth scrolling in SetPoint, it will be disabled for everything: Chrome, Internet Explorer, and the Windows 8 Start screen apps.
Wireless product not working properly when also using a USB 3.0 device
When using a USB 2.0 2.4GHz wireless peripheral device (such as a mouse, keyboard, or headphones) with a PC that also has a USB 3.0 peripheral device plugged in, you may experience erratic operation caused by interference. This is especially likely to happen when using USB 3.0 remote hard drives or flash drives.
This interference may result in:
– Delayed response to mouse or keyboard inputs
– Missing keyboard characters or mouse commands
– Decreased operating distance between the USB 2.0 wireless device and its receiver
There are some techniques that can help early adopters of USB 3.0 to mitigate potential problems with their existing 2.4GHz wireless devices:
– If your PC has multiple USB 2.0 connectors available, separate your USB 3.0 and USB 2.0 receivers by as much distance as possible. For example, if your PC has a choice of USB 2.0 connectors, use the one on the opposite side of the PC from the USB 3.0 connector.
– Position your USB 2.0 receiver as close as possible to your wireless peripheral (mouse, keyboard, headphones, etc.).
– Use a standard, USB-extender cable to position your USB 2.0 wireless receiver as far away as possible from your USB 3.0 connector.
A USB-extender cable is available for Logitech customers who are experiencing this problem (click here for more information).
NOTE: A USB 3.0 connector sometimes referred to as Super Speed USB or SS, normally has a blue plastic insert in the connector. Unlike a USB 2.0 connector which has 4 pins within the connector, a USB 3.0 connector has 9 pins.
Move your USB 2.0 wireless receiver to the opposite side of your computer: 
Make sure your USB 2.0 wireless receiver is in the USB 2.0 connector closest to your wireless peripheral: 
Use a USB extended cable to position your wireless receiver as far away from your USB 3.0 peripheral as possible: 
Windows 8 and Windows 10 product support and device compatibility
To check if your Logitech product works with Windows 8 or Windows 10, first select the appropriate product category from the list below.
Windows 8 and Windows 10 support for Logitech mice and keyboards
f you purchased your product before the Windows 8 release, you can check the list below to see if it’s been identified to work with Windows 8 and Windows 10.
Mice
Keyboards
Combos
Gaming mice and keyboards (see answer 360023353713)
Other Logitech products (see answer 360023353713)
What if my product isn’t listed?
If your product isn’t listed and you purchased it:
BEFORE the Windows 8 release – The product isn’t supported on Windows 8 or Windows 10.
AFTER the Windows 8 release – Check the product’s Support page > Downloads tab for current software support.
TIP:
For newer product support, check the product packaging and web pages.
Mice that work with Windows 8 and Windows 10
NOTE:
For gaming mice, see answer 360023353713.
The products listed here:
– Have only basic functionality on Windows RT. Software and app support aren’t available for Windows RT.
– Will provide basic navigation in Windows 8 style UI. Features programmed in SetPoint software may not function in this mode.
– Unless noted otherwise, Windows 10 software is SetPoint 6.67.82 and later.
|
Product |
Model Number (M/N) |
Windows 8 |
Windows 10 |
|
Anywhere Mouse MX |
M-R0001 |
Yes |
Yes |
|
B100 Optical USB Mouse |
M-U0003, M-U0026 |
Yes |
Yes |
|
B100 TAA for Business |
M-U0026 |
Yes |
Yes |
|
B105 Portable Mouse |
M-U0005 |
Yes** |
Yes** |
|
B110 Optical USB Mouse |
M-U0004 |
yes |
Yes |
|
B120 Optical combo Mouse |
M-B0001 |
Yes |
Yes |
|
B120 TAA for Business |
M-U0001 |
Yes |
Yes |
|
B175 Wireless Mouse |
M-R0024 |
Yes |
Yes |
|
B605 Wireless Mouse |
M-RBY125 |
Yes |
Yes |
|
Corded Mouse M125 |
M-U0023 |
No** |
No** |
|
Corded Mouse M500 |
M-U0007 |
Yes |
Yes |
|
Cordless Click! Optical Mouse |
M-RAA88 |
Yes |
Yes |
|
Cordless Click! Plus |
M-RAA89 |
Yes |
Yes |
|
Cordless Click! Plus Rechargeable |
M-RAA89B |
Yes |
Yes |
|
Cordless Optical Mouse |
M-RCE95 |
Yes |
Yes |
|
Cordless Optical TrackMan |
T-RB22 |
Yes |
Yes |
|
Cordless TrackMan Optical |
T-RB22 |
Yes |
Yes |
|
Cordless TrackMan Wheel |
T-RA18 |
Yes |
Yes |
|
Couch Mouse M515 |
M-R0018 |
Yes |
No |
|
Cube |
M-R0026 |
Yes |
Yes |
|
LS 1 Laser Mouse |
M-UAS144 |
Yes |
Yes |
|
LX3 Optical Mouse |
M-BW112A |
Yes |
Yes |
|
LX3 Plus Laser Mouse |
M-BY112A |
Yes |
Yes |
|
LX5 Cordless Optical Mouse |
M-RBN114 |
Yes |
Yes |
|
LX6 Cordless Optical Mouse |
M-RCF112 |
Yes |
Yes |
|
LX7 Cordless Optical Mouse |
M-RBG112 |
Yes |
Yes |
|
LX8 Cordless Laser Mouse |
M-BCK135 |
Yes |
Yes |
|
Marathon Mouse M705 |
M-R0009 |
Yes |
Yes |
|
Marble Mouse |
T-BC21 |
Yes |
Yes |
|
Mouse M100 |
M-U0003 |
Yes |
Yes |
|
Mouse M100R |
M-U0026 |
Yes |
Yes |
|
Mouse M105 |
M-U0036 |
Yes |
Yes |
|
Mouse M110 |
M-B0001 |
Yes |
Yes |
|
Mouse M115 |
M-U0005 |
Yes** |
Yes** |
|
Mouse M90 |
M-U0003, M-U0026 |
Yes |
Yes |
|
MX 1000 Laser Cordless Mouse |
M-RAG97 |
Yes |
Yes |
|
MX 1100 RC mouse for Business |
M-RCR147R |
Yes |
Yes |
|
MX 310 Optical Mouse |
M-BP86 |
Yes |
Yes |
|
MX 320 Laser Mouse |
M-BY112A |
Yes |
Yes |
|
MX 400 Performance Laser Mouse |
M-BZ105A |
Yes |
Yes |
|
MX 600 Laser Cordless Mouse |
M-RAZ105 |
Yes |
Yes |
|
MX 610 Left-Hand Laser Cordless Mouse* |
M-RBT105A |
Yes |
Yes |
|
MX 610 Laser Cordless Mouse* |
M-RAY105 |
Yes |
Yes |
|
MX 620 Cordless Laser Mouse |
M-RCH105 |
Yes |
Yes |
|
MX 700 Cordless Optical Mouse |
M-RY81 |
Yes |
Yes |
|
MX 900 Bluetooth Optical Mouse |
M-RAP81 |
Yes |
Yes |
|
MX Air Rechargeable Cordless Air Mouse |
M-RBP123 |
Yes |
Yes |
|
MX Revolution |
M-RBQ124 |
Yes |
Yes |
|
MX1100 Cordless Laser Mouse |
M-RCR147 |
Yes |
Yes |
|
NX50 Notebook Mouse |
M-UAU94 |
Yes** |
Yes** |
|
NX80 Cordless Laser Mouse for Notebooks |
M-RBW145 |
Yes |
Yes |
|
Optical Mouse USB |
M-UAE96, M-UV96 |
Yes |
Yes |
|
Performance Mouse MX |
M-R0007 |
Yes |
Yes |
|
Racer Mouse |
M-UV94 |
Yes** |
Yes** |
|
RX 1000 Laser Mouse |
M-BY112A |
Yes |
Yes |
|
RX 1500 Cordless Mouse |
M-UAT146 |
Yes |
Yes |
|
RX 250 Optical Mouse |
M-BAD58B |
Yes |
Yes |
|
RX 300 Optical Mouse |
M-BU115 |
Yes |
Yes |
|
RX 650 Cordless Optical Mouse |
M-UAN141 |
Yes |
Yes |
|
RX 720 Cordless Laser Mouse |
M-R0004 |
Yes |
Yes |
|
Spot Mouse |
M-UV94 |
Yes** |
Yes** |
|
Tiger Mouse |
M-UV94 |
Yes** |
Yes** |
|
Touch Mouse M600 |
M-R0030 |
Yes |
Yes |
|
Touch Mouse T620 |
M-U0030 |
Yes |
No |
|
Trackman Marble |
T-BC21 |
Yes |
Yes |
|
TrackMan Wheel |
T-BB18 |
Yes |
Yes |
|
V100 Optical Mouse for Notebooks |
M-UAG120 |
Yes |
Yes** |
|
V120 Cordless Laser Mouse for Notebooks |
M-UAU94 |
Yes |
Yes** |
|
V150 Laser Mouse for Notebooks |
M-UAL120 |
Yes |
Yes** |
|
V200 Cordless Notebook Mouse |
M-RBK93B |
Yes |
Yes |
|
V220 Cordless Optical Mouse |
M-RBS136 |
Yes |
Yes |
|
V320 Cordless Optical Mouse for Notebooks |
M-RCD125 |
Yes |
Yes |
|
V400 Laser Cordless Mouse for Notebooks |
M-RBL117 |
Yes |
Yes |
|
V450 Laser Cordless Mouse for Notebooks |
M-RBR125 |
Yes |
Yes |
|
V450 nano Cordless Laser Mouse |
M-RBY125 |
Yes |
Yes |
|
V470 Cordless Laser Mouse |
M-RCQ142 |
Yes |
No |
|
V500 Cordless Notebook Mouse |
M-RAN100 |
Yes |
Yes |
|
V550 Nano Cordless Laser Mouse for Notebooks |
M-RCS143 |
Yes |
Yes |
|
VX Nano Cordless Laser Mouse for Notebooks |
M-RCJ134 |
Yes |
Yes |
|
VX Revolution Cordless Laser Mouse |
M-RBU126 |
Yes |
Yes |
|
Wireless Mini Mouse M187 |
M-R0031 |
Yes |
Yes |
|
Wireless Mouse M195 |
M-R0013 |
Yes |
Yes** |
|
Wireless Mouse M205 |
M-R0005 |
Yes |
Yes |
|
Wireless Mouse M215 |
M-R0013 |
Yes** |
No |
|
Wireless Mouse M215 2nd Gen (Unifying) |
M-R0028 |
Yes |
Yes |
|
Wireless Mouse M225 |
M-R0024 |
Yes |
Yes |
|
Wireless Mouse M235 |
M-R0022 |
Yes |
Yes |
|
Wireless Mouse M235 2nd Gen |
M-R0022 |
Yes |
Yes |
|
Wireless Mouse M175 |
M-R0024 |
Yes |
Yes |
|
Wireless Mouse M180 |
M-R0013 |
Yes** |
Yes** |
|
Wireless Mouse M185 |
M-R0024 |
Yes |
Yes |
|
Wireless Mouse M305 |
M-R0003, M-R0012 |
Yes |
No |
|
Wireless Mouse M310 |
M-R0014 |
Yes |
Yes |
|
Wireless Mouse M315 |
M-R0022 |
Yes |
Yes |
|
Wireless Mouse M317 |
M-R0022 |
Yes |
Yes |
|
Wireless Mouse M325 |
M-R0021 |
Yes |
Yes |
|
Wireless Mouse M345 |
M-R0021 |
Yes |
No |
|
Wireless Mouse M505 |
M-RBY125 |
Yes |
Yes |
|
Wireless Mouse M510 |
M-R0019 |
Yes |
Yes |
|
Wireless Mouse M525 |
M-R0027 |
Yes |
Yes |
|
Wireless Mouse M545 |
M-R0042 |
Yes |
Yes |
|
Wireless Mouse M555b |
M-R0008 |
Yes |
Yes |
|
Bluetooth Mouse M557 |
M-R0047-O |
Yes |
Yes |
|
Wireless Mouse M560 |
M-R0049 |
Yes |
Yes |
|
Marathon Mouse M705 |
M-R0009 |
Yes |
Yes |
|
MX Anywhere 2 |
M-R0057 |
Yes |
Yes |
|
MX Master |
M-R0052 |
Yes |
Yes |
|
Ultrathin Touch Mouse T630 |
M-R0009 |
Yes |
Yes |
|
Ultrathin Touch Mouse T631 for Mac |
M-R0009 |
No |
No |
|
Wireless Rechargeable Touchpad T650 |
T-R0044 |
Yes |
No |
|
Wireless Touchpad |
T-R0002 |
Yes |
Yes |
|
Wireless Trackball M570 |
T-R0001 |
Yes |
Yes |
|
Zebra Mouse |
M-UV94 |
Yes** |
Yes** |
|
Zone Touch Mouse T400 |
M-U0030 |
Yes |
No |
* Indicates a limitation with SetPoint programmability. Some device LCD /Email or IM notification functionality isn’t supported.
** No desktop software.
NOTE: Logitech mice and keyboards are Human Interface Devices (HID). HID drivers are native to modern Windows operating systems, enabling basic functionality without the need for other software. To use enhanced features, such as programming keys and buttons, additional software may be required. See the product’s Support page > Downloads tab for software availability.
Keyboards that work with Windows 8 and Windows 10
NOTE:
For gaming keyboards, see answer 360023353713.
The products listed here:
– Have only basic functionality on Windows RT. Software and app support aren’t available for Windows RT.
– Will provide basic navigation in Windows 8 style UI. Features programmed in SetPoint software may not function in this mode.
– Unless noted otherwise, Windows 10 software is SetPoint 6.67.82 and later.
|
Product |
Model Number (M/N) |
Windows 8 |
Windows 10 |
|
Access Keyboard 600 |
Y-UQ85 |
Yes |
Yes |
|
Alto Cordless Notebook Stand with cordless keyboard and USB HUB |
Y-UU87 |
Yes** |
Yes** |
|
Alto Portable Notebook Stand with integrated keyboard |
Y-UN82 |
Yes** |
Yes** |
|
Bluetooth Illuminated keyboard K810 |
Y-R0028 |
Yes |
Yes |
|
Bluetooth Multi-Device Keyboard K480 |
Y-R0049 |
Yes |
Yes |
|
Classic Keyboard 200 |
Y-UR83 |
Yes** |
Yes** |
|
Comfort Wave 450 Keyboard |
Y-U0001 |
Yes** |
Yes** |
|
Wireless All-in-One Keyboard TK820 |
Y-R0039 |
Yes |
No |
|
Compact Keyboard K300 |
Y-U0004 |
Yes |
Yes |
|
Corded Keyboard K280e |
Y-B0002 |
Yes |
Yes |
|
diNovo Edge |
Y-RAY81 |
Yes |
No |
|
diNovo Keyboard for Notebooks |
Y-R0001 |
Yes |
Yes |
|
diNovo Mini |
Y-RBG93 |
Yes |
Yes |
|
Illuminated Keyboard K710 |
Y-UY95 |
Yes |
Yes |
|
Illuminated Livingroom Keyboard K830 |
Y-R0047 |
No |
No |
|
Internet 350 USB Keyboard |
Y-US76A,Y-UM76A |
Yes** |
Yes** |
|
Keyboard K120 |
Y-U0009 |
Yes** |
Yes** |
|
Keyboard K120 TAA for Business |
Y-U0009 |
Yes** |
Yes** |
|
Media Keyboard 600 |
Y-UQ85 |
Yes |
Yes |
|
Media Keyboard Elite |
Y-BN52 |
Yes |
Yes |
|
Media Keyboard K200 |
Y-U0011 |
Yes** |
Yes** |
|
UltraX Premium Keyboard |
Y-BL49A |
Yes** |
Yes** |
|
Washable Keyboard K310 |
Y-U0016 |
Yes** |
Yes** |
|
Wave Keyboard |
Y-UV90 |
Yes |
Yes |
|
Wireless Illuminated Keyboard K800 |
Y-R0011 |
Yes |
Yes |
|
Wireless Keyboard K230 |
Y-R0022 |
Yes |
Yes |
|
Wireless Keyboard K250 |
Y-R0008 |
Yes** |
Yes** |
|
Wireless Keyboard K270 |
Y-R0015 |
Yes |
Yes |
|
Wireless Keyboard K320 |
Y-R0010 |
Yes |
Yes |
|
Wireless Keyboard K340 |
Y-R0005 |
Yes |
Yes |
|
Wireless Keyboard K350 |
Y-RBN90 |
Yes |
Yes |
|
Wireless Keyboard K360 |
Y-R0017 |
Yes |
Yes |
|
Wireless Solar Keyboard K750 |
Y-R0016 |
Yes |
Yes |
|
Wireless Solar Keyboard K750 for Mac |
Y-R0016 |
No |
No |
|
Wireless Touch Keyboard K400 |
Y-R0019 |
Yes |
No |
|
Wireless Touch Keyboard K400 Plus |
Y-R0055 |
Yes |
Yes |
** No desktop software.
NOTE: Logitech mice and keyboards are Human Interface Devices (HID). HID drivers are native to modern Windows operating systems, enabling basic functionality without the need for other software. To use enhanced features, such as programming keys and buttons, additional software may be required. See the product’s Support page > Downloads tab for software availability.
Keyboard and mice combos that work with Windows 8 and Windows 10
NOTE:
For gaming mice and keyboards, see answer 360023353713.
The products listed here:
– Have only basic functionality on Windows RT. Software and app support aren’t available for Windows RT.
– Will provide basic navigation in Windows 8 style UI. Features programmed in SetPoint software may not function in this mode.
– Unless noted otherwise, Windows 10 software is SetPoint 6.67.82 and later.
|
Product |
Model Number (M/N) |
Windows 8 |
Windows 10 |
|
Classic Desktop MK100 |
Y-S0002, M-U0027-O |
Yes |
No |
|
Cordless 1500 Rechargeable Desktop |
Y-RAS79, M-RAK89D |
Yes |
Yes |
|
Cordless Desktop Comfort Laser |
Y-RAU7, M-RAZ105 |
Yes |
Yes |
|
Cordless Desktop EX 100 |
Y-RBH94, M-RCE95 |
Yes |
Yes |
|
Cordless Desktop EX 100 with Speakers |
Y-RBH94, M-RCE95 |
Yes |
Yes |
|
Cordless Desktop EX 110 |
Y-RAZ71, M-RCE95 |
Yes |
Yes |
|
Cordless Desktop EX 90 |
Y-RAJ56A, M-RCE95, M-RAU95 |
Yes |
Yes |
|
Cordless Desktop LX 300 |
Y-RQ52, M-RAF95 |
Yes |
Yes |
|
Cordless Desktop LX 310 Laser |
Y-RAZ71, M-RBW112 |
Yes |
Yes |
|
Cordless Desktop LX 500 |
Y-RR53, M-RAJ88A |
Yes |
Yes |
|
Cordless Desktop LX 501 |
Y-RR53, M-RAJ88A |
Yes |
Yes |
|
Cordless Desktop LX 700 |
Y-RR54, M-RAK89B |
Yes |
Yes |
|
Cordless Desktop LX 710 Laser |
Y-RBA78, Y-RAP78, M-RBW112 |
Yes |
Yes |
|
Cordless Desktop LX 715 Laser* |
Y-RAP78, M-RAZ105 |
Yes |
Yes |
|
Cordless Desktop MX 3000 Laser |
Y-RAM74, M-RAZ105 |
Yes |
Yes |
|
Cordless Desktop MX 3100 |
Y-RR54, M-RAG97 |
Yes |
Yes |
|
Cordless Desktop MX 3200 Laser |
Y-RAV80, M-RAZ105 |
Yes |
Yes |
|
Cordless Desktop MX 5000 Laser* |
Y-RAH72, M-RBA97 |
Yes |
Yes |
|
Cordless Desktop MX 5500 Revolution |
Y-RBF91, M-RCL124 |
Yes |
Yes |
|
Cordless Desktop Pro 2400 |
Y-RAT79A, M-RBV114 |
Yes |
Yes |
|
Cordless Desktop S510 |
Y-RAK73, M-RBN114 |
Yes |
Yes |
|
Cordless Desktop S510 Media Remote |
Y-RAK73, M-RBN114, M-RBG114 |
Yes |
Yes |
|
Cordless Desktop S520 |
Y-RBA97, M-RCC114B |
Yes |
Yes |
|
Deluxe 650 Cordless Desktop |
Y-RAR76, M-RAU95 |
Yes |
Yes |
|
Deluxe 660 Cordless Desktop |
Y-RAR76, M-UAN141 |
Yes |
Yes |
|
Desktop MK120 |
Y-U0009, M-U0003 |
Yes |
Yes |
|
Desktop MK120 TAA for Business |
Y-U0009, M-U0026 |
Yes |
Yes |
|
diNovo Cordless Desktop |
Y-RW42, Y-RX43, M-RAA93A |
Yes |
Yes |
|
diNovo Cordless Desktop for Notebooks |
Y-RW42, Y-RX43, M-RAA93A |
Yes |
Yes |
|
diNovo Media Desktop |
Y-RM4200, Y-RN43, M-RAB81 |
Yes |
Yes |
|
diNovo Media Desktop Laser* |
Y-RZ42, Y-RAA43, M-RBA97 |
Yes |
Yes |
|
EasyCall Desktop* |
Y-RAP78, M-RAZ105 |
Yes |
Yes |
|
Internet 1500 Laser Cordless Desktop |
Y-RAS79, M-RBW112 |
Yes |
Yes |
|
Internet USB 350 Desktop |
Y-UM76A, M-BU115 |
Yes |
Yes |
|
Laser Desktop MK140 |
Y-SAL85, Y-UQ85, M-UAL96 |
Yes |
Yes |
|
Media Combo MK200 |
Y-U0009, M-U0003 |
Yes |
No |
|
Music Combo MKZ260 |
Y-R0015, M-R0020 |
Yes** |
Yes** |
|
Pro 2800 Cordless Desktop |
Y-RBM79, M-RCH105 |
Yes |
Yes |
|
Wireless Combo MK220 |
Y-R0020, M-R0025 |
Yes |
Yes |
|
Wireless Combo MK240 |
Y-R0030, M-R0033 |
Yes |
Yes |
|
Wireless Combo MK260 |
Y-R0015, M-R0020 |
Yes** |
Yes** |
|
Wireless Combo MK260r |
Y-R0015 |
No |
No |
|
Wireless Combo MK270 |
Y-R0015, M-R0024 |
Yes |
Yes |
|
Wireless Combo MK330 |
Y-R0009, M-R0028 |
Yes |
Yes |
|
Wireless Combo MK345 |
Y-R0042 |
Yes |
Yes |
|
Wireless Combo MK360 |
Y-R0017, M-R0024 |
Yes |
Yes |
|
Wireless Combo MK365 |
Y-R0017, M-R0021 |
Yes |
No |
|
Wireless Combo MK520 |
Y-R0012, M-R0014 |
Yes |
Yes |
|
Wireless Combo MK620 |
C-U0008 |
Yes |
Yes |
|
Wireless Desktop MK250 |
Y-R0008, M-R0011 |
Yes** |
Yes** |
|
Wireless Desktop MK300 |
Y-RAZ71, M-RCE95 |
Yes |
Yes |
|
Wireless Desktop MK320 |
Y-R0009, M-R0013 |
Yes** |
Yes** |
|
Wireless Desktop MK700 |
Y-R0006, M-RCH105 |
Yes |
Yes |
|
Wireless Desktop MK710 |
Y-R0006, M-R0009 |
Yes |
Yes |
|
Wireless Wave Combo MK550 |
Y-RBN90, M-R0019 |
Yes |
Yes |
|
Wireless Wave Combo MK560 |
Y-RBN90, M-R0009 |
Yes |
Yes |
|
Wireless Solar Keyboard & Marathon Mouse Combo MK750 |
Y-R0016, M-R0009 |
Yes** |
No |
|
Wireless Performance Combo MX800 |
M-R0007, Y-R0011 |
Yes |
Yes |
* Indicates a limitation with SetPoint programmability. Some device LCD/VoIP functionality isn’t supported.
** No desktop software.
NOTE: Logitech mice and keyboards are Human Interface Devices (HID). HID drivers are native to modern Windows operating systems, enabling basic functionality without the need for other software. To use enhanced features, such as programming keys and buttons, additional software may be required. See the product’s Support page > Downloads tab for software availability.
Windows 8 and Windows 10 support for Logitech tablet and laptop accessories
If you purchased your product before the Windows 8 release, you can check the list below to see if it’s been identified to work with Windows 8 or Windows 10.
Tablet accessories
Laptop accessories
Other Logitech products (see answer 360023424873)
What if my product isn’t listed?
If your product isn’t listed and you purchased it:
– BEFORE the Windows 8 release – The product isn’t supported on Windows 8 or Windows 10.
– AFTER the Windows 8 release – Check the product’s Support page > Downloads tab for current software support.
– TIP: For newer product support, check the product packaging and web pages.
Tablet accessories that work with Windows 8 and Windows 10
NOTE: Bluetooth connection requires a Bluetooth controller on the host device.
|
Product |
Model Number (M/N) |
Windows 8 |
Windows 10 |
|
Logitech Mini BoomBox |
PF305 |
Yes |
Yes |
|
Logitech UE Boombox |
S-00124 |
Yes |
No |
|
Logitech UE Mobile Boombox |
S-00120 |
Yes |
Yes |
|
Logitech Wireless Boombox |
S-00116 |
Yes |
No |
|
Tablet Keyboard for Windows 8, Windows RT and Android 3.0+ |
Y-R0034 |
Yes |
No |
|
Tablet Speaker |
S-L0001 |
Yes |
No |
|
Wireless Boombox Z715 |
S-000116 |
Yes |
No |
|
Wireless Speaker |
S-00096 |
Yes |
Yes |
|
Wireless Speaker Z515 |
A-00026 |
Yes |
Yes |
|
Keys-To-Go |
Y-R0052 |
Yes |
Yes |
|
UE BOOM |
S-00122 |
Yes* |
Yes* |
|
UE MEGABOOM |
S-00147 |
Yes* |
Yes* |
* Desktop Update Utility
Laptop accessories that work with Windows 8 and Windows 10
|
Product |
Model Number (M/N) |
Windows 8 |
Windows 10 |
|
Cooling Pad N100 |
P-U0001 |
Yes |
Yes |
|
Cooling Pad N120 |
P-U0001 |
Yes |
Yes |
|
Cooling Pad N200 |
P-U0005 |
Yes |
Yes |
|
Logitech Wireless Number Pad N305* |
Y-R0004 |
Yes |
No |
|
Notebook Riser N110 |
P-U0001 |
Yes |
Yes |
|
Portable Lapdesk N315 |
– – |
Yes |
Yes |
|
Speaker Lapdesk N550 |
P-U0003 |
Yes |
Yes |
|
Speaker Lapdesk N700 |
P-U0002 |
Yes |
Yes |
|
Touch Lapdesk N600 |
P-U0004 |
Yes |
No |
* Indicates a limitation with some hotkey functionality.
Windows 8 and Windows 10 support for Logitech gaming products
If you purchased your product before the Windows 8 release, you can check the list below to see if it’s been identified to work with Windows 8 or Windows 10.
Gaming mice
Gaming keyboards
Gaming headsets
Gamepads
Joysticks
Steering wheels
Non-gaming mice and keyboards (see answer 360023184894)
Other Logitech products (see answer 360023184894)
What if my product isn’t listed?
If your product isn’t listed and you purchased it:
BEFORE the Windows 8 release – The product isn’t supported on Windows 8 or Windows 10.
AFTER the Windows 8 release – Check the product’s Support page > Downloads tab for current software support.
TIP: For newer product support, check the product packaging and web pages.
Gaming mice that work with Windows 8 and Windows 10
NOTE:
For non-gaming mice, see answer 360023184894.
The products listed here:
– Have only basic functionality on Windows RT. Software and app support aren’t available for this platform.
– Will provide basic navigation in Windows 8 style UI. Features programmed in SetPoint software may not function in this mode.
– All functions and features in Windows 10-compatible products will be accessible in the games that support them.
|
Product |
Model Number (M/N) |
Windows 8 |
Windows 10 |
|
G1 Optical Mouse |
M-BP82 |
Yes |
Yes** |
|
G3 Laser Mouse |
M-UAM82 |
Yes |
Yes** |
|
G5 Laser Mouse |
M-UAC113 |
Yes |
Yes** |
|
G600 MMO Gaming Mouse |
M-U0035 |
Yes |
Yes* |
|
G7 Laser Cordless Mouse |
M-RBH113 |
Yes |
Yes** |
|
G9 Laser Mouse |
M-UAJ132 |
Yes |
Yes* |
|
G9x Laser Mouse |
M-U0006 |
Yes |
Yes* |
|
Gaming Mouse G100 |
M-U0030 |
Yes |
Yes* |
|
Gaming Mouse G300 |
M-U0029 |
Yes |
Yes* |
|
Gaming Mouse G500 |
M-U0010 |
Yes |
Yes* |
|
MX518 Optical Mouse |
M-BS81A |
Yes |
Yes* |
|
Optical Gaming Mouse G400 |
M-U0028 |
Yes |
Yes* |
|
Wireless Gaming Mouse G700 |
M-R0017 |
Yes |
Yes* |
|
G100s Optical Gaming Mouse |
M-U0030 |
Yes |
Yes* |
|
G400s Optical Gaming Mouse |
M-R0028 |
Yes |
Yes* |
|
G500s Laser Gaming Mouse |
M-U0010 |
Yes |
Yes* |
|
G700s Rechargeable Gaming Mouse |
M-R0017 |
Yes |
Yes* |
|
G300s Optical Gaming Mouse |
M-U0029 |
Yes |
Yes* |
|
G602 Wireless Gaming Mouse |
M-R0048 |
Yes |
Yes* |
|
G90 Optical Gaming Mouse |
M-U0039 |
Yes |
Yes* |
|
G402 FPS Gaming Mouse |
M-U0041 |
Yes |
Yes* |
|
G502 Tunable Gaming Mouse |
M-U0042 |
Yes |
Yes* |
|
G302 MOBA Gaming Mouse |
M-R0044 |
Yes |
Yes* |
|
G303 Performance Edition Gaming Mouse |
M-U0045 |
Yes |
Yes* |
* Windows 10 software: Uses LGS 8.70.315 and later.
** Windows 10 software: Uses SetPoint 6.67.82 and later.
NOTE: Logitech mice and keyboards are Human Interface Devices (HID). HID drivers are native to modern Windows operating systems, enabling basic functionality without the need for other software. To use enhanced features, such as programming keys and buttons, additional software may be required. See the product’s Support page > Downloads tab for software availability.
Gaming keyboards that work with Windows 8 and Windows 10
NOTE:
For non-gaming keyboards, see answer 360023184894.
The products listed here:
– Have only basic functionality on Windows RT. Software and app support aren’t available for this platform.
– Will provide basic navigation in Windows 8 style UI. Features programmed in SetPoint software may not function in this mode.
– All functions and features in Windows 10-compatible products will be accessible in the games that support them.
|
Product |
Model Number (M/N) |
Windows 8 |
Windows 10 |
|
G11 Gaming Keyboard |
Y-UG75A |
Yes |
Yes* |
|
G13 Advanced Gameboard |
Y-U0002 |
Yes |
Yes* |
|
G15 Gaming Keyboard (Blue) |
Y-UG75 |
Yes |
Yes* |
|
G15 Gaming Keyboard (Orange) |
Y-UW92 |
Yes |
Yes* |
|
G19 Keyboard for Gaming |
Y-U0005 |
Yes |
Yes* |
|
Gaming Combo G100 (Keyboard) |
Y-B0001 |
Yes |
Yes |
|
G100s Gaming Combo (Keyboard) |
Y-B0001 |
Yes |
Yes |
|
Gaming Keyboard G103 |
Y-U0015 |
Yes |
Yes* |
|
Gaming Keyboard G105 |
Y-U0013 |
Yes |
Yes* |
|
Gaming Keyboard G110 |
Y-U0007 |
Yes |
Yes* |
|
Gaming Keyboard G510 |
Y-U0010 |
Yes |
Yes* |
|
Gaming Keyboard G510s |
Y-U0010 |
Yes |
Yes* |
|
G19s Gaming Keyboard |
Y-U0005 |
Yes |
Yes* |
|
G710+ Mechanical Gaming Keyboard |
Y-U0018 |
Yes |
Yes* |
|
G710 Mechanical Gaming Keyboard |
Y-U0018 |
Yes |
Yes* |
|
G910 Mechanical Gaming Keyboard |
Y-U0023 |
Yes |
Yes* |
|
G310 Mechanical Gaming Keyboard |
Y-U0022 |
Yes |
Yes* |
* Windows 10 software: Uses LGS 8.70.315 and later.
NOTE: Logitech mice and keyboards are Human Interface Devices (HID). HID drivers are native to modern Windows operating systems, enabling basic functionality without the need for other software. To use enhanced features, such as programming keys and buttons, additional software may be required. See the product’s Support page > Downloads tab for software availability.
Gaming headsets that work with Windows 8 and Windows 10
NOTE:
These products aren’t supported on Windows RT.
|
Product |
Model Number (M/N) |
Windows 8 |
Windows 10 |
|
Digital Precision Gaming Headset |
A-0231A |
Yes |
Yes* |
|
G35 Surround Sound Headset |
A-00016 |
Yes |
Yes |
|
Gaming Headset G130 |
A-00038 |
Yes |
Yes |
|
Gaming Headset G330 |
A-00022 |
Yes |
Yes* |
|
Wireless Gaming Headset G930 |
A-00023 |
Yes |
Yes |
|
G230 Stereo Gaming Headset |
A-00060 |
Yes |
Yes |
|
G430 Surround Sound Gaming Headset |
A-00061 |
Yes |
Yes* |
* Windows 10 software: Uses LGS 8.70.315 and later
Gamepads that work with Windows 8 and Windows 10
NOTE: These products aren’t supported on Windows RT.
|
roduct |
Model Number (M/N) |
Windows 8 |
Windows 10 |
|
Cordless Rumblepad 2 |
G-RC14 |
Yes |
Yes* |
|
Dual Action Gamepad |
G-UF13A |
Yes |
Yes* |
|
Gamepad F310 |
G-U0001 |
Yes |
Yes* |
|
Rumble Gamepad F510 |
G-U0002 |
Yes |
Yes* |
|
RumblePad 2 |
G-UF13 |
Yes |
Yes* |
|
Wireless Gamepad F710 |
G-R0001 |
Yes |
Yes* |
* Windows 10 software: Uses LGS 5.10.127 and later.
Joysticks that work with Windows 8 and Windows 10
NOTE: These products aren’t supported on Windows RT.
|
Product |
Model Number (M/N) |
Windows 8 |
Windows 10 |
|
Attack 3 Joystick |
J-UG18 |
Yes |
Yes* |
|
Extreme 3D Pro |
J-UK17, J-UF17 |
Yes |
Yes* |
|
Flight System G940 |
J-U0001 |
Yes |
Yes* |
|
Force 3D Pro |
J-UL19 |
Yes |
Yes* |
|
Freedom 2.4 Cordless Joystick |
J-UE16, J-UH16 |
Yes |
Yes* |
* Windows 10 software: Uses LGS 5.10.127 and later.
Steering wheels that work with Windows 8 and Windows 10
NOTE: These products aren’t supported on Windows RT.
|
Product |
Model Number (M/N) |
Windows 8 |
Windows 10 |
|
Driving Force GT |
E-X5C19 |
Yes |
Yes* |
|
Driving Force Pro |
E-UJ11 |
Yes |
Yes* |
|
G25 Racing Wheel |
E-UP15 |
Yes |
Yes* |
|
G27 Racing Wheel |
W-U0001 |
Yes |
Yes* |
|
MOMO Force |
E-UG8 |
Yes |
Yes* |
|
MOMO Racing Force Feedback Wheel |
E-UH9 |
Yes |
Yes* |
|
NASCAR Racing Wheel (PC) |
E-UK12 |
Yes |
Yes* |
|
G29 Driving Force Racing Wheel |
W-U0002 |
Yes |
Yes** |
|
Driving Force Shifter |
W-U0003 |
Yes |
Yes** |
|
G920 Driving Force Racing Wheel** |
W-U0004 |
Yes |
Yes** |
* Windows 10 software: Uses LGS 5.10.127 and later.
** Windows 10 software: Uses LGS 8.70.315 and later. LGS must be installed for the G920 Driving Force Racing Wheel.
Windows 8 support for Logitech Harmony remotes
If you purchased your product before the Windows 8 release, you can check the list below to see if it has been identified to work with Windows 8.
NOTE: To check support for other Logitech products, see answer 360023185754.
What if my product isn’t listed?
If your product isn’t listed and you purchased it:
– BEFORE the Windows 8 release — The product isn’t supported on Windows 8.
– AFTER the Windows 8 release — Check the product’s Support page > Downloads tab for current software support.
TIP: To check support for newer products, look for the Windows 8 logo on product packaging and web pages.
Harmony remotes that work with Windows 8
NOTE: Harmony Remote Software and MyHarmony need to be launched in the Windows 8 Desktop UI (not from the Start screen).
|
Product |
Model Number (P/N) |
Harmony Remote Software 7.7 |
MyHarmony |
|
Harmony 1000 |
R-RJ13 |
• |
|
|
Harmony 1100 |
N-R0002, N-R0003 |
• |
|
|
Harmony 200 |
N-I0004, N-I0005 |
|
• |
|
Harmony 300 |
N-I0004 |
|
• |
|
Harmony 360 |
R-IK10 |
• |
|
|
Harmony 520/525 |
R-IH10 |
• |
|
|
Harmony 550/555 |
R-IP10 |
• |
|
|
Harmony 600 |
N-I0003 |
• |
• |
|
Harmony 650 |
N-I0003 |
• |
• |
|
Harmony 700 |
N-I0003 |
• |
• |
|
Harmony 890/895 |
R-RG7 |
• |
|
|
Harmony 900 |
N-R0001 |
• |
|
|
Harmony Link |
O-R0003 |
|
• |
|
Harmony One |
R-IY17 |
• |
• |
|
Harmony One+ |
R-IY17 |
• |
• |
|
Harmony Touch |
N-R0006 |
|
• |
IMPORTANT: These products aren’t supported on Windows RT.
Windows 8 and Windows 10 support for Logitech speakers
If you purchased your product before the Windows 8 release, you can check the list below to see if it’s been identified to work with Windows 8 or Windows 10.
NOTE:
To check support for other Logitech products, see answer 360023188194.
What if my product isn’t listed?
If your product isn’t listed and you purchased it:
– BEFORE the Windows 8 release – The product isn’t supported on Windows 8 or Windows 10.
– AFTER the Windows 8 release – Check the product’s Support page > Downloads tab for current software support.
TIP: For newer product support, check the product packaging and web pages.
Speakers that work with Windows 8 and Windows 10
NOTES:
– Audio USB products use drivers that are native to modern Windows operating systems, enabling basic functionality without additional software.
– The products marked as analog have either, or a combination of 3.5 mm stereo connectors, Analog RCA, and 6-channel direct inputs. For these devices, Windows 8/Windows 10 OS support depends on proper sound card functionality.
– Bluetooth connection requires a Bluetooth controller on the host device.
|
Product |
Model Number (M/N) |
Connection Type |
Windows 8 |
Windows 10 |
|
AudioHub Notebook Speakers |
S-00041 |
USB |
Yes |
Yes |
|
Laptop Speaker Z305 |
S-00099 |
USB |
Yes |
Yes |
|
LS11 Speakers |
S-00035 |
Analog |
Yes |
Yes |
|
LS21 2.1 Stereo Speaker System |
S-00038 |
Analog |
Yes |
Yes |
|
Portable Speaker S715i |
S-00100 |
Analog |
Yes |
Yes |
|
Pure-Fi Mobile |
F-00001 |
Bluetooth |
Yes |
No |
|
R-10 Speakers |
S-0152B |
Analog |
Yes |
Yes |
|
R-20 Speaker System |
S-0153B |
Analog |
Yes |
Yes |
|
S-120 2.0 Multimedia Speakers |
S-00026 |
Analog |
Yes |
Yes |
|
S150 USB Speakers |
S-00038 |
USB |
Yes |
Yes |
|
S200 Speakers |
S-LBU55B |
Analog |
Yes |
Yes |
|
Speaker System Z205 |
S-00094 |
USB |
Yes |
Yes |
|
Speaker System Z313 |
S-00079 |
Analog |
Yes |
Yes |
|
Speaker System Z320 |
S-00021 |
Analog |
Yes |
Yes |
|
Speaker System Z323 |
S-00075 |
Analog |
Yes |
Yes |
|
Speaker System Z520 |
S-00085 |
Analog |
Yes |
Yes |
|
Speaker System Z523 |
S-00076 |
Analog |
Yes |
Yes |
|
Speaker System Z553 |
S-00123 |
Analog |
Yes |
Yes |
|
Speaker System Z623 |
S-00095 |
Analog |
Yes |
Yes |
|
Speaker Z130 |
S-00098 |
Analog |
Yes |
Yes |
|
Stereo Speakers S120 |
S-00026 |
Analog |
Yes |
Yes |
|
Stereo Speakers Z110 |
S-00108 |
Analog |
Yes |
Yes |
|
Surround Sound Speakers Z506 |
S-00097 |
Analog |
Yes |
Yes |
|
Surround Sound Speakers Z906 |
S-00102 |
Analog |
Yes |
Yes |
|
V10 Notebook Speakers |
S-0194A |
USB |
Yes |
Yes |
|
V20 Notebook Speakers |
S-0155A |
USB |
Yes |
Yes |
|
Wireless Speaker Adapter for Bluetooth audio devices |
S-00113 |
Bluetooth |
Yes |
No |
|
Wireless Speaker Z515 |
S-00096, A-00026 |
Bluetooth |
Yes |
Yes |
|
X-120 Speakers |
S-0083A |
Analog |
Yes |
Yes |
|
X-140 Speakers |
S-0264A |
Analog |
Yes |
Yes |
|
X-240 2.1 Speaker System |
S-0285A |
Analog |
Yes |
Yes |
|
X-530 5.1 Speaker System |
S-0114A |
Analog |
Yes |
Yes |
|
X-540 5.1 Speaker System |
S-0223A |
Analog |
Yes |
Yes |
|
Z Cinema Advanced Surround Sound System |
S-00002 |
USB |
Yes |
Yes |
|
Z-10 2.0 Interactive Speaker System |
S-0243A |
USB |
Yes |
Yes |
|
Z-2300 Speaker System |
S-0118A |
Analog |
Yes |
Yes |
|
Z-3 Speaker System |
S-0085A |
Analog |
Yes |
Yes |
|
Z-4 2.1 Speaker System |
S-0175A |
Analog |
Yes |
Yes |
|
Z-5 USB Stereo Speakers for Mac and PC |
S-00064 |
USB |
Yes |
Yes |
|
Z-500 Wireless Notebook Speaker |
S-00068 |
Bluetooth |
Yes |
No |
|
Z-5500 Digital 5.1 Speaker System |
S-0115A |
Analog |
Yes |
Yes |
Windows 8 and Windows 10 support for Logitech headphones and headsets
If you purchased your product before the Windows 8 release, you can check the list below to see if it’s been identified to work with Windows 8 or Windows 10.
NOTE:
To check support for other Logitech products, see answer 360023353693.
What if my product isn’t listed?
If your product isn’t listed and you purchased it:
– BEFORE the Windows 8 release – The product isn’t supported on Windows 8 or Windows 10.
– AFTER the Windows 8 release – Check the product’s Support page > Downloads tab for current software support.
TIP: For newer product support, check the product packaging and web pages.
Headphones and headsets that work with Windows 8 and Windows 10
NOTES:
– Audio USB products use drivers that are native to modern Windows operating systems, enabling basic functionality without additional software.
– The products marked as analog have either a single 3.5mm stereo connector for audio only, single 3.5mm stereo connector for audio, microphone, and inline remote, or a dual 3.5mm stereo connector for audio and microphone. For these devices, Windows 8/Windows 10 support depends on proper sound card functionality.
Bluetooth connection requires a Bluetooth controller on the host device.
|
Product |
Model Number |
Connection Type |
Windows 8 |
Windows 10 |
|
B530 USB |
A-00008 |
USB |
Yes |
Yes |
|
BH410 Mono USB |
HSC011 |
USB |
Yes |
|
|
BH420 Stereo USB |
HSC011 |
USB |
Yes |
|
|
BH940 Wireless Mono DECT Headset |
WHB003BS |
USB |
Yes |
|
|
BH970 Wireless Mono DECT Headset |
BH970 |
USB |
Yes |
|
|
ClearChat Comfort USB |
A-00009 |
USB |
Yes |
|
|
ClearChat PC Wireless Headset |
A-00006, A-00007 |
Bluetooth |
Yes |
|
|
ClearChat Premium PC Headset |
A-0369A |
Analog |
Yes |
Yes |
|
ClearChat Pro USB |
A-00008 |
USB |
Yes |
|
|
ClearChat Stereo |
A-00001 |
Analog |
Yes |
Yes |
|
ClearChat Style |
A-00010 |
Analog |
Yes |
Yes |
|
FreePulse Wireless Headphones |
F-0461A, A-00007 |
Bluetooth |
Yes |
|
|
Laptop Headset H555 |
A-00027 |
USB |
Yes |
Yes |
|
Logitech UE 4000 |
A-00046 |
Analog |
Yes |
Yes |
|
Logitech UE 6000 |
A-00045 |
Analog |
Yes |
Yes |
|
Logitech UE 9000 |
A-00041 |
Bluetooth |
Yes |
Yes |
|
Stereo Headset H110 |
A-00021 |
Analog |
Yes |
Yes |
|
Stereo Headset H130 |
A-00028 |
Analog |
Yes |
Yes |
|
Stereo Headset H150 |
A-00029 |
Analog |
Yes |
Yes |
|
Stereo Headset H250 |
A-00030 |
Analog |
Yes |
Yes |
|
UE 3000 |
A-00035 |
Bluetooth |
Yes |
Yes |
|
UE 3500 |
A-00035, A00032 |
Bluetooth |
Yes |
|
|
UE 3600 |
A-00051 |
Analog |
Yes |
Yes |
|
USB Desktop Microphone |
A-0182A |
USB |
Yes |
|
|
USB Headset H330 |
A-00014 |
USB |
Yes |
|
|
USB Headset H340 |
A-00044 |
USB |
Yes |
Yes |
|
USB Headset H360 |
A-00018 |
USB |
Yes |
Yes |
|
USB Headset H530 |
A-00008 |
USB |
Yes |
Yes |
|
USB Headset H540 |
A-00045 |
USB |
Yes |
Yes |
|
Wireless Headset H600 |
A-00031, A-00032 |
Bluetooth |
Yes |
Yes |
|
Wireless Headset H800 |
A-00032, A-00033 |
Bluetooth |
Yes |
Yes |
|
USB Headset H390 |
A-00052 |
USB |
Yes |
Yes |
|
USB Headset Stereo H650e |
A-00057 |
USB |
Yes |
Yes |
|
USB Headset Mono H6503 |
A-00050 |
USB |
Yes |
Yes |
|
PC 960 USB Stereo Headset |
A-00011 |
USB |
Yes |
Yes |
|
UE 5000 |
A-00062 |
Bluetooth |
Yes |
Yes |
Windows 8 support for Logitech UE Smart Radio
If you purchased your product before the Windows 8 release, you can check the list below to see if it’s been identified to work with Windows 8.
NOTE:
To check support for other Logitech products, see answer 360023358893.
What if my product isn’t listed?
If your product isn’t listed and you purchased it:
– BEFORE the Windows 8 release – The product isn’t supported on Windows 8.
– AFTER the Windows 8 release – Check the product’s Support page > Downloads tab for current software support.
TIP: To check support for newer products, look for the Windows 8 logo on product packaging and web pages.
– Logitech UE Smart Radio
– Product
– Model Number (M/N)
– UE Music Library
– Logitech UE Smart Radio
– X-R0001
NOTES: UE Music Library is required to use the Logitech UE Smart Radio with your Windows 8 computer.
You can download the latest version of UE Music Library here: http://www.uesmartradio.com/download.
Windows 8 support for Logitech Squeezebox network music players
If you purchased your product before the Windows 8 release, you can check the list below to see if it’s been identified to work with Windows 8.
NOTE: To check support for other Logitech products, see answer 360023192154.
What if my product isn’t listed?
If your product isn’t listed and you purchased it:
BEFORE the Windows 8 release – The product isn’t supported on Windows 8.
AFTER the Windows 8 release – Check the product’s Support page > Downloads tab for current software support.
TIP: To check support for newer products, look for the Windows 8 logo on product packaging and web pages.
Squeezebox network music players that work with Windows 8
NOTE: Logitech Media Server 7.7.x will work with Windows 8 (Desktop). This will be the last supported version.
|
Product |
Model Number (M/N) |
Logitech Media Software (LMS) |
|
Squeezebox Boom |
X-RB2 |
• |
|
Squeezebox Classic |
C-RH62 |
• |
|
Squeezebox Duet (Controller) |
C-RL65 |
• |
|
Squeezebox Duet (Receiver) |
C-RM66 |
• |
|
Squeezebox Radio |
X-R0001 |
• |
|
Squeezebox Touch |
X-RC4 |
• |
|
Transporter |
C-RJ63 |
• |
Windows 8 and Windows 10 support for Logitech Alert security cameras
If you purchased your product before the Windows 8 release, you can check the list below to see if it’s been identified to work with Windows 8 or Windows 10.
NOTE: To check support for other Logitech products, see answer 360023192354.
What if my product isn’t listed?
If your product isn’t listed and you purchased it:
– BEFORE the Windows 8 release – The product isn’t supported on Windows 8 or Windows 10.
– AFTER the Windows 8 release – Check the product’s Support page > Downloads tab for current software support.
TIP: For newer product support, check the product packaging and web pages.
Alert security cameras that work with Windows 8 and Windows 10
NOTE: These products aren’t supported on Windows RT.
|
Product |
Model Number (M/N) |
Windows 8 |
Windows 10 |
|
Alert 700e Add on camera |
700e |
Yes |
Yes |
|
Alert 750e Master |
|||
|
Alert 700i Add on camera |
700i |
Yes |
Yes |
|
Alert 750i Master |
|||
|
Alert 700n Add on camera |
700n |
Yes |
Yes |
|
Alert 750n Master |
Windows 8 and Windows 10 support for Logitech WiLife security cameras
WiLife Command Center software isn’t supported on Windows 8 or Windows 10.
Cursor does not follow mouse movements
If the cursor isn’t following the movements of your mouse, we suggest you:
1. Use a mouse pad.
2. Avoid using your mouse on:
– Glass and other see-through surfaces
– Reflective surfaces, such as mirrors and metal desks
– Wood grains and grooved surfaces
3. Try the mouse on a piece of white paper to make sure it isn’t a tracking issue on the particular surface you’re using.
Operating distance between the mouse or keyboard and USB receiver
In an ideal environment, a Unifying or non-Unifying device can operate up to 30 feet (10 meters) away from its receiver (shown below) in a clear line of sight. 

If you’re not getting this distance, try these suggestions:
– Replace the battery/batteries or make sure your mouse or keyboard is fully charged
– Move devices that emit radio waves or could cause radio interference away from your work area (Examples: cell phones, radios, wireless routers, microwaves)
To determine if your environment is shortening your operating range, try using your device in a different environment to see if the distance improves. If it does, look for other possible sources of interference you can remove from your work area.
Uninstalling Logitech SetPoint Software
To uninstall Logitech SetPoint software, first select your operating system:
Windows XP
1. Go to Add or Remove Programs:
– Default Start Menu: Start > Control Panel > Add or Remove Programs
– Classic Start Menu: Start > Settings > Control Panel > Add or Remove Programs
2. Select “Logitech SetPoint” from the list. 
3. Click the Remove button.
4. Follow the on-screen instructions to remove SetPoint from your system.
NOTE: You may need to restart your computer to finish uninstalling SetPoint.
Windows 7 and Vista
1. Go to Uninstall a program:
– Default Start Menu: Start > Control Panel > Uninstall a program
– Classic Start Menu: Start > Settings > Control Panel > Programs and Features
2. Select “Logitech SetPoint” from the list. 
3. Click Uninstall.
4. Follow the on-screen instructions to remove SetPoint from your system.
NOTE: You may need to restart your computer to finish uninstalling SetPoint.
Windows 8
1. Go to Uninstall a program:
– Start screen > Right-click on Mouse and Keyboard Settings > Uninstall
– Start screen > Right-click on empty space and select All apps > Control Panel > Uninstall a program 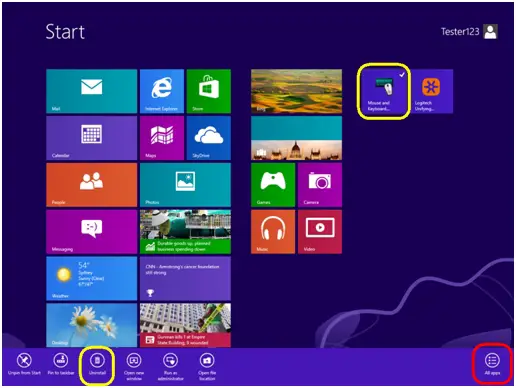
2. Select “Logitech SetPoint” from the list. 
3. Click Uninstall.
4. Follow the on-screen instructions to remove SetPoint from your system.
NOTE: You may need to restart your computer to finish uninstalling SetPoint.
Windows 10
1. Go to Programs and Features:
– Right-click on the Windows logo on the bottom left of the window, then click Programs and Features
– Select Logitech SetPoint from the list of programs.
Click on Uninstall and follow the on-screen instructions to uninstall Setpoint.
NOTE: You may need to restart your computer to finish uninstalling.
USB receiver storage
Most Logitech mice are designed with a space to store its receiver. When you’re not using the mouse, you can store the receiver inside of it.
To locate the storage space for the receiver in your mouse:
1. Flip the mouse over and slide the battery cover off. 
2. Locate the small rectangular slot next to the battery compartment.
3. Slide the receiver into the slot. It will fit facing either way.
4. Replace the battery cover.
Note: The image is only for reference to indicate the location of the receiver. The actual receiver may look different depending on the product specification.
TIP: If you have an extra receiver from any Logitech device you aren’t currently using, this is a great place to store it.
Mouse and keyboard compatibility with USB hubs and KVM switches
We do not support the use of third-party devices with our mice and keyboards. They can interfere with communication between a mouse or keyboard and the computer.
Unsupported third-party devices include:
– KVM switch boxes
– Port replicators
– Docking stations
– USB hubs
NOTE: The manufacturers of these third-party devices implement keyboard and mouse support in different ways. There is currently no industry standard.
Supported operating systems for the M325
The M325 mouse is supported by these operating systems:
– Windows 7
– Windows XP
– Windows Vista
– Macintosh OS X 10.5 or above
– Linux kernel 2.6 or above
NOTE: The M325 is not supported on Windows 98, Windows ME, Windows 2000 and UNIX operating systems.
M325 battery life and replacement
Battery information for your mouse
– Requires 1 AA alkaline battery
– Expected battery life is up to 18 months
Checking battery status
You can check your mouse’s battery status using the Logitech SetPoint mouse and keyboard software. See Knowledge Base article 23060 for instructions.
Installing a new battery
When you install a new battery in your mouse, make sure it faces the correct direction, as shown below. 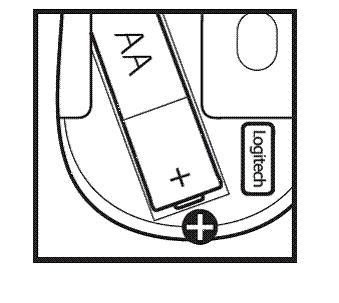
Battery performance tips
Your mouse enters standby mode to conserve power when it is not in use. Here are some other ways you can help extend the battery life:
– Use only alkaline batteries. Non-alkaline batteries (such as NiMH,or NiCd) operate at a lower voltage and may affect the battery life.
– Avoid using your mouse on dark or transparent surfaces, such as glass. These surfaces cause the optical sensor to use more power.
– Make sure replacement batteries are new and within the manufacturer’s expiration date.
Mouse buttons do not work as programmed in SetPoint
When the mouse buttons aren’t working the way you programmed them to, the problem is usually with the configuration. You can check and change your mouse button settings in the Logitech SetPoint mouse and keyboard software. See Knowledge Base article 23057 for more information.
M325 mouse not working or frequently loses connection
Mouse is not working
If your mouse isn’t working, the problem is likely a lost connection. The connection between the mouse and the USB receiver can be lost for several reasons, such as:
– Low battery levels
– Moving the USB receiver from one port to another
– Moving the USB receiver to another computer
– Plugging the USB receiver into a hub or other unsupported device such as a KVM switch (NOTE:
– Your Unifying USB receiver must be plugged directly into your computer.)
– Using your cordless mouse on metal surfaces
Radio frequency (RF) interference from more powerful devices such as:
– Wireless speakers
– Computer power supplies
– Monitors
– Cell phones
– Garage door openers
Before reconnecting your mouse
Before you connect your mouse to a Windows computer:
1. Fix or rule out the potential problem sources listed above.
2. Turn your computer on.
3. Insert fresh batteries in your mouse. For instructions on changing your mouse battery, see Knowledge Base article 23493.
4. Turn your mouse on. The power indicator on top should be green. 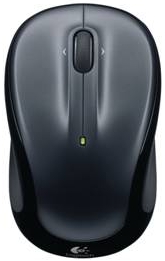
5. If the power indicator is not lit, move the power switch on the bottom of the mouse to the “ON” position. The power indicator should now turn green. 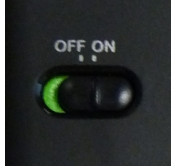
6. Plug the receiver directly and securely into a working USB port on your computer.
Reconnecting your mouse
To reconnect your mouse to a Windows computer:
1.Download the correct version of Logitech SetPoint mouse and keyboard software from the M325 Downloads page.
2. Launch the Logitech Unifying Software:Windows: Start > Programs > Logitech > Unifying > Logitech Unifying Software
3. When the Logitech Unifying Software Welcome screen displays, click Next to continue. 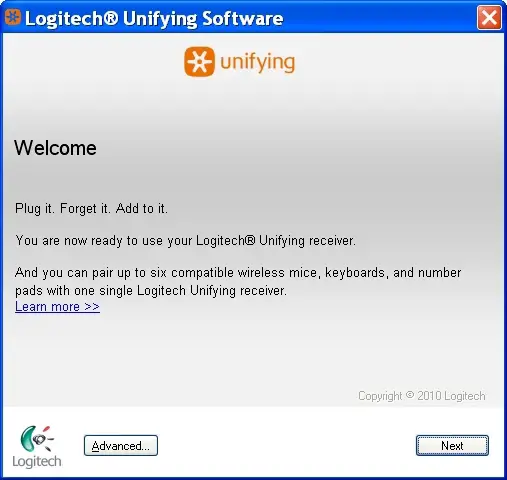
4. Follow the on-screen instructions to turn your mouse off and then back on. 
5. When your mouse is detected, you’ll see the confirmation message below. Click Yes and then Next. 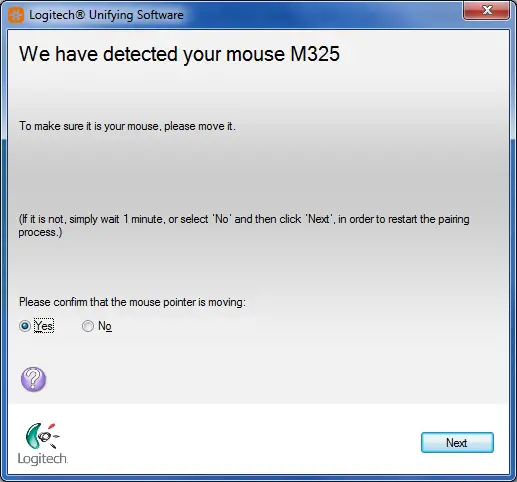
6. Click Finish to exit the Logitech Unifying Software. Your mouse should now be connected.
If this solution doesn’t work after a couple of attempts, restart your computer and try the reconnection process again.
Mouse frequently stops working
– Keep other electrical devices at least 8 inches (20 cm) away from the USB receiver
– Move the mouse or keyboard closer to the USB receiver
– Move the receiver to a different USB port on your computer
Contact information
Need more help? see Knowledge Base article 23480 for how to contact Logitech Customer Care about this product.
Using the M325 with a different USB receiver
Your M325 ships with the Logitech Unifying USB receiver shown below: 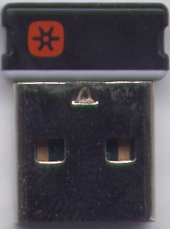
You can also connect your M325 to any other USB receiver that displays this Unifying logo: ![]() .
.
NOTE: Although the device may be supported by the Unifying receiver, SetPoint and/or Logitech Control Center (LCC) support will depend on the specific product.
Turning the M325 mouse on and off
To turn the M325 mouse on and off:
1. Flip the mouse over.
2. Locate the power switch on the bottom. 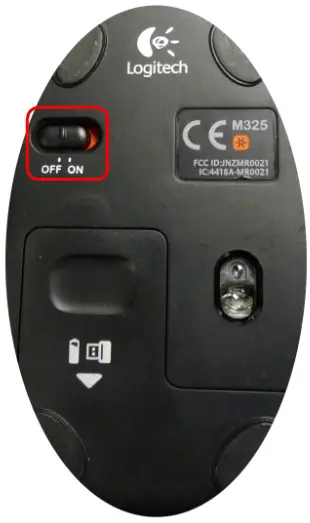
3. Slide the switch to the right to turn it ON.
4. Slide the switch to the left to turn it OFF.
Macintosh Keyboard Setup Assistant appears when USB receiver gets plugged in
The Keyboard Setup Assistant (shown below) may launch when you plug in the receiver for your mouse. This behavior is normal and expected.
You do not need to complete the Assistant to use your mouse. Click the red button in the top left corner to close the Keyboard Setup Assistant. 
Purchasing a replacement Unifying USB receiver for the M325
If you’ve lost or damaged the Unifying USB receiver for your mouse, you can purchase a replacement one from the M325 Parts Store.
Your M325 mouse uses a Logitech Unifying USB receiver that looks like this: 
The Mouse won’t work with a non-Unifying USB receiver. To be sure you have the right receiver, look for this Unifying logo:  .
.
Unable to customize my mouse or keyboard in SetPoint
Normally, you should be able to customize your mouse or keyboard settings in the Logitech SetPoint mouse and keyboard software on the My Mouse / My Keyboard tab.
Without the My Mouse / My Keyboard tab in SetPoint, only the Tools tab will display, as shown here: 
If the My Mouse / My Keyboard tab isn’t displayed, you’ll need to uninstall and re-install SetPoint following the instructions below.
To uninstall and re-install SetPoint:
Windows XP
1. Go to Add or Remove Programs.
– Default Start Menu view: Start > Control Panel > Add/Remove Programs
– Classic Start Menu view: Start > Settings > Control Panel > Add/Remove Programs
2. Select Logitech SetPoint from the list of programs displayed. 
3. Click the Change / Remove button and follow the on-screen instructions to uninstall SetPoint.
4. Download and install the latest version of SetPoint from the Web Downloads Page.
NOTE: You may need to restart your system after SetPoint has been installed.
5. After your system restarts, open SetPoint to verify that the My Mouse / My Keyboard tab is available.
If the My Mouse / My Keyboard tab is still missing:
1. Right-click on the SetPoint icon in the system tray (at the bottom right of your screen) and select Exit. ![]()
2. Click the Windows Start button.
3. Choose Run.
4. Type %windir% in the Run dialog box. 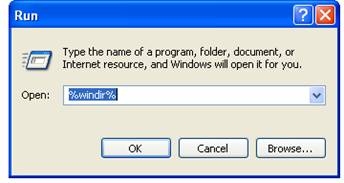
5. Double-click the System32 folder to open it.
6. Double-click the drivers folder.
7. Rename the file wdf01000.sys to wdf01000.bak.
8. Re-install SetPoint.
IMPORTANT: Before you restart your system, make sure the wdf01000.sys file is present in the drivers folders. If you restart without this file, it may prevent some of your hardware — including mice and keyboards — from working properly.
9. If the wdf01000.sys file isn’t in the drivers folder, change wdf01000.bak back to wdf01000.sys.
10. Restart the computer.
11. After your system restarts, open SetPoint to verify that the My Mouse / My Keyboard tab is present.
Windows Vista and Windows 7
1. Go to Uninstall a program.
– Default Start Menu view: Start > Control Panel > Uninstall a program
– Classic Start Menu view: Start > Settings > Control Panel > Programs and Features
2. Select Logitech SetPoint from the list of programs displayed. 
3. Click the Uninstall button highlighted above and follow the on-screen instructions to uninstall SetPoint.
4. Download and install the latest version of SetPoint from the Web Download page.
5. After your system restarts, open SetPoint to make sure the My Mouse / My Keyboard tab is
Windows 8
1. Go to Uninstall a program.
– Start screen > Right-click on Mouse and Keyboard Settings > Uninstall
– Start screen > Right-click on empty space and select All apps > Control Panel > Uninstall a program 
2. Select “Logitech SetPoint” from the list. 
3. Click Uninstall.
4. Follow the on-screen instructions to remove SetPoint from your system.
NOTE: You may need to restart your computer to finish uninstalling SetPoint.
Customizing the M325 mouse with Logitech SetPoint Software
Follow these links to learn how you can customize your mouse using Logitech SetPoint mouse and keyboard software:
NOTE: If you don’t already have SetPoint installed, you can download it. See Knowledge Base article 22980 for instructions.
Contact information
Need help? See Knowledge Base article 23480 for how to contact Logitech Customer Care about this product.
Customizing mouse buttons in SetPoint
You can customize how your mouse buttons function using the Logitech SetPoint mouse and keyboard software.
NOTE: If you don’t already have SetPoint installed, you can download it. See Knowledge Base article 22980 for instructions.
To change the task a mouse button performs:
1. Launch the Logitech SetPoint mouse and keyboard software.
– Start > Programs > Logitech > Mouse and Keyboard > Mouse and Keyboard Settings
2. Click the My Mouse tab at the top of the SetPoint Settings window. 
3. Select your mouse from the product drop-down menu at the top left.
4. Choose the mouse button you want to customize in the Select Button field.
5. Choose the task you want to assign in the Select Task field.
NOTE: You can click the “?” icon for descriptions of the tasks.
6. Click Apply to save your settings and then OK to exit SetPoint.
Adjusting the mouse cursor in SetPoint
You can adjust how your mouse moves and scrolls using the Logitech SetPoint mouse and keyboard software.
NOTE: If you don’t already have SetPoint installed, you can download it. See Knowledge Base article 360023356593 for instructions.
To adjust the movements of your mouse:
1. Launch the Logitech SetPoint mouse and keyboard software.
– Start > Programs > Logitech > Mouse and Keyboard > Mouse and Keyboard Settings
2. Click the My Mouse tab at the top of the SetPoint Settings window. 
3. Select your mouse from the product drop-down menu at the top left.
4. Click the cursor icon on the left toolbar to display the Pointer and Scrolling Settings screen.
NOTE: You can click the “?” icon for descriptions of the settings.
5. Click Apply to save your settings and then OK to exit SetPoint
Customizing mouse settings for games in SetPoint
You can customize your mouse settings for game playing using the Logitech SetPoint mouse and keyboard software.
NOTE: If you don’t already have SetPoint installed, you can download it. See Knowledge Base article 360023188414 for instructions.
To customize the mouse button settings for games:
1. Launch the Logitech SetPoint mouse and keyboard software.
– Start > Programs > Logitech > Mouse and Keyboard > Mouse and Keyboard Settings
2. Click the My Mouse tab at the top of the SetPoint Settings window. 
3. Select your mouse from the product drop-down menu at the top left.
4. Click the chess piece icon on the left toolbar to display the Game Settings screen.
Select your settings.
NOTE: can click the “?” icon for descriptions of the settings.
5. Click Apply to save your settings and then OK to exit SetPoint.
Advanced mouse settings for specific applications in SetPoint
You can customize your mouse settings for specific applications using the Logitech SetPoint mouse and keyboard software.
NOTE: If you don’t already have SetPoint installed, you can download it. See Knowledge Base article 360023356233 for instructions.
To customize the mouse button settings for a specific application:
1. Launch the Logitech SetPoint mouse and keyboard software.
– Start > Programs > Logitech > Mouse and Keyboard > Mouse and Keyboard Settings
2. Click the My Mouse tab at the top of the SetPoint Settings window. 
3. Select your mouse from the product drop-down menu at the top left.
4. Click the mouse icon with the “+” on the left toolbar to display the Advanced Settings screen.
NOTE: You can click the “?” icon for descriptions of the settings.
5. Make sure “Enable application-specific button settings” is selected and then click Configure. This dialog box will display: 
6. Select the application for which you want to configure the mouse settings.
7. Choose the button you want to program for the application you selected.
8. Select the task you want the button to perform in that application.
NOTE: Not all mouse buttons will have the same tasks to select from.
9. Click Apply and then OK to exit.
Optical light not visible on the M325
Your mouse uses an infrared (IR) optical LED light that is invisible to the human eye. This means you won’t be able to see the light emitting from the bottom of your mouse.
If you’re not sure whether your mouse is powered on, check the ON/OFF switch located on the bottom. When your mouse is:
ON — The switch is pushed over to the right and you see green next to it.
OFF — The switch is pushed over to the left and you see red next to it. 
Mouse doesn’t display in LCC and can’t be programmed for Mac
This mouse model isn’t supported by the Logitech Control Center (LCC) for Macintosh, but might still work as a basic mouse on a Mac.
If a device is programmable, the LCC for Mac will display the image for that device. Because this mouse isn’t supported, the image won’t display in the LCC and you won’t be able to program it there. 
If a device is not supported in the LCC, there won’t be an image for it. 
Using the optional USB extender

The optional USB extender:
– Makes your computer’s USB ports more easily accessible
– Varies the position of the USB receiver to reduce possible interference
To connect your USB extender:
– Plug the USB receiver that came with your device into the female end of the USB extender.
– Plug the male end of the USB extender into a USB port on your computer. 
M325 battery light doesn’t stay on
The green battery light in the center of your M325 mouse is not meant to stay on. This is the normal behavior of the mouse.
When you turn your mouse on or replace the batteries, the light will come on for a few seconds. This indicates that the battery has enough charge for your mouse to work.
The light will go off again after a few seconds to conserve battery power. 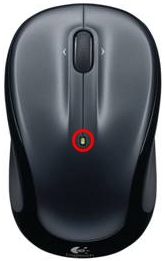
My Unifying mouse or keyboard wakes the computer even when it is set not to
Symptom
After disabling the ability to wake-up the system in Windows Device Manager, the Unifying mouse or keyboard still brings the system out of sleep mode.
Solution
Even if you bought a mouse-only or keyboard-only product, the Unifying receiver that came with it still enumerates for both the mouse and keyboard interfaces.
Example
If you have two mice attached, then you would need to uncheck the “Allow this device to wake the computer” option for both mice plus a keyboard in the Windows Device Manager.
Use the process below to identify and configure the Unifying devices to not wake up the system in Windows Device Manager.
Changing wake-up settings in the Device Manager
To change the wake-up settings in Windows Device Manager, you’ll need to launch it through Computer Management and then make your selections.
Here’s how:
1. Click Start, right-click Computer, and then click Manage.
2. Click Device Manager in the navigation pane on the left. 
3. Select and expand either the “Keyboards” or “Mice and other pointing devices” category.
4. Right-click on the first entry and go to Properties > Details tab > Hardware IDs under the Property section.
5. Make sure the Value section contains: HID\VID_046D&PID_C52B. If it doesn’t, click Cancel and open the next mouse or keyboard entry in the list. 
6. Select the “Power Management” tab and uncheck the “Allow this device to wake the computer” check box. 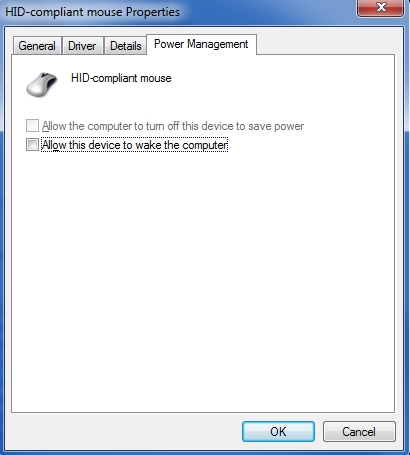
7. Repeat the same steps for all entries in both the “Keyboards” and “Mice and other pointing devices” categories.
Mouse double-clicks when clicked once
If your mouse double-clicked from the first day of usage, check the Windows setting called Single-click to open an item. This option makes a single mouse click act as a double click. Disable this setting to return the mouse to the standard one click option.
To disable, first select your operating system:
Disabling the single-click to open option in Windows 8/Windows 10
1. Click on the magnifying glass to bring up the Search menu, type ‘single-click’, and then select Specify single- or double-click to open.
2. Select the General tab, and under Click items as follows, make sure Double-click to open an item (single-click to select) is the selected option.
Disabling the Single-Click to open option in Windows 7/Vista
1. Open your computer window by clicking on Computer.
2. Click Folder and Search Options in the file menu under Organize.
3. Under the General tab, make sure that the option ‘Double-click to open an item’ is selected.
4. Click on OK to save the settings.
5. If the ‘Single-click to open an item’ option was not selected, try resetting the mouse by switching it off and on.
Disabling the Single-Click to open option in Windows XP
1. Open My Computer.
2. Click Folder Options in the file menu under Tools.
3. Under the General tab, make sure that the option ‘Double-click to open an item’ is selected.
4. Click on OK to save the settings.
5. If the ‘Single-click to open an item’ option was not selected, try resetting the mouse by switching it off and on.
Additional help
If the steps above do not help, or if your mouse has only recently begun to double-click, please contact Logitech Customer Care.
Download
Download
Logitech M325 Wireless Mouse User Manual – [ Download PDF ]
Read More About …. M325 Bluetooth Mouse
https://www.logitech.com/en-us/products/mice/m325-wireless-mouse.910-002651.html


