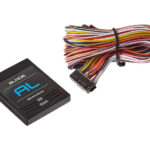
idatalink DL-CH7 Chrysler Data Doorlock Integration
INSTRUCTION MANUAL
FTI-CDP1: Vehicle Coverage and Preparation Notes

Firmware: Covered vehicles use BLADE-AL(DL)-CH7, flash module and update the controller firmware before installing.
Install: Type 2 vehicles use the included CAN extension cable to source CAN data from the green CAN junction block (left side of the dash) or from the BCM (pin#25, CANH, brown, pin #26, CANL, yellow).
Lighting: Type A parking lights use the 6-pin connector, secure the unused 10 pin connector for safety.
Ignition: Common ignition provisions are listed in the BLADE diagram, ignition is also available at the vehicle BCM (connector C5/E, pin #27, pink/white).
FTI-CDP1 – Installation and Configuration Notes

FTI-CDP1 – DL-CH7 – Type 3 2018-19 Dogde Challenger PTS

LED Programming Error Codes
Module LED flashing RED during programming
1x – CAN Error, check CAN wiring and voltages
2x – Key code not learned, confirm unlock sent, check CAN 3x – No PTS signal, check button connection
4x – No immobilizer data, check wiring
4x – No immobilizer, confirm only one key in vehicle
5x – No ignition, check wiring
6x – VIN error, check CAN wiring, confirm vehicle application 7x – PTS signal error, check button connection
8x – No PTS signal, check button connection
CARTRIDGE INSTALLATION

MODULE PROGRAMMING PROCEDURE – WITH KLON – 1 OF 2


MODULE PROGRAMMING PROCEDURE – WITH KLON – 2 OF 2
WARNING: READ BEFORE REMNO OTICETE STARTING THE VEHICLE
IMPORTANT
All OEM keyfobs must be at least 10 feet away from the vehicle. All vehicle doors must be closed and locked prior to remote start sequence. Failure to comply will result in remote starter malfunction.
TAKE OVER PROCEDURE – TO THE VEHICLE OWNER


Specifications
- Make: DL-CH7 Dodge
- Model: Challenger PTS
- Year: 2018
- Install Type: Type 2
- CAN: CJB
- Lights: Park / Auto
- Type: A
- IGN: BCM
- Hood I/O Changes: BCM Green White/Blue
- Firmware: BLADE-AL(DL)-CH7
Product Usage Instructions
Installation
1. Install the BLADE-AL(DL)-CH7 flash module and update the controller firmware before proceeding.
2. For Type 2 vehicles, use the included CAN extension cable to source CAN data from the green CAN junction block or from the BCM.
Lighting Setup
1. For Type A parking lights, use the 6-pin connector and secure the unused 10-pin connector for safety.
Ignition Configuration
1. Refer to the BLADE diagram for common ignition provisions.
2. Ignition is also available at the vehicle BCM (connector C5/E, pin #27, pink/white).
FAQ
Q: What are some common LED programming error codes?
A: Here are some common LED error codes during programming:
- 1x – CAN Error, check CAN wiring and voltages
- 2x – Key code not learned, confirm unlock sent, check CAN
- 3x – No PTS signal, check button connection
- 4x – No immobilizer data, check wiring
- 5x – No ignition, check wiring
- 6x – VIN error, check CAN wiring, confirm vehicle application
- 7x – PTS signal error, check button connection
- 8x – No PTS signal, check button connection
Q: What is the process for module programming with KLON?
A: To program the module with KLON:
-
- Close driver door.
- Press UNLOCK on keyfob 1.
- Wait for LED to flash BLUE once [1x].
- Remove valet key from keyfob 1.
Documents / Resources
 |
idatalink DL-CH7 Chrysler Data Doorlock Integration [pdf] Installation Guide DL-CH7, CM7000-7200, CM-900S-900AS, DL-CH7 Chrysler Data Doorlock Integration, DL-CH7, Chrysler Data Doorlock Integration, Data Doorlock Integration, Doorlock Integration, Integration |
 |
idatalink DL-CH7 Chrysler Data Doorlock Integration [pdf] Installation Guide FTI-CDP1-CH7, DL-CH7, CM7000-7200, CM-900S-900AS, CM-900, DL-CH7 Chrysler Data Doorlock Integration, DL-CH7, Chrysler Data Doorlock Integration, Data Doorlock Integration, Doorlock Integration, Integration |


