
1. Johdanto
This manual provides detailed instructions for the safe and effective operation of your ZHDBD 5012H Digital Oscilloscope. Please read this manual thoroughly before using the device to ensure proper functionality and to prevent damage. Keep this manual for future reference.
2. Tuote ohiview
2.1 Tärkeimmät ominaisuudet
- Intelligent anti-burn protection.
- Afterglow display technology for clear waveform visualization.
- 2.4-inch color display screen (320*240 resolution).
- 100MHz analog bandwidth with a 500MS/s sampling rate (1X = 5MHz, 10X = 100MHz).
- One-button waveform storage with built-in 64M storage space, capable of storing up to 2000 waveform images.
- Powerful waveform file manager supporting thumbnail browsing, viewing, detail viewing, flipping, and deletion.
- Waveform display pause function.
- One-button AUTO function for quick waveform display without complex adjustments.
- Complete triggering functions: Single, Normal, Automatic.
- Built-in 3000mAh rechargeable lithium battery, providing up to 8 hours of continuous use on a full charge.
- Säädettävä näytön kirkkaus.
- Memory compression technology for flicker-free waveform refresh.
- Anti-slip and anti-drop silicone sleeve for enhanced durability.
- Kompakti ja kannettava muotoilu.
2.2 Komponentit ja lisävarusteet
The ZHDBD 5012H Digital Oscilloscope comes with the following components and accessories:
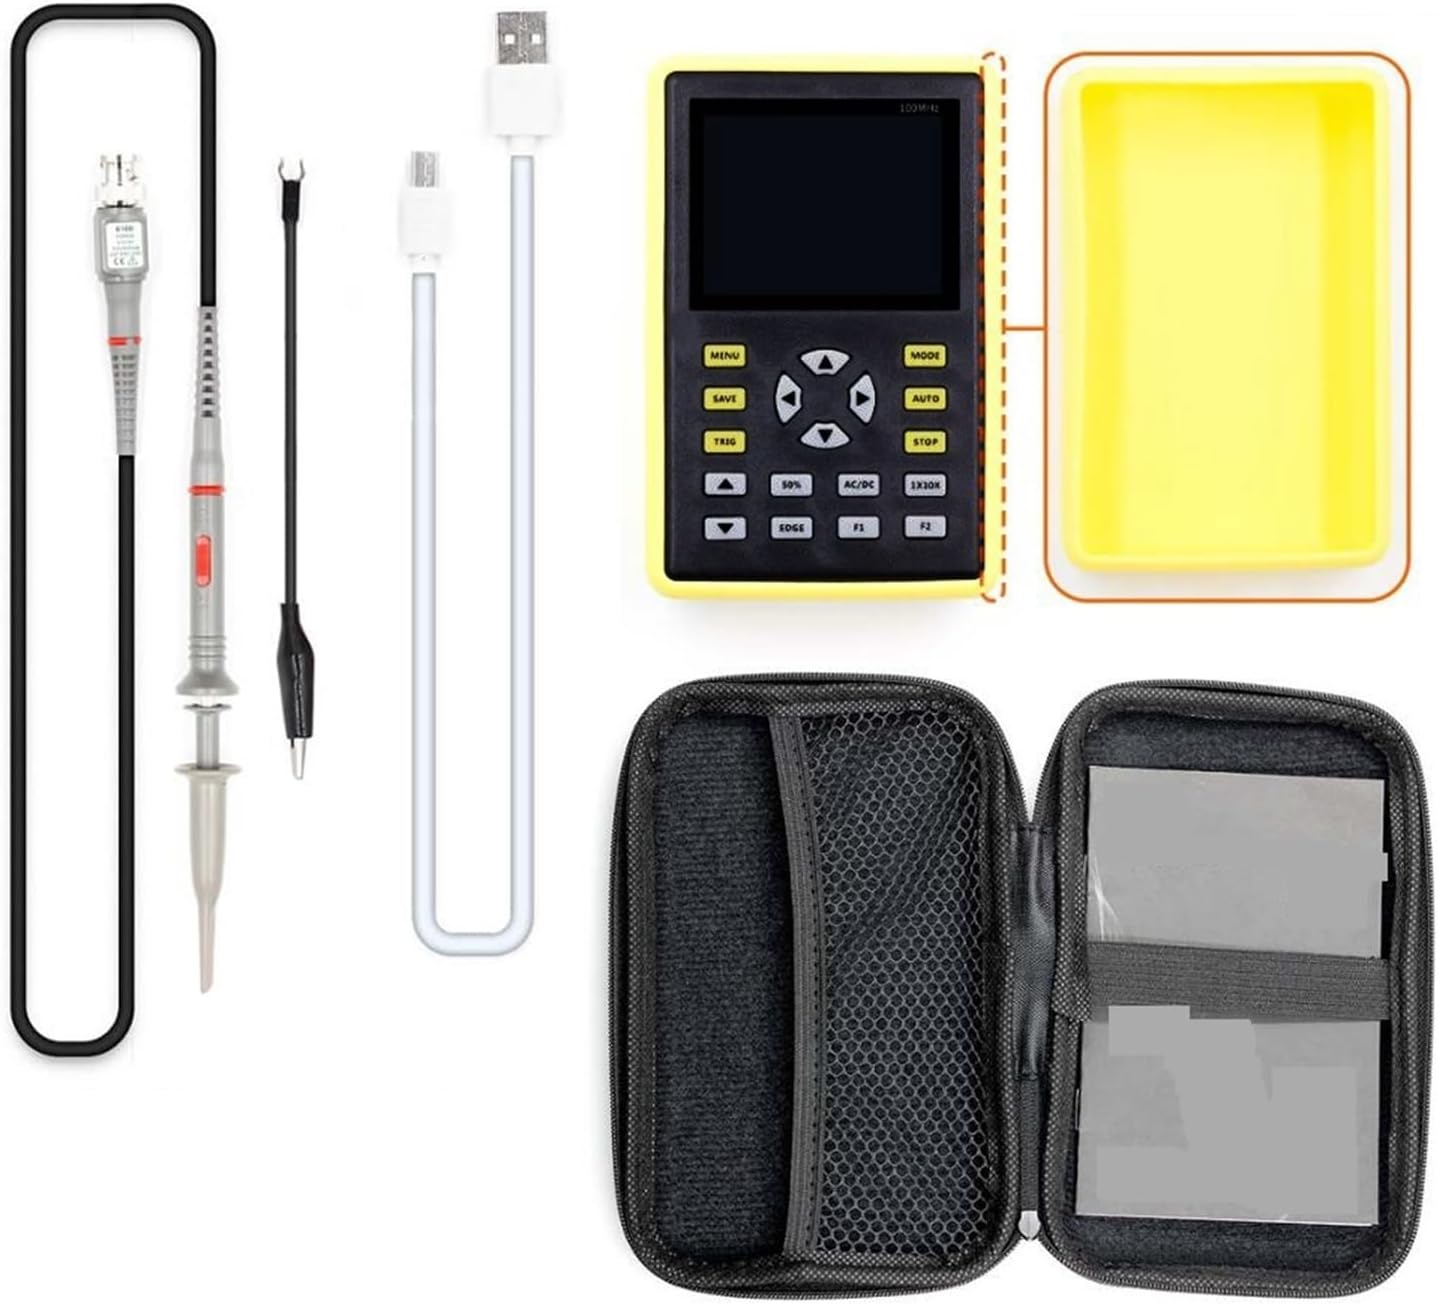
Kuva 2.2.1: The ZHDBD 5012H Digital Oscilloscope package includes the main unit, a probe, a USB cable for charging and data transfer, and a protective carrying case.
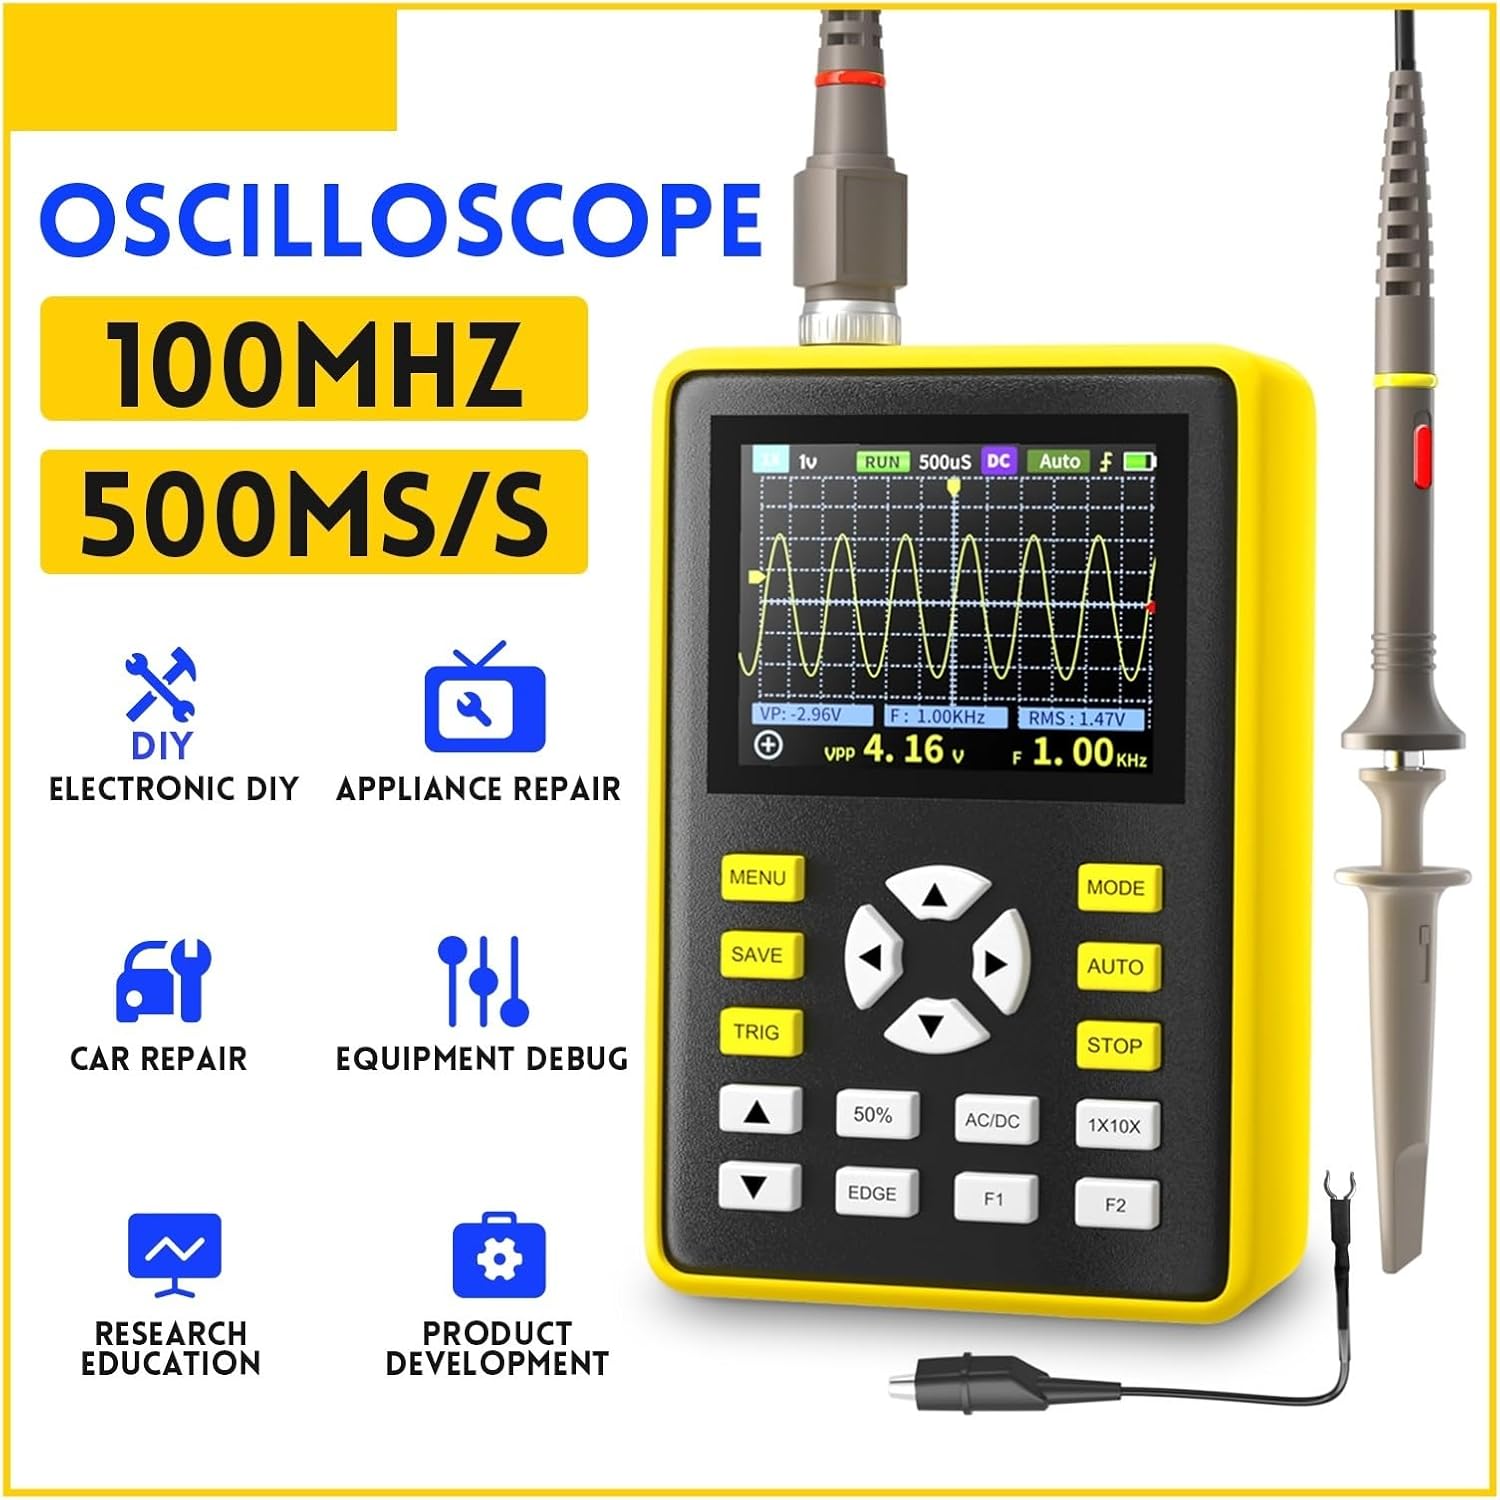
Kuva 2.2.2: Edessä view of the oscilloscope, highlighting the 2.4-inch display, navigation buttons, and function keys (MENU, MODE, SAVE, AUTO, TRIG, STOP, 50%, AC/DC, EDGE, F1, F2).
3. Asennus
3.1 Laitteen lataaminen
- Connect the provided USB cable to the oscilloscope's charging port.
- Liitä USB-kaapelin toinen pää tavalliseen USB-virtalähteeseen (ei sisälly toimitukseen) tai tietokoneen USB-porttiin.
- The charging indicator will illuminate. A full charge typically takes several hours and provides up to 8 hours of continuous operation.
3.2 Anturin liittäminen
- Ensure the oscilloscope is powered off before connecting the probe.
- Connect the BNC connector of the oscilloscope probe to the input BNC port on the oscilloscope.
- Attach the ground clip of the probe to the ground point of the circuit under test.
- Select the appropriate attenuation setting (1X or 10X) on the probe based on the expected signal voltage. For higher voltages, use 10X.
- Tärkeää: When using the 10X attenuation setting on the probe, ensure the oscilloscope's input setting is also configured for 10X to obtain accurate readings. Failure to do so may result in incorrect measurements or potential damage if high voltage is applied with a 1X setting.
4. Käyttöohjeet
4.1 Virta päälle/pois
- Käynnistääksesi laitteen, pidä virtapainiketta painettuna, kunnes näyttö syttyy.
- Sammuta virta pitämällä virtapainiketta painettuna, kunnes näyttö sammuu.
4.2 Automatic Measurement (AUTO)
The one-button AUTO function automatically adjusts the vertical, horizontal, and trigger settings to display a stable waveform. This is useful for quickly viewtuntematonta signaalia.
- Paina AUTO button. The oscilloscope will attempt to automatically detect and display the input waveform.
4.3 Liipaisutoiminnot
Triggering stabilizes repetitive waveforms and captures single-shot events. Press the TRIG -painiketta päästäksesi liipaisimen asetuksiin.
- Auto Trigger: The oscilloscope triggers automatically, even without a stable signal. Suitable for most general-purpose measurements.
- Normal Trigger: The oscilloscope triggers only when the signal meets the specified trigger conditions. If no trigger event occurs, the display remains unchanged. Useful for capturing specific events.
- Yksittäinen liipaisin: The oscilloscope waits for a single trigger event, captures one waveform, and then stops. Ideal for capturing non-repetitive or transient events.
- Trigger Edge: Käytä REUNA button to select between rising edge or falling edge triggering.
4.4 Waveform Storage and Management
The device allows for easy storage and management of waveform images.
- Tallenna aaltomuoto: Paina TALLENTAA button to instantly store the current waveform displayed on the screen. The device has 64M storage, capable of holding up to 2000 images.
- Waveform Manager: Access the waveform file manager through the MENU button. This allows for thumbnail browsing, viewing, detailed inspection, page turning, and deletion of stored waveforms.
4.5 Adjusting Display and Settings
- Pystysuuntainen herkkyys (volttia/jako): Use the up/down arrow buttons to adjust the vertical scale, changing the voltage represented by each vertical division on the grid.
- Horizontal Time Base (Sec/Div): Use the left/right arrow buttons to adjust the horizontal scale, changing the time represented by each horizontal division on the grid.
- AC/DC Coupling: Paina AC/DC button to toggle between AC and DC coupling. AC coupling blocks the DC component of the signal, showing only the AC variations. DC coupling shows the entire signal, including both AC and DC components.
- Näytön kirkkaus: Adjust screen brightness through the MENU asetukset optimaalisia vieweri valaistusolosuhteissa.
5. Huolto
5.1 Puhdistus
- Power off the device and disconnect all probes and cables before cleaning.
- Use a soft, dry cloth to wipe the exterior of the oscilloscope.
- Pinttyneeseen likaan, kevyesti dampPyyhi liina vedellä tai miedolla, hankaamattomalla puhdistusaineella. Vältä voimakkaiden kemikaalien tai liuottimien käyttöä.
- Älä päästä nesteitä laitteen sisään.
5.2 Akun hoito
- Akun käyttöiän pidentämiseksi vältä akun usein tapahtuvaa täydellistä tyhjentymistä.
- If storing the device for an extended period, charge the battery to approximately 50% and store it in a cool, dry place. Recharge every few months to prevent deep discharge.
- Käytä lataamiseen vain mukana toimitettua USB-kaapelia.
5.3 Varastointi
- Store the oscilloscope in its protective carrying case when not in use to prevent physical damage.
- Keep the device away from extreme temperatures, high humidity, and direct sunlight.
6. Vianmääritys
If you encounter issues with your ZHDBD 5012H Digital Oscilloscope, refer to the following common problems and solutions:
| Ongelma | Mahdollinen syy | Ratkaisu |
|---|---|---|
| Laite ei käynnisty. | Akku on vähissä tai virtapainiketta ei painettu oikein. | Lataa laite täyteen. Varmista, että virtapainiketta painetaan muutaman sekunnin ajan. |
| Ei aaltomuotoa näytössä. | Probe not connected, signal too weak/strong, incorrect trigger settings, or incorrect time/voltage mittakaava. | Check probe connection. Use the AUTO button. Adjust vertical (Volts/Div) and horizontal (Sec/Div) scales. Check trigger mode and level. |
| Unstable waveform. | Incorrect trigger settings or trigger level. | Adjust the trigger level. Try different trigger modes (Auto, Normal, Single). Ensure the probe ground clip is securely connected. |
| Väärä voltage lukemat. | Probe attenuation mismatch (1X/10X). | Ensure the probe's attenuation setting (e.g., 10X) matches the oscilloscope's input setting. |
Jos ongelma jatkuu näiden ratkaisujen kokeilemisen jälkeen, ota yhteyttä asiakastukeen.
7. Tekniset tiedot
| Parametri | Arvo |
|---|---|
| Analoginen kaistanleveys | 100 MHz |
| Suurin reaaliaikainen Sampling korko | 500 MS/s |
| Horizontal Time Base Range | 50S/div ~ 6nS/div |
| Säilytyssyvyys | 128 kt |
| Tulovastus | 1MΩ |
| ADC Precision | 8 bittiä |
| Kytkentätila | AC/DC |
| Trigger Mode | Single, Normal, Auto |
| Trigger Edge | Ascending/Descending edge |
| Näyttö | 2.4 inch - 320*240 color display |
| Virtalähde | 3000 mAh litiumakku |
8. Takuu ja tuki
The ZHDBD 5012H Digital Oscilloscope is designed for reliability and performance. For specific warranty information, please refer to the documentation provided with your purchase or contact the retailer.
For technical support, troubleshooting assistance beyond what is covered in this manual, or inquiries regarding parts and service, please contact ZHDBD customer service through their official channels.