Felicitysolar H2407 DTU Wireless Module
Instructions
Model

LED status:

Detailed Pin Function Of RJ45 Port:

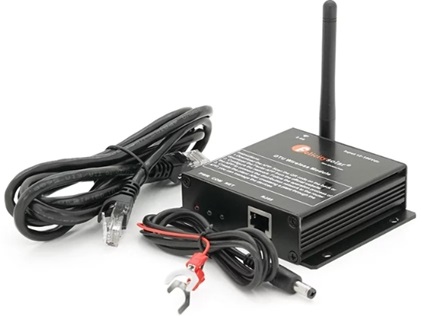
Connection between device and Smart WiFi module
The RJ45 of Smart WiFi DTU-S supports RS232 and power interface. If the RJ45 interface of the device cannot provide 12V DC to Smart WiFi DTU-S, then Smart WiFi DTU-S, like DTU-M, needs to be connected to a separate power supply.

Configure Network
Download APP
Scan the QR Code on the right side and download the APP.

Connect to Smart WiFi module wireless network
Configure the mobile phone WLAN to connect to the wireless network of the Smart VViFi module.
- Run the APP, enter the login page, click the Setup network button to enter the network configuration page.
- On the network configuration page, click the switch to moble WLAN page to selection button to enter the mobile phone WLAN page.

- On the WLAN page of the mobile phone, find the corresponding wireless network name (SSID) of the Smart WiFi module, starting with S(e.g. Snnxxxxxxxxxx, the xxxxxxxxx is the same as the last 10 bytes of the Smart Wifi module serial number), enter the module wireless network password (default password: 12345678), and connect to the wireless network of the Smart WiFi module.
Configure the network
- After the mobile WLAN is connected to the wireless network of the Smart WiFi module,return to the network configuration page of the APP and click the NEXT button to enter the WiFi network page.
- On the WiFi network page, click the choose network button, select the router wireless network to which the Smart WiFi module needs to connect, enter the router wireless network password and click the Connect button.
- And then wait for the Smart WiFi module to connect to the router’s wireless network, which will take some time.
Note: if the LED status of NET is always on, it indicates that the Smart WiFi module has been correctly connected to the server. Otherwise, the Smart WiFi module is not connected to the server. Then you can use the diagnostic function of the APP or according to the fault appendix to troubleshoot the problem.
Create the plant
After the Smart WiFi module is connected to the server, it will transmit the data of the solar device to the server. And after the plant is created, users can view and manage the solar device via the APP or web browser.
Manage device via APP
Register an account
Run the APP, enter the login page, click the register button, fill in the relevant information, and register an account.
Adding devices
- After logging into the APP with an account, enter the home page, click the Device button to enter the device interface.
- Click the + button to enter the Add Device page, and fill in the relevant information as required. Note: Device SN refers to a solar device serial number, such as an inverter serial number.
Adding plant
- After adding the device, click the Plant button to enter the plant interface.
- Click the+ button to enter the page of adding the plant fill in relevant information as required and finally click the Submit button to add the plant.
Manage the device via a web browser, please refer to: https://shine.felicitysolar.com

Appendix: Troubleshooting table

Documents / Resources
 |
Felicitysolar H2407 DTU Wireless Module [pdf] Installation Guide H2407, H2407 DTU Wireless Module, DTU Wireless Module, Wireless Module, Module |