

BEIJING RM5A Rowing Machine

IMPORTANT!
PLEASE READ THIS MANUAL CAREFULLY BEFORE USING THIS MACHINE. RETAIN THIS MANUAL FOR FUTURE REFERENCE.
If you have any inquiries or require further assistance during the assembly or using, please contact our customer support:
- Method 1: Go to Order Page to contact seller via Amazon
- Method 2: Reach us via Email: supportfitness@163.com
- Method 3: Contact us by phone: 1-888-688-7771
Warm Tips:
Our support team responds to emails within 24 hours, if you don’t get the reply beyond 24 hours, the replies may be wrongly allocated by the email system, please kindly check the spam box or resend your email, so we can realize that you don’t get the replies then try another way to contact you.
USER MANUAL
IMPORTANT SAFETY NOTICE:
- Assemble the machine exactly as described in this manual. Do not modify it.
- Check all the screws, nuts and other connections before each use for any signs of damage or looseness. Do not use the machine if it is impaired in any way.
- Ensure that the machine is in a safe and secure indoor location on a level floor away from moisture and water.
- Place a suitable base (e.g. mat) beneath the trainer during assembly to limit dust and dirt entering the components. Only use the supplied tools or suitable tools of your own for assembly.
- Before beginning training, please remove all objects within a radius of 2 meters.
- Wipe all sweat from the machine with a soft absorbent cloth after training. Avoid aggressive solvents or harsh brushes when cleaning.
- Your health can be affected by incorrect or excessive training. Consult a doctor before beginning a health program. Your doctor can define settings (heart rate, duration etc.) to which you may train yourself. This machine is not for therapeutic purposes. It is for private home use.
- Use only original spare parts for any necessary repairs.
- This machine should be used by only one person at a time.
- Never use the machine when under the influence of drugs, alcohol or medication that causes disorientation.
- Wear training clothes and shoes that are suitable for fitness training. Your training shoes should be enclosed and tight fitting.
- Do not put hands, fingers, feet, toes or any objects on or near this machine when someone using the machine.
- lf you have a feeling of chest pain, shortness of breath, dizziness, sickness or other abnormal symptoms, please stop training and consult a doctor immediately.
- Disabled or handicapped persons should only use machine after gaining your doctor’s approval and in the presence of an adult who can give aid and advice.
- This machine is not designed for use by children. And please keep pets away from the machine during use.
PRODUCT ACCESSORIES
Packing List
Upon opening the package, you can find the following item parts inside the box:


ASSEMBLY STEPS
- STEP 1:
Install the front stabilizer (B) onto the main frame (A) and secure it with 2 cap nuts (75), curved washers (74), and carriage bolts (30). - STEP2:
First, stand the main frame (A) upright; then, attach the middle support (C) to the main frame (A) and tighten them with the 3 flat washers (17) and round head hex socket screws (29) fully; finally, secure the adjustable foot pads (D) to the middle support (C).
- STEP3:
- Connect the lower sensor wire (23) and the middle sensor wire (22), Then, attach the monitor bracket (E) to the main frame (A) using 2 curved washers (20) and round head hex socket screws (19) for secure installation.
- Remove the 2 screws (18) from the back of the monitor (F), connect the middle sensor wire (22) to the output wire of the monitor (F), then mount the monitor (F) onto the monitor bracket (E) using 2 removed screws (18).

- STEP4:
- Install the left pedal ( G-L) onto the main frame (A) using 1 cylindrical head hex socket screw (28).
- Install the right pedal (G-R) in the same manner.

- STEP 5:
First, attach the rear stabilizer(!) onto the slide rail (H) using 2 flat washers (17) and round head hex socket screws (29) (Note: do not tighten them now).- Then, attach the slide rail rear decorative cover (K) and end cap fixing plate (26) to the slide rail (H) using 4 flat washers (17) and round head hex socket screws (29).
- Then, tighten the flat washers (17) and round head hex socket screws (29) from the first step.
- Next, remove the half-round self-tapping screws (78) on the rear stabiliser decorative cover, then install the rear stabilizer decorative covers (J-L/R) on both sides of the rear stabilizer (I) using 1 Phillips half-round self-tapping screw (78) and 2 large flat head self-tapping screws (43).
- Finally, mount the seat (L) onto the slide rail (H).

- STEP 6:
Attach the slide rail front decorative cover (M) and the slide rail (H) to the main frame (A) using 6 flat washers (17) and round head hex socket screws (29), and tighten them fully.
Note: You can stand the main frame upright before installing the slide rail

EQUIPMENT USAGE GUIDE
Adjusting and Tightening the Adjustable Foot Pads:
Rotate the knob on the side of the foot plug (5) to adjust the height of the foot pad so that the entire product is stable.
Adjust the foot pad (D) beneath the middle support (C) to leave a 5mm gap between the foot pad and the ground, then tighten them with an open-end wrench.

INSTRUCTIONS FOR MONITOR
Buttons Functions:
- MODE – Press the button to select the function.
- Press and hold the button for about 2 seconds to reset the Time.Count, Distance and Calories.
- SET – Set target Time, Count, Distance and Calories.
- RESET – Reset Target Time, Counts, Distance and Calories.
FUNCTIONS AND OPERATION:
 Target Settings:
The Monitor has four target modes: Time, times, Distance and Calories (when switching to the target function, if the “SCAN” word flashes on the monitor, please press the “MODE” button again to make the “SCAN” word disappear before setting).
 During or after the setting process, if you want to modify the target value, simply press “Reset” to clear the current setting value, and then reset it according to the setting method of the corresponding target item.
Note:
- If the battery symbol on the monitor lights up, please replace the battery.
- If there is no signal input or button operation within 2 minutes, the monitor will automatically turn off and enter sleep mode.
- Restart exercise or press the button, and the monitor will restart.
- When you stop exercising for 4 seconds, the monitor will stop counting and “Stop” will be displayed on the monitor screen. When you start exercising, the monitor will automatically start counting and “Stop” will disappear.
MONITOR PARAMETERS
 Bluetooth Functionality:
- To ensure the accuracy and validity of data recorded on the mobile device, the wireless transmitter will only record user data and send it to the mobile app when the monitor is connected to the phone. Before using the equipment, please connect the app to the Bluetooth monitor to ensure the recorded data is accurate.
- lf the monitor does not receive any signal for 2 minutes, it will enter sleep mode. In sleep mode, the phone will not be able to search for the monitor. The user must press any button to wake the Bluetooth monitor for the phone to detect it.
- The Bluetooth on the monitor is turned off by default. Before connecting to the app, please press any button on the monitor to enable Bluetooth.
- If the Bluetooth is not connected to the app within 60 seconds after being turned on, and no buttons are pressed on the monitor, the Bluetooth will turn off again.
- When the monitor successfully connects to the app, it will turn off its display, and all data will be shown on the app.
- After connecting to the app, if you need to operate the monitor again, you must exit the application and turn off the phone’s Bluetooth.
APP
- Search “KINOMAP” in the mobile app store to download the app.
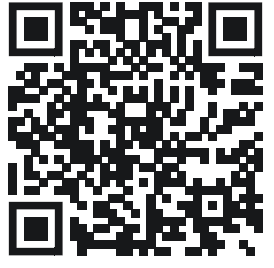
- Please scan the QR code code for Bluetooth connection instructions.

FCC WARNING STATEMENT
Changes or modifications not expressly approved by the party responsible for compliance couldvoid the user’s authority to operate the equipment. This equipment has been tested and found to comply with the limits for a Class B digital device, pursuant to Part 15 of the FCC Rules. These limits are designed to provide reasonable protection against harmful interference in a residential installation. This equipment generates uses and can radiate radio frequency energy and, if not installed and used in accordance with the instructions, may cause harmful interference to radiocommunications. However, there is no guarantee that interference will not occur in a particular installation. If this equipment does cause harmful interference to radio or television reception. which can be determined by turning the equipment off and on, the user is encouraged to try to correct the interference by one or more of the following measures:-
- Reorient or relocate the receiving antenna.
- Increase the separation between the equipment and receiver.-
- Connect the equipment into an outlet on a circuit different from that to which the receiver is connected.
- Consult the dealer or an experienced radio/TV technician for help.
This device complies with part 15 of the FCC Rules. Operation is subject to the following two conditions:
The device has been evaluated to meet general RF exposure requirements. The device can be usedin portable exposure condition without restriction.
ISED CANADA STATEMENT
This device contains licence-exempt transmitter(s)/receiver(s) that comply with lnnovationScience and Economic Development Canada ‘s licence-exempt RSS(s). Operation is subject to the following two conditions:
- This device may not cause interference.
- This device must accept any interference, including interference that may cause undesired operation of the device.
Radiation Exposure
This equipment compliles with Canada radiation Exposure limits set forth for an uncontrolled environment to maintain compliance with IC’s RF Exposure guidelines. This device’s antenna(s) must not be co-located or operate in conjunction with any other antenna or transmitter.
Zhongshan Shengdongli Fitness Equipment Co., Ltd. declares that the radio equipment type RMS, is in compliance with Directive 2014/53/EU.
The full text of the EU declaration of conformity is available at the following internet address: https://scan.erweicaihong.cn/QIRR
Documents / Resources
 | RM5A Rowing Machine |
References
- User Manualmanual.tools