
1. Introduction
The LoraTap WiFi Smart Garage Door Opener Module transforms your existing garage door opener into a smart device, allowing for remote control, voice commands, and scheduled operations. This module connects directly to your 2.4GHz Wi-Fi network and is compatible with Android and iOS devices via the free Smart Life app, requiring no additional hub. It also integrates with Amazon Echo Alexa and Google Home for convenient voice control.
The Smart Life app provides security and monitoring features, recording garage door open/close status and offering customizable notifications to remind you to close the door for enhanced security.
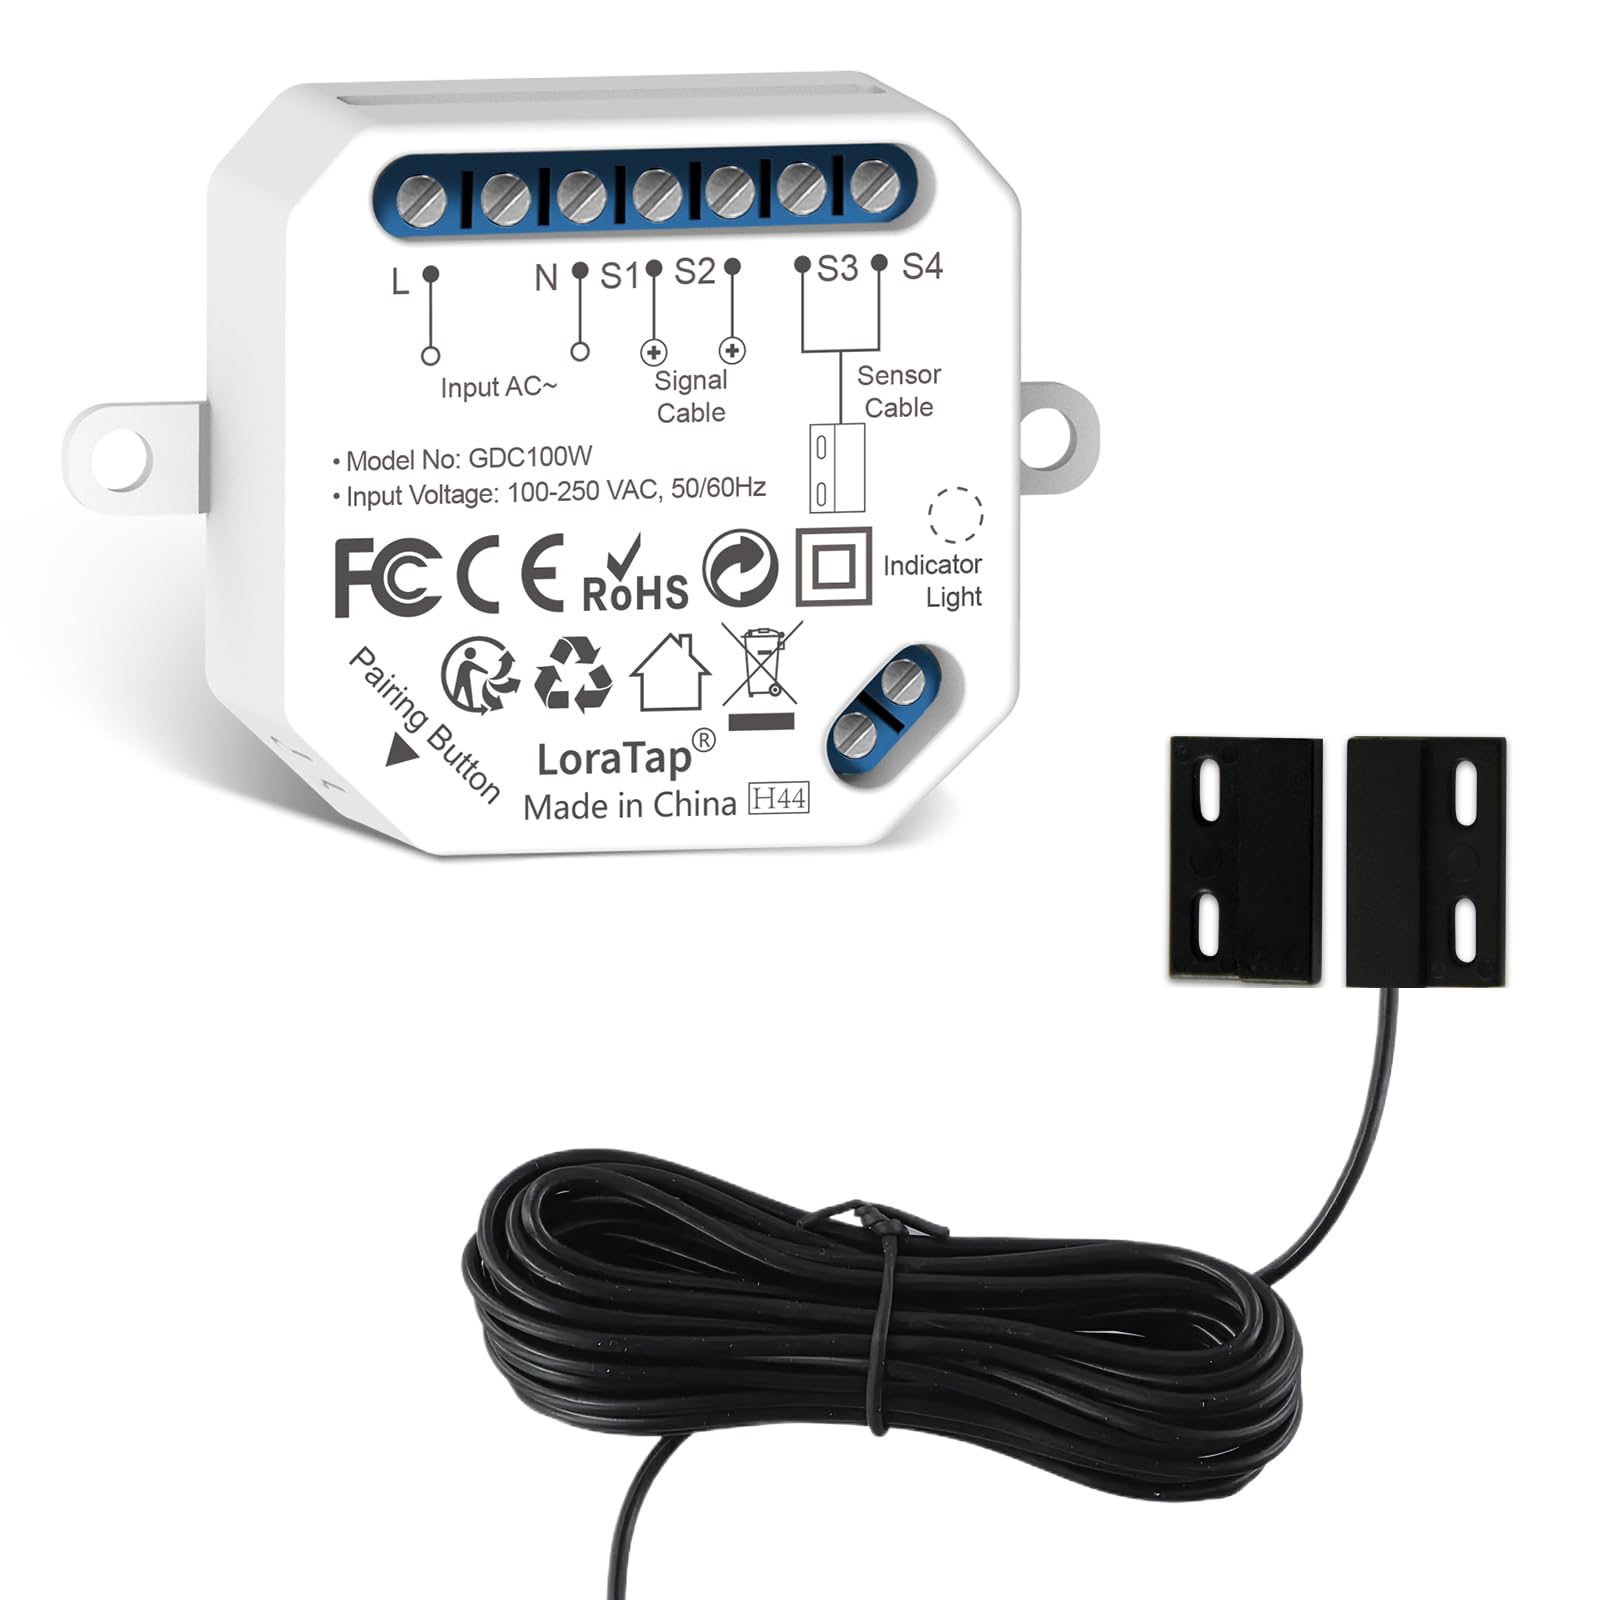
Image 1.1: LoraTap WiFi Smart Garage Door Opener Module. This image shows the compact white module with connection terminals.
2. Package Contents
Please check that all items are present and in good condition upon opening the package:
- Smart Garage Door Opener Module
- Power Adapter
- 5-meter Sensor Cable
- Mounting Bracket
- Screws
- Cable Fixing Devices
- Screwdriver
- Cable Ties
- Double-sided Adhesive Tape

Image 2.1: Diagram of Package Contents. This image illustrates all components included in the box, such as the opener module, power cable, sensor cable, mounting bracket, screws, cable clips, screwdriver, cable, and double-sided adhesive tape.
3. Safety Information
Please read and understand all safety instructions before installation and use. Failure to follow these instructions may result in electric shock, fire, or serious injury.
- Electrical Safety: Ensure power is disconnected before performing any wiring. Installation should be performed by a qualified electrician if you are unsure.
- Wi-Fi Network: This device operates on a 2.4GHz Wi-Fi network only. Ensure your router supports this frequency.
- Installation Environment: Install the device in a dry environment, away from direct water exposure.
- Children Safety: Keep the device and its components out of reach of children.
- Garage Door Operation: Always ensure the area around the garage door is clear before operating it remotely or via voice command.
4. Setup
4.1 Pre-installation Checks
- Wi-Fi Compatibility: Confirm your home Wi-Fi network is 2.4GHz. The device is not compatible with 5GHz networks or consolidated dual-band 2.4GHz/5GHz networks unless the 2.4GHz band can be isolated.
- Signal Strength: Ensure the installation location is within 10 meters (approximately 33 feet) of your Wi-Fi router to guarantee a strong and stable Wi-Fi signal.

Image 4.1: Wi-Fi Signal Range. This diagram illustrates the importance of installing the device within 10 meters of the Wi-Fi router for optimal signal strength, showing both good and poor signal scenarios.
4.2 Physical Installation
The installation process involves connecting the module to your existing garage door opener and mounting the sensor.
- Power Off: Disconnect power to your garage door opener before proceeding.
- Connect Module: Wire the LoraTap module to your garage door opener's control terminals. Typically, this involves connecting the module's output to the same terminals where your wall-mounted push-button switch is connected. Refer to your garage door opener's manual for specific wiring diagrams.
- Install Sensor: Mount the magnetic sensor to your garage door and frame. The two parts of the sensor should be aligned and close to each other when the garage door is closed. Use the provided screws or double-sided adhesive tape. The sensor cable is 5 meters long and waterproof.
- Mount Module: Secure the LoraTap module using the provided mounting bracket, screws, or adhesive tape in a location where it has good Wi-Fi reception and is easily accessible for wiring.
- Power On: Reconnect power to your garage door opener.
4.3 App Pairing (Smart Life / Tuya App)
Follow these steps to connect your LoraTap module to the Smart Life or Tuya app:
- Download App: Download and install the 'Smart Life' or 'Tuya Smart' app from your device's app store (available for Android and iOS).
- Register/Login: Open the app and register a new account or log in with an existing one.
- Add Device: In the app, tap the '+' icon or 'Add Device' to begin the pairing process. Select 'Garage Door Opener' from the device list.
- Enter Wi-Fi Details: Follow the on-screen prompts to connect the device to your 2.4GHz Wi-Fi network. Enter your Wi-Fi password when requested.
- Confirmation: Once successfully added, the device will appear in your app. You can rename it for easier identification (e.g., "Garage Door").

Image 4.2: App Pairing Process. This image displays the step-by-step Wi-Fi configuration, including checking network compatibility, installing the Tuya/Smart Life app, and entering Wi-Fi credentials.
5. Operating Instructions
5.1 Remote Control via App
After successful pairing, you can control your garage door from anywhere using the Smart Life app:
- Open the Smart Life app.
- Select your garage door opener device.
- Tap the control button to open or close the garage door.
- The app will display the real-time status (Open/Closed) of your garage door based on the sensor feedback.
5.2 Voice Control
Integrate your LoraTap module with Amazon Alexa or Google Home for hands-free control:
- Link Account: In your Alexa or Google Home app, enable the 'Smart Life' skill/service and link your Smart Life account.
- Discover Devices: Ask your voice assistant to discover new devices.
- Voice Commands: Use commands such as:
- "Alexa, open the garage door."
- "Hey Google, close the garage."
- Security PIN: For security, voice assistants may require a PIN for opening the garage door. Set this up in the Smart Life app's device settings.
5.3 Monitoring and Notifications
The Smart Life app provides real-time status updates and customizable alerts:
- Real-time Feedback: The app displays whether your garage door is currently open or closed, based on the magnetic sensor.

Image 5.1: Real-time Status Feedback. This diagram illustrates how the magnetic sensor detects the garage door's position (open or closed) and updates the status on a smartphone app in real-time.
- Alarm Notifications: Set up alerts to receive notifications if the garage door remains open for a specified period.

Image 5.2: Open Door Alarm. This image shows a mobile phone displaying an alert notification when the garage door has been left open for an extended period, with a visual of the open garage.
- Activity Log: The app maintains a history of garage door operations, allowing you to review when the door was opened or closed.
6. Maintenance
The LoraTap WiFi Smart Garage Door Opener Module requires minimal maintenance. Follow these guidelines to ensure optimal performance:
- Keep Clean: Periodically wipe the module and sensor with a dry, soft cloth to remove dust.
- Check Connections: Ensure all wiring connections remain secure.
- Sensor Alignment: Verify that the magnetic sensor parts remain properly aligned for accurate open/close detection.
- Firmware Updates: Check the Smart Life app regularly for any available firmware updates for the device to ensure you have the latest features and security enhancements.
7. Troubleshooting
If you encounter issues with your LoraTap Smart Garage Door Opener Module, refer to the following troubleshooting tips:
| Problem | Possible Cause | Solution |
|---|---|---|
| Device cannot connect to Wi-Fi. | Incorrect Wi-Fi password; 5GHz network; weak signal; device too far from router. | Verify Wi-Fi password. Ensure you are connecting to a 2.4GHz network. Move the device closer to the router (within 10m). Restart router and device. |
| Garage door does not respond to app/voice commands. | No power to module; incorrect wiring; app/voice assistant not linked; Wi-Fi disconnected. | Check module power. Verify wiring to garage opener. Ensure Smart Life account is linked in Alexa/Google Home app. Check Wi-Fi connection. |
| App shows incorrect garage door status. | Magnetic sensor misaligned or damaged; sensor cable disconnected. | Check alignment of magnetic sensor parts. Ensure sensor cable is securely connected to the module. Inspect cable for damage. |
| Voice control requires a PIN unexpectedly. | Security feature enabled. | This is a security measure. Enter the PIN when prompted. You can manage PIN settings in the Smart Life app. |
8. Specifications
| Feature | Detail |
|---|---|
| Manufacturer | LoraTapuk |
| Product Dimensions (L x W x H) | 4.8 x 2.2 x 4.7 cm |
| Weight | 310 grams |
| Model Color | White or Grey |
| Material | Copper, Brass |
| Power | 230 Watts |
| Switch Type | 1-way |
| Electrical Plug Type | Surface Mount |
| Switch Style | Push-button |
| Certifications | CE |
| Batteries Included | No |
| Batteries Required | No |
| First Available Date | August 6, 2020 |
9. Warranty and Support
9.1 Warranty Information
The LoraTap WiFi Smart Garage Door Opener Module comes with a 24-month warranty from the date of purchase. This warranty covers manufacturing defects and malfunctions under normal use. Please retain your proof of purchase for warranty claims.
9.2 Customer Support
For technical assistance, troubleshooting, or warranty inquiries, please contact LoraTap customer support through the retailer's platform or visit the official LoraTap website for contact information. Please have your product model number (B08FCBCT3N) and purchase date ready when contacting support.