
1. Important Safety Instructions
Please read all instructions carefully before using the COUPLUX Espresso Machine. Keep this manual for future reference. Improper use may result in injury or damage to the appliance.
- Ensure the machine is placed on a stable, level, and heat-resistant surface.
- Do not immerse the machine, power cord, or plug in water or other liquids.
- Unplug the machine from the outlet when not in use and before cleaning.
- Do not operate the machine with a damaged cord or plug.
- Keep hands and utensils away from moving parts during operation.
- Use only cold, fresh water in the water tank.
- Exercise caution when operating the steam wand, as hot steam can cause burns.
- This appliance is for household use only.
2. Product Overview and Components
The COUPLUX Espresso Machine is an all-in-one unit designed for grinding, brewing, and frothing. Familiarize yourself with its components.
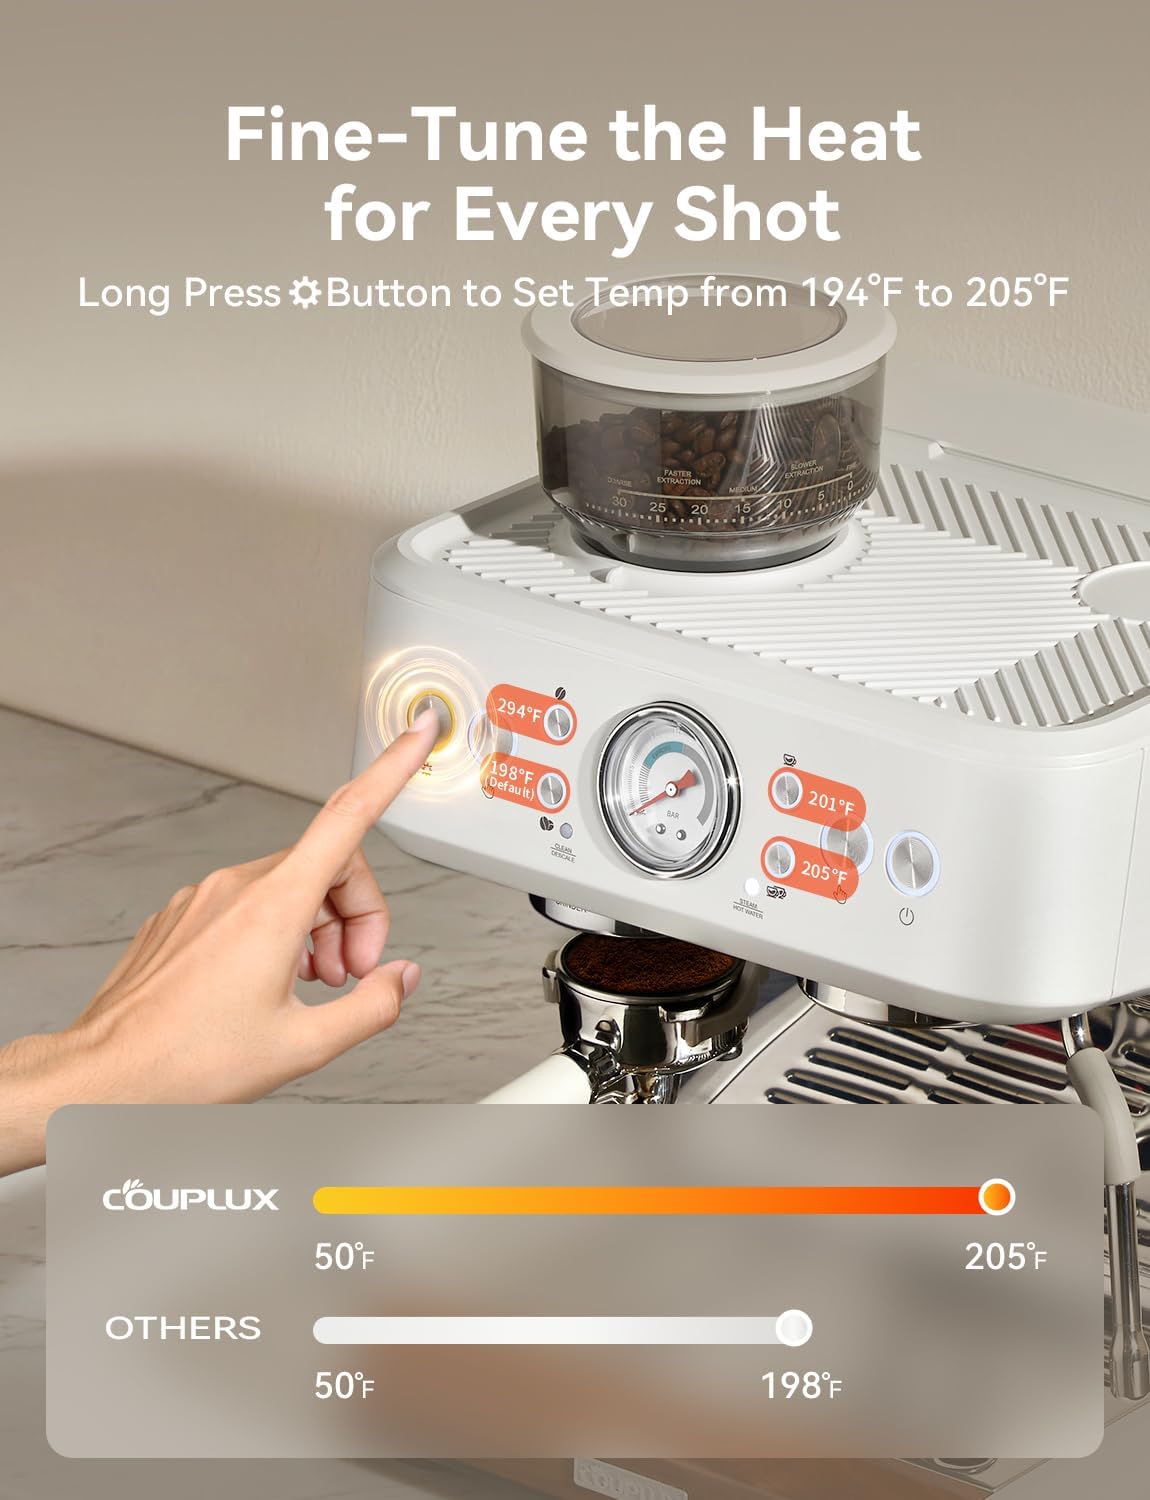
Figure 2.1: Overview of the COUPLUX Espresso Machine and its included accessories.
This image displays the COUPLUX Espresso Machine with its various parts and accessories laid out. Key components include the 58mm Portafilter, Milk Frothing Pitcher, Dosing Ring, Single-Wall Filters (1 & 2 Cup), Drip Tray, Cleaning Tool Box, Water Tank, Bellow Air Blower, Blind Disk, and Tamper.
Included Components:
- Espresso Machine with Grinder (1)
- Removable Water Tank (1)
- Detachable Bean Hopper (1)
- Silicone Bellow Blower (1)
- Removable Drip Tray (1)
- Milk Frothing Pitcher (1)
- Stainless Steel Tamper (1)
- Portafilter (1)
- One Cup Filter (1)
- Two Cup Filter (1)
- Dosing Funnel (1)
- Cleaning Kit (1)
- Silicone Backflush Disk (1)
3. Setup
3.1 Unpacking and Initial Placement
Carefully remove all packaging materials. Place the espresso machine on a flat, stable, and dry surface. Ensure there is adequate space around the machine for ventilation and access to the water tank and bean hopper.
3.2 Initial Cleaning
Before first use, clean all removable parts (water tank, bean hopper, portafilter, filter baskets, drip tray, milk frothing pitcher) with warm soapy water. Rinse thoroughly and dry. Wipe the exterior of the machine with a damp cloth.
3.3 Water Tank and Bean Hopper Installation
- Fill the removable water tank with fresh, cold water up to the MAX line. Place it securely in its position at the back of the machine.
- Install the detachable bean hopper onto the top of the machine. Ensure it is properly seated and locked into place.
3.4 Power Connection and Priming
- Plug the power cord into a grounded 120V AC outlet.
- Turn on the machine. The machine will begin heating.
- To prime the system, run hot water through the group head and steam wand without coffee. This flushes out any air and prepares the machine for use.
4. Operating Instructions
4.1 Grinding Coffee Beans
The integrated conical burr grinder offers 30 grind settings for optimal flavor extraction. Adjust the grind setting based on your coffee beans and desired espresso shot.

Figure 4.1: The internal conical burr grinder with anti-static technology and 30 adjustable settings.
This image illustrates the advanced conical burr grinder, highlighting its anti-static design and the range of 30 grind settings available for precise coffee preparation.
- Fill the bean hopper with fresh whole coffee beans.
- Select your desired grind size using the grind adjustment dial. Finer grinds are typically used for espresso.
- Place the portafilter with a filter basket under the grinder outlet.
- Activate the grinder to dispense fresh coffee grounds into the portafilter. The built-in plasma generator reduces static for a cleaner process.
4.2 Brewing Espresso
The machine features a 58mm commercial stainless steel group head and a 15-Bar Italian Ulka pump for optimal pressure. It also offers precise temperature control.

Figure 4.2: Espresso extraction from the 58mm commercial system.
This image shows a rich espresso shot being extracted from the machine's 58mm portafilter into a clear glass, illustrating the brewing process and the quality of the output.

Figure 4.3: Temperature control interface for precise brewing.
This image displays the control panel of the espresso machine, highlighting the temperature adjustment options ranging from 194°F to 205°F, allowing users to fine-tune their brew.
- Distribute the ground coffee evenly in the filter basket and tamp firmly with the included tamper.
- Wipe any excess grounds from the rim of the portafilter.
- Insert the portafilter into the group head and lock it into place.
- Select your desired brewing temperature (194°F to 205°F) by pressing the SET button and then using the grind/brew buttons to adjust.
- Press the brew button to start extraction. The machine utilizes a low-pressure pre-infusion to evenly wet the coffee grounds, followed by 15-bar pressure for full flavor.
- Monitor the pressure gauge for optimal extraction.
4.3 Milk Frothing
The 10mm commercial steam wand provides strong, dry steam for creating silky microfoam for lattes and cappuccinos.

Figure 4.4: The 10mm steam wand in action, producing steam for milk frothing.
This image focuses on the machine's 10mm steam wand, showing steam being released into a milk frothing pitcher, indicating its powerful frothing capability.
- Fill the milk frothing pitcher with cold milk.
- Position the steam wand just below the surface of the milk.
- Turn on the steam function. Lower the pitcher slightly to introduce air for frothing, then raise it to heat the milk.
- Once desired texture and temperature are reached, turn off the steam.
- Wipe the steam wand immediately after use with a damp cloth to prevent milk residue buildup.
5. Maintenance
5.1 Daily Cleaning
- Drip Tray: Empty and clean the drip tray daily.
- Portafilter and Filter Baskets: After each use, remove spent coffee grounds and rinse the portafilter and filter baskets under hot water.
- Steam Wand: Wipe the steam wand immediately after frothing milk. Purge the wand briefly to clear any internal milk residue.
- Group Head: Use the included cleaning brush to remove any coffee grounds from the group head seal and shower screen.
5.2 Weekly Cleaning / Backflushing
Perform a backflush using the silicone backflush disk and a small amount of espresso machine cleaning detergent (not included) to clean the group head.
- Insert the silicone backflush disk into the portafilter, then add a small amount of cleaning detergent.
- Lock the portafilter into the group head.
- Activate the brew cycle for 10 seconds, then stop for 10 seconds. Repeat this process 5 times.
- Remove the portafilter, rinse the disk, and repeat the backflush process with clean water to rinse.
5.3 Descaling
Regular descaling is essential to remove mineral buildup and maintain machine performance. The frequency depends on water hardness and usage. Use a commercial descaling solution designed for espresso machines.
- Follow the instructions provided with your descaling solution.
- Typically, this involves mixing the solution with water in the tank and running it through the machine's brew head and steam wand.
- Always rinse the machine thoroughly with several tanks of fresh water after descaling to remove any chemical residue.
6. Troubleshooting
This section addresses common issues you might encounter. For problems not listed here, please contact customer support.
| Problem | Possible Cause | Solution |
|---|---|---|
| No water flow from group head. | Water tank empty, machine not primed, pump airlocked, or scale buildup. | Fill water tank. Prime the machine. Descale if necessary. |
| Espresso extracts too slowly or not at all. | Coffee ground too fine, too much coffee in basket, or tamped too hard. | Adjust grinder to a coarser setting. Reduce coffee dose. Tamp with less pressure. |
| Espresso extracts too quickly. | Coffee ground too coarse, too little coffee in basket, or tamped too lightly. | Adjust grinder to a finer setting. Increase coffee dose. Tamp with more pressure. |
| Grinder clogs. | Beans are too oily, or grinder needs cleaning. | Use less oily beans. Clean the grinder burrs. Use the silicone bellow blower to clear grounds. |
| No steam from wand. | Steam wand clogged with milk residue, or machine not at steaming temperature. | Clean steam wand thoroughly. Wait for machine to reach steaming temperature. |
| Machine leaks water. | Water tank not seated correctly, or drip tray is full. | Ensure water tank is properly installed. Empty and re-insert drip tray. |
7. Specifications
| Feature | Detail |
|---|---|
| Brand | COUPLUX |
| Model Number | CP6300WH |
| Capacity | 2.8 liters (Water Tank) |
| Color | Pearl White |
| Product Dimensions (D x W x H) | 13.7"D x 13.5"W x 16.1"H |
| Item Weight | 23.8 pounds |
| Coffee Maker Type | Espresso Machine (Semi-Automatic) |
| Wattage | 1500 watts |
| Voltage | 120 volts |
| Output Pressure | 15 bar (Italian Ulka pump) |
| Grinder Settings | 30 conical burr grind settings with anti-static feature |
| Group Head Size | 58mm stainless steel with 700+ water outlets |
| Temperature Control | 4 levels, 194°F to 205°F |
| Steam Wand | 10mm commercial steam wand |
| Material | Stainless Steel |
| Coffee Input Type | Ground, Whole Bean |
8. Warranty and Support
8.1 Warranty Information
COUPLUX provides a 1-year service commitment for this espresso machine. This warranty covers defects in materials and workmanship under normal use.
- The warranty period begins from the date of purchase.
- Proof of purchase is required for all warranty claims.
- The warranty does not cover damage caused by misuse, neglect, unauthorized modification, or failure to follow operating instructions.
8.2 Customer Support
For any questions, concerns, or support needs regarding your COUPLUX Espresso Machine, please contact our customer service team. Our friendly team aims to respond within 24 hours.
You can find contact information and additional resources on the official COUPLUX website or through your purchase platform.
Visit the COUPLUX Store on Amazon for more information.