
1. Introduction
This manual provides detailed operating instructions and safety information for the KAIWEETS KE1000 Megohmmeter Insulation Resistance Tester and the KAIWEETS KC602s Smart Digital Clamp Meter. Please read this manual thoroughly before using the devices to ensure proper operation and to prevent potential hazards.
2. Safety Information
WARNING: Failure to follow these safety instructions may result in electric shock, fire, or serious injury.
- Always adhere to local and national safety codes.
- Do not use the device if it appears damaged or if the insulation on test leads is compromised.
- Ensure the device is turned off and disconnected from the circuit before making connections or changing functions.
- Wear appropriate personal protective equipment (PPE), such as safety glasses and insulated gloves.
- Do not operate the device in wet environments or in the presence of explosive gases or dust.
- Observe all warnings and operating instructions marked on the device.
- The KE1000 is rated CAT III 1000V and CAT IV 600V. The KC602s is rated CAT III 600V. Do not exceed these ratings.
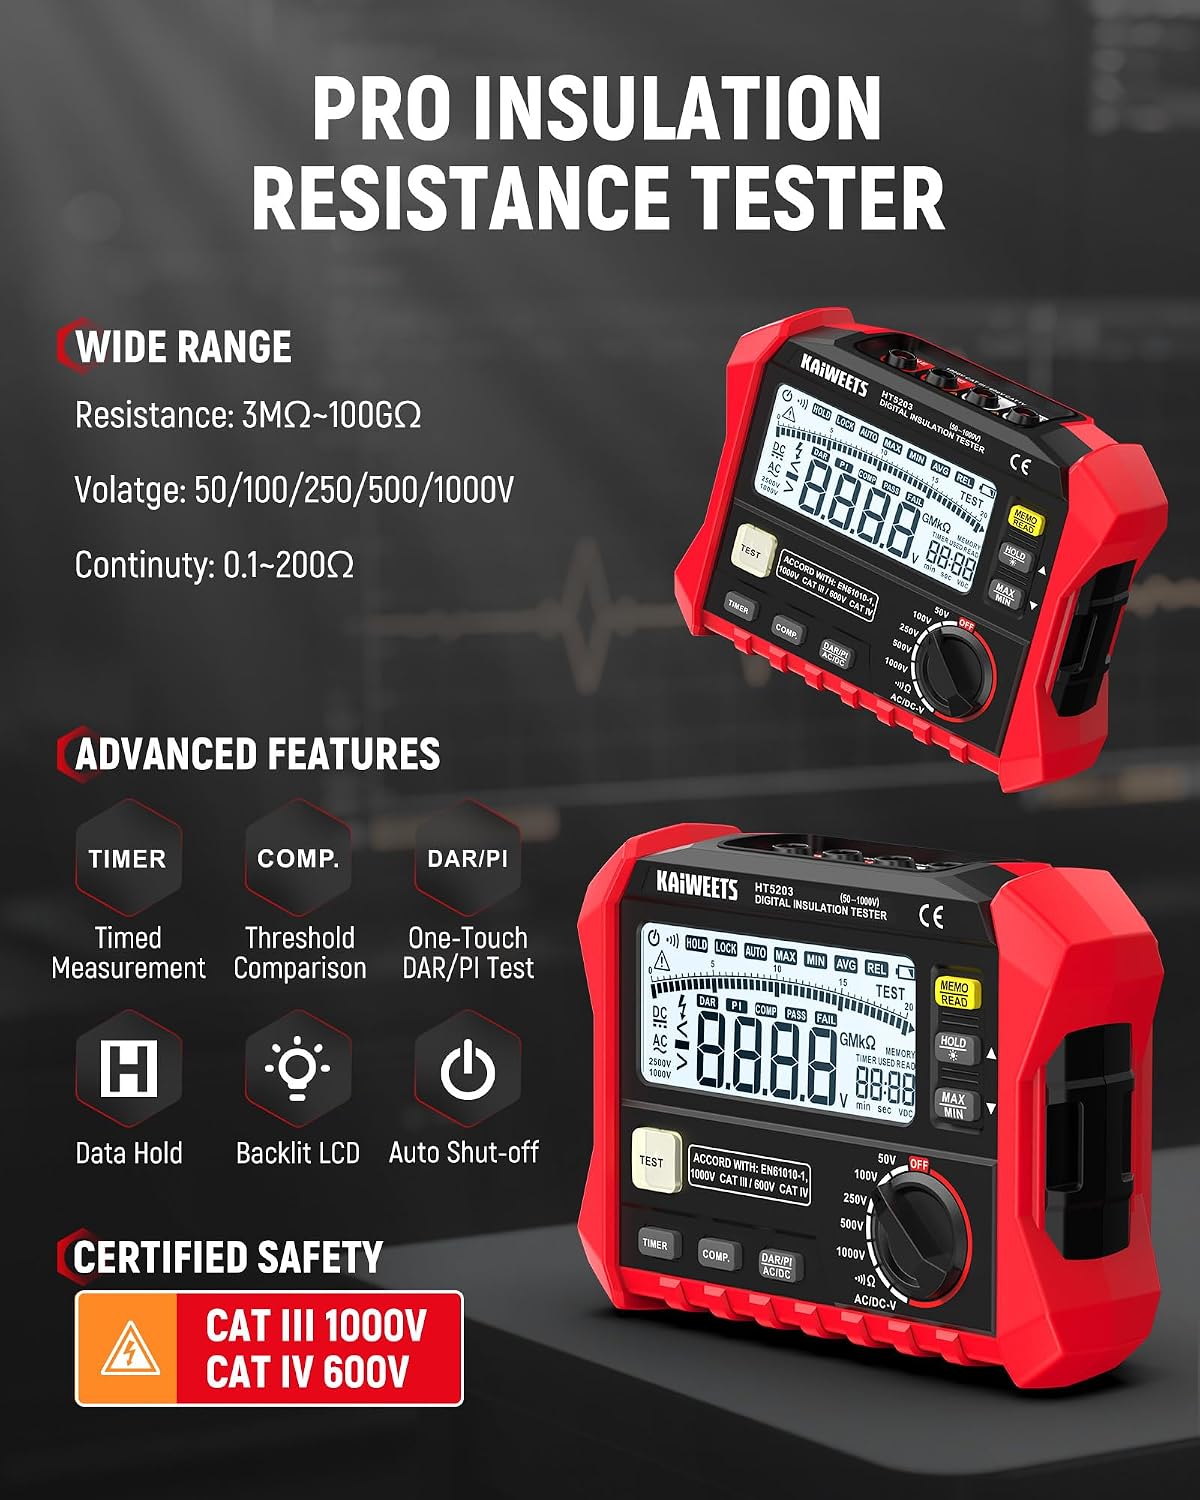
Image 2.1: KAIWEETS KE1000 Megohmmeter highlighting its wide measurement range, advanced features like DAR/PI, and safety certifications (CAT III 1000V, CAT IV 600V).
3. KAIWEETS KE1000 Megohmmeter Insulation Resistance Tester
3.1. Features
- Insulation Resistance: Measures from 3.00 MΩ to 100.0 GΩ.
- Test Voltages: Selectable 50V, 100V, 250V, 500V, 1000V.
- One-Touch DAR/PI Calculation: Automatic calculation of Dielectric Absorption Ratio (DAR) and Polarization Index (PI).
- Continuity Testing: Range 0.1Ω to 200Ω.
- AC/DC Voltage Measurement: Max 750V AC, Max 1000V DC.
- Advanced Functions: Timed Measurement, Threshold Comparison, Data Hold, Backlit LCD, Auto Shut-off.
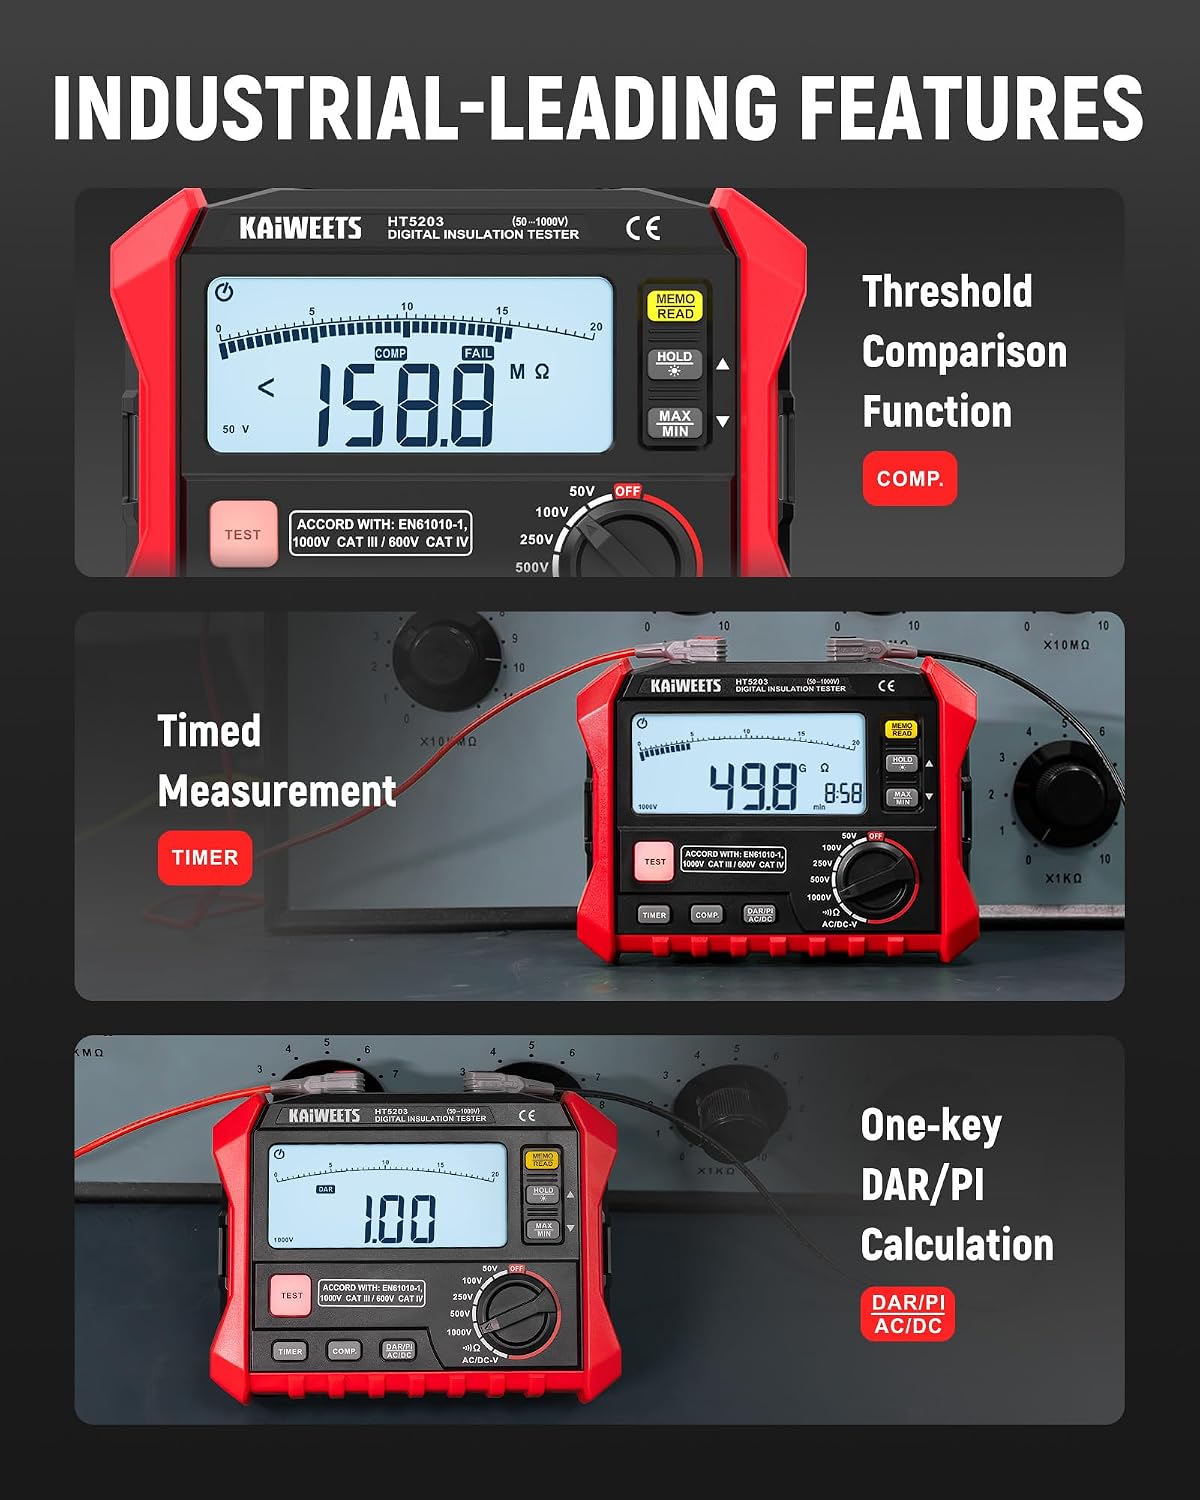
Image 3.1: The KE1000's industrial-leading features, including Threshold Comparison, Timed Measurement, and One-key DAR/PI Calculation.
3.2. Setup
- Battery Installation: Open the battery compartment on the back of the device and insert the required batteries, observing polarity.
- Test Lead Connection: Connect the red test lead to the 'VΩ' terminal and the black test lead to the 'COM' terminal. For insulation resistance tests, use the specialized test leads provided.
- Power On: Turn the rotary switch to the desired function.
3.3. Operating Instructions
3.3.1. Insulation Resistance Measurement
- Ensure the circuit under test is de-energized and safely discharged.
- Turn the rotary switch to one of the insulation resistance test voltage settings (50V, 100V, 250V, 500V, 1000V).
- Connect the test leads to the circuit or component to be tested.
- Press the TEST button to begin the measurement. The display will show the insulation resistance value.
- Release the TEST button to stop the measurement.

Image 3.2: The KE1000 conducting an insulation resistance test, demonstrating its capability to measure up to 100 GΩ with high accuracy.
3.3.2. DAR/PI Calculation
- Select an insulation resistance test voltage.
- Press the DAR/PI button. The device will automatically perform the necessary measurements and display the DAR and PI values.
3.3.3. Continuity Testing
- Turn the rotary switch to the continuity symbol (Ω with sound wave).
- Connect the test leads across the component or circuit.
- A continuous beep indicates continuity (low resistance). The resistance value will be displayed.

Image 3.3: The KE1000 demonstrating continuity testing and its ability to measure AC and DC voltages.
3.3.4. AC/DC Voltage Measurement
- Turn the rotary switch to the AC/DC V position.
- Connect the test leads in parallel to the voltage source.
- The display will show the measured voltage.
3.4. Specifications (KE1000)
| Parameter | Range/Value | Accuracy |
|---|---|---|
| Insulation Resistance | 3.00 MΩ to 100.0 GΩ | ±(3% + 5 digits) ≤20 GΩ, ±(5% + 5 digits) ≤100 GΩ |
| Test Voltages | 50V, 100V, 250V, 500V, 1000V | ±(3% + 5 digits) |
| Continuity | 0.1Ω to 200Ω | ±(2% + 3 digits) |
| AC Voltage | Max 750V | ±(1.5% + 5 digits) |
| DC Voltage | Max 1000V | ±(1.0% + 3 digits) |
| Safety Rating | CAT III 1000V, CAT IV 600V |
4. KAIWEETS KC602s Smart Digital Clamp Meter
4.1. Features
- AI-Powered Measurement: Automatically identifies and measures AC/DC voltage, AC/DC current, resistance, continuity, capacitance, diodes, and temperature.
- True RMS: Provides accurate readings for non-sinusoidal waveforms.
- 6000 Counts Display: High-resolution measurement.
- Non-Contact Voltage (NCV) Detection: For detecting live wires without physical contact.
- Inrush Current Measurement: Captures peak current during motor startup.
- Frequency Measurement: Measures AC frequency.

Image 4.1: The KC602s Clamp Meter's AI-powered measurement, showcasing its ability to automatically detect and measure 7 different parameters.
4.2. Setup
- Battery Installation: Open the battery compartment on the back and insert the required batteries.
- Power On: Press the power button. The device will perform an automatic self-test and display 'CAL'.
- Test Lead Connection (for non-clamp functions): Connect the red test lead to the 'VΩ' terminal and the black test lead to the 'COM' terminal.

Image 4.2: The KC602s offers true automation for all functions, simplifying measurements compared to meters requiring manual mode selection.
4.3. Operating Instructions
4.3.1. AI Auto Measurement Mode
When powered on, the KC602s defaults to AI Auto mode. In this mode, the meter automatically identifies and measures:
- AC/DC Voltage
- Resistance
- Continuity
- Diode
- Capacitance
- Temperature
Simply connect the test leads to the circuit or component, and the meter will display the appropriate measurement.
4.3.2. AC/DC Current Measurement (Clamp)
- Press the FUNC button to select AC or DC current mode (if not automatically detected).
- Open the clamp jaws and enclose a single conductor. Ensure the jaws are fully closed.
- Read the current value on the display.
4.3.3. Non-Contact Voltage (NCV) Detection
- Press the NCV button.
- Move the top of the clamp meter near a live conductor or outlet.
- The meter will beep and the NCV indicator will light up, with varying intensity/frequency indicating voltage presence and strength (low/high voltage).

Image 4.3: The KC602s performing Non-Contact Voltage (NCV) detection, illustrating how it indicates both low and high voltage presence.
4.3.4. Inrush Current Measurement
- Ensure the device is in AC current mode.
- Press the INRUSH button.
- Open the clamp jaws and enclose a single conductor of the motor or device to be tested.
- Start the motor/device. The meter will capture and display the peak inrush current.

Image 4.4: The KC602s conducting an inrush current test, useful for analyzing motor startup characteristics.
4.4. Specifications (KC602s)
| Parameter | Range | Resolution | Accuracy |
|---|---|---|---|
| AC Current | 600A | 0.1A | ±(2.5% + 5 digits) |
| DC Current | 600A | 0.1A | ±(2.5% + 5 digits) |
| AC Voltage | 600V | 0.001V | ±(1.0% + 3 digits) |
| DC Voltage | 600V | 0.001V | ±(0.5% + 3 digits) |
| Resistance | 60MΩ | 0.1Ω | ±(1.0% + 3 digits) |
| Capacitance | 60mF | 0.001nF | ±(4.0% + 5 digits) |
| Temperature | -20°C to 1000°C | 1°C | ±(2.0% + 2 digits) |
| Display | 6000 Counts | ||
| Safety Rating | CAT III 600V |
5. Maintenance
- Cleaning: Wipe the device with a damp cloth and mild detergent. Do not use abrasive cleaners or solvents.
- Battery Replacement: Replace batteries when the low battery indicator appears. Ensure correct polarity.
- Storage: Store the devices in a cool, dry place away from direct sunlight and extreme temperatures. Remove batteries if storing for extended periods.
- Calibration: For professional use, periodic calibration by a qualified service center is recommended to maintain accuracy.
6. Troubleshooting
- Device does not power on: Check battery installation and ensure batteries are not depleted.
- Inaccurate readings: Ensure test leads are properly connected and not damaged. Verify the correct function is selected. Check for external interference.
- No continuity beep: Ensure the circuit is de-energized. Check for open circuits or high resistance.
- Display shows 'OL' (Overload): The measured value exceeds the device's range for the selected function. Select a higher range if available or ensure the measurement is within limits.
7. Warranty and Support
KAIWEETS products are designed for reliability and performance. For warranty information, technical support, or service inquiries, please refer to the warranty card included with your product or visit the official KAIWEETS website. Please have your model number (KE1000 or KC602s) and purchase date available when contacting support.
No official product videos were provided in the product data for embedding in this manual.