
1. Introduction
Thank you for choosing the LiTHELi U20LM03-4A220 Cordless Lawn Mower. This manual provides essential information for the safe operation, assembly, maintenance, and troubleshooting of your new lawn mower. Please read this manual thoroughly before first use and keep it for future reference.

Image 1.1: The LiTHELi U20LM03-4A220 Cordless Lawn Mower. This image shows the overall design of the mower, highlighting its compact and modern appearance.
2. Safety Information
Always observe basic safety precautions to reduce the risk of fire, electric shock, and personal injury when operating this product.
General Safety Warnings:
- Read the entire manual: Understand all instructions and warnings before operating the mower.
- Wear appropriate safety gear: Always wear eye protection, sturdy footwear, and long pants. Avoid loose clothing that could get caught in moving parts.
- Keep bystanders away: Ensure children, pets, and other people are at a safe distance from the mowing area.
- Inspect the area: Before mowing, clear the lawn of any objects that could be thrown by the blade, such as rocks, sticks, or toys.
- Disconnect battery: Always remove the battery pack before cleaning, performing maintenance, or when leaving the mower unattended.
- Avoid wet grass: Do not operate the mower in wet conditions, as this can increase the risk of slipping and electric shock.
- Maintain a firm grip: Always hold the handle firmly with both hands during operation.
- Never lift or carry the mower while it is running.
- Use only LiTHELi approved batteries and chargers.
3. Package Contents
Carefully unpack your new lawn mower. Ensure all items listed below are present and undamaged. If any parts are missing or damaged, contact customer service.
- LiTHELi U20LM03-4A220 Cordless Lawn Mower Unit
- Handle Assembly (Upper and Lower)
- Grass Collection Bag
- Mulch Plug
- 2 x 5.0Ah 12V Batteries
- 45W GaN Charger
- Instruction Manual
4. Setup
4.1 Handle Assembly
- Unfold the lower handle and secure it into position.
- Attach the upper handle to the lower handle using the provided knobs and bolts. Ensure the handle is securely fastened.
- Adjust the handle to one of the three available height levels for comfortable operation.

Image 4.1: The mower features a 3-level adjustable handle, allowing users from 5.3 FT to 6.7 FT to find a comfortable operating height.
4.2 Battery Installation
- Open the battery compartment cover.
- Insert the fully charged 5.0Ah batteries into the battery slots until they click into place.
- Close the battery compartment cover securely.
4.3 Grass Collection Bag / Mulch Plug Installation
Your mower can operate in either mulching or bagging mode.
- For Mulching Mode: Insert the mulch plug into the rear discharge opening. Ensure it is seated firmly to prevent clippings from exiting.
- For Bagging Mode: Remove the mulch plug (if installed). Lift the rear discharge flap and hook the grass collection bag onto the mower's frame. Ensure it is securely attached.
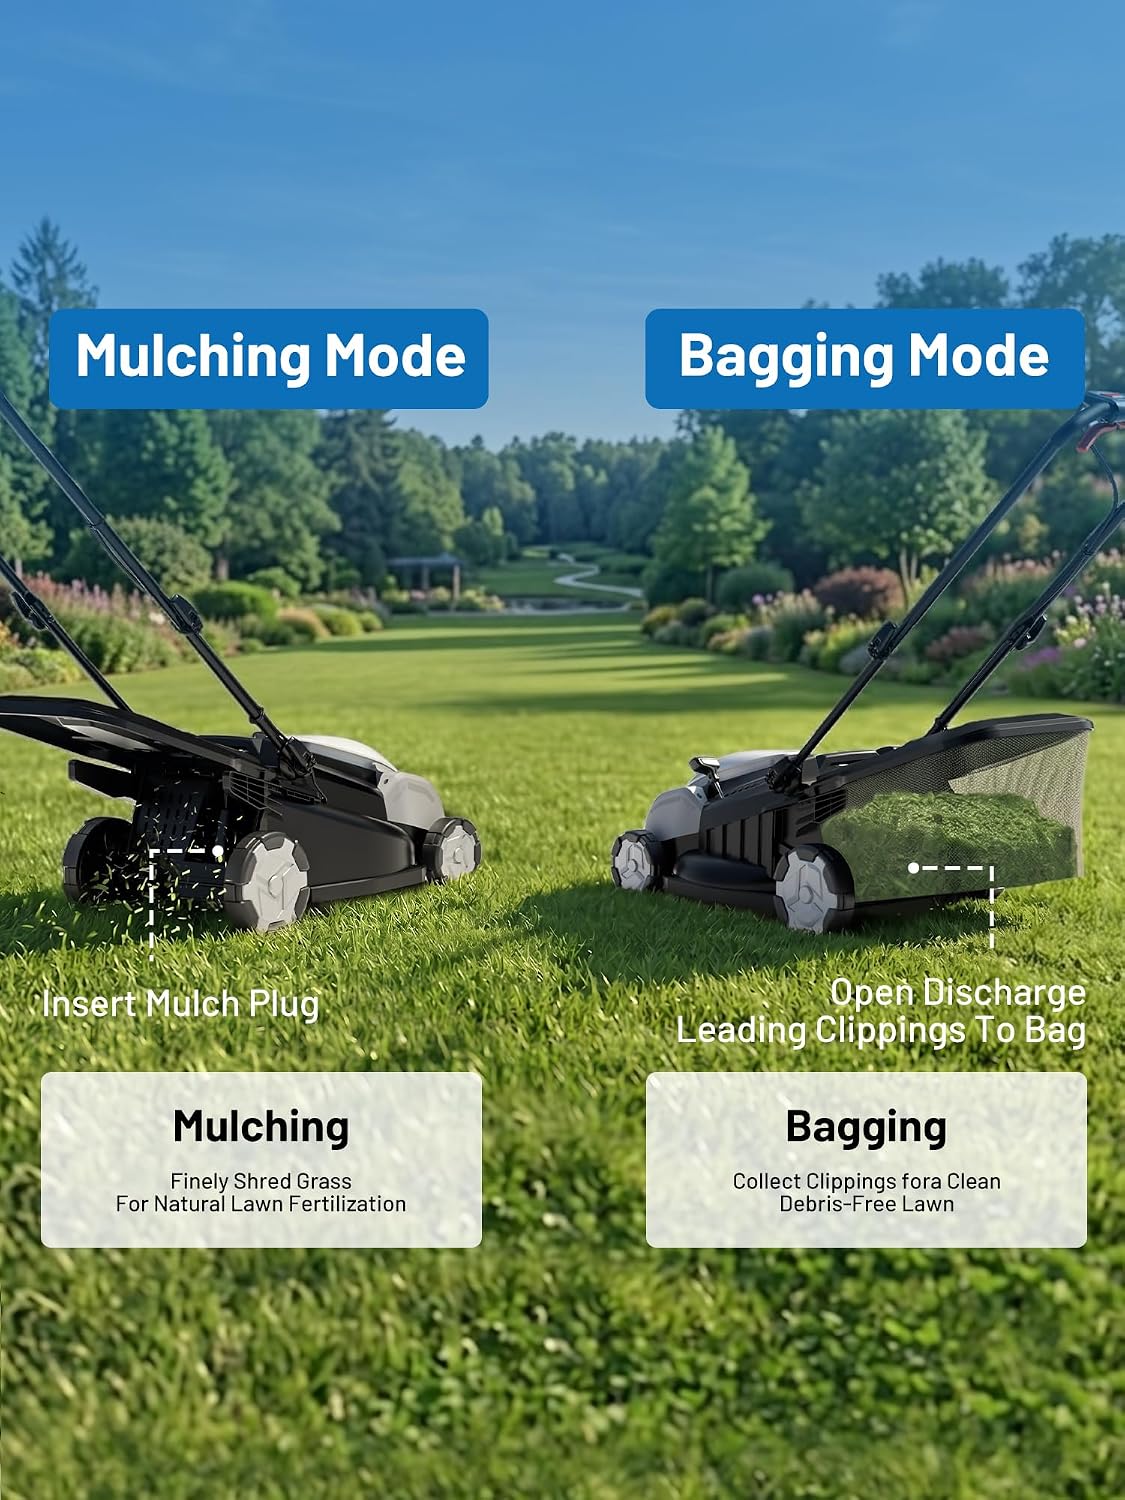
Image 4.2: Illustration of the mulching mode (left) with the mulch plug inserted for finely shredded grass, and bagging mode (right) with the grass collection bag attached for collecting clippings.
4.4 Adjusting Cutting Height
The mower offers 6 adjustable cutting heights to suit various lawn conditions and preferences.
- Ensure the mower is turned off and the battery is removed before adjusting the cutting height.
- Locate the height adjustment lever on the side of the mower.
- Pull the lever outwards and move it to the desired height setting. The available heights range from 0.98" (25mm) to 2.95" (75mm).
- Release the lever to lock it into position. Ensure all wheels are at the same height setting.

Image 4.3: Visual representation of the 6 adjustable cutting heights, ranging from 0.98 inches (25mm) to 2.95 inches (75mm).
5. Operating Instructions
5.1 Starting the Mower
- Ensure the batteries are fully charged and correctly installed.
- Press and hold the safety button on the handle.
- While holding the safety button, pull the bail lever towards the handle. The mower will start.
- Release the safety button once the mower is running.
5.2 Stopping the Mower
Release the bail lever to stop the mower. The blade will cease rotation within a few seconds.
5.3 Mowing Techniques
- For best results, mow in straight, overlapping lines.
- Avoid cutting more than one-third of the grass blade length at a time.
- If the grass is very tall, make two passes, raising the cutting height for the first pass.
- The LiTHELi mower is designed for quiet operation, reducing noise pollution compared to traditional gas mowers.

Image 5.1: Comparison illustrating the quiet operation of the LiTHELi cordless mower versus the high noise of a traditional gas mower and the cord limitation of an electric corded mower.
5.4 Battery Usage and Charging
The mower uses two 5.0Ah 12V batteries for extended runtime.
- Battery Capacity: The 5.0Ah batteries offer 25% more capacity compared to 4.0Ah batteries, providing longer mowing sessions.
- Charging: Use the included 45W GaN charger to recharge the batteries. Connect the charger to a standard 100-240V AC outlet.
- Charging Indicator: The charger will indicate the charging status. Refer to the charger's manual for specific indicator lights.

Image 5.2: This image highlights the 5.0Ah upgrade battery, showing it provides 25% more capacity than a 4.0Ah battery, suitable for small to medium lawns up to 1/8 acre.

Image 5.3: The 45W GaN charger, capable of charging the 5.0Ah batteries. It also features USB 3.0 CT-C2 input/output for versatile charging of other devices.
6. Maintenance
Regular maintenance ensures optimal performance and extends the life of your lawn mower.
6.1 Cleaning
- Always remove the battery pack before cleaning.
- Clean the underside of the mower deck after each use to prevent grass buildup. Use a stiff brush or scraper.
- Wipe down the exterior of the mower with a damp cloth. Do not use water jets or high-pressure washers directly on the mower.
6.2 Blade Care
- Inspect the blade regularly for sharpness and damage. A dull blade can tear grass, leading to an unhealthy lawn.
- If the blade is dull, it can be sharpened by a qualified service technician or replaced with a genuine LiTHELi replacement blade.
- Always wear heavy-duty gloves when handling the blade.
6.3 Battery Storage
- Store batteries in a cool, dry place away from direct sunlight and extreme temperatures.
- For long-term storage, charge batteries to approximately 50% capacity.
- Do not store batteries in a discharged state.
7. Troubleshooting
Refer to this section for common issues and their solutions.
| Problem | Possible Cause | Solution |
|---|---|---|
| Mower does not start | Battery not installed correctly Batteries discharged Safety button/bail lever not engaged | Ensure batteries are fully seated Charge batteries Press safety button then pull bail lever |
| Poor cutting performance | Dull or damaged blade Cutting height too low for grass Grass buildup under deck | Sharpen or replace blade Increase cutting height Clean mower deck |
| Mower stops during operation | Batteries discharged Overload protection activated (e.g., very thick grass) | Recharge batteries Raise cutting height, mow slower, or clear obstruction |
8. Specifications
| Feature | Specification |
|---|---|
| Model Number | U20LM03-4A220 |
| Brand | LiTHELi |
| Item Type Name | Lawn Mower |
| Power Source | Battery Powered |
| Batteries | 2 x 12V 5.0Ah (included) |
| Cutting Width | 15 inches (approx. 38 cm) |
| Cutting Heights | 6 positions (0.98" to 2.95" / 25mm to 75mm) |
| Operation Mode | Manual (Push Mower) |
| Product Dimensions (D x W x H) | 71.5 x 44 x 36 cm (approx.) |
| Item Weight | 22.55 kg |
| Color | White |
| Charger | 45W GaN Charger (AC Input: 100-240V 50Hz-60Hz) |
9. Warranty and Support
LiTHELi products are manufactured to high-quality standards. For warranty information, technical support, or to order replacement parts, please refer to the warranty card included with your product or visit the official LiTHELi website. Keep your proof of purchase for warranty claims.


