
1. Introduction
This manual provides essential information for setting up, operating, and maintaining your WIWB Gaming PC Desktop Computer. Please read it thoroughly before use to ensure proper functionality and longevity of your system. Keep this manual for future reference.
2. What's in the Box
Verify that all items are present upon unpacking:
- WIWB Gaming Desktop Computer
- Power Cable
- User Manual (this document)
3. Product Overview
The WIWB Gaming PC Desktop Computer is designed for performance, featuring an AMD Ryzen 7 4700LE processor and an NVIDIA GeForce RTX 3050 8GB graphics card. It comes pre-assembled with 16GB DDR4 RAM and a 512GB NVMe M.2 SSD.
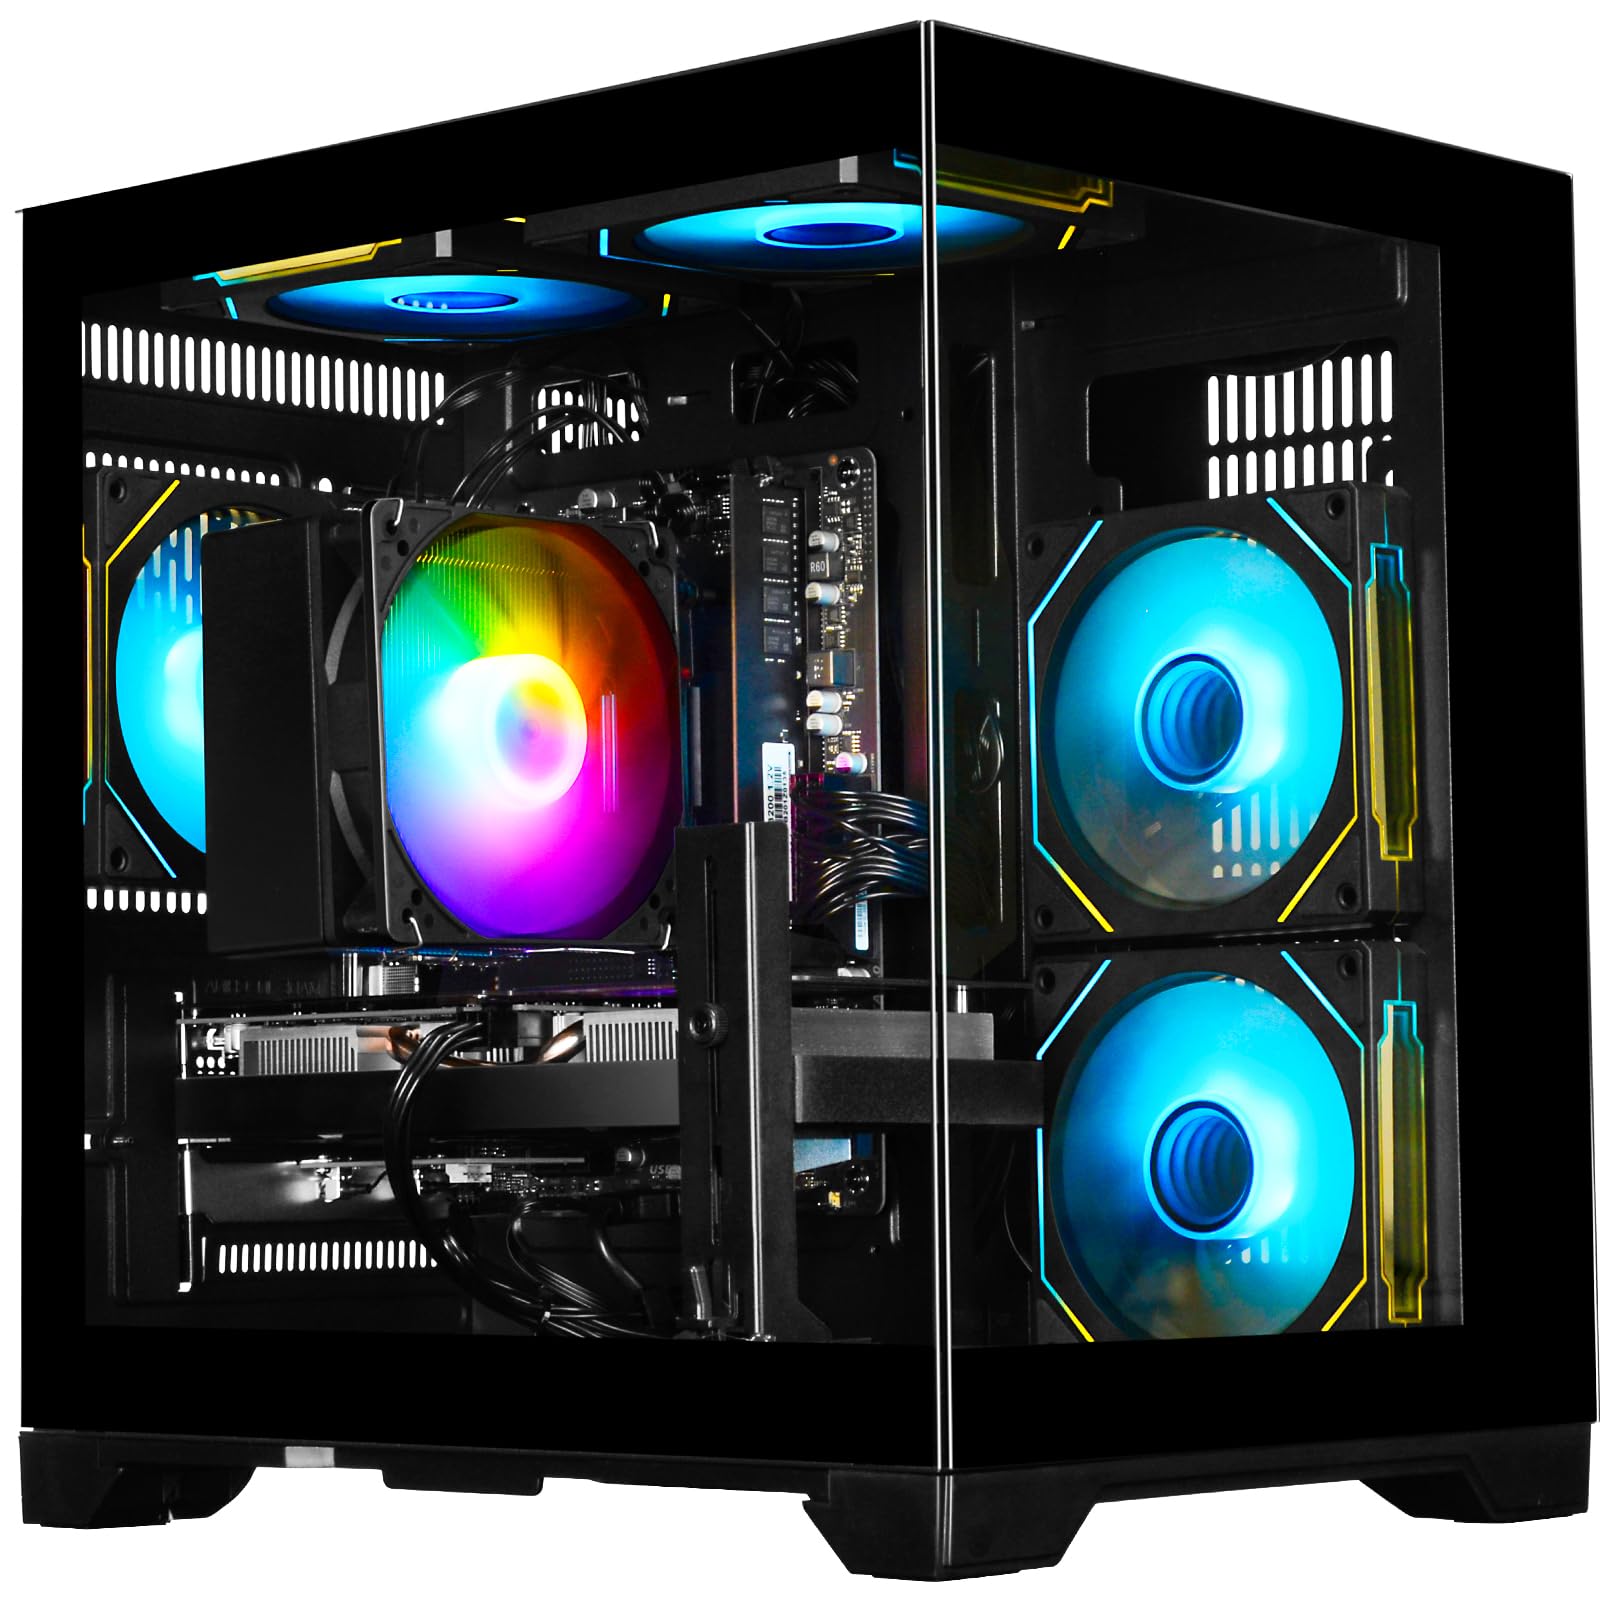
Figure 3.1: Front-side view of the WIWB Gaming PC Desktop Computer, showcasing the tempered glass panel and internal RGB lighting.
3.1 Front/Top Panel Connections

Figure 3.2: Close-up of the top panel, indicating the RGB fans button, Reset button, Headphone/Microphone interface, USB 2.0 ports, USB 3.0 port, and Power button. Also visible is the magnetic dust filter.
- Power Button: Turns the computer on or off.
- Reset Button: Restarts the computer.
- RGB Fans Button: Cycles through RGB lighting modes for the internal fans.
- Headphone/Microphone Interface: 3.5mm jacks for audio input and output.
- USB 2.0 Ports: For connecting peripherals such as keyboards, mice, or other low-bandwidth devices.
- USB 3.0 Port: For connecting high-speed devices like external hard drives or flash drives.
3.2 Rear Panel Connections

Figure 3.3: Rear panel connections, highlighting USB 3.0, USB 2.0, Microphone In, Network Port, Audio In, Audio Out, HDMI, and DisplayPort outputs from the dedicated graphics card.
- USB 3.0 Ports: High-speed USB connections.
- USB 2.0 Ports: Standard USB connections.
- Microphone In: 3.5mm jack for microphone input.
- Network Port (RJ45): For wired internet connection.
- Audio In/Out: 3.5mm jacks for audio input and output.
- HDMI Port (Graphics Card): Connects to a display device.
- DisplayPort (Graphics Card): Connects to a display device.
Important: When connecting your monitor, ensure you use the HDMI or DisplayPort outputs directly from the dedicated graphics card (located lower on the rear panel), not the motherboard's video ports, as they are disabled with a dedicated GPU installed.
4. Setup Instructions
4.1 Unpacking and Placement
- Carefully remove the computer from its packaging.
- Place the computer on a stable, flat surface with adequate ventilation. Ensure there is clear space around the air intake and exhaust vents.
- Remove any protective films or internal packaging materials.
4.2 Connecting Peripherals
- Monitor: Connect your monitor to one of the HDMI or DisplayPort outputs on the graphics card (refer to Figure 3.3).
- Keyboard and Mouse: Connect your keyboard and mouse to any available USB ports on the rear or top panel.
- Audio: Connect speakers or headphones to the appropriate audio output jack on the rear or top panel.
- Network: For a wired connection, connect an Ethernet cable from your router/modem to the Network Port on the rear panel. For wireless, ensure your Wi-Fi antenna (if included) is attached.
4.3 Power Connection and First Boot
- Connect the provided power cable to the power input on the rear of the computer and then to a wall outlet.
- Press the Power Button on the top panel (refer to Figure 3.2).
- The computer will boot up, and you may be guided through the initial Windows setup process. Follow the on-screen instructions to configure your operating system.
5. Operating Instructions
5.1 Power On/Off
- To Power On: Press the Power Button on the top panel.
- To Shut Down: In Windows, click the Start button, then Power, and select "Shut down." Avoid simply holding the power button to turn off the computer, as this can lead to data loss or system corruption.
- To Restart: In Windows, click the Start button, then Power, and select "Restart."
5.2 Network Connectivity
- Wired Connection: If an Ethernet cable is connected, your computer should automatically detect the network.
- Wireless Connection (Wi-Fi 6): In Windows, click the Wi-Fi icon in the taskbar, select your network, enter the password, and click Connect.
5.3 RGB Lighting Control
Use the RGB Fans Button on the top panel to cycle through various lighting effects and colors for the internal fans. Pressing the button repeatedly will change the mode.
6. Maintenance
6.1 Cleaning
- Exterior: Use a soft, damp cloth to clean the exterior of the case. Avoid harsh chemicals.
- Dust Filters: Regularly check and clean the magnetic dust filters (e.g., on the top panel) to maintain optimal airflow and prevent dust buildup inside the system. Gently remove and brush off accumulated dust.
- Internal Components: For advanced cleaning of internal components, it is recommended to consult a professional or refer to detailed guides, ensuring the computer is powered off and unplugged before opening the case.
6.2 Software Updates
Regularly update your operating system, drivers (especially graphics drivers), and security software to ensure optimal performance, stability, and protection against vulnerabilities.
6.3 Storage Management
Periodically review your installed applications and files. Uninstall unused programs and delete unnecessary files to free up storage space and maintain system responsiveness.
7. Troubleshooting
This section addresses common issues you might encounter.
7.1 No Power
- Ensure the power cable is securely connected to both the computer and the wall outlet.
- Verify the wall outlet is functional by plugging in another device.
- Check the power supply switch on the rear of the computer; ensure it is in the 'ON' position.
7.2 No Display on Monitor
- Confirm the monitor is powered on and correctly connected to the graphics card's HDMI or DisplayPort output (refer to Figure 3.3).
- Ensure the correct input source is selected on your monitor.
- Try a different display cable or monitor if available.
7.3 Network Connectivity Issues
- Wired: Check if the Ethernet cable is securely connected to both the computer and the router/modem. Verify router/modem status.
- Wireless: Ensure Wi-Fi is enabled in Windows and you are connected to the correct network with the correct password. Restart your router/modem.
7.4 System Performance Issues
- Close unnecessary background applications.
- Ensure your operating system and drivers are up to date.
- Check for sufficient free storage space on your SSD.
- Monitor system temperatures to ensure components are not overheating.
8. Specifications
| Feature | Specification |
|---|---|
| Brand | WIWB |
| Model Number | wwr7go |
| Operating System | Windows |
| CPU Model | AMD Ryzen 7 4700LE |
| CPU Speed | 3.6 GHz (Base), up to 4.2 GHz (Boost) |
| Graphics Card | NVIDIA GeForce RTX 3050 8GB GDDR6 |
| RAM | 16GB DDR4 3200MHz (Dual-channel) |
| Storage | 512GB NVMe M.2 SSD |
| Wireless Connectivity | Wi-Fi 6 |
| Wired Connectivity | Ethernet |
| Video Output | HDMI, DisplayPort |
| USB Ports | USB 3.0, USB 2.0 |
| Dimensions (L x W x H) | 15 x 12.75 x 17.5 inches |
| Power Plug Type | Type B - 3 pin (North American) |
9. Warranty Information
This product comes with a 1-year limited warranty from the date of purchase. This warranty covers manufacturing defects and hardware malfunctions under normal use. It does not cover damage caused by misuse, accidents, unauthorized modifications, or natural disasters.
For detailed warranty terms and conditions, please refer to the official WIWB website or contact customer support.
10. Support
If you encounter any issues not covered in this manual or require further assistance, please contact WIWB customer support through the following channels:
- Online Support: Visit the official WIWB website for FAQs, driver downloads, and support resources.
- Email Support: Refer to your purchase documentation for the customer support email address.
- Phone Support: Check the WIWB website for regional phone support numbers.
Please have your product model number (Ryzen 7 4700LE | RTX 3050 8G) and purchase date ready when contacting support.