
Introduction
This manual provides detailed instructions for the setup, operation, and maintenance of your New Bee Gaming Audio Mixer GM10. Designed for gamers, streamers, podcasters, and content creators, this mixer offers comprehensive audio control and creative sound effects. Please read this manual thoroughly before using the device to ensure optimal performance and longevity.
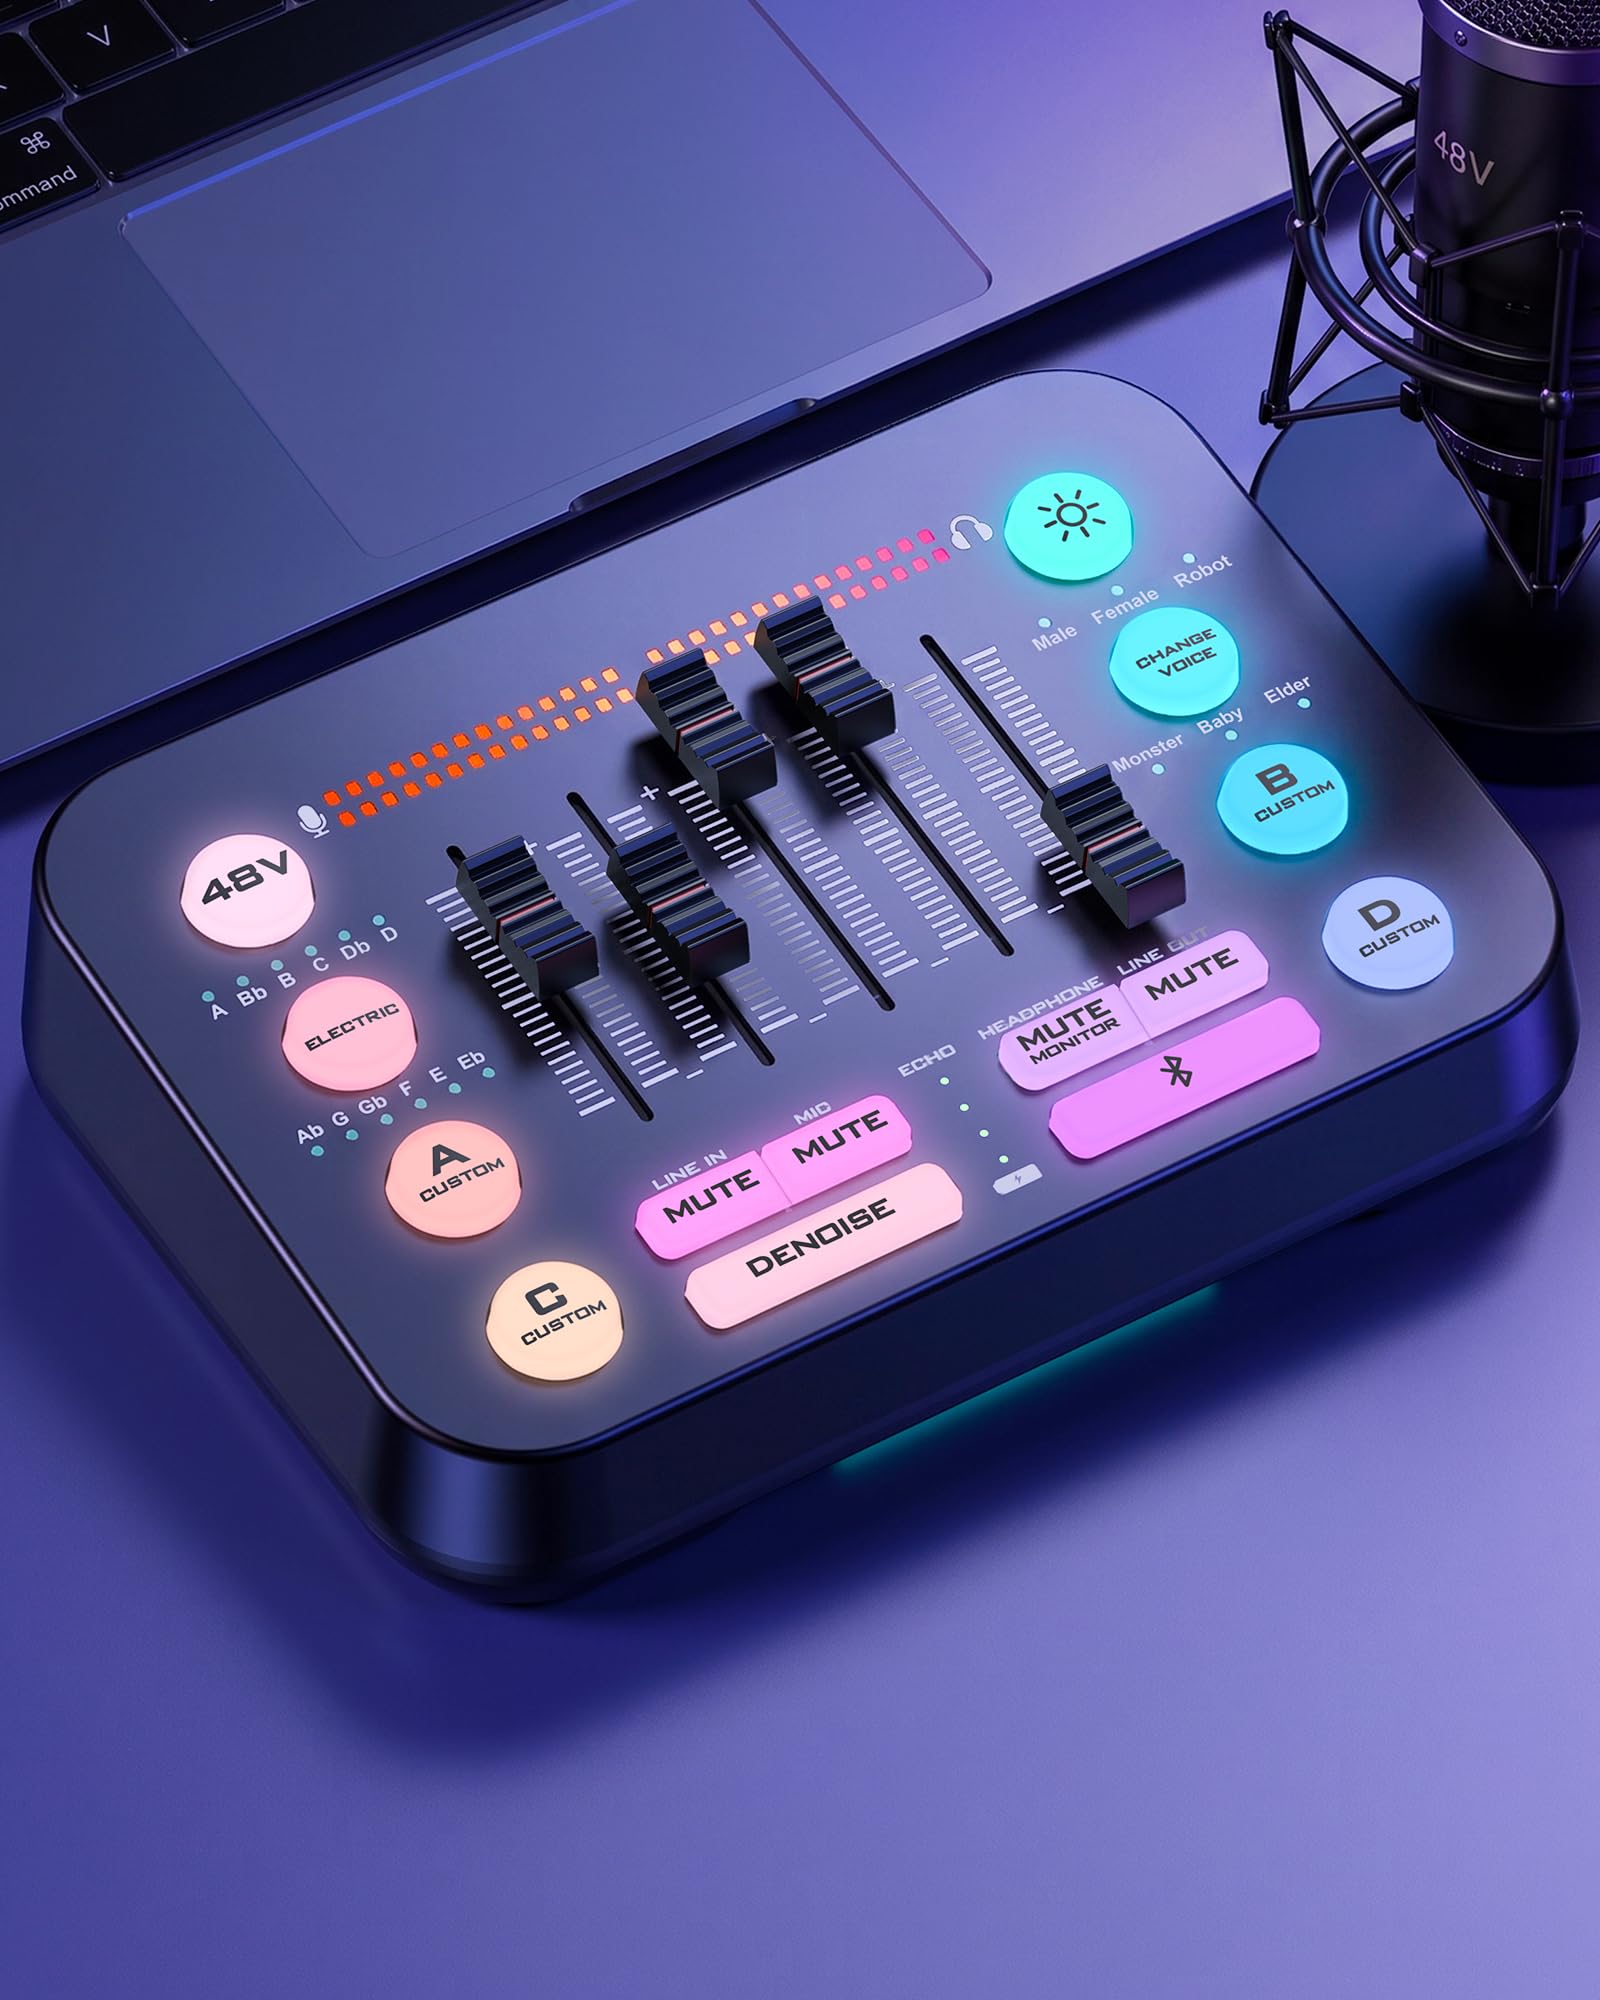
Figure 1: New Bee Gaming Audio Mixer GM10. This image shows the compact design of the mixer with its various faders, buttons, and vibrant RGB lighting, highlighting its appeal for gaming and streaming setups.
Safety Information
- Do not expose the device to water or excessive moisture.
- Avoid placing the device near heat sources or in direct sunlight.
- Use only the provided USB-C cable for power.
- Do not attempt to disassemble or modify the device.
- Keep out of reach of children.
- Ensure proper ventilation around the device during operation.
Package Contents
Verify that all items are present in the package:
- 1x New Bee Gaming Audio Mixer GM10
- 1x 3.5mm Audio Cable
- 1x Headphone Extension Cable
- 1x USB Type-C to USB-A Cable (for PC connection)
- 1x USB Type-C to USB Type-C Cable (for smartphone connection)
- 1x User Manual

Figure 2: Contents of the New Bee GM10 package. This image displays the mixer unit, various connecting cables (USB-C, 3.5mm audio, headphone extension), and the user manual, ensuring users can verify all included accessories.
Device Overview
Familiarize yourself with the various ports and controls on your New Bee GM10 mixer.

Figure 3: Rear panel connections of the New Bee GM10. This diagram labels the Type-C port, AUX output, AUX input, 3.5mm microphone input, 48V XLR input, headphone monitoring jack, and headphone with mic jack, providing a clear guide for connecting peripherals.
Front Panel Controls:
- Faders: Four independent physical faders for Microphone, Line In, Headphone, and Line Out volume control.
- Mute Buttons: Dedicated mute buttons for each channel, including a monitor mute.
- Denoise Button: Activates intelligent noise reduction.
- 48V Phantom Power Button: Engages 48V phantom power for XLR condenser microphones.
- Voice Changer Button: Cycles through 6 voice change effects.
- Electronic Key Button: Adjusts pitch with 12 levels.
- Custom Sound Pads (A, B, C, D): Record and trigger personalized sound clips.
- RGB Lighting Button: Cycles through 11 RGB lighting effects.
Setup Guide
1. Powering On the Device
- Connect the provided USB-C cable to the "OTG/PC" port on the mixer and the other end to your computer (PC/Mac) or a compatible USB power adapter.
- The mixer will power on automatically, indicated by the RGB lighting.
2. Connecting to a Computer (PC/Mac)
- Connect the mixer to your computer using the USB-C to USB-A cable.
- The device is plug-and-play; no drivers are typically required.
- In your computer's sound settings, select "New Bee GM10" as the input and output device.
3. Connecting Microphones
- XLR Condenser Microphone:
- Connect your XLR condenser microphone to the XLR 48V input port on the rear of the mixer.
- Press the 48V Phantom Power Button on the front panel to activate phantom power. The indicator light will illuminate.
- Dynamic Microphone (3.5mm):
- Connect your 3.5mm dynamic microphone to the "Micro 3.5mm" input port on the rear of the mixer.

Figure 4: Connecting an XLR microphone to the GM10. This image highlights the XLR input port and the 48V phantom power button, essential for condenser microphones, demonstrating the mixer's professional audio capabilities.
4. Connecting Headphones and Speakers
- Monitoring Headphones: Connect your headphones to the "Casque de monitoring" (Headphone Monitoring) 3.5mm jack for real-time audio monitoring.
- Headphones with Microphone: If your headphones have an integrated microphone, connect them to the "Casque (avec micro)" 3.5mm jack.
- External Speakers/Line Out: Connect your speakers or other audio output devices to the "Sortie AUX" (AUX Output) 3.5mm jack.
5. Connecting External Audio Sources (Line In/AUX In)
- Connect external audio devices (e.g., phone, tablet, other audio players) to the "Entrée AUX" (AUX Input) 3.5mm jack using the provided 3.5mm audio cable.
6. Bluetooth Connectivity
- Activate Bluetooth on your mobile device.
- Press the Bluetooth button on the mixer (indicated by a Bluetooth icon). The indicator light will flash.
- Select "GM10" from your device's Bluetooth pairing list. The indicator light will become solid once connected.
- Audio played via Bluetooth will be routed through the "Line In" channel.
Operating Instructions
1. Adjusting Volume Levels
Use the four independent faders to precisely control the volume of different audio sources:
- Microphone Fader: Controls the input volume of your connected microphone.
- Line In Fader: Controls the volume of audio from the AUX Input or Bluetooth connection.
- Headphone Fader: Controls the output volume for your monitoring headphones.
- Line Out Fader: Controls the main output volume to your speakers or streaming software.

Figure 5: Precision audio control with faders. This image illustrates a hand adjusting the faders on the GM10, emphasizing the individual control over microphone, accompaniment, headphone, and output levels for real-time audio management.
2. Mute Functions
The mixer features independent mute buttons for quick audio control:
- Press the Mute button above each fader to instantly silence that channel.
- The Mute Monitor button silences the headphone monitoring output without affecting the main output.

Figure 6: Multi-channel independent mute function. This diagram visually explains the different mute options available on the GM10, including fade-out mute, soft cut-off, and instant mute, providing flexibility for various live situations.
3. Noise Reduction (Denoise)
Activate the intelligent noise reduction feature to minimize background noise:
- Press the Denoise button on the front panel. The indicator light will illuminate when active.
- This function helps ensure your voice remains clear and audible.

Figure 7: Intelligent noise reduction. This image shows the Denoise button on the GM10 and a graphic illustrating how background noise is reduced, ensuring clear vocal output for streaming and recording.
4. Vocal Effects
- Voice Changer: Press the Voice Changer button to cycle through 6 different voice effects (e.g., female, male, robot, monster, baby, elder).
- Electronic Keys: Use the Electronic Key button to adjust your vocal pitch across 12 levels.

Figure 8: 6 voice change modes. This image displays the voice changer button and icons representing different voice effects like female, male, robot, monster, baby, and elder, demonstrating the creative vocal modification capabilities of the GM10.
5. Custom Sound Pads
The GM10 features four customizable sound pads (A, B, C, D) to trigger your favorite sound effects:
- Recording: To record a custom sound, press and hold one of the A/B/C/D buttons until it flashes. Speak into your microphone or play an audio source. Press the button again to stop recording. The mixer supports up to 30 seconds of recording per pad.
- Playback: Briefly press an A/B/C/D button to play the recorded sound effect.

Figure 9: 4 customizable sound effect buttons. This image shows the custom sound pads (A, B, C, D) on the GM10, along with examples of pre-programmed sounds like rain, laughter, and footsteps, and the ability to record up to 30 seconds of personalized audio.
6. RGB Lighting Effects
Personalize your setup with dynamic RGB lighting:
- Press the RGB Lighting Button (sun icon) to cycle through 11 different RGB lighting effects and colors.

Figure 10: 11 RGB lighting effects. This image showcases the GM10 with its vibrant RGB lighting, illustrating the various dynamic lighting options available to customize the device's appearance.
Maintenance
- Cleaning: Use a soft, dry cloth to clean the surface of the mixer. Do not use liquid cleaners or abrasive materials.
- Storage: When not in use for extended periods, store the mixer in a cool, dry place away from direct sunlight.
- Cable Care: Avoid bending or twisting cables excessively to prevent damage.
Troubleshooting
| Problem | Possible Cause | Solution |
|---|---|---|
| No sound output from headphones/speakers. |
|
|
| Microphone not working or low volume. |
|
|
| Distorted or noisy audio. |
|
|
| Bluetooth connection issues. |
|
|
Specifications
| Feature | Detail |
|---|---|
| Brand | New Bee |
| Model Number | GM10 |
| Number of Channels | 4 |
| Connectivity Technology | USB, XLR for mic input, Bluetooth 5.0 |
| Power Source | USB-C (3600mAh internal battery) |
| Frequency Response | 2000 Hz (as listed, likely sample rate or internal processing frequency) |
| Output Connector Type | 3.5mm Headphone Jack, 3.5mm Line Out Jack |
| Audio Input | XLR (48V Phantom Power), 3.5mm Mic Input, 3.5mm AUX Input |
| Voltage | 48 Volts (for phantom power) |
| Product Dimensions (L x W x H) | 11.3 x 16.4 x 4.1 cm |
| Compatibility | Windows, Mac, iOS, Android, PS4, PS5 |
Warranty and Support
New Bee products are designed and manufactured to the highest quality standards. In the unlikely event of a problem with your product, please contact New Bee customer support for assistance.
- Warranty: Please refer to the warranty card included in your package or visit the official New Bee website for detailed warranty information.
- Customer Support: For technical support, troubleshooting, or service inquiries, please contact our customer service team via the contact information provided on the New Bee website or your purchase platform.