
1. Introduction
Thank you for choosing the Aeitto ICE-JUN-02 Countertop Ice Maker. This appliance is designed to produce bullet-shaped ice quickly and efficiently, offering convenience for your home, kitchen, or office. Please read this manual thoroughly before operation to ensure proper use, maintenance, and safety.

Image 1.1: Aeitto Portable Bullet Ice Maker highlighting its main features.
2. Safety Instructions
To prevent injury to persons or damage to the appliance, please observe the following safety precautions:
- Ensure the power supply voltage matches the rating label on the appliance.
- Do not immerse the appliance, power cord, or plug in water or other liquids.
- Unplug the ice maker from the outlet when not in use, before cleaning, or during maintenance.
- Keep the appliance away from heat sources and direct sunlight.
- Place the ice maker on a stable, level surface with adequate ventilation (at least 6 inches of clearance around all sides).
- Use only potable water in the water reservoir.
- Do not operate the appliance with a damaged cord or plug. Contact customer support for assistance.
- This appliance is for household use only. Do not use outdoors.
3. Package Contents
Verify that all items are included in the package:
- Aeitto Ice Maker (1 unit)
- Ice Scoop (1 unit)
- Ice Basket (1 unit)
4. Product Diagram
Familiarize yourself with the components of your ice maker.
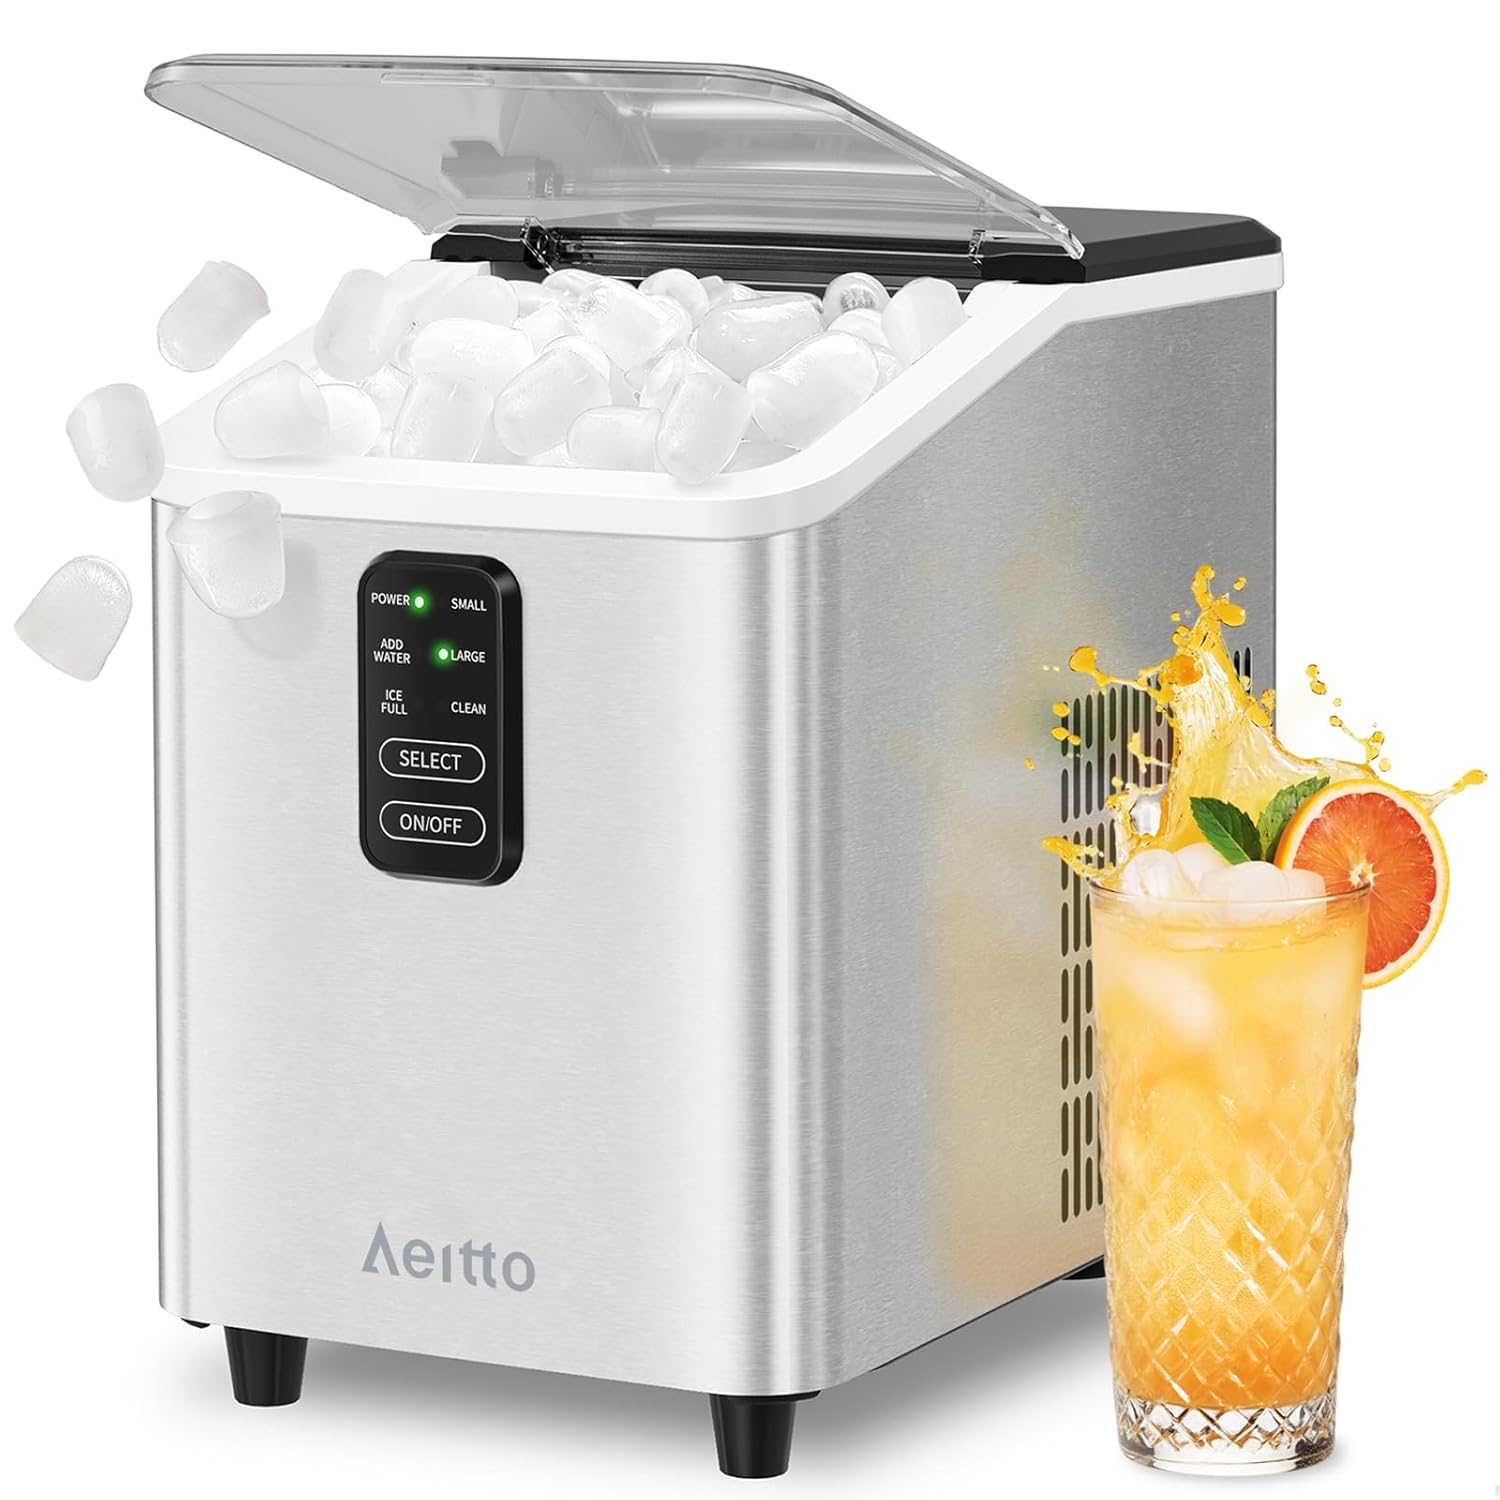
Image 4.1: Front view of the Aeitto ICE-JUN-02 Ice Maker.
Key Components:
- Control Panel: Features POWER, SMALL, LARGE, ADD WATER, ICE FULL, CLEAN indicators, and SELECT/ON/OFF buttons.
- Ice Basket: Removable basket for collecting produced ice.
- Water Reservoir: Located beneath the ice basket, where water is stored for ice production.
- Ice Scoop: For hygienic removal of ice from the basket.
- Transparent Lid: Allows visibility of the ice production process.
- Air Vent: Located on the side, ensures proper heat dissipation.
5. Setup
Follow these steps to set up your ice maker for first use:
- Unpack: Carefully remove all packaging materials and inspect the ice maker for any damage.
- Clean: Before first use, clean the interior of the ice maker, including the water reservoir and ice basket, with a soft cloth and mild detergent. Rinse thoroughly with clean water.
- Placement: Place the ice maker on a flat, stable surface away from direct sunlight and heat sources. Ensure there is at least 6 inches (15 cm) of clearance around the unit for proper ventilation.
- Rest: Allow the unit to stand upright for at least 2 hours before plugging it in. This allows the refrigerant to settle.
- Add Water: Open the lid, remove the ice basket, and fill the water reservoir with potable water up to the MAX fill line. Do not overfill.
- Power On: Plug the power cord into a grounded electrical outlet. The 'POWER' indicator will light up.

Image 5.1: Proper placement of the ice maker on a countertop.
6. Operating Instructions
Operating your Aeitto ice maker is straightforward:
- Start Ice Production: Press the 'ON/OFF' button to start the ice-making cycle. The 'POWER' indicator will illuminate.
- Select Ice Size: Press the 'SELECT' button to choose between 'SMALL' or 'LARGE' bullet ice. The corresponding indicator light will illuminate. For the first batch, 'SMALL' is often recommended.
- First Batch: The ice maker will produce its first batch of ice in approximately 6 minutes. Subsequent batches may take slightly longer.
- Ice Full Reminder: When the ice basket is full, the 'ICE FULL' indicator will light up, and the ice production will automatically pause. Remove ice from the basket to resume production.
- Add Water Reminder: If the water reservoir is low, the 'ADD WATER' indicator will light up, and the ice production will stop. Add more potable water to the reservoir, and the unit will automatically resume operation after a few minutes.
- Stop Operation: To stop ice production at any time, press the 'ON/OFF' button.

Image 6.1: Ice production process, showing 8 ice cubes ready in 6 minutes.

Image 6.2: Comparison of small and large bullet ice sizes.

Image 6.3: Ice-full reminder mechanism.
7. Maintenance
Regular cleaning and maintenance will ensure optimal performance and longevity of your ice maker.
7.1 Automatic Self-Cleaning Function
The ice maker features an automatic self-cleaning cycle:
- Ensure the water reservoir is filled with clean water.
- Press and hold the 'ON/OFF' button for 5 seconds. The 'CLEAN' indicator will light up, and the cleaning cycle will begin.
- The cleaning process takes approximately 5 minutes. Once complete, the unit will automatically stop.
- Drain the dirty water from the unit by removing the drain plug located at the bottom or back of the unit.

Image 7.1: Steps for activating the self-cleaning function.
7.2 Regular Cleaning
- Unplug the ice maker before cleaning.
- Remove the ice basket and clean it with warm, soapy water. Rinse and dry thoroughly.
- Wipe the exterior of the unit with a soft, damp cloth.
- For the interior, use a soft cloth dampened with a mild solution of water and vinegar or a food-grade sanitizer. Wipe all surfaces, then rinse with clean water.
- Ensure all parts are dry before reassembling and operating the unit.
7.3 Descaling
Mineral deposits from hard water can affect ice quality and machine performance. Descale your ice maker regularly:
- Monthly: In moderately hard water areas.
- Every two or three weeks: In hard to very hard water areas.
To descale, use a descaling solution specifically designed for ice makers or a mixture of water and white vinegar. Follow the instructions for the self-cleaning cycle, using the descaling solution instead of plain water. After descaling, run several cycles with clean water to rinse thoroughly.

Image 7.2: Hard water concentration map and descaling recommendations.
8. Troubleshooting
If you encounter issues with your ice maker, refer to the following table:
| Problem | Possible Cause | Solution |
|---|---|---|
| Ice maker not turning on | No power; loose plug | Check power outlet; ensure plug is securely inserted. |
| "ADD WATER" indicator on | Water reservoir is empty or low | Fill the water reservoir with potable water up to the MAX line. |
| "ICE FULL" indicator on | Ice basket is full | Remove ice from the basket. |
| No ice production | Insufficient water; ambient temperature too high; air vent blocked | Add water; ensure room temperature is suitable (10-32°C); clear air vents. |
| Ice cubes are too small or cloudy | Water temperature too high; mineral buildup | Use colder water; perform descaling and regular cleaning. |
| Unusual noise during operation | Unit not level; internal component issue | Ensure unit is on a level surface; if noise persists, contact customer support. |
9. Specifications
| Feature | Specification |
|---|---|
| Brand | Aeitto |
| Model Name | ICM14 |
| Model Number | ICE-JUN-02 |
| Product Dimensions (D x W x H) | 11.9" x 10.8" x 7.3" (30.2cm x 27.4cm x 18.5cm) |
| Ice Production Capacity | Up to 26 lbs (11.8 kg) per 24 hours |
| First Ice Batch Time | Approx. 6 minutes |
| Ice Cube Shape | Bullet |
| Ice Cube Sizes | Small (20mm*28mm), Large (23mm*30mm) |
| Voltage | 110 Volts |
| Wattage | 1100 watts |
| Refrigerant | R600a |
| Material Type | Stainless Steel |
10. Warranty and Support
10.1 Warranty Information
The Aeitto ICE-JUN-02 Ice Maker comes with a 1-Year Limited Warranty from the date of purchase. This warranty covers defects in materials and workmanship under normal use. It does not cover damage resulting from misuse, accident, alteration, neglect, or unauthorized repair.
10.2 Customer Support
For technical assistance, warranty claims, or general inquiries, please contact Aeitto Customer Support. Have your model number (ICE-JUN-02) and purchase information ready when contacting support.
Contact Information:
- Please refer to the contact details provided on the product packaging or the official Aeitto website.