
1. Introduction
Thank you for choosing the VANBAR DC609 Mirror Dash Cam Anti-Reflection Film. This manual provides detailed instructions for the proper installation, operation, and maintenance of your product. Please read this manual thoroughly before use to ensure optimal performance and safety.
2. Safety Information
- Do not attempt to disassemble, repair, or modify the product. This may cause damage, electric shock, or fire.
- Ensure the product is securely installed and does not obstruct the driver's view or interfere with vehicle controls.
- Keep the product away from water, moisture, and extreme temperatures.
- Use only the specified power adapter and cables provided with the product.
- Clean the product with a soft, dry cloth. Avoid using harsh chemicals or abrasive cleaners.
3. Package Contents
Verify that all items are present in the package:
- VANBAR DC609 Mirror Dash Cam Anti-Reflection Film (Main Unit)
- Rear Camera
- Power Cable
- Mounting Straps/Accessories
- User Manual (This document)
4. Product Overview
The VANBAR DC609 is a mirror-type dash cam designed to provide clear recording while minimizing glare with its anti-reflection film. It includes a main unit that attaches to your existing rearview mirror and a separate rear camera for recording the view behind your vehicle.
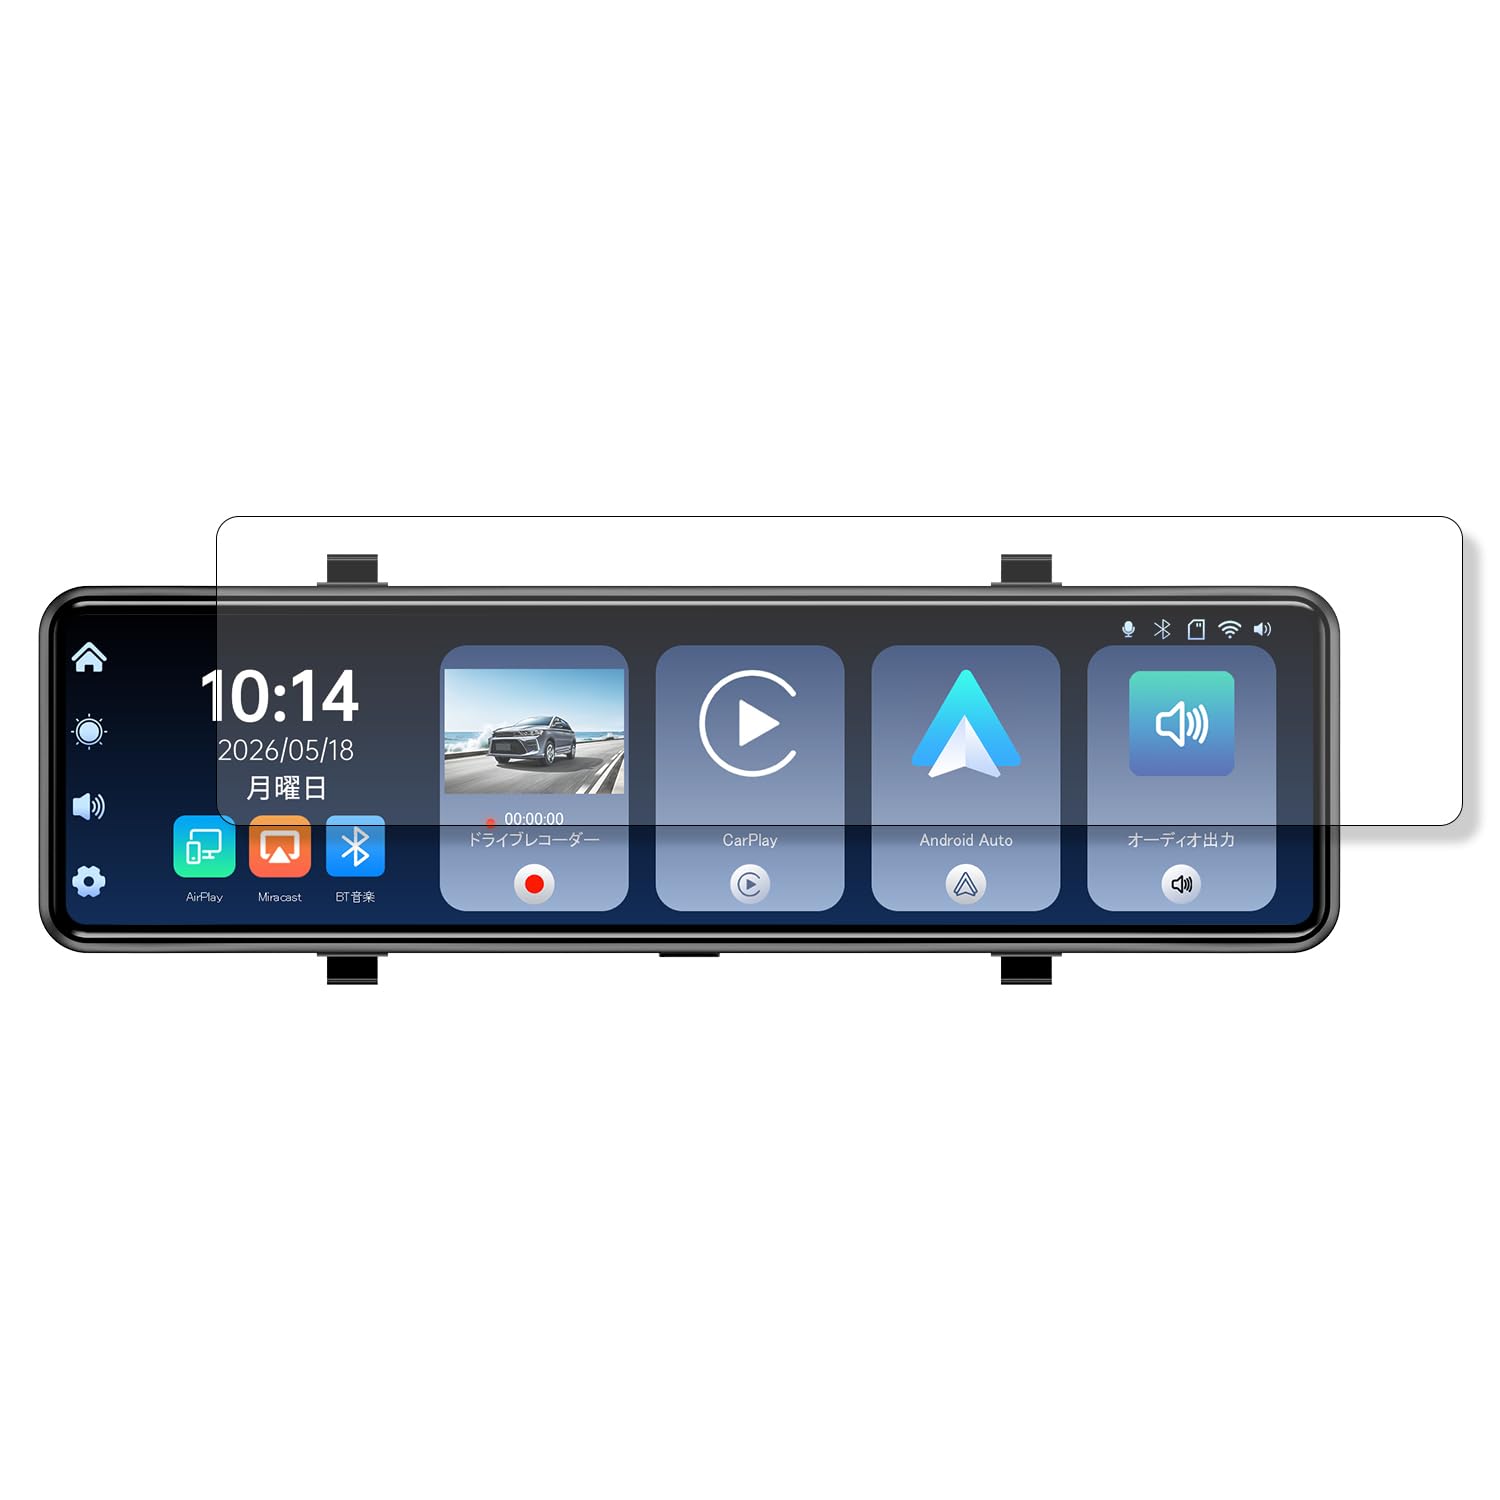
Image 1: VANBAR DC609 Mirror Dash Cam Main Unit. This image shows the front view of the mirror dash cam, highlighting its reflective surface and integrated camera lens.
4.1 Main Unit (Mirror Dash Cam)
- Front Camera Lens: Records the road ahead.
- Display Screen: Integrated into the mirror for live view and playback.
- Mounting Points: For attaching to the vehicle's rearview mirror.
- Power Port: For connecting the power cable.
- Rear Camera Input: For connecting the rear camera cable.
- Memory Card Slot: For inserting a microSD card (not included).
- Control Buttons: For menu navigation and operation.
4.2 Rear Camera
- Rear Camera Lens: Records the view behind the vehicle.
- Cable Connector: For connecting to the main unit.
- Mounting Bracket: For securing the camera to the rear of the vehicle.
5. Setup and Installation
5.1 Preparing for Installation
- Ensure the vehicle's engine is off.
- Clean the windshield and the area where the dash cam will be mounted.
- Insert a compatible microSD card (Class 10 or higher, up to 128GB recommended) into the main unit's memory card slot.
5.2 Installing the Main Unit
- Attach the main unit to your vehicle's existing rearview mirror using the provided mounting straps. Ensure it is securely fastened and does not vibrate.
- Adjust the angle of the front camera lens to capture the desired view of the road ahead.
5.3 Installing the Rear Camera
- Determine a suitable location for the rear camera, typically on the rear windshield or near the license plate.
- Secure the rear camera using its mounting bracket.
- Route the rear camera cable from the rear of the vehicle to the main unit, tucking it neatly along the vehicle's interior trim to avoid obstruction.
- Connect the rear camera cable to the designated input port on the main unit.
5.4 Connecting Power
- Connect the power cable to the main unit's power port.
- Plug the other end of the power cable into your vehicle's 12V power outlet (cigarette lighter socket).
- Route the power cable neatly to avoid interference with driving.
6. Operating Instructions
6.1 Power On/Off
- Automatic Power On/Off: The dash cam will automatically power on and begin recording when the vehicle engine starts, and power off when the engine is turned off.
- Manual Power On/Off: Press and hold the Power button for a few seconds to manually turn the device on or off.
6.2 Recording Modes
- Loop Recording: The dash cam continuously records video in short segments (e.g., 1, 3, or 5 minutes). When the memory card is full, the oldest unlocked files are overwritten.
- Emergency Recording (G-Sensor): In the event of a sudden impact or collision, the built-in G-sensor will automatically detect the event and lock the current video segment, preventing it from being overwritten by loop recording.
- Parking Monitor (Optional): If supported and properly wired (requires a hardwire kit, sold separately), the dash cam can record when motion is detected or an impact occurs while the vehicle is parked.
6.3 Menu Navigation and Settings
Use the control buttons on the main unit to navigate through the menu options. Common settings include:
- Resolution: Adjust video recording quality.
- Loop Recording Duration: Set the length of video segments.
- G-Sensor Sensitivity: Adjust the sensitivity of impact detection.
- Date/Time: Set the correct date and time.
- Language: Select the desired language for the menu.
- Format SD Card: Format the microSD card to ensure proper function and clear old data.
6.4 Playback
To view recorded videos:
- Stop recording (if currently active).
- Enter playback mode via the menu.
- Browse through the recorded files.
- Select a file to play.
- Alternatively, remove the microSD card and view files on a computer using a card reader.
7. Maintenance
- Cleaning the Lens: Gently wipe the camera lenses with a soft, lint-free cloth to ensure clear recordings.
- Cleaning the Screen: Use a soft, dry cloth to clean the mirror display. Avoid pressing too hard.
- SD Card Maintenance: Format the microSD card regularly (e.g., once a month) to prevent data corruption and ensure optimal recording performance. Back up important files before formatting.
- Storage: If not using the dash cam for an extended period, store it in a cool, dry place away from direct sunlight.
8. Troubleshooting
| Problem | Possible Cause | Solution |
|---|---|---|
| Dash cam does not power on. | No power supply; faulty cable; loose connection. | Check power cable connection; ensure vehicle's 12V outlet is working; try a different power source if available. |
| Recording stops or freezes. | SD card error; incompatible SD card; full SD card. | Format the SD card; use a high-speed (Class 10 or higher) SD card; replace the SD card if damaged. |
| Poor video quality. | Dirty lens; low resolution setting; poor lighting. | Clean the camera lens; adjust video resolution in settings; ensure adequate lighting conditions. |
| Rear camera not displaying. | Loose connection; faulty rear camera cable. | Check the connection between the rear camera and the main unit; ensure the cable is not damaged. |
9. Specifications
- Brand: VANBAR
- Model: DC609
- Included Components: Rear Camera
- Product Dimensions (D x W x H): 20 mm x 20 mm x 20 mm
- Manufacturer Model Number: DC609-JYX
- ASIN: B0H266TMKG
10. Warranty and Support
This VANBAR product comes with a 1-year manufacturer's warranty from the date of purchase. This warranty covers manufacturing defects and malfunctions under normal use.
The warranty does not cover damage caused by:
- Improper installation or operation.
- Unauthorized repairs or modifications.
- Accidents, misuse, or neglect.
- Natural disasters or external factors.
For warranty claims or technical support, please contact VANBAR customer service through the retailer where the product was purchased or visit the official VANBAR website for contact information. Please have your purchase receipt and product model number ready when contacting support.
For more information, you may visit the VANBAR Store on Amazon.