
1. Introduction
Thank you for purchasing the Vipbear 51.3" Tall White Dresser with LED Lights & Charging Station. This dresser is designed to provide versatile storage, ambient lighting, and convenient power access for your bedroom, living room, or hallway. Please read this manual thoroughly before assembly and use to ensure proper function and safety.
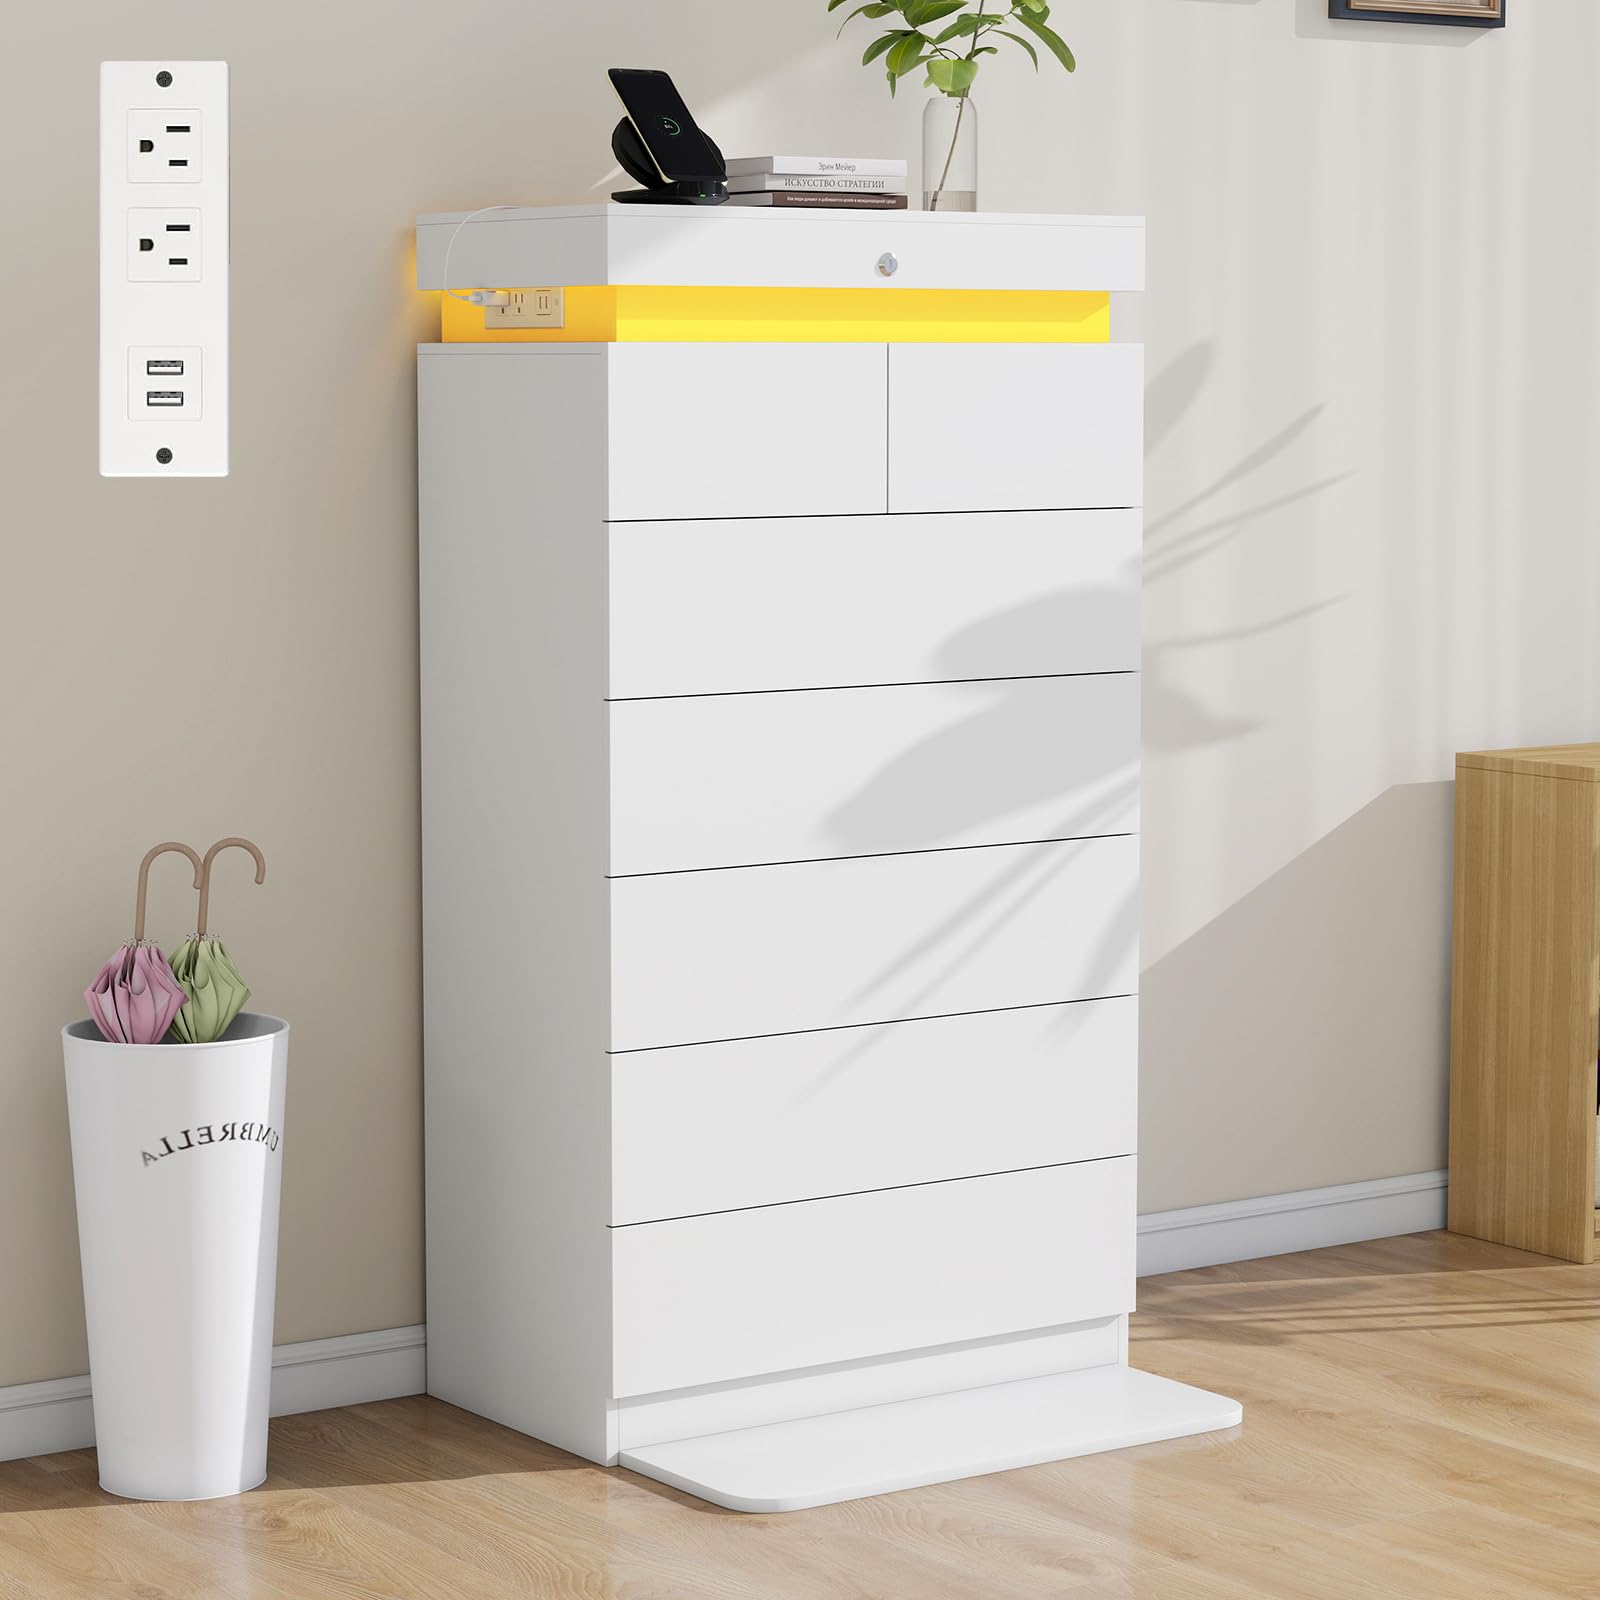
Overall view of the Vipbear 51.3" Tall White Dresser.
2. Safety Information
- Anti-Tip Device: Always install the included anti-tip device to prevent the dresser from tipping over, especially in households with children or pets. Secure it firmly to a wall stud.
- Weight Capacity: Do not overload drawers or the top surface. Refer to specifications for maximum weight limits.
- Electrical Safety: The built-in charging station is designed for standard household use. Do not exceed the rated power capacity. Avoid spilling liquids near the outlets or USB ports. Disconnect power during cleaning or if any electrical issue occurs.
- Assembly: Assemble the dresser on a soft, clean surface to prevent scratches. Ensure all hardware is securely tightened before use.
- Placement: Place the dresser on a level surface to ensure stability.
3. Package Contents
Before beginning assembly, verify that all parts and hardware are present. If any items are missing or damaged, please contact Vipbear customer support.
- Dresser Panels (various sizes)
- Drawer Components (fronts, sides, backs, bottoms)
- Drawer Slides (metal smooth slide rails)
- LED Light Strip with Controller
- Charging Station Unit (2 AC outlets, 2 USB ports)
- Power Cord (4.9 feet)
- Key for Sliding Top Lock
- Anti-Tip Board/Kit
- Assembly Hardware (screws, dowels, cam locks, etc.)
- Instruction Manual
4. Setup & Assembly
Assembly is required for this dresser. Please follow the step-by-step instructions provided in the separate assembly guide included in your package. All parts are labeled for easy identification.
- Prepare Workspace: Clear a spacious area and lay out all components on a soft, protective surface to prevent damage.
- Assemble Frame: Follow the guide to construct the main frame of the dresser.
- Install Drawer Slides: Attach the metal smooth slide rails to the dresser frame and drawer sides as instructed.
- Assemble Drawers: Construct the 7 drawers (2 small, 5 large) according to the guide.
- Install Charging Station: Integrate the charging station unit into the designated top compartment.
- Attach LED Light Strip: Adhere the RGB LED light strip under the top panel as shown in the assembly guide.
- Secure Sliding Top: Install the sliding top panel and ensure the key lock mechanism functions correctly.
- Install Anti-Tip Device: For safety, securely attach the anti-tip device to the back of the dresser and to a wall stud using appropriate hardware.

Detailed product dimensions for planning placement.

Illustration of key features including anti-tipping devices and drawer rails.
5. Operating Instructions
5.1. LED Lighting System
The dresser features multi-color RGB LED light strips with adjustable brightness and color, controlled via button, remote, or smartphone app.
- Button Control: A discreet button on the dresser allows for basic on/off and cycling through preset colors/modes.
- Remote Control: Use the provided remote to access a wider range of colors, brightness levels, and dynamic lighting modes (e.g., light mode, music mode, timing mode). Point the remote directly at the LED receiver.
- Smartphone App Control: Download the designated app (refer to the LED light manual for QR code or app name) to unlock full customization, including precise color selection, custom scenes, and advanced timing functions.

Control options for the adjustable RGB LED light strips.

The dresser with its LED lights activated, providing ambient lighting.
5.2. Built-in Charging Station
The dresser is equipped with a charging station featuring 2 AC outlets and 2 USB ports.
- Power Connection: Plug the dresser's main power cord into a standard wall outlet.
- Using AC Outlets: Insert standard electrical plugs into the 125V/12A AC outlets to power lamps, laptops, or other devices.
- Using USB Ports: Connect your USB charging cables to the 5V/2A USB ports to charge smartphones, tablets, and other compatible devices.

The built-in charging station with 2 AC outlets and 2 USB ports.

Example of devices charging on the integrated station.
5.3. Sliding Top with Key Lock
The top panel of the dresser slides open to reveal a hidden compartment, secured by a key lock.
- To Open: Insert the provided key into the lock on the top panel and turn to unlock. Gently slide the top panel forward to access the hidden storage.
- To Close & Lock: Slide the top panel back into its closed position. Insert the key and turn to lock, ensuring it is secure. Remove the key and store it in a safe place.

The hidden storage compartment with key lock.
5.4. Drawer Usage
The dresser features 2 side-by-side small top drawers and 5 large deep drawers.
- Opening/Closing: Use the handle-free design by gently pulling the bottom edge of the drawer front to open. Push firmly to close.
- Storage Capacity: The drawers offer ample space for various items. The small top drawers are suitable for accessories, while the large drawers accommodate clothing, blankets, and other larger items.

Demonstration of the dresser's large storage capacity.

The two distinct drawer sizes and smooth metal slide rails.
6. Maintenance
- Cleaning: Wipe the dresser surfaces with a soft, damp cloth. Avoid harsh chemicals or abrasive cleaners, which can damage the finish.
- Dusting: Regularly dust the surfaces to prevent buildup.
- Drawer Slides: Periodically check drawer slides for smooth operation. If they become stiff, a small amount of silicone lubricant can be applied.
- Hardware: Occasionally check and retighten any loose hardware to maintain stability.
- LED Lights: The LED strip is designed for long-term use. If issues arise, refer to the LED light manual or contact support.
7. Troubleshooting
| Problem | Possible Cause | Solution |
|---|---|---|
| LED lights not turning on. | Power cord not plugged in; LED strip disconnected; remote battery dead; app not connected. | Ensure power cord is securely plugged in. Check LED strip connection. Replace remote battery. Re-pair app with LED controller. |
| Charging station not working. | Dresser power cord unplugged; device not properly connected; faulty device cable. | Verify dresser power cord is plugged into a live outlet. Ensure devices are correctly plugged into AC outlets/USB ports. Try a different charging cable or device. |
| Drawers stick or do not slide smoothly. | Overloaded drawer; misaligned drawer slides; loose hardware. | Reduce drawer contents. Check that drawer slides are correctly installed and aligned. Tighten any loose screws on the slides or drawer components. |
| Sliding top is difficult to open/close or lock. | Obstruction; lock mechanism jammed; key not fully inserted. | Check for any items obstructing the sliding mechanism. Ensure the key is fully inserted and turned correctly. Do not force the lock. |
| Dresser feels unstable. | Not on a level surface; anti-tip device not installed or loose; loose assembly hardware. | Move dresser to a level surface. Ensure the anti-tip device is securely installed to a wall stud. Check and tighten all assembly hardware. |
8. Specifications
- Brand: Vipbear
- Model Name: COD06
- Product Dimensions: 15.2"D x 27.5"W x 51.3"H
- Material: Engineered Wood
- Finish Type: Painted
- Number of Drawers: 7 (2 small, 5 large)
- Item Weight: 105 Pounds
- Color: Tall White
- Style: Modern
- Room Type: Bedroom, Dressing Room, Laundry Room, Living Room, Nursery
- Charging Station: 2 AC Outlets (125V/12A), 2 USB Ports (5V/2A)
- LED Lighting: RGB Multi-color, App/Remote/Button Control
- Special Features: Sliding Top with Key Lock, Anti-Tip Board (Optional)
- Assembly Required: Yes
- GTIN/UPC: 753747446241
9. Warranty & Support
Vipbear products are manufactured with quality and customer satisfaction in mind. This product is backed by Vipbear support. For any questions, concerns, or assistance with assembly, parts, or product functionality, please contact our customer service team. Please have your model number (COD06) and purchase information ready when contacting support.
Contact Information: Please refer to the contact details provided on your purchase receipt or the Vipbear official website for the most up-to-date support channels.