
Important Safety Instructions
Please read and understand all instructions before assembly and use. Keep this manual for future reference.
- Anti-Tip Device: Always install the included anti-tip device to prevent serious injury from furniture tip-over.
- Weight Limits: Do not exceed the maximum weight capacity for the top surface or individual drawers. Overloading can cause damage or instability.
- Electrical Safety: Ensure the charging station is connected to a properly grounded outlet. Do not overload the outlets. Keep liquids away from electrical components.
- Assembly: Assemble on a soft, clean surface to prevent scratches. Ensure all fasteners are securely tightened before use.
- Children: Do not allow children to climb on or play with the dresser.
Package Contents
Verify all parts are present before beginning assembly. If any parts are missing or damaged, contact customer support.
- Dresser Panels (various sizes)
- Drawer Components (fronts, sides, backs, bottoms)
- Drawer Slides (left and right)
- LED Light Strip with Controller
- Charging Station Unit
- Anti-Tip Kit
- Hardware Pack (screws, dowels, cam locks, etc.)
- Assembly Tools (e.g., Allen wrench)
Setup and Assembly
Follow the step-by-step instructions provided in the separate assembly guide for detailed diagrams. This section provides an overview of key assembly points.
1. Prepare for Assembly
Clear a spacious area and lay out all components on a soft, clean surface to prevent damage.
2. Assemble the Main Frame
Connect the side panels, back panel, and base according to the numbered parts in your assembly guide. Ensure all cam locks and screws are tightened securely.
3. Install Drawer Slides
Attach the drawer slides to the interior of the dresser frame using the provided screws. Ensure they are level and aligned for smooth drawer operation.

Image: Detail of metal drawer slide mechanism.
Description: This image shows a close-up of the metal sliding rail for a drawer, indicating where screws are inserted to secure it to the dresser frame. Proper installation ensures smooth drawer movement.
4. Assemble Drawers
Assemble each drawer by connecting the sides, back, and front panels. Slide the drawer bottom into the grooves. Attach the remaining drawer slide components to the assembled drawers.
5. Install LED Light Strip
Carefully attach the LED light strip to the designated area, typically under the top overhang or within a recessed channel. Connect the LED controller and power adapter. Ensure the strip is firmly adhered.
6. Install Charging Station
Insert the charging station unit into the pre-cut opening on the dresser top. Secure it with any provided fasteners. Route the power cord safely to an electrical outlet.
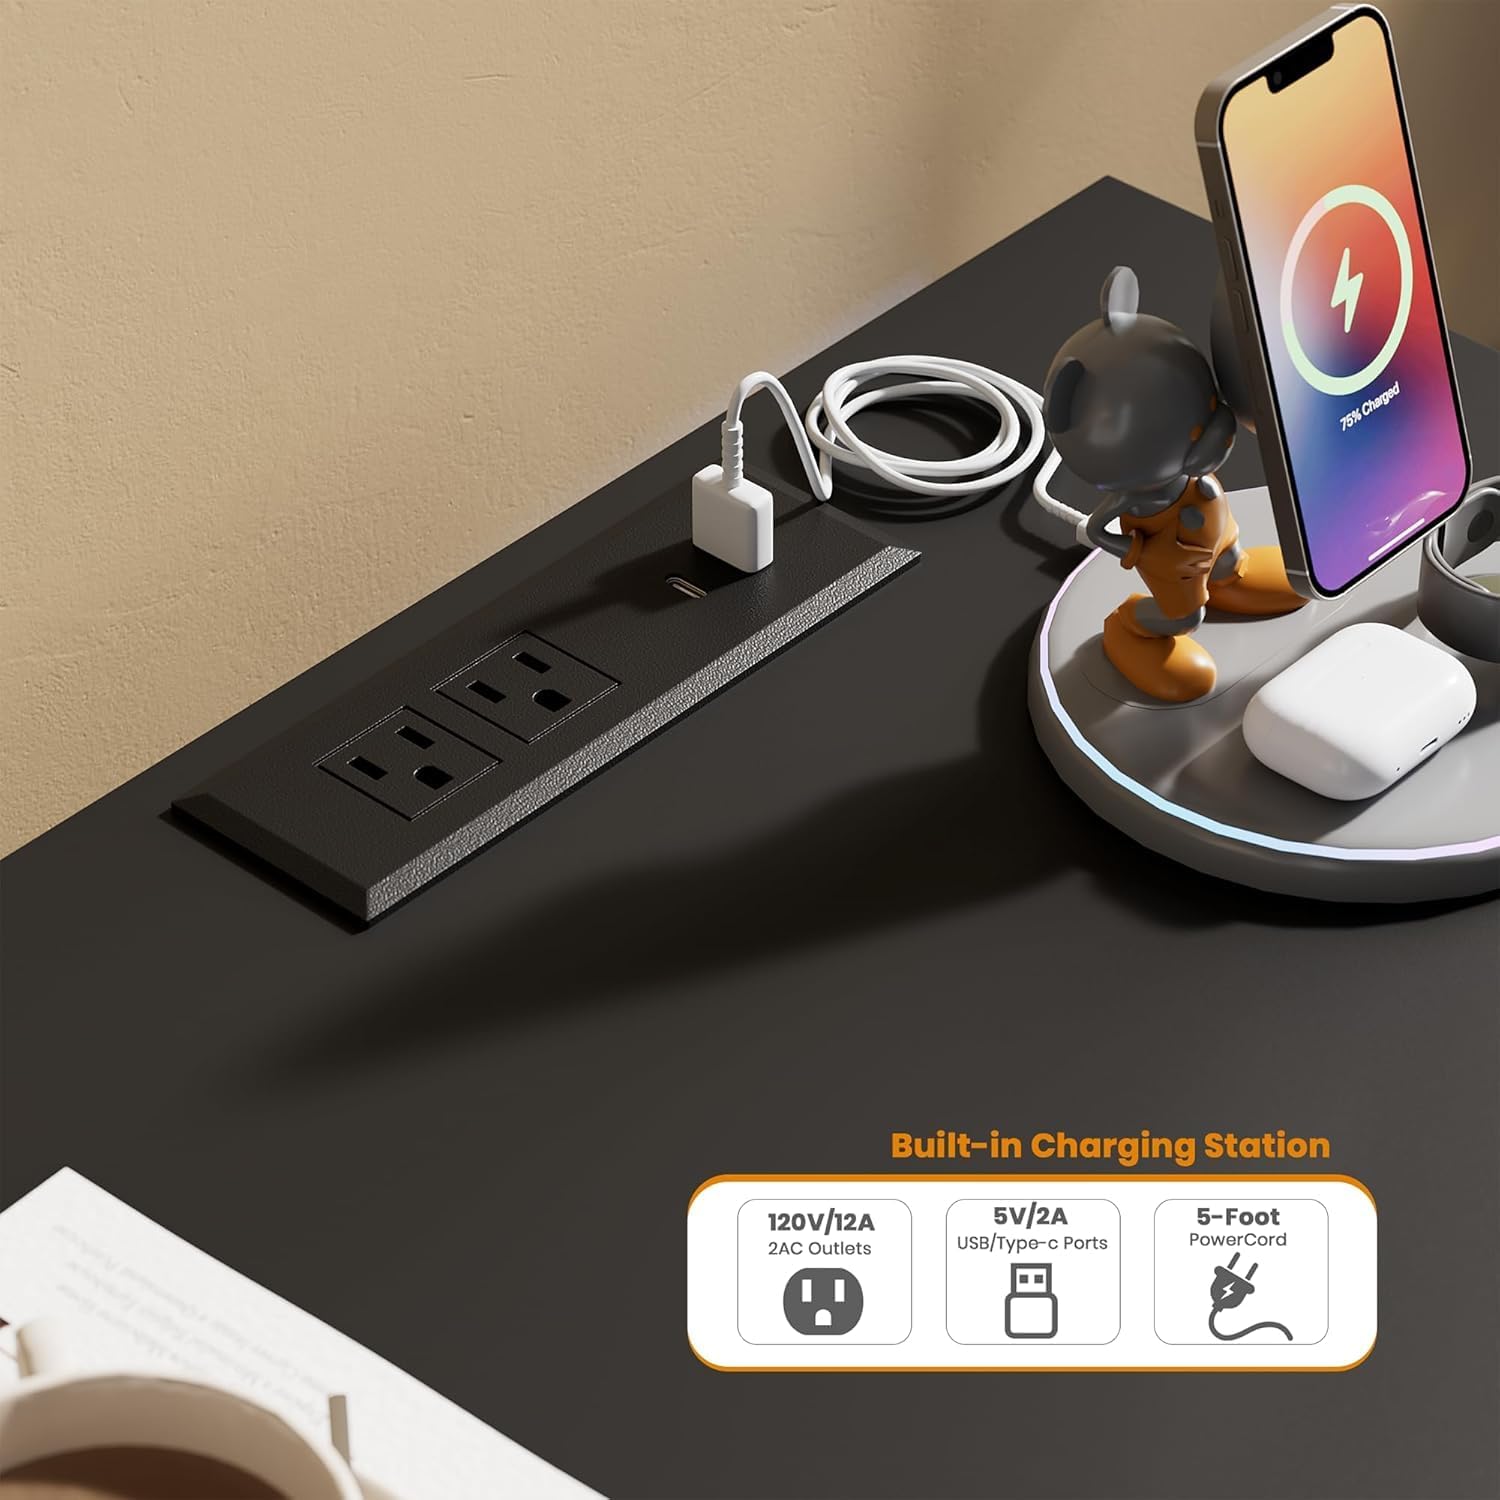
Image: Close-up of the built-in charging station.
Description: This image displays a close-up of the integrated charging station on the dresser's surface, featuring two AC outlets, two USB ports, and a Type-C port, along with a 5-foot power cord. A smartphone is shown charging wirelessly on a separate pad next to it.
7. Install Anti-Tip Device
This is a critical safety step. Secure one end of the anti-tip strap to the back of the dresser and the other end to a wall stud using the provided hardware. Ensure it is taut.

Image: Detail of the anti-tip device.
Description: This image shows a close-up of the metal bracket for the anti-tip device, designed to secure the dresser to a wall and prevent accidental tipping.
Operating Instructions
1. LED Light Operation
- Power On/Off: Use the inline switch or the smartphone app to turn the LED lights on or off.
- Smartphone App Control: Download the recommended app (refer to LED controller instructions for app name). Connect your smartphone via Bluetooth to the LED controller.
- Adjustments:
- Brightness: Adjust the light intensity using the app slider.
- Color: Select from over 60,000 colors or preset color modes.
- Modes: Choose from various dynamic modes (e.g., flashing, fading, music sync).
- Timers: Set schedules for the lights to turn on or off automatically.

Image: Adjustable RGB Light Strips with App Control.
Description: This image illustrates the versatility of the adjustable RGB light strips, showing the dresser with lights off and then illuminated in various colors (purple, red, green, cyan, blue). Icons indicate features like timing function, custom style, over 60,000 colors, mic mode, music mode, and app control.
2. Charging Station Usage
- AC Outlets: Plug in standard electronic devices (e.g., lamps, laptops) into the 120V/12A AC outlets.
- USB Ports: Connect USB-powered devices (e.g., smartphones, tablets) to the 5V/2A USB-A ports.
- Type-C Port: Use the fast-charging Type-C port for compatible devices.
- Power: Ensure the dresser's power cord is plugged into a wall outlet for the charging station to function.
3. Drawer Usage
The drawers are equipped with smooth metal slides for easy opening and closing. Avoid forcing drawers if they feel stuck. Distribute weight evenly within drawers to prevent strain on the slides.

Image: 9 Storage Drawers with Wide Desktop.
Description: This aerial view shows the dresser with all nine drawers partially open, revealing neatly folded clothes and various items stored inside. The wide desktop surface is also visible, holding decorative items like books, vases, and a lamp.
Maintenance
- Cleaning Surfaces: Wipe the dresser surfaces with a soft, damp cloth. Avoid abrasive cleaners or harsh chemicals that can damage the finish.
- Drawer Care: Periodically check drawer slides for debris and clean if necessary. Do not overload drawers.
- Electrical Components: Keep the LED light strip and charging station free from dust. Do not use liquid cleaners directly on electrical parts.
- Hardware Check: Periodically check all screws and fasteners to ensure they remain tight. Retighten as needed.
- Anti-Tip Device: Regularly inspect the anti-tip device to ensure it is securely attached to both the dresser and the wall.
Troubleshooting
LED Lights Not Working
- Check Power: Ensure the LED power adapter is securely plugged into an outlet and the LED controller.
- Controller Connection: Verify all connections between the LED strip, controller, and power adapter are firm.
- App Connection: If using the app, ensure Bluetooth is enabled on your device and it's properly paired with the controller.
Charging Station Not Functioning
- Check Power: Ensure the dresser's main power cord is securely plugged into a working wall outlet.
- Device Compatibility: Confirm the device you are trying to charge is compatible with the port (e.g., USB-C for fast charging).
- Overload: Unplug some devices to see if an overload has tripped an internal safety mechanism.
Drawers Sticking or Not Closing Smoothly
- Obstruction: Check for items inside the drawer or behind it that might be blocking movement.
- Alignment: Ensure the drawer slides are properly aligned on both the drawer and the dresser frame.
- Overload: Reduce the weight in the drawer if it is overloaded.
- Hardware: Check that all screws securing the drawer slides are tight.
Specifications
| Model Number | MHK_388Q |
| Overall Dimensions (W x D x H) | 63.0" x 15.2" x 32.0" |
| Drawer Interior Dimensions (W x D x H) | 20.5" x 11.8" x 6.4" |
| Material | Engineered Wood |
| Number of Drawers | 9 |
| Top Surface Weight Capacity | 300 lbs (approx.) |
| Charging Station Output | 2x AC 120V/12A, 2x USB 5V/2A, 1x Type-C |

Image: Product Dimensions.
Description: This diagram provides detailed measurements of the Garvee 9-drawer dresser, including overall width (63.0"), depth (15.2"), height (32.0"), and individual drawer interior dimensions (20.5"W x 11.8"D x 6.4"H).
Warranty and Support
Garvee products are manufactured with quality and care. This product comes with a standard manufacturer's warranty against defects in materials and workmanship. For specific warranty details, claims, or technical support, please refer to the warranty card included with your purchase or visit the official Garvee website.
For assistance, please contact Garvee Customer Service:
- Website: Visit the Garvee Store on Amazon
- Email: Refer to your purchase documentation for direct contact email.
