
Introduction
Thank you for choosing the Patiowell 8x4 FT Outdoor Storage Shed. This manual provides essential information for the safe assembly, operation, and maintenance of your new storage shed. Please read all instructions carefully before beginning assembly and retain this manual for future reference.
Safety Information
- Always wear appropriate safety gear, including gloves and eye protection, during assembly.
- Ensure the assembly area is clear of obstructions and children.
- Assemble the shed on a firm, level surface.
- Securely anchor the shed to the ground after assembly to prevent wind damage.
- Do not store flammable liquids or hazardous materials inside the shed.
- Keep doors closed and locked when not in use to prevent unauthorized access and protect contents.
- This shed is designed for storage purposes only. Do not use it as a dwelling or play structure.
Package Contents
Before starting assembly, verify that all components listed below are present and undamaged. If any parts are missing or damaged, please contact customer support.
- Metal Panels (Walls, Roof, Doors)
- Frame Components (Beams, Supports)
- Hardware Kit (Screws, Nuts, Washers)
- Lockable Latch Mechanism
- Screw Protection Caps
- Corner Protection Caps
- Installation and Usage Manual (this document)
- Tool Kit (basic assembly tools)
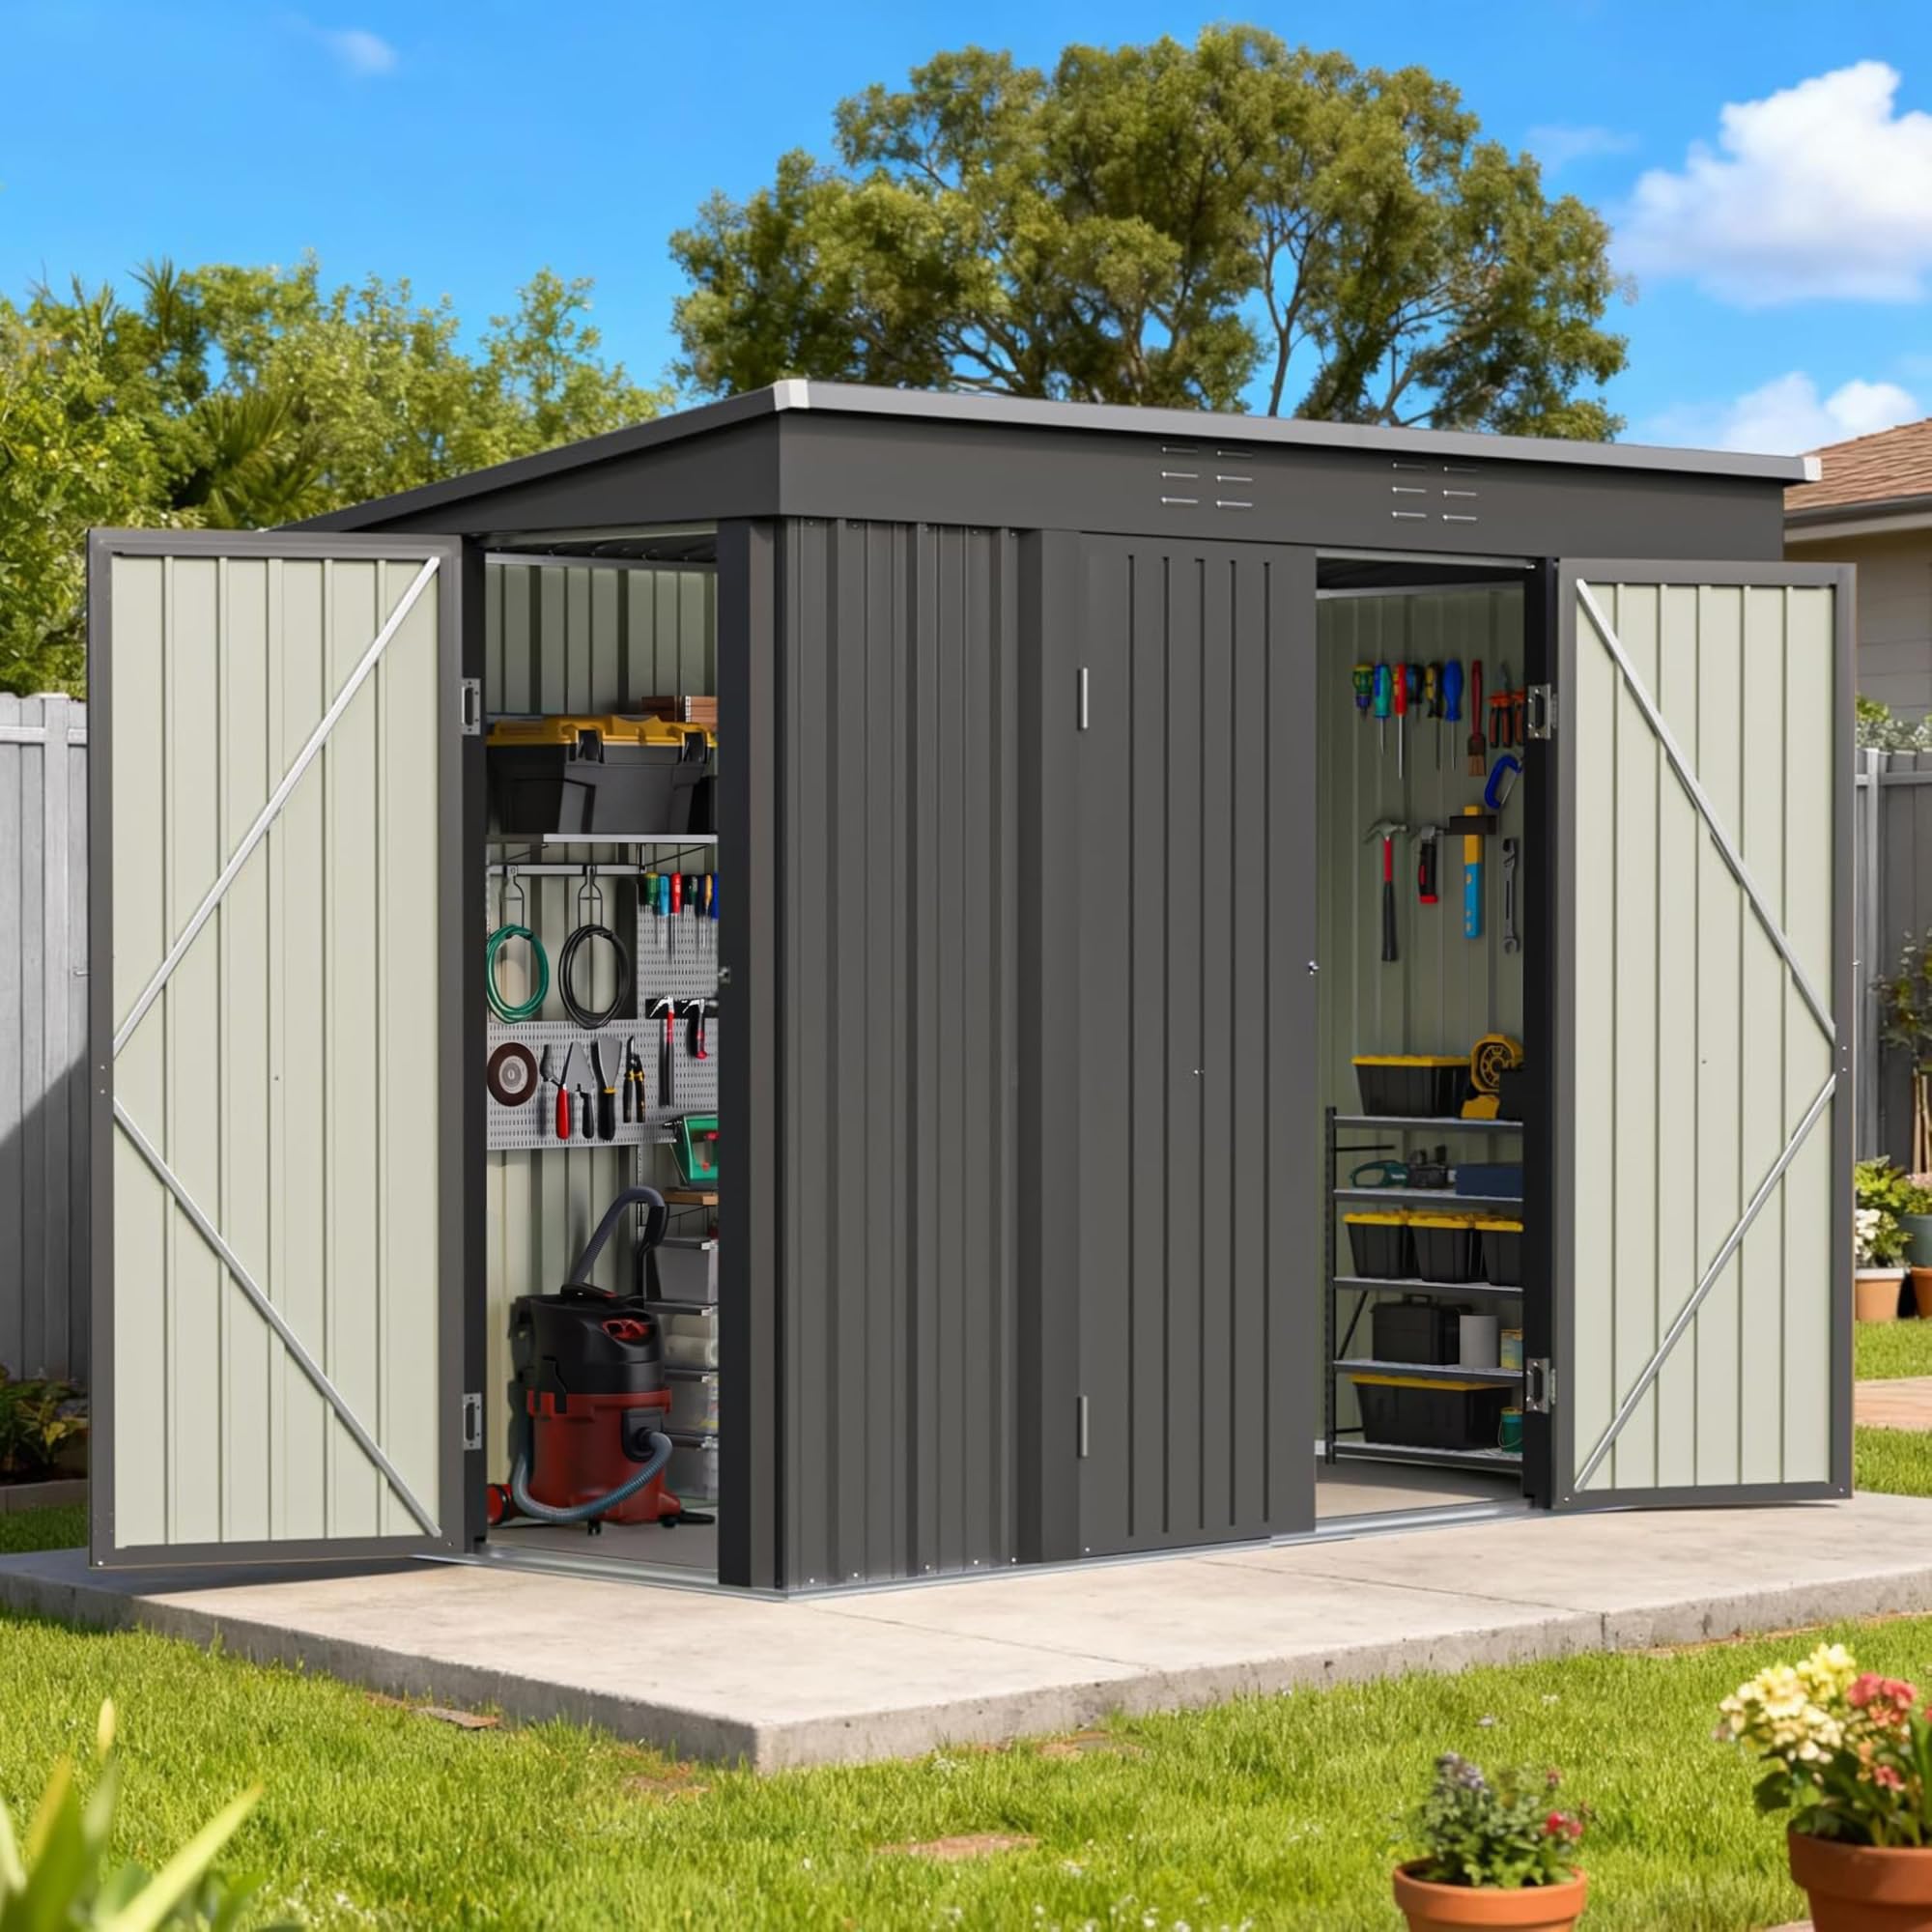
Image: Overview of the Patiowell 8x4 FT Outdoor Storage Shed, showcasing its overall design and size.
Setup and Assembly
Assembly requires at least two people. Follow the detailed step-by-step instructions provided in the included manual. Ensure all components are correctly oriented before tightening screws.
- Site Preparation: Choose a flat, level surface for the shed. A concrete slab or a well-compacted gravel base is recommended for optimal stability and drainage.
- Unpacking and Inspection: Carefully unpack all components. Each part is labeled. Inspect for any damage.
- Protective Film Removal: Many panels come with a protective plastic film. This film must be removed from all panels before assembly. This process can be time-consuming.
- Base Assembly: Assemble the base frame first, ensuring it is square and level. This is crucial for the alignment of all subsequent panels.
- Wall Panel Installation: Attach the wall panels to the base frame, following the numerical order in the manual. Secure them with the provided screws and hardware.
- Door Frame Assembly: Assemble the door frames and attach them to the designated wall sections.
- Roof Assembly: Install the roof support beams and then attach the roof panels. Ensure the sloped roof design is correctly oriented for water drainage.
- Door Installation: Hang the triple doors onto their hinges. Adjust as necessary to ensure smooth operation and proper alignment for locking.
- Finishing Touches: Install the lockable latch, screw protection caps, and corner protection caps.
- Anchoring: Securely anchor the shed to the ground using appropriate anchoring hardware (not always included, may need to be purchased separately based on your foundation type). This prevents the shed from being moved or damaged by strong winds.
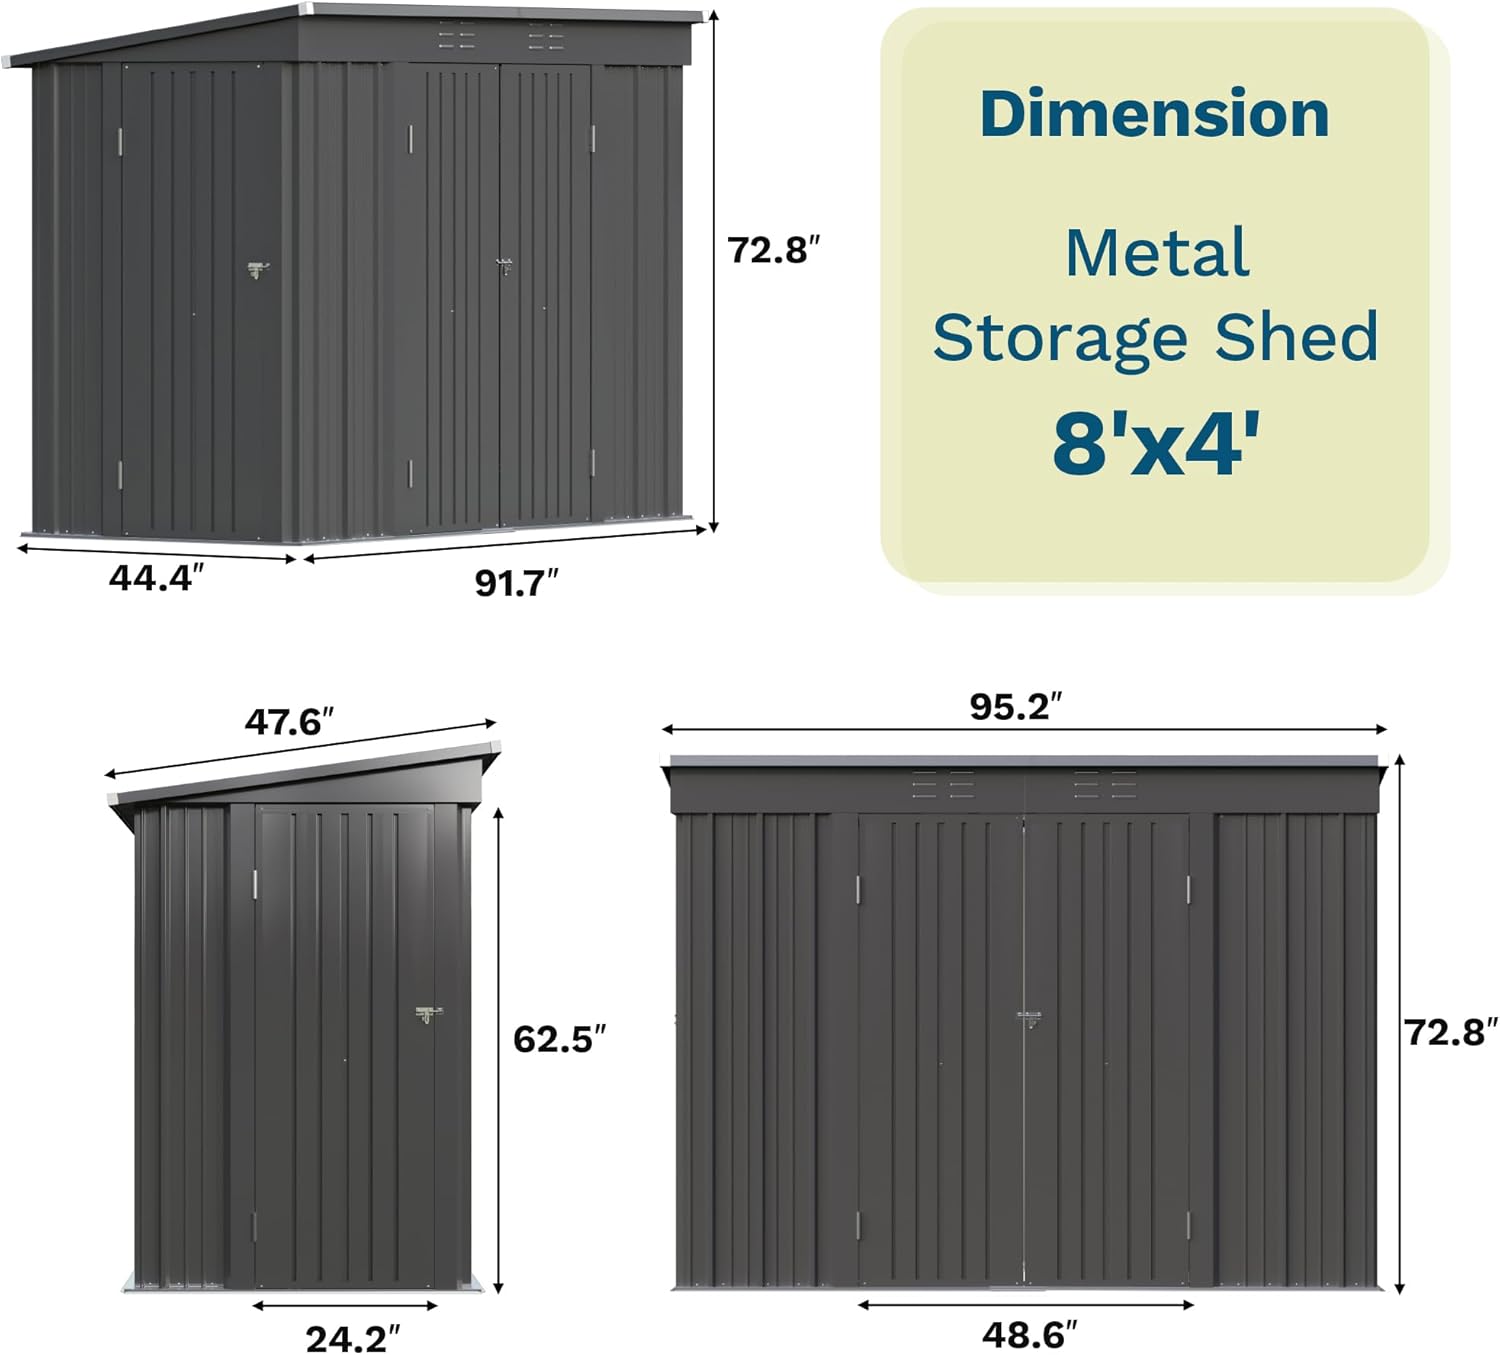
Image: Diagram illustrating the dimensions of the 8x4 FT storage shed, including height, width, and depth measurements.

Image: The Patiowell storage shed with its triple doors fully open, demonstrating wide access for large items.
Operating Instructions
Door Operation
- The shed features a triple-door design for flexible access.
- To open, unlatch the lockable mechanism and pull the doors outwards.
- For larger items, all three doors can be opened simultaneously.
- For smaller items, opening a single door can help minimize dust entry.
- Ensure doors are fully closed and latched to protect contents from weather and secure them.
Ventilation
- The shed is equipped with four air vents located near the roofline.
- These vents promote air circulation, helping to reduce condensation and maintain a dry interior environment.
- Do not block these vents.

Image: Interior view of the storage shed, showing ample space and potential for organizing tools and equipment with shelving.

Image: Close-up of key shed features, including the four air vents for circulation, the lockable metal latch for security, and protective caps for screws and corners.
Maintenance
- Cleaning: Clean the exterior of the shed periodically with mild soap and water. Avoid abrasive cleaners or harsh chemicals that could damage the finish.
- Drainage: Ensure the area around the shed is clear of debris to allow for proper water drainage from the sloped roof.
- Inspection: Regularly inspect the shed for any loose screws, damaged panels, or signs of rust. Tighten fasteners as needed.
- Lubrication: Periodically lubricate door hinges and the latch mechanism to ensure smooth operation.
- Anchoring: Verify that the shed remains securely anchored to the ground, especially after severe weather.

Image: View of the shed's sloped roof during rainfall, demonstrating its design for rapid water drainage.
Troubleshooting
| Problem | Possible Cause | Solution |
|---|---|---|
| Doors do not align or close properly. | Uneven base; loose hinges; incorrect door panel installation. | Ensure the shed base is perfectly level. Check and tighten all hinge screws. Re-adjust door panels if necessary. |
| Water leakage inside the shed. | Improperly sealed panels; blocked roof drainage; damaged roof. | Verify all roof and wall panels are securely fastened and overlapping correctly. Clear any debris from the roof and surrounding area. Inspect roof for damage. |
| Shed feels unstable or wobbly. | Not properly anchored; loose frame connections; uneven ground. | Ensure the shed is securely anchored to a solid foundation. Tighten all frame screws. Confirm the ground beneath the shed is level. |
| Difficulty removing protective film. | Film adhered tightly due to heat or time. | Use a plastic scraper or your fingernail to lift an edge. Peel slowly and steadily. Warm water can sometimes help loosen stubborn film. |
Specifications
| Feature | Detail |
|---|---|
| Model Number | PS25-1023-BK-3 |
| Material | Metal (Steel) |
| Color | Black |
| Product Dimensions (D x W x H) | 91.7"D x 44.4"W x 72.8"H (Approx. 8x4 FT footprint) |
| Door Style | Triple Hinged Doors |
| Water Resistance Level | Water Resistant |
| Ventilation | 4 Air Vents |
Warranty and Support
Patiowell offers a 30-day easy return policy for this product. For any questions, missing parts, or assistance with assembly, please contact Patiowell customer support. Refer to your purchase documentation for specific contact details.
Customer Support: For assistance, please visit the Patiowell Store on Amazon or refer to the contact information provided with your purchase.


