
1. Introduction
This manual provides detailed instructions for the assembly, operation, and maintenance of your PRAISUN L Shaped Gaming Desk with LED Lights and Power Outlets. Please read this manual thoroughly before assembly and use to ensure proper function and safety. Keep this manual for future reference.
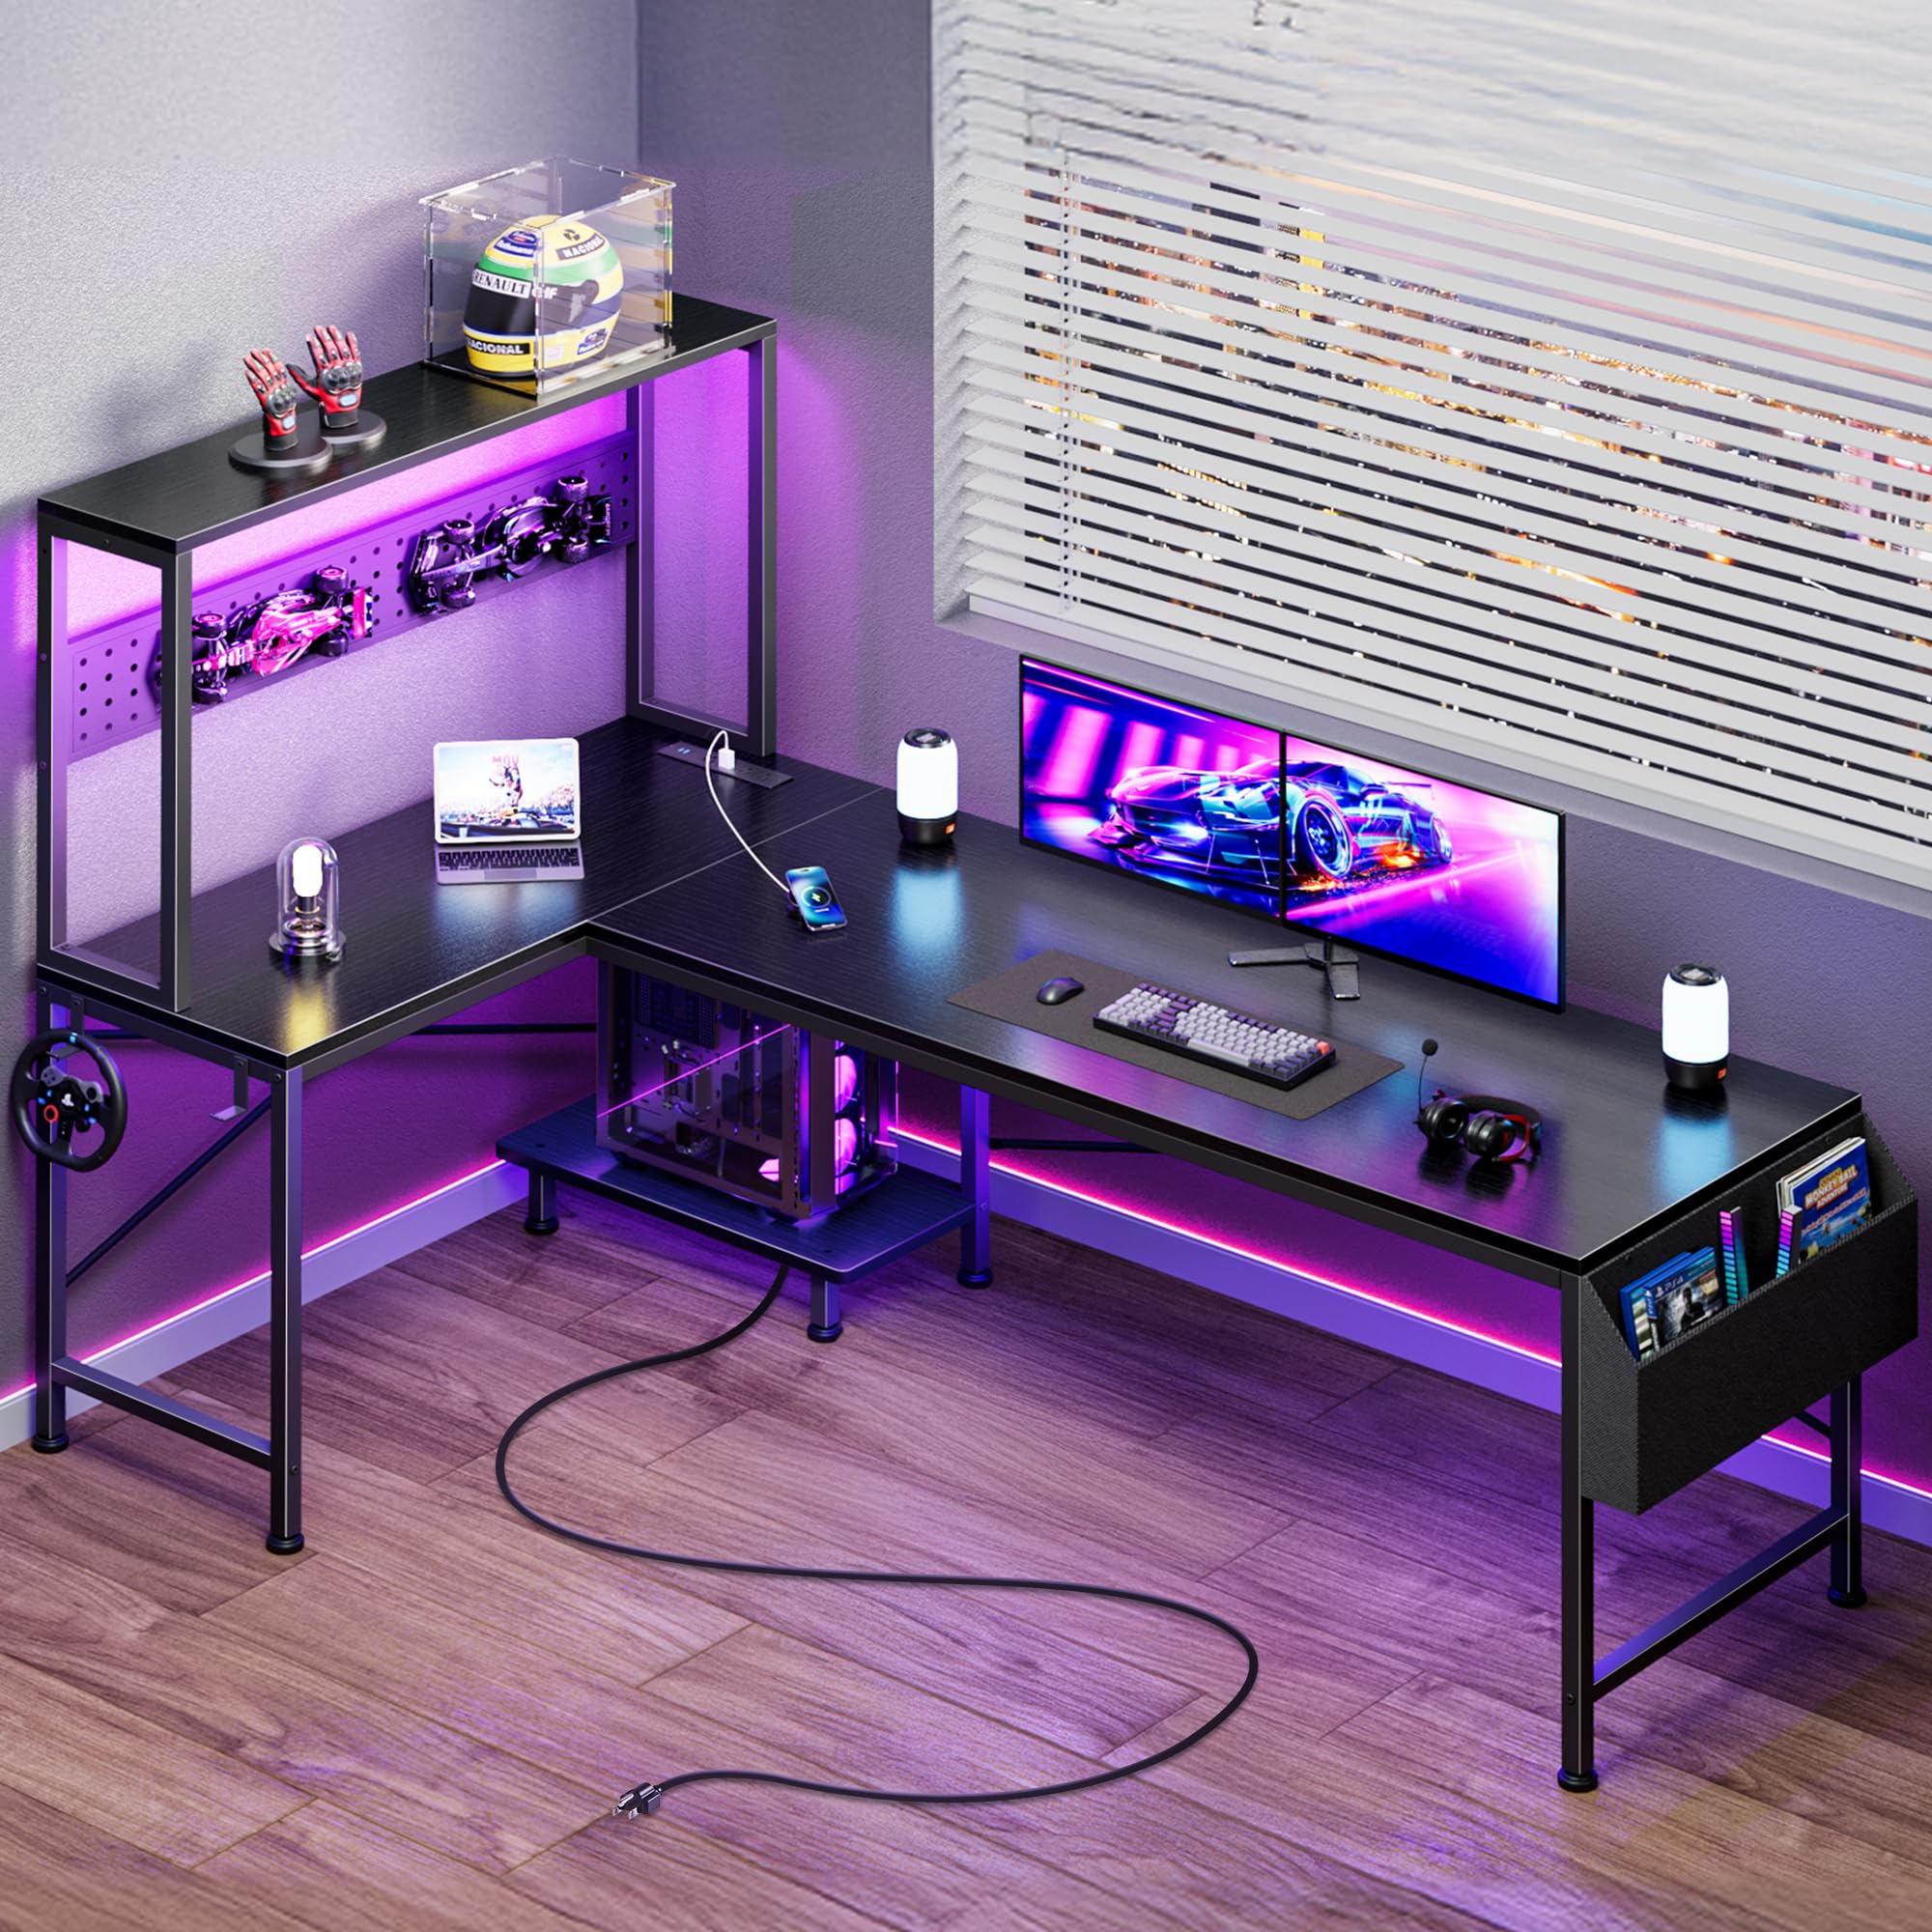
Image 1.1: Overview of the PRAISUN L Shaped Gaming Desk in Black.
Product Overview Video
Video 1.1: This video provides a visual overview of the L Shaped Gaming Desk, highlighting its key features such as LED lights and power outlets. It demonstrates the desk's design and functionality.
2. Safety Information
Please observe the following safety precautions to prevent injury or damage to the product:
- Ensure all parts are present and undamaged before assembly. Do not proceed with assembly if any parts are missing or damaged.
- Assemble the desk on a soft, clean surface to prevent scratches.
- Tighten all screws and bolts securely, but do not overtighten. Periodically check and retighten fasteners.
- Do not exceed the maximum weight capacity of the desk.
- Keep children and pets away during assembly. Small parts can be a choking hazard.
- Ensure the power outlets are connected to a grounded power source. Do not overload the power strip.
- Avoid exposing the LED lights and electrical components to water or excessive moisture.
3. Package Contents
Verify that all components listed below are included in your package. If any parts are missing or damaged, please contact customer support.
Desk Components
- Desktop Panels (L-shaped sections)
- Metal Frame Legs and Support Bars
- Top Shelf
- Pegboard
- Built-in Power Outlet Strip (4 AC, 2 USB, 1 Type-C)
- LED Light Strip with Controller
- Adjustable CPU Stand
- Side Fabric Bag
- Headphone Hooks (2)
Hardware & Tools
- Screws, bolts, and washers (various sizes)
- Allen wrench / Hex key
- Screwdriver
- Instruction Manual
4. Setup & Assembly
Follow these steps carefully for proper assembly. It is recommended to have two people for assembly.
4.1 Desk Dimensions and Reversible Installation
The desk measures 61 inches in width, 39.4 inches in depth, and 58.3 inches in height (including the top shelf). The L-shaped configuration is reversible, allowing you to choose the orientation that best suits your space.

Image 4.1: This diagram illustrates the overall dimensions of the desk and shows how the L-shape can be reversed during assembly to fit different room layouts.
4.2 Frame Assembly
- Unpack all components and lay them out on a protected surface.
- Assemble the main metal frame sections according to the provided diagrams, ensuring all connections are secure.
- Attach the desktop panels to the assembled frame. Ensure proper alignment before tightening all screws.
4.3 Pegboard Installation
The pegboard can be installed in various configurations to optimize your workspace.
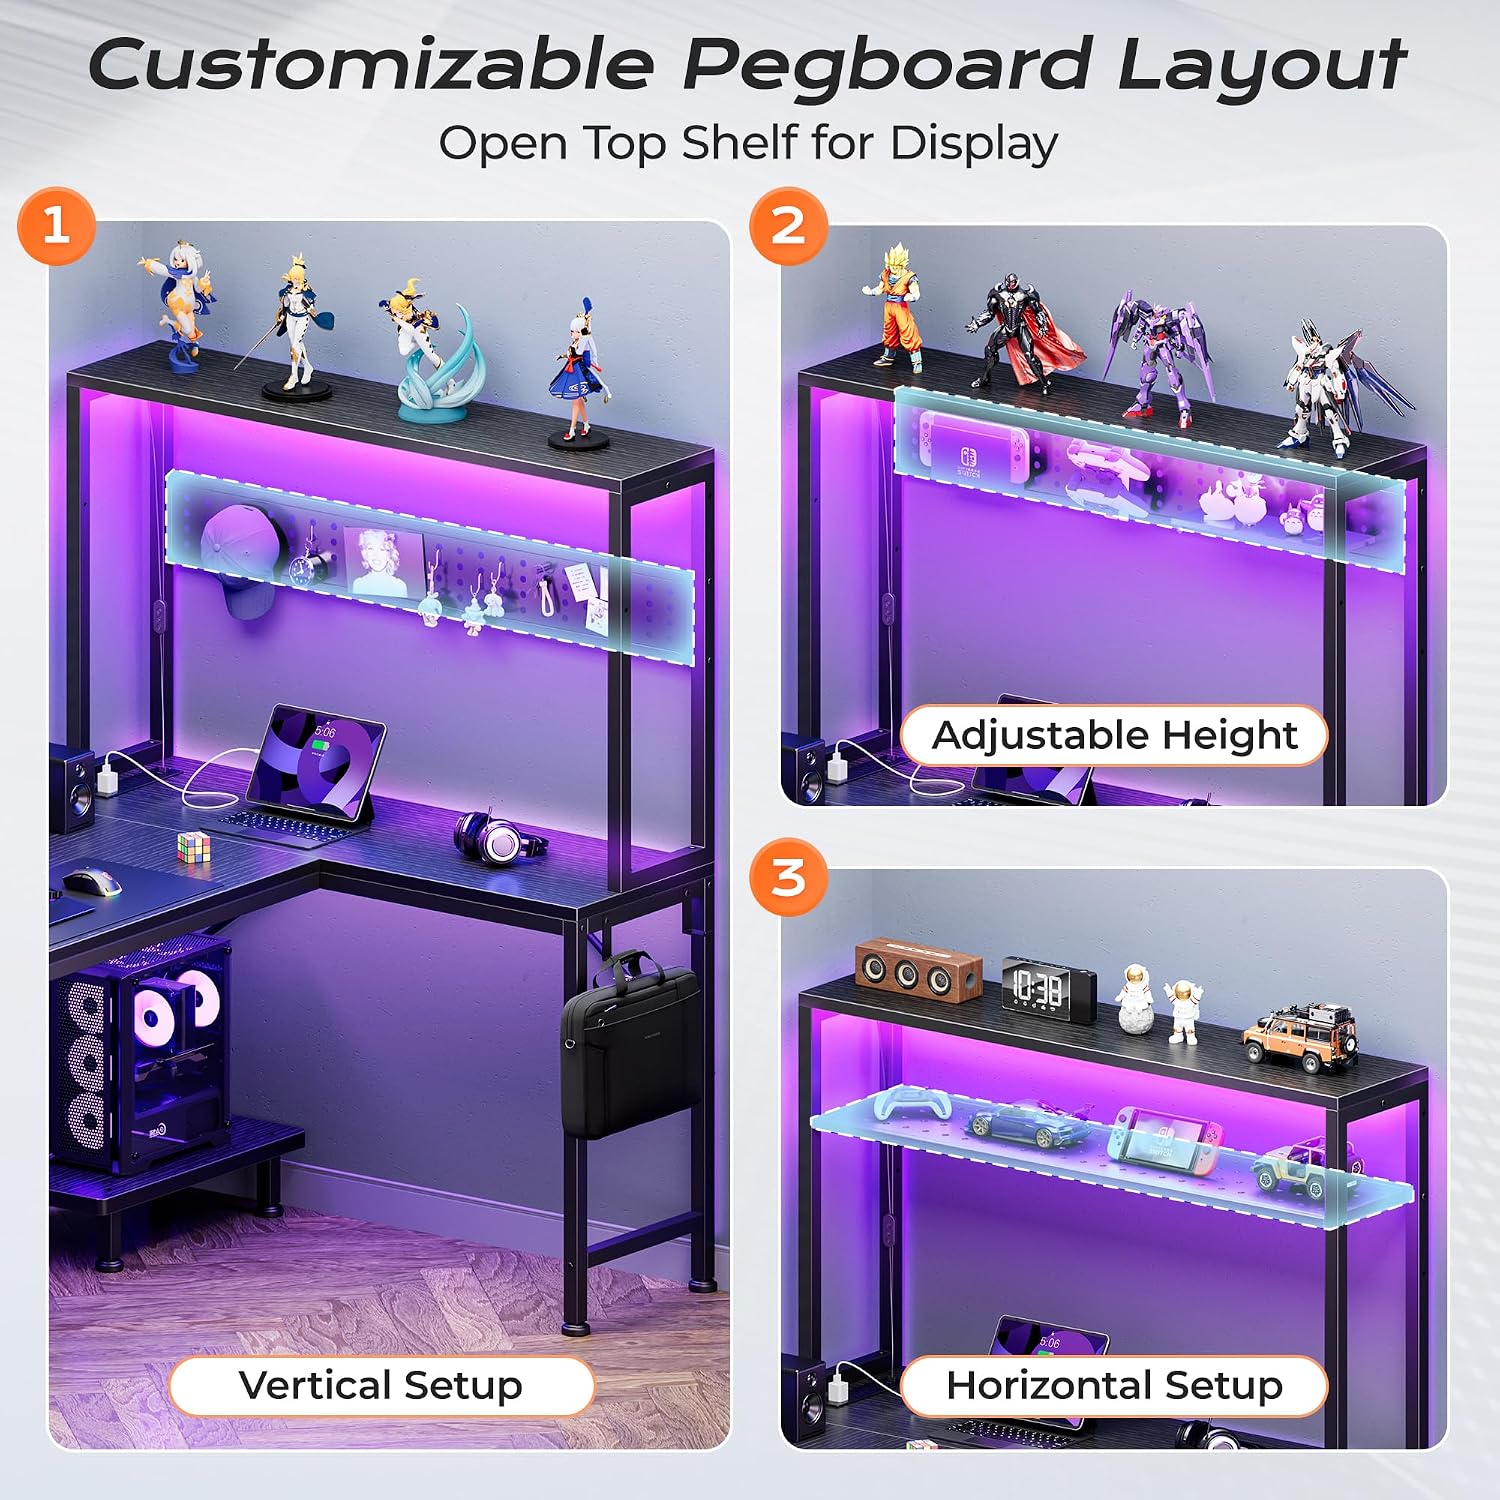
Image 4.2: This image displays three pegboard installation options: vertical setup, adjustable height, and horizontal setup, allowing for flexible organization of accessories.
- Decide on your preferred pegboard orientation (vertical or horizontal) and height level (3 adjustable levels).
- Secure the pegboard to the designated frame sections using the provided hardware.
4.4 Storage Solutions Installation
Install the additional storage features to enhance organization.

Image 4.3: This image highlights the desk's storage features: two headphone hooks, an adjustable CPU holder with three positions, and a side storage pocket for documents or magazines.
- Attach the two headphone hooks to the desired locations on the desk frame.
- Place the adjustable CPU stand in one of the three available positions on the desk legs.
- Secure the side fabric bag to the side of the desk using the provided attachments.
5. Operation
5.1 LED Lights
The desk features integrated LED lights with multiple customization options.

Image 5.1: This image details the LED light strip's features, including 60,000+ colors, 12 scene modes, adjustable speed and brightness, music sync, and control via app or manual switch.
- Manual Control: Use the inline switch to turn the lights on/off, change colors, and adjust brightness.
- App Control: Download the designated app (refer to the LED light instruction sheet for QR code or app name) to access advanced features such as 60,000+ colors, 12 scene modes, adjustable speed, brightness, and music synchronization.
5.2 Power Outlets
The desk includes a built-in power strip for convenient device charging.

Image 5.2: This image shows the integrated power strip with 4 AC outlets (125V/12A), 2 USB ports (5V/3A), and 1 Type-C port (5V/3A), designed for charging multiple devices simultaneously.
- Connect the desk's power cord to a standard wall outlet.
- Utilize the 4 AC outlets for monitors, PCs, or other electronics.
- Use the 2 USB ports and 1 Type-C port for charging phones, tablets, and other USB-powered devices.
- Do not exceed the maximum electrical load capacity of the power strip.
6. Maintenance
- Cleaning: Wipe the desk surfaces with a soft, damp cloth. Avoid harsh chemicals or abrasive cleaners that may damage the finish.
- Fasteners: Periodically check all screws and bolts to ensure they remain tight. Retighten as necessary to maintain stability.
- Electrical Components: Keep the power outlets and LED lights free from dust and debris. Do not attempt to repair electrical components yourself.
- General Care: Avoid placing hot items directly on the desk surface. Use coasters for drinks.
7. Troubleshooting
| Problem | Possible Cause | Solution |
|---|---|---|
| Desk is wobbly or unstable. | Loose fasteners; uneven floor. | Ensure all screws and bolts are tightened. Adjust the leveling feet on the bottom of the desk legs. |
| LED lights are not working. | Power connection issue; faulty LED strip; controller malfunction. | Check if the desk's main power cord is plugged in. Ensure the LED strip is properly connected to the controller and power source. Try using the manual switch. If issues persist, contact support. |
| Power outlets are not providing power. | Desk not plugged in; circuit breaker tripped; overloaded circuit. | Verify the desk's main power cord is securely plugged into a working wall outlet. Check your home's circuit breaker. Avoid overloading the power strip with too many high-power devices. |
| Pegboard accessories do not fit. | Incorrect accessory size. | Ensure you are using standard pegboard accessories compatible with the pegboard hole size. |
8. Specifications
| Feature | Detail |
|---|---|
| Model | B0GYQSJZXC |
| Brand | PRAISUN |
| Dimensions (D x W x H) | 39.4" x 61" x 29.5" (Desk Height) / 58.3" (Overall Height with Shelf) |
| Color | Black |
| Material | Engineered Wood, Metal Frame |
| Power Outlets | 4 AC (125V/12A), 2 USB (5V/3A), 1 Type-C (5V/3A) |
| LED Lights | RGB, 60,000+ colors, 12 scene modes, adjustable speed/brightness, music sync, app/manual control |
| Special Features | Reversible L-shape, 3-level adjustable pegboard, adjustable CPU stand, side fabric bag, 2 headphone hooks |
| Assembly Required | Yes (All tools included) |
9. Warranty & Support
PRAISUN offers a 3-year service for this product, ensuring quality assurance. For any questions, missing parts, or assistance with assembly and operation, please contact PRAISUN customer support.
Contact Information:
- Visit the official PRAISUN Store on Amazon: PRAISUN Store
- Refer to your purchase documentation for specific customer service contact details.