
Introduction
Welcome to the AZDOME M350 4-Channel Dash Cam user manual. This guide provides detailed instructions for the installation, operation, and maintenance of your new dash cam. Please read this manual thoroughly before using the product to ensure proper functionality and safety. The AZDOME M350 is designed to provide comprehensive vehicle surveillance with its 4-channel recording capabilities and advanced features like Apple Find My integration and 5GHz Wi-Fi.
Product Overview
Key Features
- 4-Channel Continuous Recording: Simultaneously records front, rear, right side, and left side views of your vehicle.
- Crystal Clear Resolution: Front camera records in 2K resolution, while rear and side cameras record in 1080P Full HD.
- Apple Find My Integration: Track your vehicle's real-time location using the Apple "Find My" app on your Apple devices.
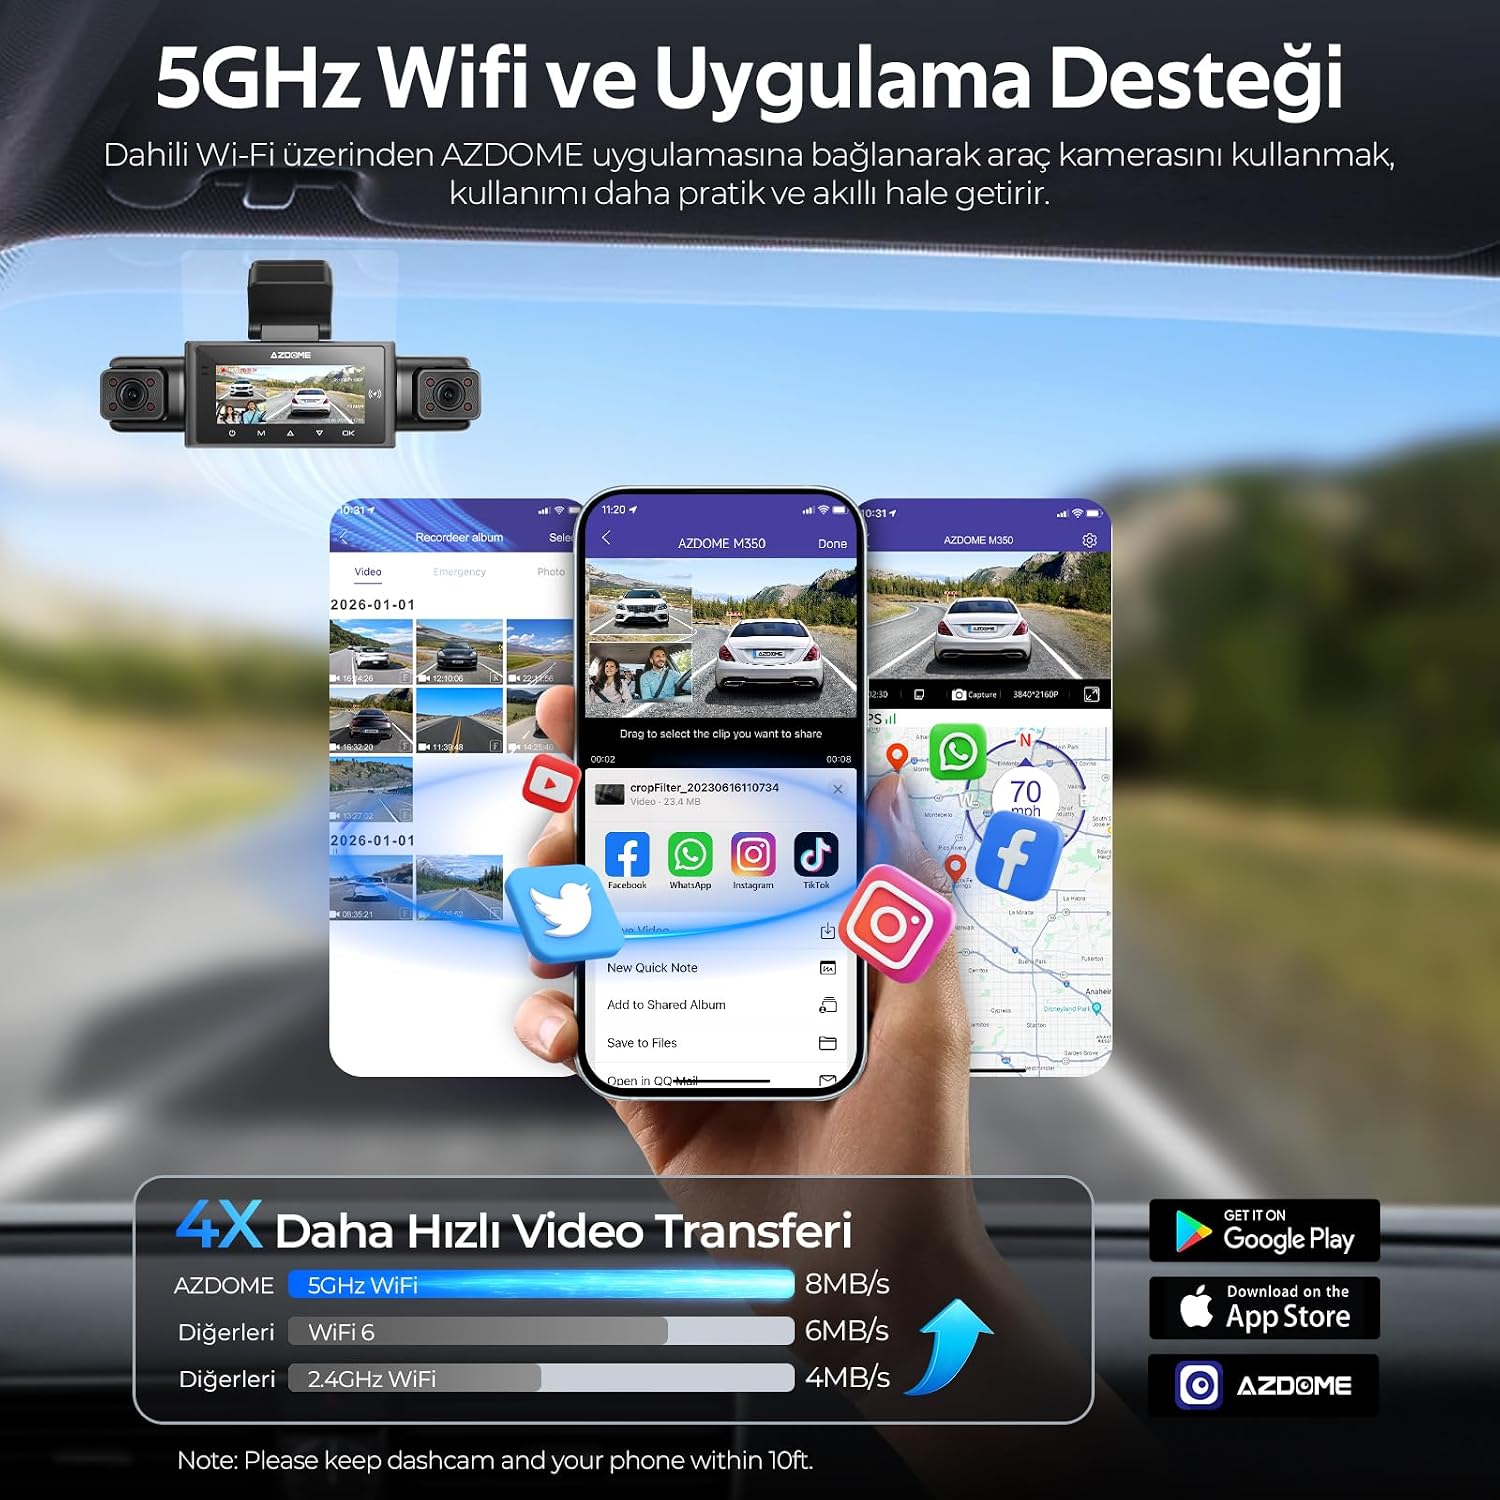
- 5GHz Ultra-Fast Wi-Fi: Provides up to 4 times faster video transfer speeds compared to traditional Wi-Fi, accessible via the AZDOME app.
- Built-in GPS and Route Tracking: Records driving routes, speed data (MPH/KMH), altitude information, and precise location coordinates directly onto video footage.
- Wide Viewing Angles: Front and rear cameras offer a 150° view, with side cameras designed to minimize blind spots.
Package Contents
Before installation, please verify that all the following items are present in your product package:
- AZDOME M350 Main Unit (includes front and side cameras)
- Rear Camera
- 64 GB Memory Card
- Type-C USB Car Charger
- 3M Bracket and Spare Stickers
- Electrostatic Sticker (2 pieces)
- Installation Auxiliary Tools
- User Manual

Setup
1. Prepare for Installation
- Clean the windshield area where the dash cam will be mounted. Ensure it is free of dust and grease for optimal adhesion.
- Apply an electrostatic sticker to the chosen area on the windshield. This helps protect your windshield and makes removal easier.
2. Mount the Main Unit
- Attach the 3M bracket to the main unit.
- Carefully peel off the protective film from the 3M adhesive on the bracket.
- Press the main unit firmly onto the electrostatic sticker on your windshield, ensuring it is centered and does not obstruct your view. Hold for at least 30 seconds to secure.

3. Install the Rear Camera
- Mount the rear camera on the rear windshield, typically above the license plate or inside the vehicle, ensuring a clear view.
- Route the rear camera cable discreetly along the vehicle's headliner and A-pillars to the main unit. Use the provided installation tools to tuck the cable.
- Connect the rear camera cable to the designated port on the main unit.

4. Insert the Memory Card
- Locate the memory card slot on the main unit.
- Insert the provided 64GB memory card with the gold contacts facing the correct direction until it clicks into place.
- It is recommended to format the memory card within the dash cam's settings before first use.
5. Power Connection
- Connect the Type-C USB car charger to the main unit's power input port.
- Plug the other end of the car charger into your vehicle's 12V power outlet (cigarette lighter socket).
- Route the power cable neatly to avoid interference with driving.
- The dash cam will automatically power on and begin recording when your vehicle starts.
Operating Instructions
Basic Operation
- Power On/Off: The device powers on automatically with vehicle ignition and powers off when the ignition is turned off. You can also manually power it on/off using the power button.
- Recording: Continuous loop recording starts automatically when the device is powered on. Emergency recordings are triggered by sudden impacts (G-sensor) and are locked to prevent overwriting.
- Screen Display: The screen displays live views from the cameras. You can switch between different camera views or display all four simultaneously.
AZDOME App Connection (5GHz Wi-Fi)
The AZDOME M350 features 5GHz Wi-Fi for fast connection to your smartphone via the AZDOME app. This allows for live view, video playback, download, and settings adjustment.
- Download the "AZDOME" app from the Apple App Store or Google Play Store.
- Turn on the Wi-Fi function on your AZDOME M350 (refer to the device's on-screen menu).
- On your smartphone, go to Wi-Fi settings and connect to the AZDOME dash cam's Wi-Fi network (SSID and password will be displayed on the dash cam screen).
- Open the AZDOME app. You can now access live footage, browse recorded videos, download files to your phone, and configure dash cam settings.
Apple Find My Integration
The AZDOME M350 is the world's first 4-channel dash cam to support the Apple Find My network, allowing you to locate your vehicle globally.
- Ensure your AZDOME M350 is properly powered and connected.
- On your Apple device (iPhone, iPad, Mac), open the "Find My" app.
- Your AZDOME M350 will appear as an item in the "Find My" app, allowing you to view its current location on a map.
- You can use this feature to track your parked vehicle or locate it if it has been moved.


GPS and Route Tracking
The integrated GPS module records precise driving data, which can be viewed alongside your video footage.
- Data Recorded: Driving route, speed (MPH/KMH), altitude, and exact GPS coordinates.
- Viewing Data: This information is embedded directly into the video files and can be accessed using the AZDOME app or a compatible GPS player software on a computer.

Maintenance
- Cleaning the Lenses: Regularly clean the camera lenses with a soft, lint-free cloth to ensure clear video quality. Avoid abrasive materials.
- Memory Card Management:
- Format the memory card monthly to maintain optimal performance and prevent data corruption.
- Replace the memory card every 6-12 months, depending on usage, as memory cards have a limited lifespan for continuous writing.
- Firmware Updates: Check the AZDOME official website or app periodically for firmware updates. Keeping your dash cam's firmware updated ensures access to the latest features and bug fixes.
- Temperature Considerations: Avoid exposing the dash cam to extreme temperatures for extended periods. If parked in direct sunlight, consider removing the dash cam or using a sunshade.
Troubleshooting
If you encounter issues with your AZDOME M350, please refer to the following common problems and solutions:
- Dash Cam does not power on:
- Ensure the car charger is securely plugged into both the dash cam and the vehicle's 12V power outlet.
- Check if the vehicle's 12V power outlet is functioning (e.g., by plugging in another device).
- Try a different Type-C USB cable or car charger if available.
- Recording stops or footage is corrupted:
- Format the memory card within the dash cam's settings.
- Ensure you are using a high-speed (Class 10 or U3) memory card.
- The memory card may be full; enable loop recording or replace the card.
- The memory card may be faulty; try a new, reputable brand memory card.
- Wi-Fi connection issues:
- Ensure Wi-Fi is enabled on the dash cam.
- Make sure your smartphone is within close proximity (within 10 feet) of the dash cam.
- Restart both the dash cam and your smartphone.
- Verify you are connecting to the correct Wi-Fi network (SSID) and entering the correct password.
- Apple Find My not showing location:
- Ensure the dash cam is powered on and has a stable connection.
- Check if Location Services are enabled on your Apple device for the Find My app.
- Ensure the dash cam is within range of other Apple devices on the Find My network.
- Poor video quality:
- Clean the camera lenses thoroughly.
- Ensure the protective film has been removed from all lenses.
- Check dash cam settings for resolution and exposure.
Specifications
| Brand | AZDOME |
| Model | M350 |
| Front Camera Resolution | 2K (2560x1440P) |
| Rear/Side Camera Resolution | 1080P Full HD (1920x1080P) |
| Viewing Angle | Front/Rear 150°, Wide-angle Side Cameras |
| Wi-Fi | 5GHz |
| GPS | Built-in GPS for Route & Speed Tracking |
| Storage | Supports up to 64GB MicroSD card (64GB included) |
| Power Input | Type-C USB Car Charger (12V) |
| Included Components | Main Camera, Rear Camera, Side Cameras, 64GB Memory Card, Connection Cable, Electrostatic Tape, 3M Bracket, Car Charger, Installation Tools, User Manual |
| Manufacturer | Dongguan Lingdu Electronic Technology Co., Ltd |
Warranty and Support
The AZDOME M350 Dash Cam comes with a 2-Year Official Distributor Warranty. Please retain your proof of purchase for warranty claims.
For technical support, troubleshooting assistance, or warranty inquiries, please contact your official AZDOME distributor or visit the official AZDOME website for contact information.

