
1. Introduction
Thank you for choosing the COMHOMA Outdoor Dog Kennel with Roof. This manual provides essential information for the safe and efficient assembly, operation, and maintenance of your new dog enclosure. Please read these instructions carefully before setup and retain them for future reference.
This large metal dog enclosure is designed to provide a secure and spacious outdoor area for medium to large dogs. It features a galvanized metal frame, durable wire mesh panels, a weather-resistant roof, and a lockable gate for pet safety and comfort.
2. Safety Information
- Adult Assembly Required: This product contains small parts and requires adult assembly. Keep children and pets away during assembly.
- Proper Placement: Choose a level, stable outdoor surface for installation. Avoid placing the kennel on uneven ground or near hazards.
- Secure Installation: Ensure all connections are tightened and ground stakes are properly installed to prevent tipping or collapse.
- Regular Inspection: Periodically check the kennel for loose parts, damaged wire, or signs of wear. Repair or replace components as needed.
- Pet Supervision: While the kennel provides a secure enclosure, always supervise your pet, especially during initial use.
- Weather Conditions: The weather-resistant roof offers protection, but extreme weather conditions may require additional measures or bringing pets indoors.
- Ventilation: Ensure adequate airflow within the kennel, especially during warm weather.
3. Package Contents
Before beginning assembly, verify that all parts are present and undamaged. If any parts are missing or damaged, do not proceed with assembly. Contact customer support for assistance.
- Galvanized Metal Frame Panels
- Wire Mesh Panels
- Gate Panel with Lockable Latch
- Weather-Resistant Roof Cover
- Roof Cover Ties
- Ground Stakes
- Assembly Hardware (bolts, nuts, washers, connectors)
- Swivel Feeder with Bowls (if included in your model)
- Instruction Manual
4. Setup and Assembly
Follow these steps for proper assembly. It is recommended to have at least two adults for assembly.
4.1 Site Preparation
- Choose a flat, level, and well-drained area for the kennel.
- Clear the area of any debris, rocks, or sharp objects that could damage the kennel or injure your pet.
- Ensure there is sufficient space around the kennel for assembly and future access.
4.2 Frame Assembly
- Unpack all components and lay them out on a clean, soft surface to prevent scratches.
- Connect the vertical and horizontal frame pipes using the provided connectors and hardware. Do not fully tighten bolts until all frame sections are in place.
- Assemble the base frame first, ensuring it forms a stable rectangle or square.
- Attach the vertical support posts to the base frame.
- Install the upper frame sections, forming the top structure of the kennel.
- Once the main frame is assembled, gently tighten all bolts, ensuring the structure remains square and level.

Figure 1: Illustration of the sturdy frame, reinforced wire, and ground stakes for stability.
4.3 Wire Mesh and Gate Installation
- Attach the wire mesh panels to the assembled frame using the designated clips or ties. Ensure the mesh is taut and securely fastened to all frame sections.
- Install the gate panel. Ensure the hinges are properly aligned and the gate swings freely.
- Test the lockable latch to ensure it operates smoothly and securely.
- If your model includes a swivel feeder, install it onto the gate or designated panel according to the specific instructions provided with the feeder.

Figure 2: The large walk-in gate features a security lock for easy access and pet containment.

Figure 3: The 360-degree swivel feeder allows for convenient feeding and watering with adjustable height.
4.4 Roof Cover Installation
- Drape the weather-resistant roof cover over the top frame of the kennel.
- Align the cover so it provides maximum shade and protection.
- Secure the roof cover to the frame using the provided ties or bungee cords, ensuring a snug fit to prevent wind uplift.

Figure 4: The all-weather protection roof shields your pet from various elements.
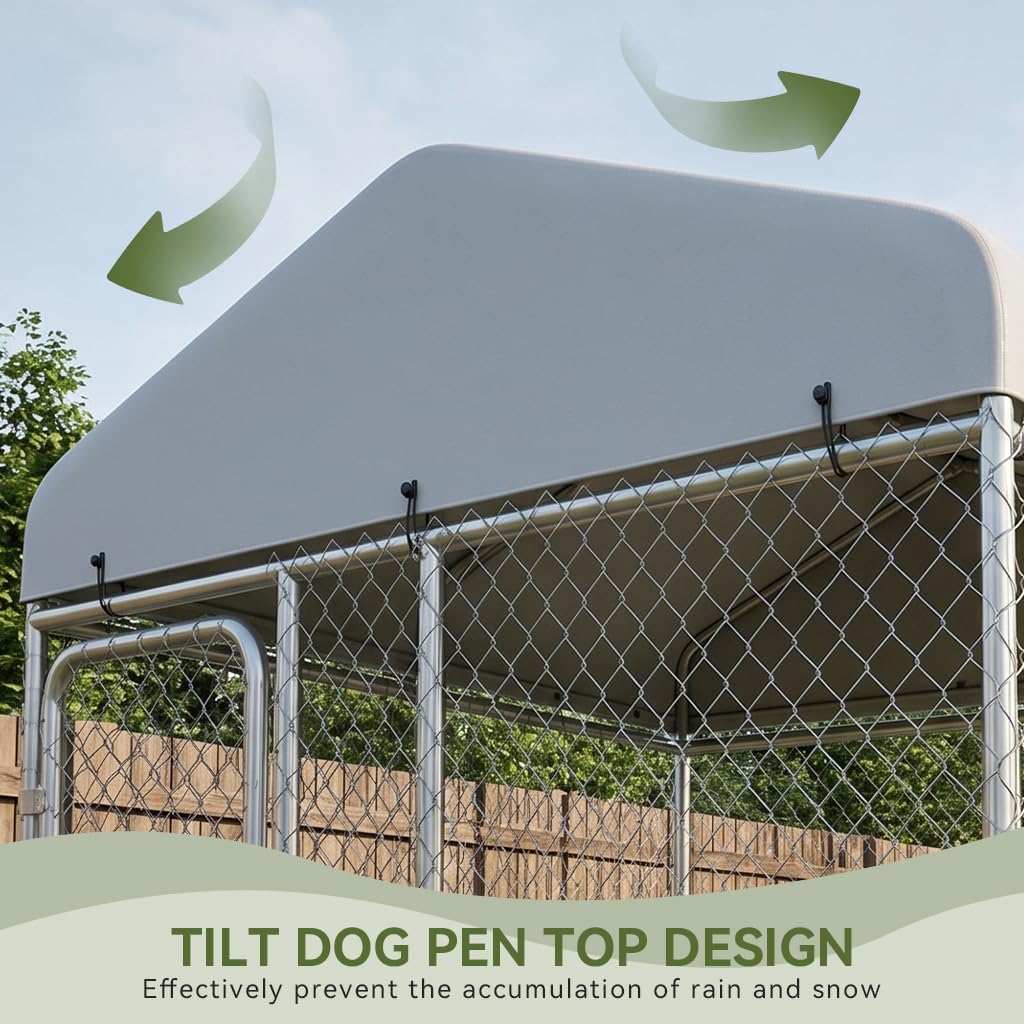
Figure 5: The tilt design of the roof helps prevent accumulation of rain and snow.
4.5 Securing to the Ground
- Once the kennel is fully assembled, use the provided ground stakes to anchor the base frame firmly into the ground. This enhances stability and prevents movement.
5. Operating Instructions (Usage)
- Pet Introduction: Allow your pet to gradually acclimate to the new enclosure. Supervise them during initial use.
- Gate Operation: Always ensure the lockable gate is securely latched when your pet is inside the kennel.
- Feeding and Watering: Utilize the swivel feeder for easy access to food and water bowls without entering the main enclosure. Adjust the height as needed for your pet.
- Space Utilization: The spacious design allows pets to move, stretch, and play comfortably. Consider adding bedding or toys for enrichment.
- Weather Protection: The roof provides shade from the sun and protection from light rain. During heavy rain, strong winds, or extreme temperatures, consider moving your pet indoors.
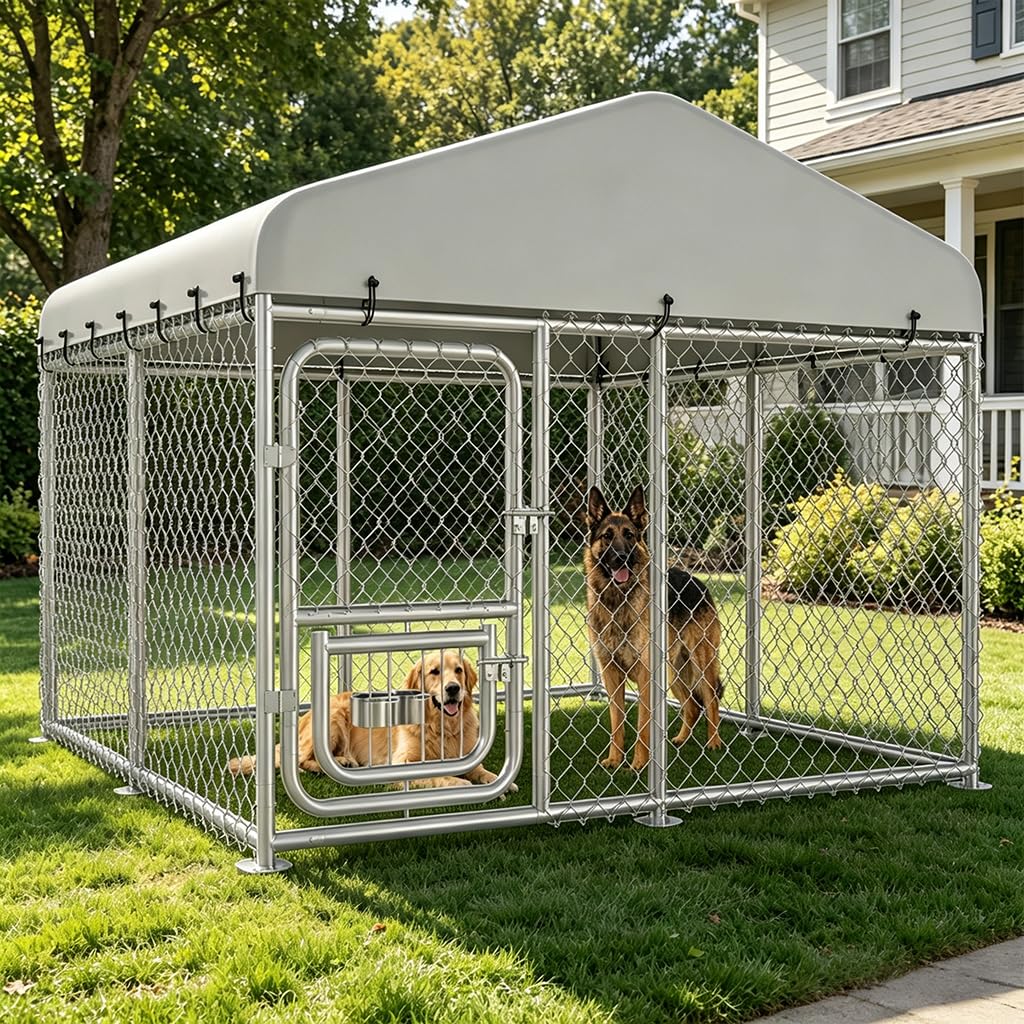
Figure 6: The spacious kennel provides ample room for pets to relax and play.
6. Maintenance
- Regular Cleaning: Clean the kennel regularly to maintain hygiene. Use pet-safe cleaning solutions and rinse thoroughly.
- Frame and Wire Inspection: Periodically inspect the galvanized metal frame and wire mesh for any signs of rust, damage, or loose connections. Tighten bolts as necessary.
- Roof Cover Care: Clean the weather-resistant roof cover with mild soap and water. Ensure it is free of debris, leaves, or standing water. Check ties for security.
- Ground Stakes: Verify that ground stakes remain firmly in place, especially after heavy rain or strong winds. Re-secure if loose.
- Swivel Feeder: Clean the food and water bowls daily. Inspect the swivel mechanism for smooth operation.
7. Troubleshooting
| Problem | Possible Cause | Solution |
|---|---|---|
| Kennel feels unstable or wobbly. | Loose connections; uneven ground; ground stakes not fully secured. | Ensure all bolts are tightened. Relocate to a level surface. Drive ground stakes deeper or add more if needed. |
| Gate does not close or latch properly. | Misaligned hinges; obstruction; damaged latch. | Check hinge alignment and adjust if necessary. Clear any debris. Inspect latch for damage and contact support if broken. |
| Roof cover sags or collects water. | Loose ties; improper alignment; excessive debris. | Re-tighten all roof ties. Adjust cover position for proper tension and tilt. Remove accumulated leaves or snow. |
| Wire mesh appears loose or damaged. | Improper installation; wear and tear; pet activity. | Ensure all mesh clips/ties are securely fastened. Inspect for broken wires and repair or replace panels if integrity is compromised. |
8. Specifications
- Model: DF-JY-GD05-7FT-FB
- Brand: COMHOMA
- Product Dimensions (L x W x H): 90" x 90" x 72" (7.5ft x 7.5ft x 6ft)
- Item Weight: 82 Pounds
- Material: Galvanized Metal (Frame), Wire Mesh, Weather-Resistant Fabric (Cover)
- Specific Uses: Outdoor Pet Enclosure
- Special Features: Durable, Lockable, Rust Resistant, Stable, Weather Resistant
- Included Components: Kennel Frame, Wire Mesh, Gate, Roof Cover, Ground Stakes, Swivel Feeder with Bowls
- Breed Recommendation: All Breed Sizes (Medium to Large Dogs)

Figure 7: Detailed dimensions of the COMHOMA Outdoor Dog Kennel.
9. Warranty and Support
COMHOMA products are designed for quality and durability. For specific warranty information, please refer to the product packaging or contact COMHOMA customer support directly.
If you encounter any issues during assembly or use, or have questions regarding your COMHOMA Outdoor Dog Kennel, our customer support team is available to assist you. Please visit the official COMHOMA website or refer to your purchase documentation for contact details.
Contact Information: Please refer to your purchase receipt or the COMHOMA official website for the most up-to-date customer support contact information.