
Loniko G7-1-WP
Loniko Smart Toilet with Bidet Built-In (Model G7-1-WP) Instruction Manual
Comprehensive guide for installation, operation, and maintenance.
Introduction
Thank you for choosing the Loniko Smart Toilet with Bidet Built-In, Model G7-1-WP. This manual provides detailed instructions for the safe and efficient installation, operation, and maintenance of your new smart toilet. Please read this manual thoroughly before use and retain it for future reference.
Important Safety Information
- Ensure all electrical connections are performed by a qualified electrician and comply with local codes.
- Do not immerse the product in water or spray water directly onto electrical components.
- Unplug the unit from the power outlet before cleaning or performing any maintenance.
- This appliance is not intended for use by persons (including children) with reduced physical, sensory or mental capabilities, or lack of experience and knowledge, unless they have been given supervision or instruction concerning use of the appliance by a person responsible for their safety.
- In case of power outage, the toilet may require manual flushing.
Package Contents
Before installation, verify that all components are present in the package:
- Smart Toilet Unit
- Remote Control
- Wax Ring
- Angle Valve
- Flange
- Widen Baby Seating (Child-friendly seat width adapter)
- Screws and Mounting Hardware
- Aroma Tablets (for aroma diffusion system)
- User Manual (this document)
- Emergency Backup Battery

Setup and Installation
This smart toilet is designed for a standard 12-inch rough-in. A step-by-step video guide is available to assist with installation. Professional installation is recommended if you are unfamiliar with plumbing or electrical work.
Pre-Installation Checklist:
- Confirm 12-inch rough-in measurement.
- Ensure a grounded electrical outlet is available near the installation area.
- Turn off the main water supply before beginning installation.
- Gather necessary tools (e.g., wrench, screwdriver, level).
Installation Steps:
- Prepare the Area: Remove the old toilet and clean the flange area.
- Install Flange and Wax Ring: Secure the new flange if necessary and place the wax ring over the drain opening.
- Position the Toilet: Carefully lower the smart toilet onto the flange, ensuring it is level.
- Secure the Toilet: Fasten the toilet to the floor using the provided screws and mounting hardware. Do not overtighten.
- Connect Water Supply: Connect the angle valve to the water supply line and then to the toilet's water inlet. Turn on the water supply and check for leaks.
- Connect Power: Plug the toilet into a grounded electrical outlet.
- Insert Aroma Tablets: Open the aroma compartment and insert the provided aroma tablets.
- Install Emergency Battery: Insert the emergency backup battery into its designated compartment.


Operating Instructions
The Loniko Smart Toilet offers various features for enhanced comfort and hygiene. Control options include an intuitive side dial and a wireless remote control.
Automatic Functions:
- Auto Open & Close: The lid automatically opens upon approach and closes upon leaving.
- Foot Sensor: A foot sensor allows for hands-free lid/seat lift and auto flush.
- Auto Flush: The toilet flushes automatically after use.


Flushing System:
- Powerful Cyclone Siphon Flush: The tankless siphonic system provides a 360° vortex flush for thorough cleaning.
- Dual-Flush: Offers 0.92 GPF (gallons per flush) and 1.28 GPF options for water efficiency.
- Emergency Backup: An emergency battery ensures flushing capability during power outages.

Bidet Functions:
- Heated Seat: The contoured seat provides adjustable warmth.
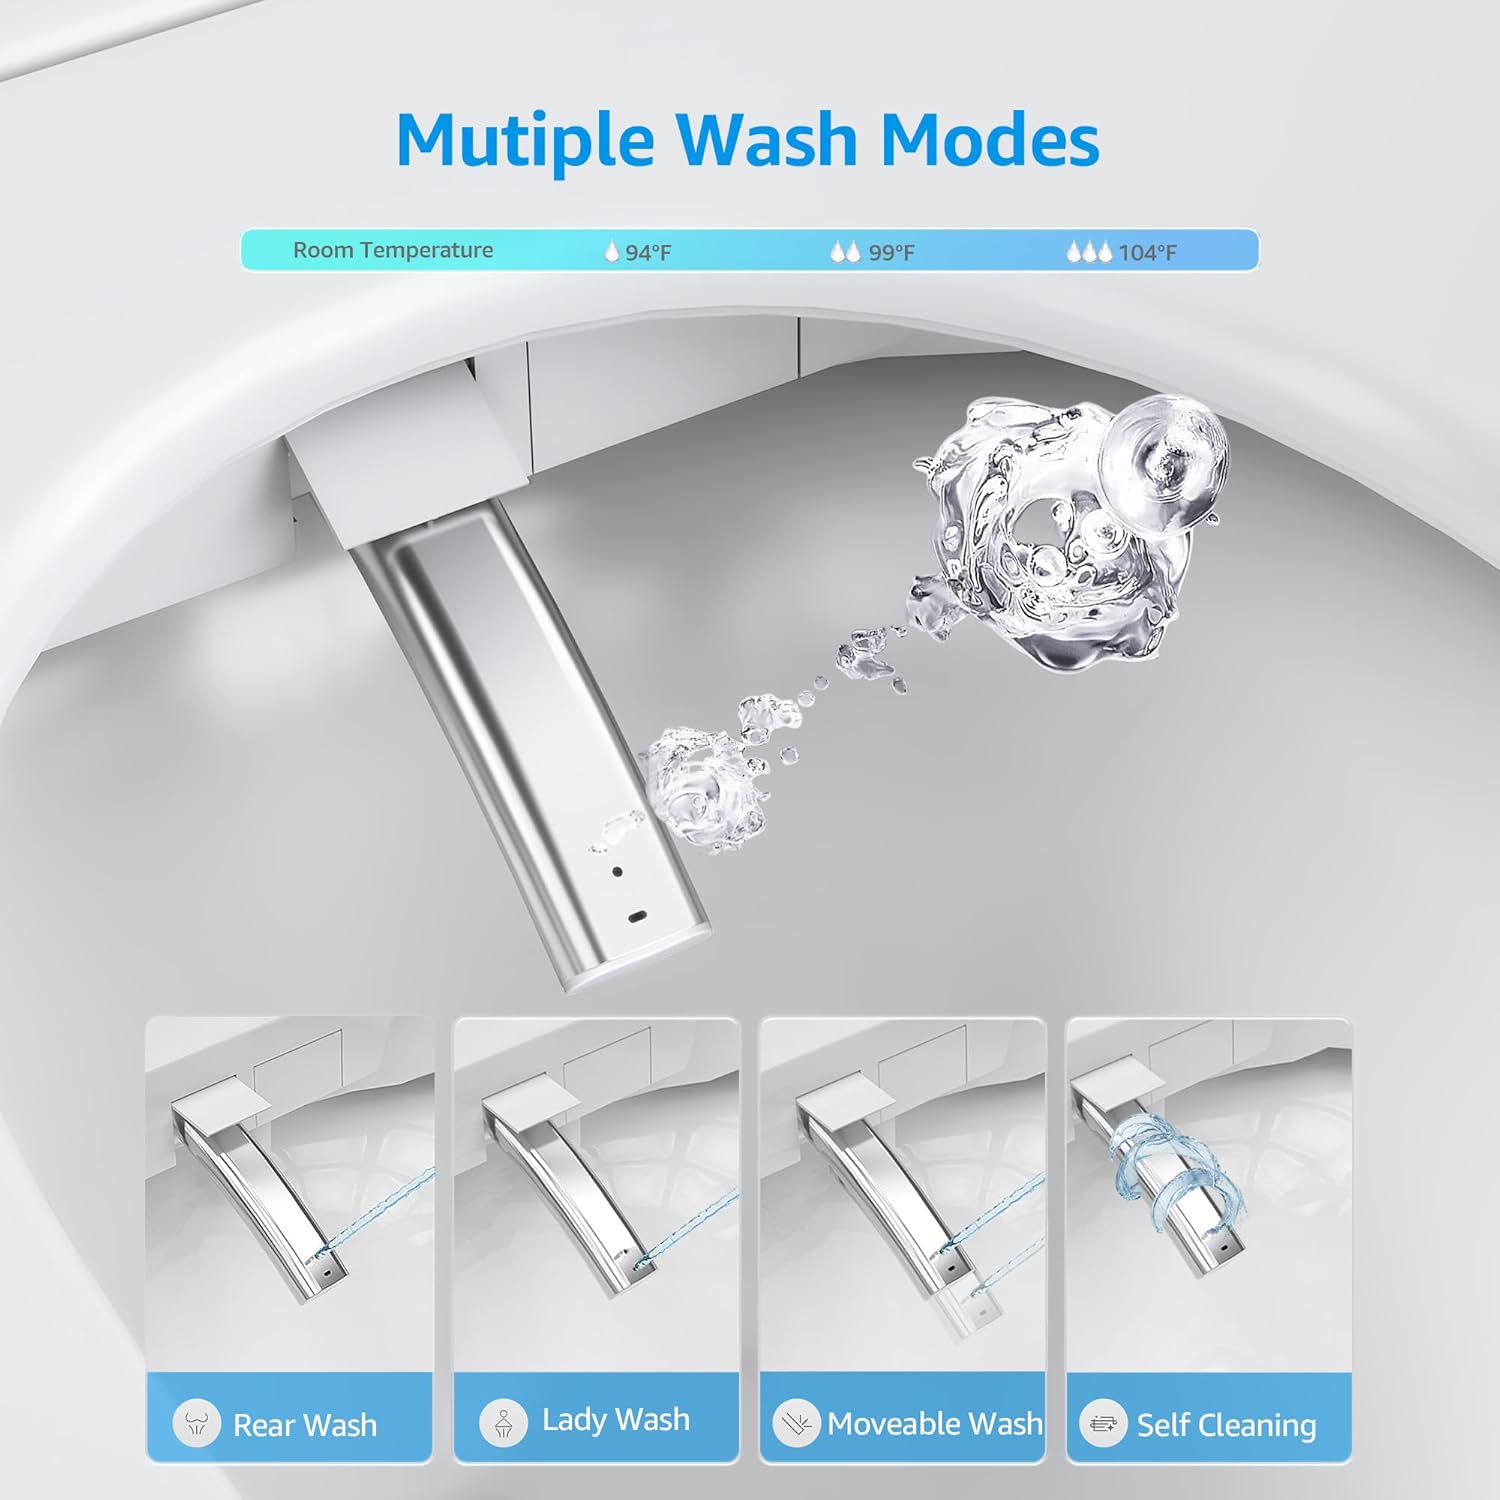
- Warm Water Wash: Instant warm water for personal cleansing. Temperature is adjustable (94°F, 99°F, 104°F).
- Wash Modes: Includes Rear Wash, Lady Wash, and Moveable Wash.
- Warm Air Dryer: Adjustable warm air for drying after washing.
- Self-Cleaning Nozzle: The bidet nozzle performs a self-cleaning cycle.


Control Options:
- Side Dial: An intuitive rotary knob for quick, one-touch operations.
- Wireless Remote Control: Full control over all bidet functions from a distance.
- LCD Display: Provides real-time status updates.
- LED Nightlight: Offers soft illumination for safe guidance during nighttime use.


Additional Features:
- Anti-Splash Foam Shield: Creates a protective foam layer on the water surface to trap odors, prevent splashback, and reduce residue buildup.
- Aroma Diffusion System: An integrated compartment gently diffuses fragrance during use.
- Soft Close Lid: Ensures quiet operation.


Maintenance and Cleaning
Regular maintenance ensures the longevity and optimal performance of your smart toilet.
General Cleaning:
- Unplug the toilet from the power outlet before cleaning.
- Use a soft, damp cloth and mild, non-abrasive cleaner to wipe down the exterior surfaces.
- Do not use harsh chemicals, abrasive cleaners, or brushes that could damage the finish.
- For the bowl, use standard toilet bowl cleaner.
Bidet Nozzle Cleaning:
- The bidet nozzle features an automatic self-cleaning function before and after each use.
- For manual cleaning, gently pull out the nozzle and wipe it with a soft cloth and mild soap. Do not use excessive force.

Foam Shield System:
- Ensure the foam shield reservoir is refilled with standard liquid soap as needed to maintain its effectiveness.
Troubleshooting Guide
Refer to this section for common issues and their solutions. If the problem persists, contact customer support.
| Problem | Possible Cause | Solution |
|---|---|---|
| Toilet does not flush. | No power; water supply off; sensor obstruction. | Check power connection. Ensure water supply valve is open. Clear any obstructions from sensors. Use emergency flush if power is out. |
| Bidet functions not working. | No power; water supply off; remote control battery low. | Verify power and water supply. Replace remote control batteries. |
| Remote control is unresponsive. | Low battery; signal interference. | Replace remote control batteries. Ensure no obstructions between remote and toilet. |
| Water leakage. | Loose connections; damaged wax ring. | Check all water connections and tighten if necessary. If leakage persists from the base, professional re-installation may be required. |
| Foam shield not working. | Soap reservoir empty. | Refill the foam shield soap reservoir with standard liquid soap. |
Specifications
| Feature | Detail |
|---|---|
| Brand | Loniko |
| Model Number | G7-1-WP |
| Installation Type | Floor Mounted |
| Rough-In | 12-Inch Standard |
| Flush System | Tankless Siphonic, 360° Vortex Flush (1000g MAP score) |
| Dual Flush | 0.92 GPF / 1.28 GPF |
| Seat Type | Elongated, Heated, Widened Ergonomic |
| Water Temperature | Adjustable (94°F, 99°F, 104°F) |
| Air Dryer | Adjustable Warm Air |
| Control | Side Dial, Wireless Remote Control |
| Display | LCD Digital Display |
| Nightlight | Soft LED |
| Special Features | Auto Open/Close, Foot Sensor Flush, Anti-Splash Foam Shield, Aroma Diffusion, Self-Cleaning Nozzle, Emergency Battery Backup |
| UPC | 747759583773 |
| ASIN | B0GXFN45JF |


Warranty and Support
Your Loniko Smart Toilet is backed by a 12-month replacement warranty. For any questions, technical assistance, or warranty claims, please contact our professional support team.
Customer Support: Available 24/7 for your convenience.
Please refer to your purchase documentation for specific contact details.
Video Guides
Watch these official video guides for visual assistance with product features and operation.
Loniko G7 Smart Toilet: Ultimate Comfort & Advanced Hygiene
Video: An overview of the Loniko G7 Smart Toilet, highlighting its comfort features and advanced hygiene capabilities. This video demonstrates various functions and benefits of the smart toilet.
Related documentsG7-1-WP


Ask a question about this manual
Ask about setup, troubleshooting, compatibility, parts, safety, or missing instructions. Manuals+ will review the question and use this page’s manual context to help answer it.