
1. Introduction and Safety Guidelines
Thank you for choosing the Riuiio G01MAX Electric Scooter. This manual provides essential information for the safe operation, assembly, and maintenance of your scooter. Please read it thoroughly before your first ride and keep it for future reference. Always prioritize safety when operating the scooter.
General Safety Warnings
- Always wear a helmet and appropriate protective gear (knee pads, elbow pads) when riding.
- Do not ride in wet conditions, heavy rain, or through puddles deeper than 1 inch.
- Avoid riding on slippery surfaces, loose gravel, or uneven terrain.
- Maintain a safe speed and distance from other vehicles and pedestrians.
- Obey all local traffic laws and regulations.
- Do not allow children under the age of 16 to operate the scooter.
- Do not perform stunts or sudden maneuvers.
- Ensure the scooter is fully charged and all components are secure before each ride.
- Maximum weight limit for the rider is 264 pounds (120 kg).
2. Package Contents
Verify that all items are present and in good condition upon opening the package.
- Riuiio G01MAX Electric Scooter
- Power Adapter / Charger
- Phone Holder
- Security Lock
- User Manual (this document)

Image: The power adapter and charging cable for the Riuiio G01MAX Electric Scooter. It features a warning label for indoor use only and a tag to unplug when not in use.
3. Setup and Initial Preparation
3.1 Assembly
The Riuiio G01MAX Electric Scooter comes mostly pre-assembled. Follow these steps to complete the setup:
- Carefully remove the scooter from its packaging.
- Unfold the handlebar stem until it locks securely into place. Ensure the locking mechanism is fully engaged.
- Attach the handlebars to the stem, ensuring all cables are properly connected and not pinched. Secure with the provided screws and tools.
- Check that all screws and fasteners are tightened before your first ride.
3.2 Initial Charging
Before your first ride, fully charge the scooter's battery.
- Locate the charging port on the scooter.
- Connect the charger to the charging port, then plug the charger into a standard wall outlet.
- The charging indicator on the charger will typically show red during charging and turn green when fully charged.
- Charging time is approximately 4 hours for a full charge. Do not overcharge.

Image: An illustration showing the 36V/9Ah Lithium Battery, 4 hours charging time, and up to 31 miles max range of the Riuiio Electric Scooter, along with UL2722 certification.
3.3 App Download and Pairing
Enhance your riding experience by connecting your scooter to the dedicated smartphone application.
- Download the official Riuiio scooter app from your smartphone's app store.
- Turn on your scooter.
- Open the app and follow the on-screen instructions to pair your scooter via Bluetooth.
- Once paired, you can access features like riding modes, cruise control, battery monitoring, ride statistics, and scooter locking.

Image: A smartphone screen displaying the Riuiio scooter app interface, showing connectivity status, battery level, and controls for headlight, start mode, and riding modes. The scooter is shown next to the phone in a rural setting.
4. Operating Instructions
4.1 Power On/Off
- To power on: Press and hold the power button on the handlebar until the display illuminates.
- To power off: Press and hold the power button until the display turns off.
4.2 Riding Modes
The scooter features three riding modes to suit different preferences and conditions. Switch between modes using the control button or the app.
- ECO Mode: Lower speed (approx. 8 MPH) for extended range and beginner riders.
- DRIVE Mode: Medium speed (approx. 13 MPH) for balanced performance.
- SPORT Mode: Maximum speed (approx. 22 MPH) for experienced riders and faster commutes.

Image: A rider on the Riuiio Electric Scooter in a city setting, with an overlay showing the three riding modes: ECO (8mph), DRIVE (13mph), and SPORT (22mph).
4.3 Braking System
The Riuiio G01MAX is equipped with a dual braking system for reliable stopping power.
- EABS Electronic Brake: Engaged via the handlebar lever, providing smooth and controlled deceleration.
- Rear Drum Brake: Mechanical brake for additional stopping force, also controlled by a handlebar lever.
- Always apply brakes gently and evenly to avoid skidding.

Image: A person riding the Riuiio Electric Scooter, highlighting the dual braking system with text overlay: "Dual Braking: Drum and Electronic brakes for more responsive stopping power."
4.4 Lighting System
For enhanced visibility and safety, especially during low-light conditions, the scooter includes a comprehensive lighting system.
- LED Headlight: Provides illumination for the path ahead.
- Rear Brake Light: Illuminates when braking, signaling to others.
- Side Reflectors: Increase side visibility.
- Turn on lights manually via the control panel or app when riding in dim conditions.
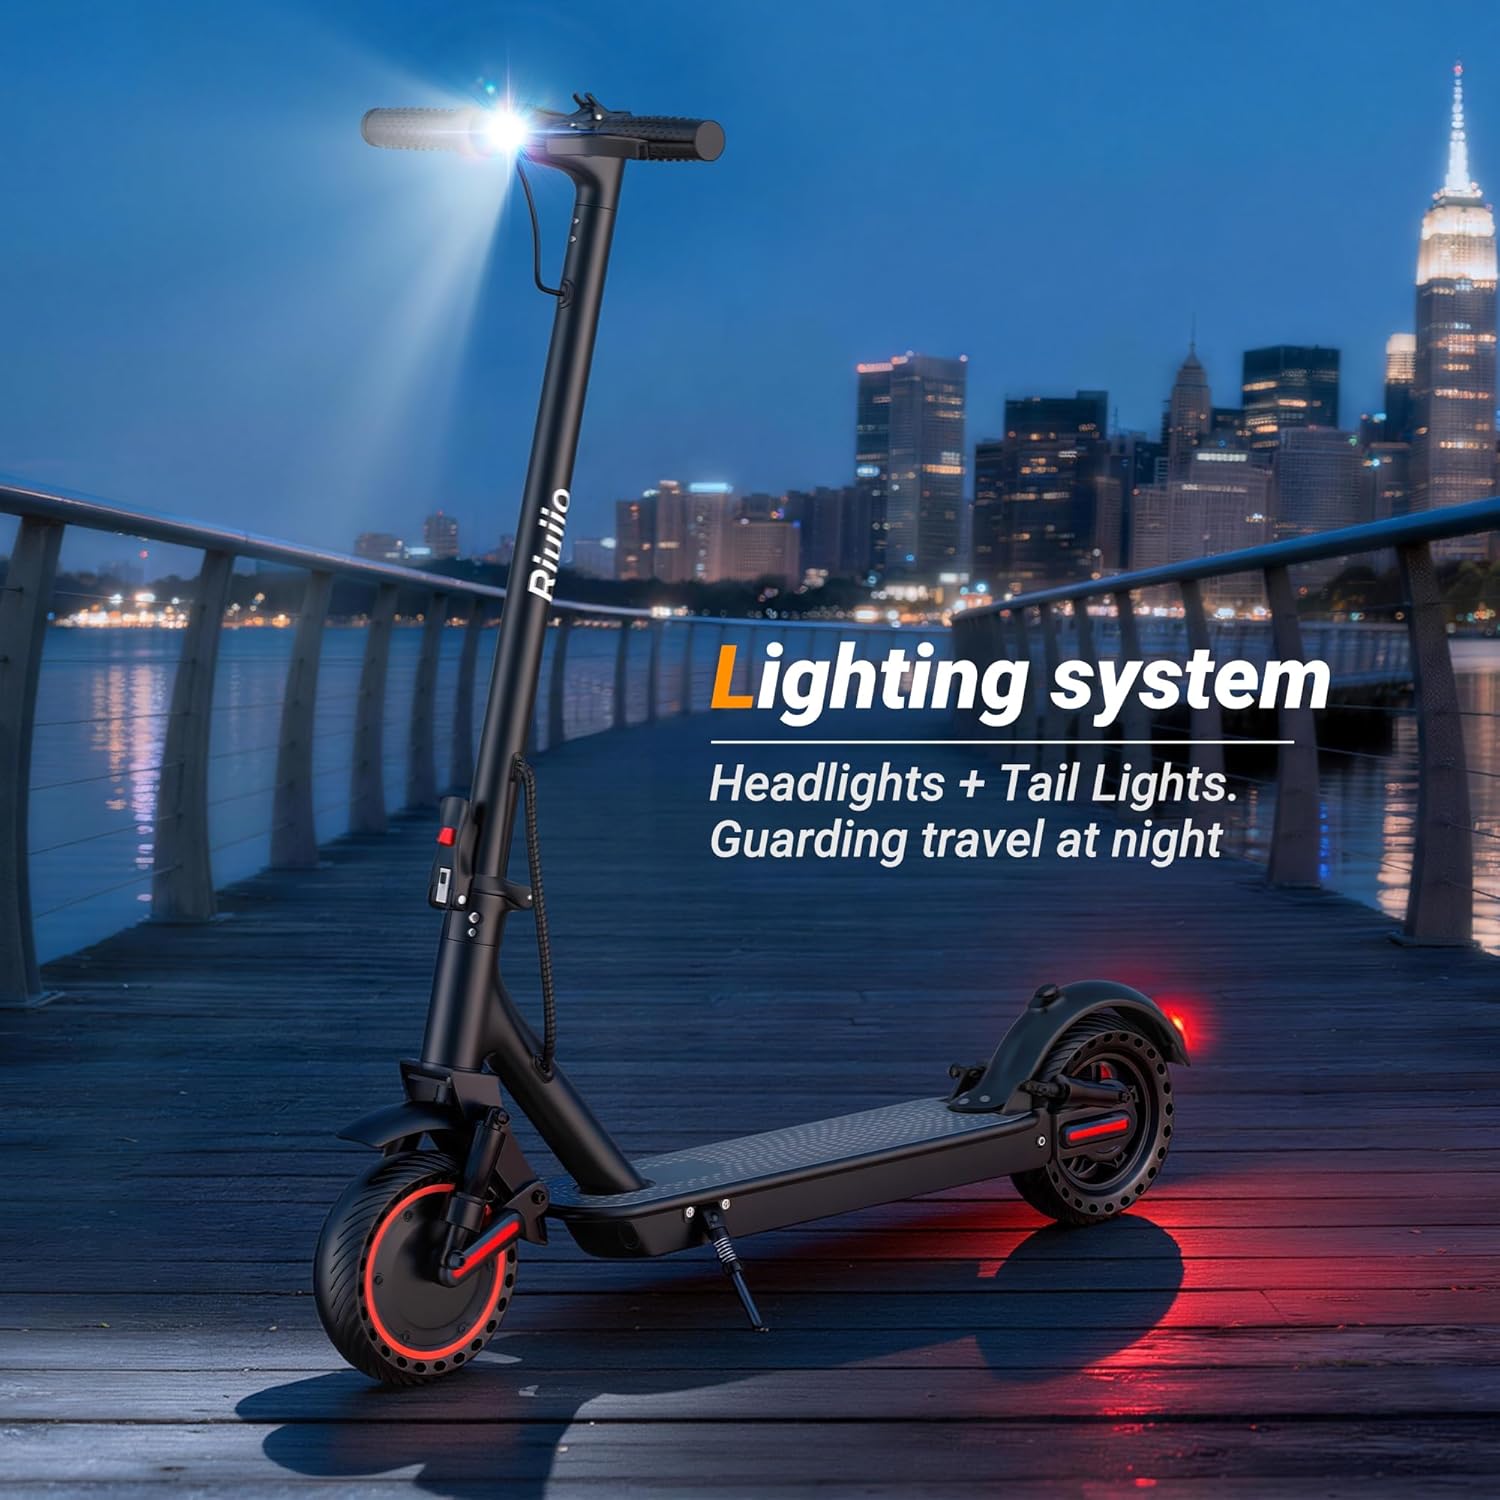
Image: The Riuiio Electric Scooter parked at night on a pier, with its bright LED headlight and taillights illuminated, emphasizing its lighting system for night travel.
4.5 Folding Mechanism
The scooter features a quick-folding design for easy storage and transport.
- Ensure the scooter is powered off.
- Locate the folding latch mechanism at the base of the handlebar stem.
- Engage the release lever and fold the stem downwards until it clicks into the rear fender lock.
- To unfold, release the lock from the rear fender and raise the stem until it clicks into the upright position.
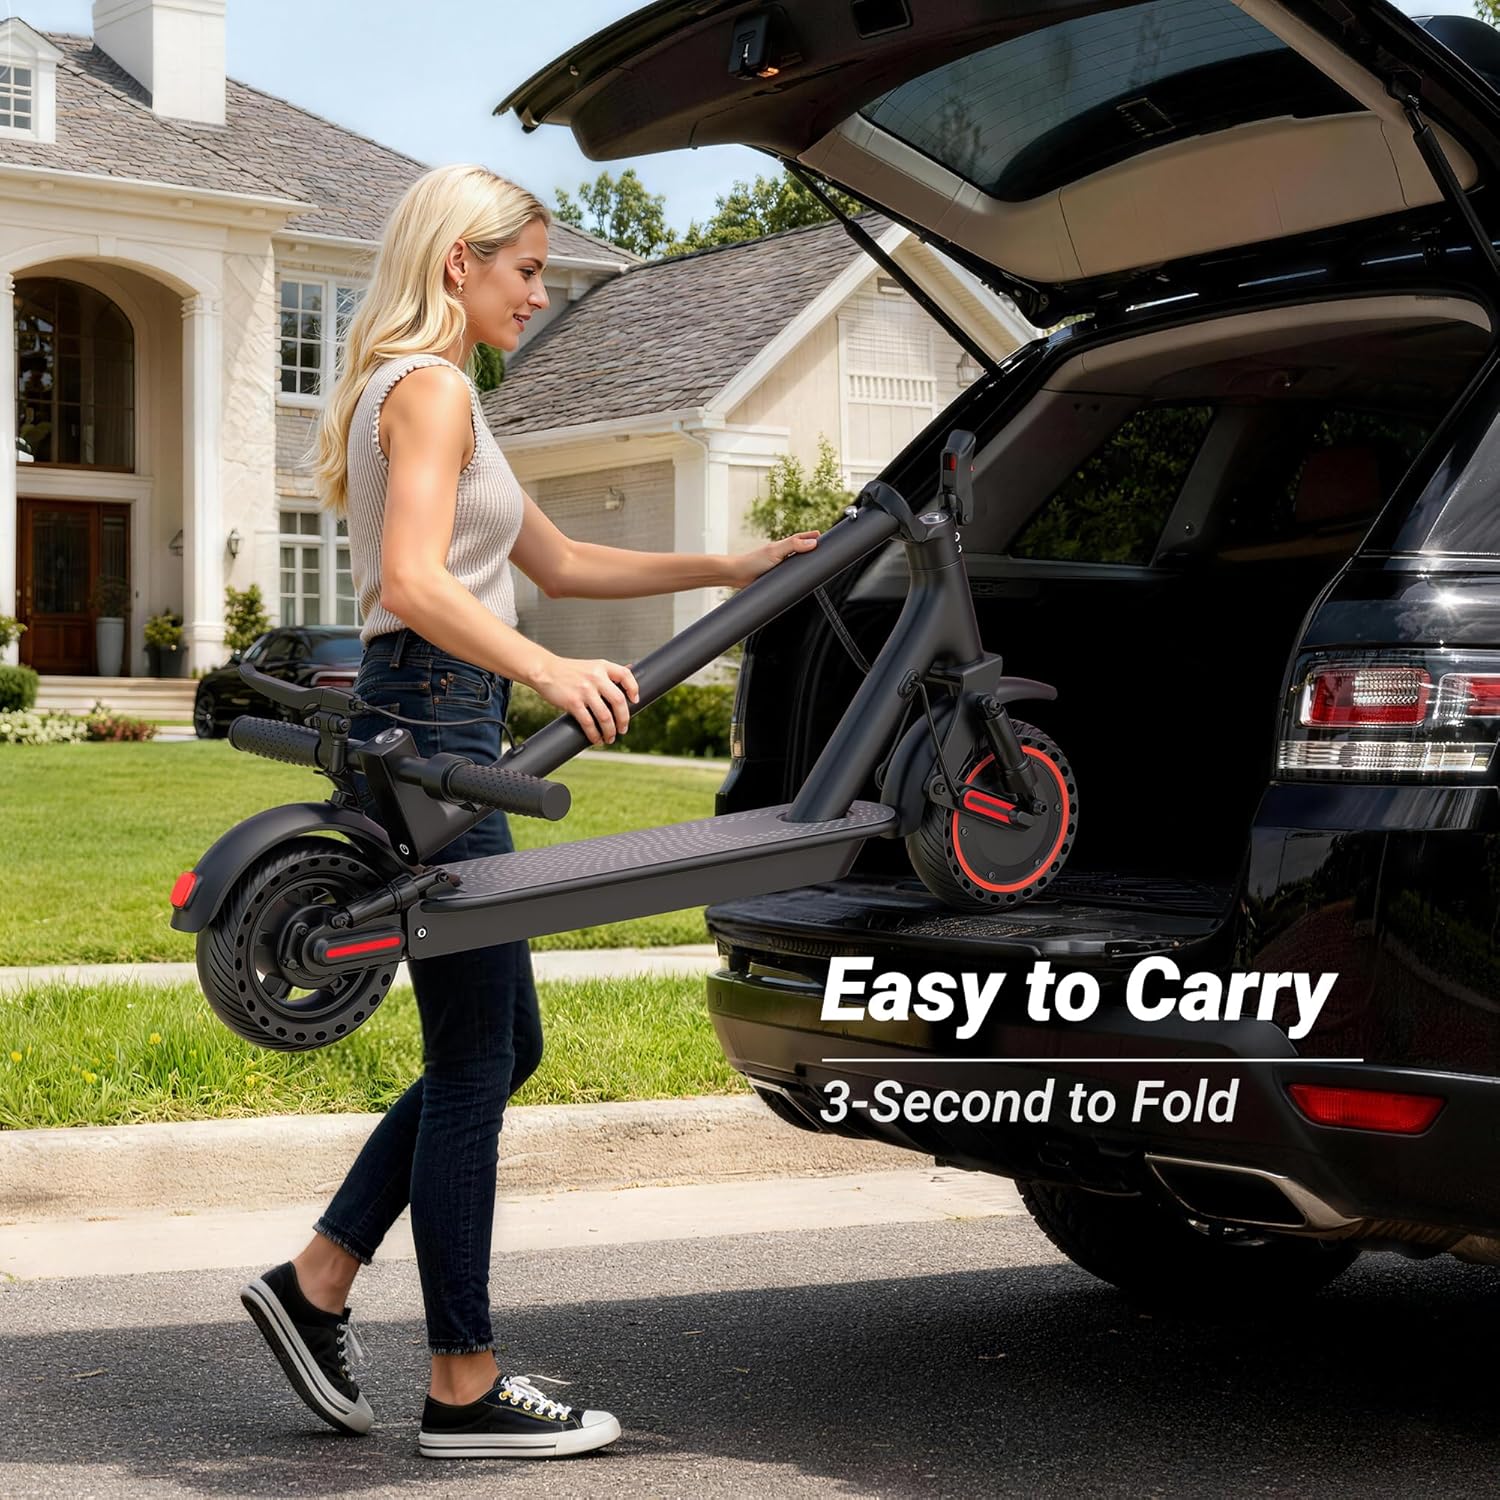
Image: A woman easily placing the folded Riuiio Electric Scooter into the trunk of a car, demonstrating its portability and 3-second folding capability.
5. Maintenance
Regular maintenance ensures the longevity and safe operation of your Riuiio G01MAX Electric Scooter.
5.1 Cleaning
- Wipe the scooter with a damp cloth after each ride to remove dirt and dust.
- Do not use high-pressure water jets or corrosive cleaning agents.
- Ensure the charging port cover is securely closed to prevent water ingress.
5.2 Tire Care
The scooter is equipped with 10-inch honeycomb solid tires, which are maintenance-free and puncture-proof.
- Regularly inspect tires for any signs of wear, cracks, or damage.
- While puncture-proof, severe impacts can still cause damage. Replace tires if significant damage is observed.
5.3 Battery Care
- Charge the battery fully before long periods of storage.
- If storing for more than 30 days, charge the battery to 50-70% every 30 days to prevent deep discharge.
- Store the scooter in a cool, dry place away from direct sunlight and extreme temperatures.
- Use only the original Riuiio charger provided with the scooter.
6. Troubleshooting
This section addresses common issues you might encounter with your scooter.
| Problem | Possible Cause | Solution |
|---|---|---|
| Scooter does not power on | Low battery; Loose connections; Power button malfunction | Charge the battery; Check all visible cable connections; Contact support if issue persists. |
| Reduced range or speed | Low battery; Riding uphill frequently; Heavy load; Extreme temperatures | Ensure full charge; Ride on flatter terrain; Reduce load; Operate in moderate temperatures. |
| Brakes feel weak or unresponsive | Brake cable adjustment needed; Worn brake pads | Adjust brake cable tension; Inspect and replace brake pads if worn. |
| App not connecting to scooter | Bluetooth off; Scooter not powered on; App error | Ensure Bluetooth is enabled on phone; Power on scooter; Restart app and phone; Re-pair scooter. |
| Unusual noises during operation | Loose components; Debris in wheels; Motor issue | Inspect scooter for loose parts; Clear any debris from wheels; Contact support if noise persists. |
7. Specifications
Detailed technical specifications for the Riuiio G01MAX Electric Scooter.
| Feature | Detail |
|---|---|
| Brand | Riuiio |
| Model Name | G01MAX |
| Motor Power | 500W Brushless Motor |
| Max Speed | 22 MPH (35 km/h) |
| Max Range | Up to 31 Miles (50 km) |
| Battery | 36V/9Ah Lithium Battery |
| Charging Time | Approx. 4 Hours |
| Tires | 10-inch Honeycomb Solid Tires |
| Suspension | Dual Suspension (Front Hydraulic, Rear Spring) |
| Brake System | EABS Electronic Brake + Rear Drum Brake |
| Weight Limit | 264 Pounds (120 kg) |
| Uphill Climbing | Up to 20° Incline |
| Connectivity | Smart App Control (Bluetooth) |
| Certification | UL2722 Certified |
| Foldable | Yes, 3-second folding |
| Included Components | Electric Scooter, Phone Holder, Scooter Lock |

Image: A close-up view of the Riuiio Electric Scooter's rear wheel and motor, illustrating the 500W powerful motor, 22MPH max speed, 20° uphill climbing capability, and 10-inch solid tire.

Image: A person riding the Riuiio Electric Scooter on a path, with an overlay highlighting the dual suspension system (front fork and rear spring) for enhanced comfort.
8. Warranty Information
The Riuiio G01MAX Electric Scooter comes with a limited warranty.
- Warranty Period: 1 Year from the date of purchase.
- This warranty covers manufacturing defects in materials and workmanship.
- It does not cover damage caused by misuse, accidents, unauthorized modifications, or normal wear and tear.
- Keep your proof of purchase for warranty claims.
9. Customer Support
For any questions, technical assistance, or warranty claims, please contact Riuiio customer support.
- Refer to the contact information provided on the product packaging or the official Riuiio website.
- When contacting support, please have your scooter's model number (G01MAX) and proof of purchase ready.