
1. Important Safety Instructions
Read all safety warnings, instructions, illustrations, and specifications provided with this power tool. Failure to follow all instructions listed below may result in electric shock, fire, and/or serious injury.
Work Area Safety
- Keep work area clean and well lit. Cluttered or dark areas invite accidents.
- Do not operate power tools in explosive atmospheres, such as in the presence of flammable liquids, gases, or dust. Power tools create sparks which may ignite the dust or fumes.
- Keep children and bystanders away while operating a power tool. Distractions can cause you to lose control.
Electrical Safety
- Power tool plugs must match the outlet. Never modify the plug in any way. Do not use any adapter plugs with earthed (grounded) power tools. Unmodified plugs and matching outlets will reduce risk of electric shock.
- Avoid body contact with earthed or grounded surfaces, such as pipes, radiators, ranges and refrigerators. There is an increased risk of electric shock if your body is earthed or grounded.
- Do not expose power tools to rain or wet conditions. Water entering a power tool will increase the risk of electric shock.
Personal Safety
- Always wear eye protection. Use safety glasses, goggles, or a face shield.
- Dress properly. Do not wear loose clothing or jewelry. Keep your hair and clothing away from moving parts.
- Stay alert, watch what you are doing, and use common sense when operating a power tool.
2. Product Overview
The Generic 48V Cordless Impact Drill/Driver is a versatile tool designed for both drilling and screwdriving tasks. It features a powerful 48V motor, a 10mm keyless chuck, variable speed control, and a reversible function. The kit includes two rechargeable batteries, various drill bits, screwdriver bits, sockets, and a durable carrying case for easy transport and storage.
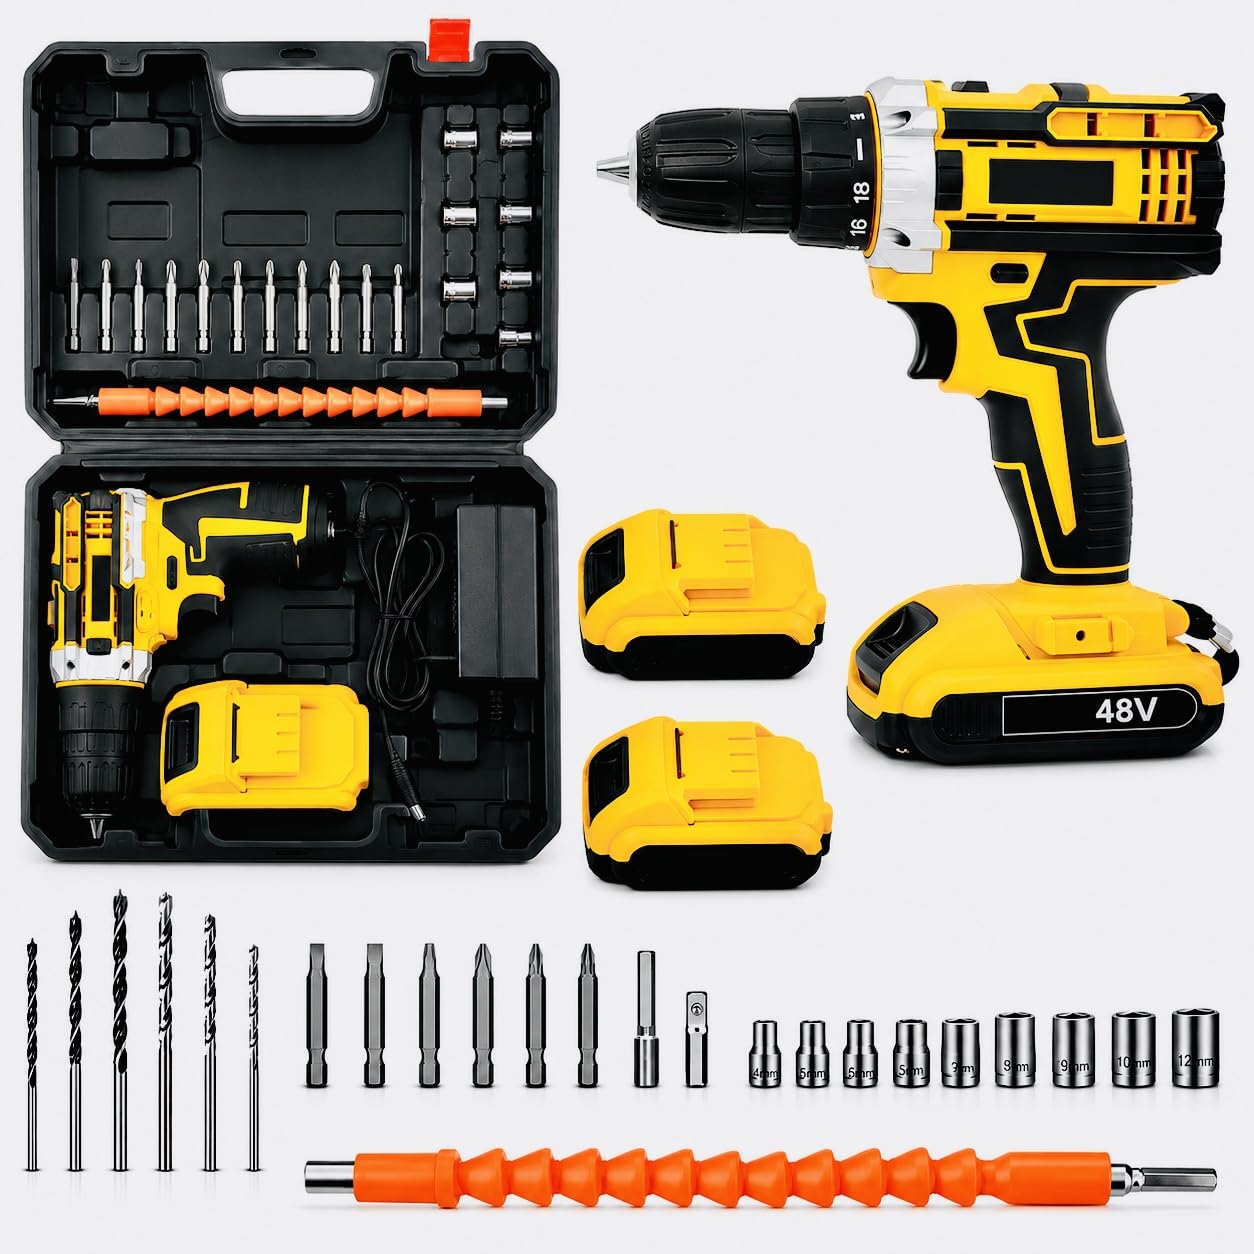
Figure 1: Overview of the 48V Cordless Impact Drill/Driver and its complete accessory kit.
3. Setup
3.1 Charging the Battery
- Ensure the battery is clean and dry before charging.
- Connect the charger to a standard electrical outlet (110V or 220V, as the tool is Bivolt).
- Slide the battery pack onto the charger until it clicks into place.
- The charging indicator light on the charger will illuminate, typically red for charging and green for fully charged.
- Allow the battery to charge completely before first use. Charging time may vary.
- Disconnect the charger from the power outlet and remove the battery once charging is complete.
3.2 Installing/Removing the Battery
- To install: Align the battery pack with the base of the drill handle and slide it in until it locks securely.
- To remove: Press the battery release button (usually located on the sides of the battery pack) and slide the battery out.
3.3 Installing Drill Bits/Screwdriver Bits
- Ensure the drill is turned off and the forward/reverse switch is in the center (locked) position to prevent accidental starting.
- Rotate the chuck collar counter-clockwise to open the jaws.
- Insert the desired drill bit or screwdriver bit into the chuck, ensuring it is centered and inserted as far as possible.
- Rotate the chuck collar clockwise to tighten the jaws firmly around the bit. Hand-tighten only; do not use tools to tighten the chuck.
- To remove a bit, rotate the chuck collar counter-clockwise and pull the bit out.

Figure 2: Key features of the drill/driver, including the 10mm chuck for quick bit changes.
4. Operating Instructions
4.1 Power On/Off and Variable Speed Control
- The tool is turned on by pressing the trigger switch. The speed is variable; the further the trigger is pressed, the faster the tool operates.
- Release the trigger switch to turn off the tool.
4.2 Forward/Reverse Rotation
- The forward/reverse switch is located above the trigger.
- Push the switch to the left for forward rotation (for drilling and tightening screws).
- Push the switch to the right for reverse rotation (for removing screws or backing out drill bits).
- For safety, always set the switch to the center position when not in use or when changing bits. This locks the trigger.
4.3 Torque Adjustment
- The torque adjustment ring is located behind the chuck. Rotate it to select the desired torque setting.
- Lower settings are for driving small screws or working with soft materials.
- Higher settings are for driving larger screws or working with harder materials.
- The drill mode (indicated by a drill bit icon) provides maximum torque for drilling applications.
4.4 Speed Selection
- The gear selector switch is located on top of the drill.
- Position 1 (low speed, 0-400 RPM) is for high-torque applications like driving screws or drilling large holes.
- Position 2 (high speed, 0-1400 RPM) is for fast drilling with smaller bits.

Figure 3: Examples of the drill/driver in use for various tasks.
5. Maintenance
5.1 Cleaning
- Always disconnect the battery before cleaning.
- Use a soft, damp cloth to wipe down the tool's exterior. Do not use harsh chemicals or abrasive cleaners.
- Keep the ventilation openings clear of dust and debris to prevent overheating. Use compressed air if necessary.
5.2 Battery Care and Storage
- Store batteries in a cool, dry place, away from direct sunlight and extreme temperatures.
- For long-term storage, charge batteries to approximately 50% capacity.
- Do not store batteries completely discharged or fully charged for extended periods.
- Avoid dropping or damaging battery packs.
5.3 General Storage
- Store the drill/driver and its accessories in the provided carrying case when not in use.
- Keep the tool out of reach of children and in a secure, dry location.
6. Troubleshooting
| Problem | Possible Cause | Solution |
|---|---|---|
| Tool does not start. | Battery not charged or improperly installed. Forward/reverse switch in center (locked) position. | Charge battery. Reinstall battery correctly. Move forward/reverse switch to forward or reverse position. |
| Reduced power or speed. | Battery low on charge. Overload. | Recharge battery. Reduce pressure on the tool or use a higher torque setting. |
| Bit slips in chuck. | Chuck not tightened sufficiently. Bit shank is dirty or damaged. | Retighten chuck firmly by hand. Clean or replace the bit. |
| Tool overheats. | Continuous heavy use. Blocked ventilation slots. | Allow tool to cool down. Clear ventilation slots. Avoid prolonged heavy use. |
7. Specifications
| Feature | Specification |
|---|---|
| Brand | Generic |
| Power Source | Battery Powered |
| Battery Voltage | 48V |
| Charger Voltage | 110V / 220V (Bivolt) |
| Max Rotation Speed | 1850 RPM |
| Max Chuck Size | 10 mm |
| Max Torque | 38 Newton Meters |
| Number of Speeds | 2 (0-400 RPM / 0-1400 RPM) |
| Amperage | 1 Ampere |
| Drill Type | Basic Drill |
| Compatible Devices | Rechargeable Batteries |
| Included Components | Drill Bits, Screwdriver Bits, Sockets, Carrying Case, 2 Rechargeable Batteries |
| ASIN | B0GWY89VFX |
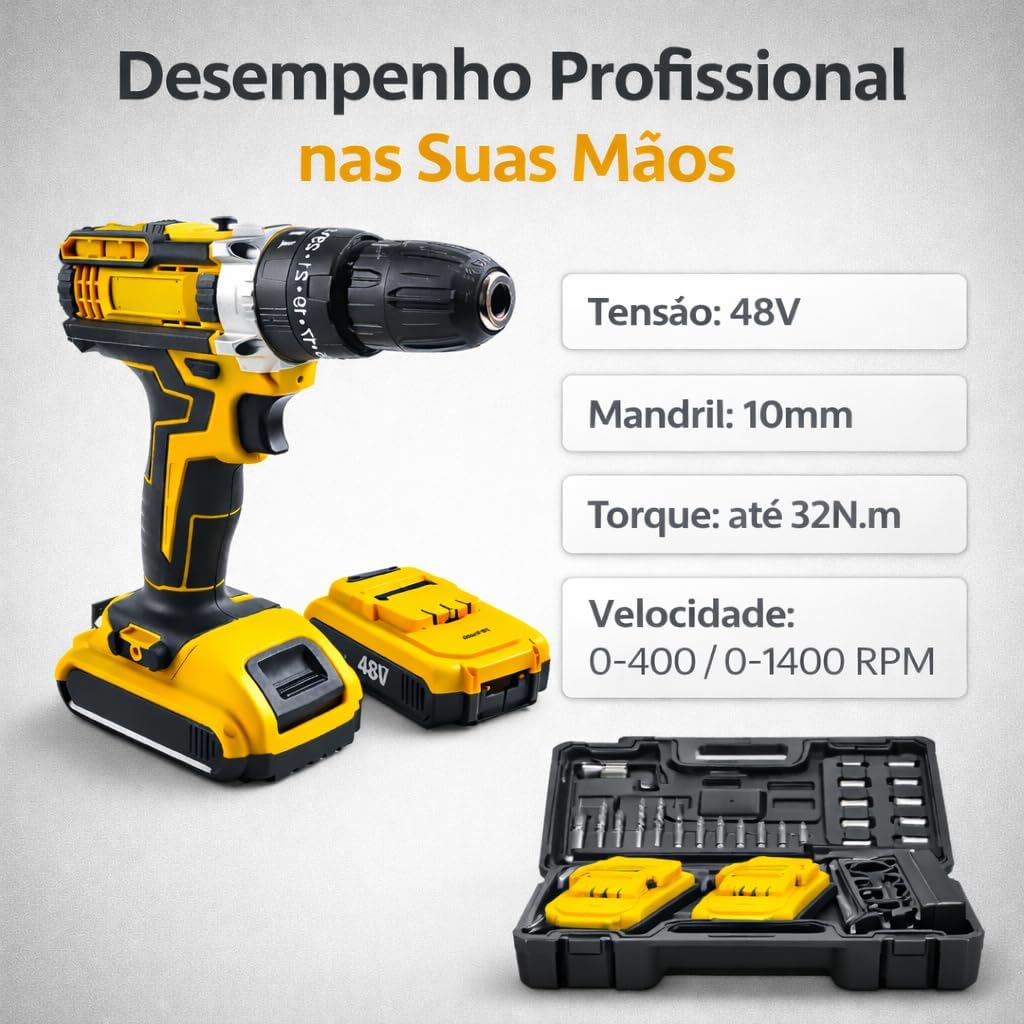
Figure 4: Visual representation of the drill/driver's main technical specifications.
8. Warranty and Support
8.1 Warranty Information
This product may be eligible for extended warranty plans against failures and defects. Please refer to the purchase documentation or contact your retailer for specific warranty terms and conditions. Standard return policy allows for refunds/replacements within 30 days of purchase.
8.2 Customer Support
For technical assistance, parts, or service, please contact the seller directly. The seller for this product is Or Logos. You can typically find their contact information through your purchase platform or order history.
For general inquiries or to report issues, please refer to the Amazon customer service portal: Amazon Help.