
1. Introduction
Thank you for choosing the Horavie Single Serve Coffee Maker with Built-in Grinder. This versatile appliance allows you to enjoy fresh coffee using whole beans, pre-ground coffee, or K-Cup pods. Designed for convenience and quality, it features a built-in grinder, multiple brew sizes, and a compact design suitable for various spaces.
2. Important Safety Information
Please read all instructions carefully before using the appliance. Keep this manual for future reference.
- Always ensure the appliance is unplugged before cleaning or when not in use.
- Do not immerse the power cord, plug, or the appliance itself in water or other liquids.
- Keep hands and fingers away from moving parts, especially the grinder blade, during operation.
- Do not operate the appliance with a damaged cord or plug.
- Use only cold, fresh water in the water tank. Do not fill with hot water.
- Ensure the lid is properly closed before brewing.
- This appliance is for household use only.
3. Product Components
Familiarize yourself with the parts of your Horavie coffee maker:
- Coffee Maker Unit
- Bean Basket Lid
- Reusable Bean Basket with Grinder Blade
- Capsule Holder (for K-Cup pods)
- Drip Tray
- Funnel
- Coffee Scoop
- Cleaning Brush
- Coffee Drip Bags (30 included)

Image: Overview of the Horavie Single Serve Coffee Maker and its key components, including the reusable bean basket and the capsule holder.
4. Setup and First Use
4.1 Unpacking and Initial Cleaning
- Remove all packaging materials and labels from the coffee maker.
- Wash the reusable bean basket, capsule holder, drip tray, and water tank with warm, soapy water. Rinse thoroughly and dry.
- Wipe the exterior of the coffee maker with a damp cloth.
4.2 Filling the Water Tank
- Remove the 47oz water tank from the back of the unit.
- Fill the tank with fresh, cold water up to the MAX line (47oz capacity). Do not exceed the MAX line.
- Place the water tank back onto the unit, ensuring it is securely seated.

Image: The removable 47oz water reservoir being handled, showing its capacity markings.
4.3 Placement
The compact design of the Horavie coffee maker (4.69" wide x 11.42" high) allows it to fit in various spaces. Place the unit on a stable, level surface near a power outlet.

Image: The coffee maker's dimensions (4.69" W x 11.42" H) and the removable drip tray, which accommodates cups up to 6.89" high.
5. Operating Instructions
The Horavie coffee maker offers three brewing methods: whole beans, ground coffee, and K-Cup pods.
5.1 Brewing with Whole Beans (Grind & Brew)
- Open the top lid of the coffee maker.
- Insert the reusable bean basket with the grinder blade into the funnel.
- Add your desired amount of whole coffee beans into the bean basket.
- Close the top lid securely.
- On the control panel, select your desired CUP SIZE (6oz, 8oz, 10oz, 12oz, 14oz, or 16oz).
- Select the GRIND TIME (6s, 8s, 10s, 12s, 14s, or 16s). A longer grind time results in a finer grind. For minimal sediment, a medium-coarse grind (8-10 seconds) is recommended, especially if not using drip bags.
- Press the BEAN BREW button to start the grinding and brewing process.
- The machine will grind the beans and then immediately begin brewing.

Image: Coffee beans undergoing the grinding process within the reusable basket, illustrating the fresh-ground, fresh-brewed feature.
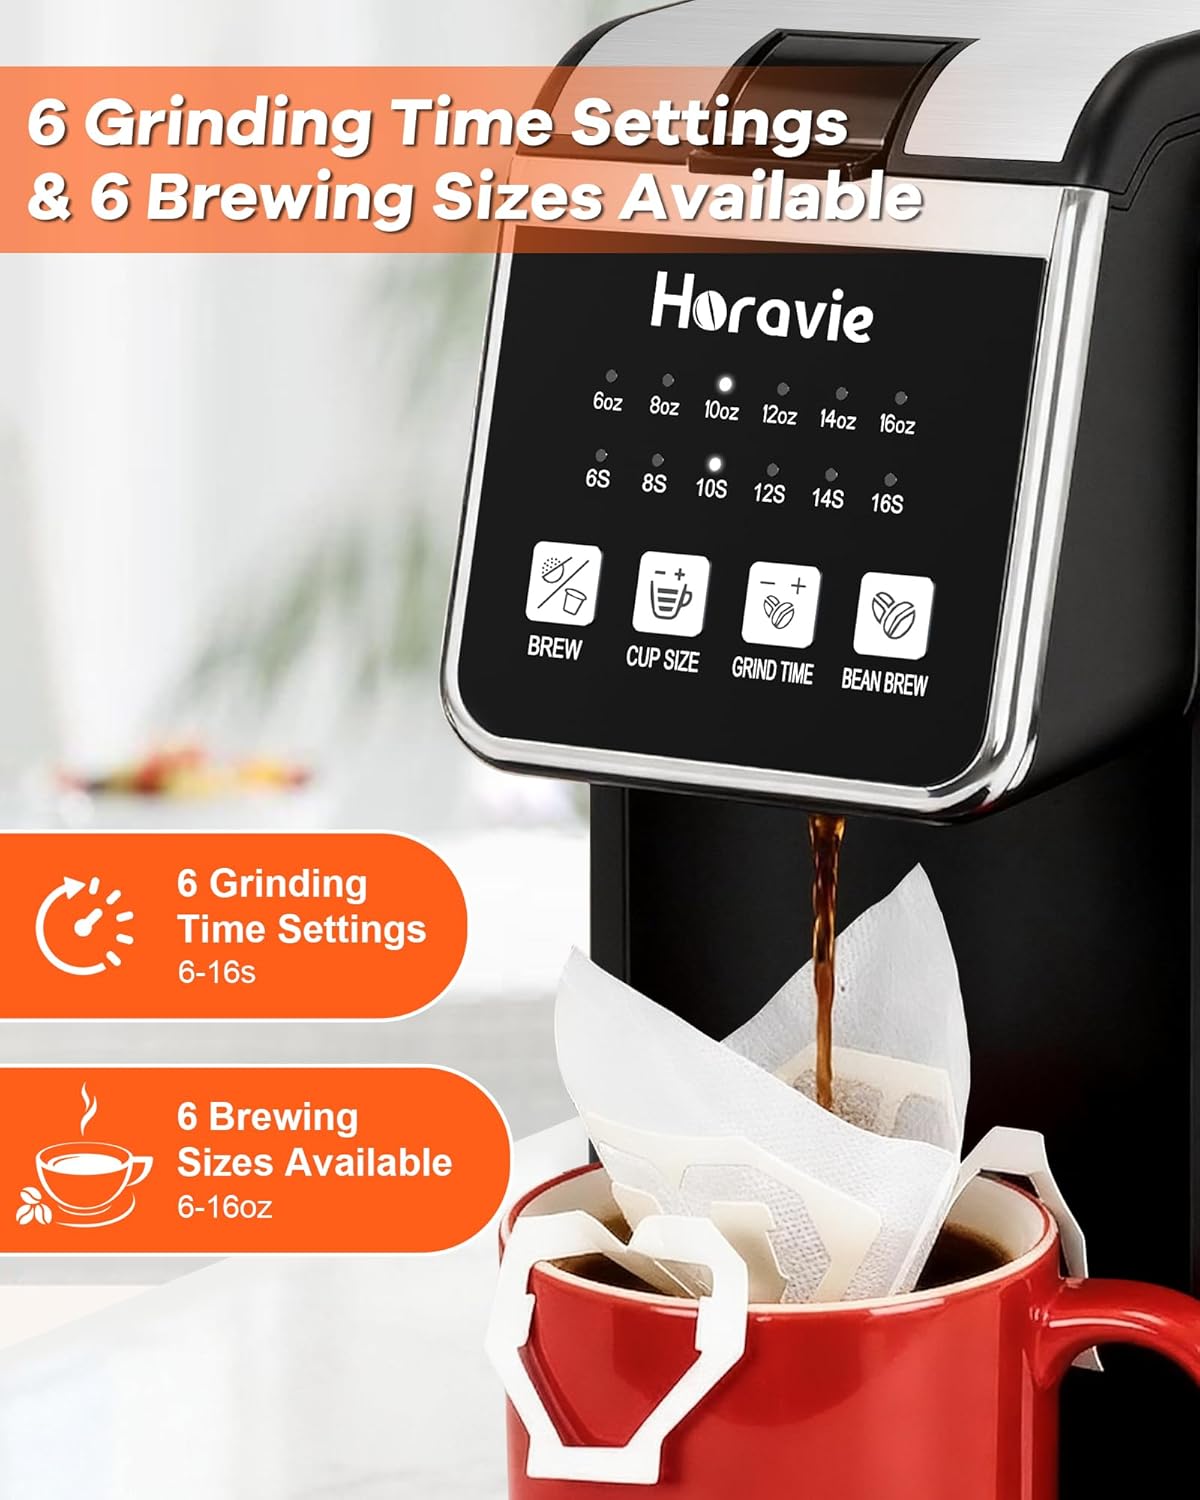
Image: The control panel displaying the 6 grinding time settings (6-16 seconds) and 6 brewing sizes (6-16 oz) available for customization.
Video: Demonstrates the Horavie coffee maker's ability to grind whole beans and immediately brew a fresh cup of coffee.
5.2 Brewing with Ground Coffee
- Open the top lid.
- Insert the reusable bean basket (without the grinder blade, or ensure it's clean if used for beans) into the funnel.
- Add your desired amount of pre-ground coffee into the bean basket. For best results and minimal sediment, use a medium-coarse grind. Using one of the included coffee drip bags is also recommended for the cleanest cup.
- Close the top lid securely.
- On the control panel, select your desired CUP SIZE.
- Press the BREW button to start brewing.

Image: Illustrates the process of adding pre-ground coffee into the reusable basket for brewing.
5.3 Brewing with K-Cup Pods
- Open the top lid.
- Insert the capsule holder into the funnel.
- Place a K-Cup pod into the capsule holder.
- Close the top lid securely.
- On the control panel, select your desired CUP SIZE.
- Press the BREW button to start brewing.
Image: A K-Cup pod being placed into the dedicated capsule holder for single-serve brewing.
5.4 Water Shortage Alert
If the water level in the tank is insufficient for the selected brew size, the corresponding brew size indicator light will flash, alerting you to refill the water tank.
6. Cleaning and Maintenance
Regular cleaning ensures optimal performance and extends the life of your coffee maker.
6.1 Daily Cleaning
- Unplug the coffee maker and allow it to cool completely.
- Remove and empty the reusable bean basket/capsule holder and the drip tray. Wash them with warm, soapy water, rinse, and dry.
- Wipe the exterior of the machine with a damp, soft cloth.
- Clean the grinder blade area with the provided cleaning brush to remove any residual coffee grounds.
6.2 Descaling
Over time, mineral deposits (scale) can build up in your coffee maker, affecting performance and taste. The machine features a descaling alert. When the descaling alert activates, follow these steps:
- Fill the water tank with a descaling solution (e.g., white vinegar and water, or a commercial descaling agent) according to the solution's instructions.
- Place a large mug on the drip tray.
- Run several brew cycles without coffee until the water tank is empty.
- Rinse the water tank thoroughly and fill it with fresh water.
- Run several more brew cycles with fresh water to flush out any remaining descaling solution.
7. Troubleshooting
| Problem | Possible Cause | Solution |
|---|---|---|
| Coffee not brewing. | Water tank empty or low. Lid not closed properly. | Refill water tank. Ensure lid is securely closed. |
| Grinder not operating. | Bean basket not inserted correctly. No beans added. | Ensure bean basket is properly seated. Add whole beans. |
| Coffee grounds in cup (when using whole beans/ground coffee). | Grind setting too fine. No drip bag used. | Adjust grind time to 8-10 seconds for a medium-coarse grind. Use a coffee drip bag for cleaner results. |
| Water shortage alert flashing. | Insufficient water for selected brew size. | Refill the water tank to the desired level. |
| Descaling alert active. | Mineral buildup in the machine. | Perform a descaling cycle as described in Section 6.2. |
8. Product Specifications
| Feature | Detail |
|---|---|
| Brand | Horavie |
| Model Number | B0GWR4F24F |
| Capacity | 47.35 Fluid Ounces (Water Tank) |
| Color | Black |
| Product Dimensions (D x W x H) | 13.5"D x 6.02"W x 13.38"H |
| Special Features | Built-in Grinder, Permanent Filter, Removable Tank, Single Cup Brew, Descaling Alert |
| Coffee Input Type | Capsule, Ground, Whole Bean |
| Compatible Coffee Pods | K-Cup |
| Filter Type | Reusable |
| Operation Mode | Fully Automatic |
| Voltage | 120 Volts (AC) |
| Item Weight | 3.1 Pounds |
| Material | Stainless Steel |
9. Warranty and Customer Support
For warranty information or technical support, please refer to the product packaging or contact Horavie customer service directly. Contact details can typically be found on the manufacturer's website or through your retailer.