
1. Introduction
Thank you for choosing the Ollygrin Conical Burr Coffee Grinder Electric. This manual provides essential information for the safe and efficient operation, maintenance, and troubleshooting of your new coffee grinder. Please read these instructions thoroughly before first use and retain them for future reference.
2. Important Safety Instructions
- Read all instructions before using the appliance.
- Do not immerse the appliance, power cord, or plug in water or other liquids.
- Close supervision is necessary when any appliance is used by or near children.
- Unplug from outlet when not in use, before assembling or disassembling parts, and before cleaning.
- Avoid contact with moving parts.
- Do not operate any appliance with a damaged cord or plug, or after the appliance malfunctions or has been damaged in any manner.
- The use of attachments not recommended or sold by the manufacturer may cause fire, electric shock, or injury.
- Do not use outdoors.
- Do not let cord hang over edge of table or counter, or touch hot surfaces.
- Do not place on or near a hot gas or electric burner, or in a heated oven.
- Always attach plug to appliance first, then plug cord into the wall outlet. To disconnect, turn any control to 'off', then remove plug from wall outlet.
- Do not use appliance for other than intended household use.
- Ensure the bean hopper lid is securely in place before operating.
3. Product Components
Familiarize yourself with the parts of your Ollygrin coffee grinder:
- Bean Hopper: Holds whole coffee beans.
- Conical Burr Grinding Mechanism: Grinds beans uniformly.
- Grind Size Selector: Adjusts the fineness of the grind.
- Touch Panel Display: For cup selection, time setting, and power control.
- Ground Coffee Container: Collects the ground coffee.
- Cleaning Brush: For maintenance.
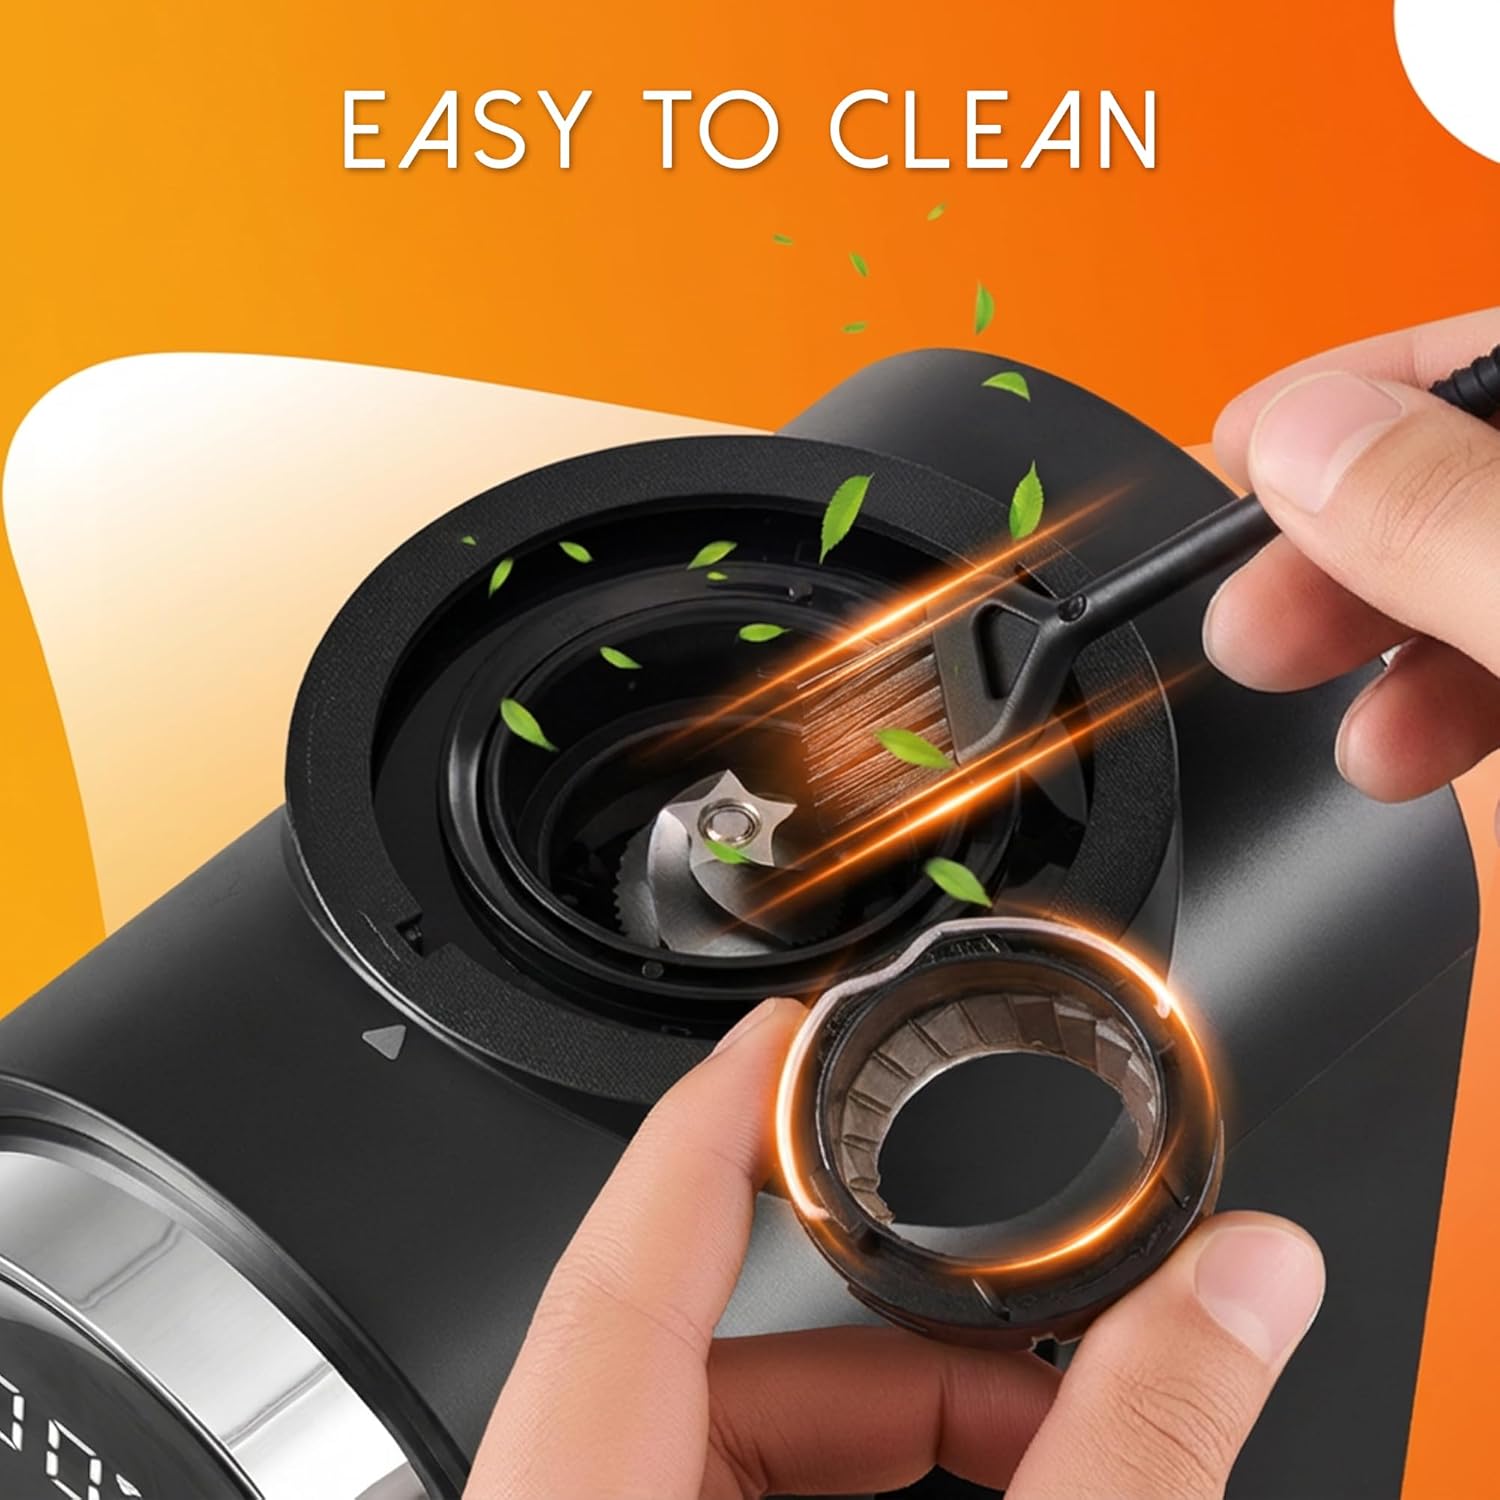
Image: The large, detachable bean hopper for holding coffee beans.

Image: The stainless steel conical burr, designed for uniform grinding.
4. Setup
- Unpack: Carefully remove all components from the packaging.
- Clean: Wash the bean hopper lid, bean hopper, and ground coffee container with warm, soapy water. Rinse thoroughly and dry completely. The burr grinding mechanism should be cleaned with the included brush.
- Assemble: Place the clean and dry bean hopper onto the grinder base, ensuring it locks into position. Insert the ground coffee container into its designated slot.
- Position: Place the grinder on a stable, flat, and dry surface.
- Connect Power: Plug the power cord into a standard 120V AC electrical outlet.
5. Operating Instructions
5.1 Adjusting Grind Settings
Your Ollygrin grinder offers 30 precise grind settings, from fine to coarse, suitable for various brewing methods.
- Fill Hopper: Add whole coffee beans to the bean hopper. Do not overfill.
- Select Grind Size: Rotate the bean hopper to align the desired grind setting with the indicator.
- Fine (1-8): Ideal for Espresso.
- Medium (9-21): Suitable for Siphon, Pour Over, and Mocca.
- Coarse (22-30): Best for French Press.

Image: The grind setting dial, illustrating 30 options for various coffee preparations.
5.2 Grinding Process
The intuitive touch panel allows for easy control over the grinding process.
- Power On: Press the power button on the touch panel to turn on the grinder.
- Select Quantity: Use the '+' and '-' buttons to select the desired number of cups (1-12 cups) or grinding time (1-60 seconds). The display will show your selection.
- Start Grinding: Press the start button (often indicated by a coffee bean icon or similar) to begin grinding. The grinder will automatically stop once the selected quantity/time is reached.
- Collect Grounds: Remove the ground coffee container and use the freshly ground coffee immediately for best flavor.

Image: The touch panel, showing options for selecting grinding time or number of cups.
Video: Official demonstration of the Ollygrin Coffee Grinder with 30 Grinding Settings, showcasing its operation and features.
6. Maintenance and Cleaning
Regular cleaning ensures optimal performance and extends the life of your grinder.
- Unplug: Always unplug the grinder from the power outlet before cleaning.
- Disassemble: Remove the bean hopper and the ground coffee container.
- Clean Removable Parts: Wash the bean hopper, its lid, and the ground coffee container with warm, soapy water. Rinse thoroughly and dry completely.
- Clean Burr: Use the included cleaning brush to remove any residual coffee grounds from the conical burrs and the grinding chamber. The upper burr is removable for deeper cleaning. Refer to the diagram for removal and reinstallation.
- Wipe Base: Wipe the exterior of the grinder base with a damp cloth. Do not immerse the base in water.
- Reassemble: Ensure all parts are completely dry before reassembling and storing the grinder.

Image: Demonstrating the easy cleaning process of the removable burr with the provided brush.
7. Troubleshooting
| Problem | Possible Cause | Solution |
|---|---|---|
| Grinder does not turn on. | Not plugged in; power outage; hopper not correctly seated. | Ensure plug is securely in outlet; check power supply; ensure bean hopper is locked into place. |
| Beans are not grinding. | Hopper empty; burrs clogged; grind setting too fine for bean type. | Add beans; clean burrs thoroughly; try a coarser grind setting. |
| Inconsistent grind. | Burrs dirty or damaged; foreign object in burrs. | Clean burrs thoroughly; inspect for damage or foreign objects. |
| Grinder stops during operation. | Overheating; motor overload; safety lock engaged. | Unplug and let cool for 30 minutes; reduce amount of beans; ensure hopper is correctly seated. |
8. Specifications
| Feature | Detail |
|---|---|
| Brand | Ollygrin |
| Model Number | BG713 |
| Color | Black |
| Material | Plastic (housing), Stainless Steel (burrs) |
| Grind Settings | 30 Precise Settings |
| Capacity | 12 Cups (coffee beans) |
| Wattage | 150 Watts |
| Voltage | 120 Volts |
| Product Dimensions (L x W x H) | 6.74" x 11.39" x 5.36" |
| Included Components | Cleaning Brush |
| UPC | 730688960654 |

Image: The Ollygrin coffee grinder with its key dimensions indicated.
9. Warranty and Support
For warranty information or technical support, please refer to the documentation included with your purchase or contact Ollygrin customer service. Keep your purchase receipt as proof of purchase.