
1. Introduction
This manual provides essential information for the safe and efficient operation, installation, and maintenance of your Gidrox 10000 BTU 12V DC RV Air Conditioner, Model RX55. Please read this manual thoroughly before installation and use, and retain it for future reference.
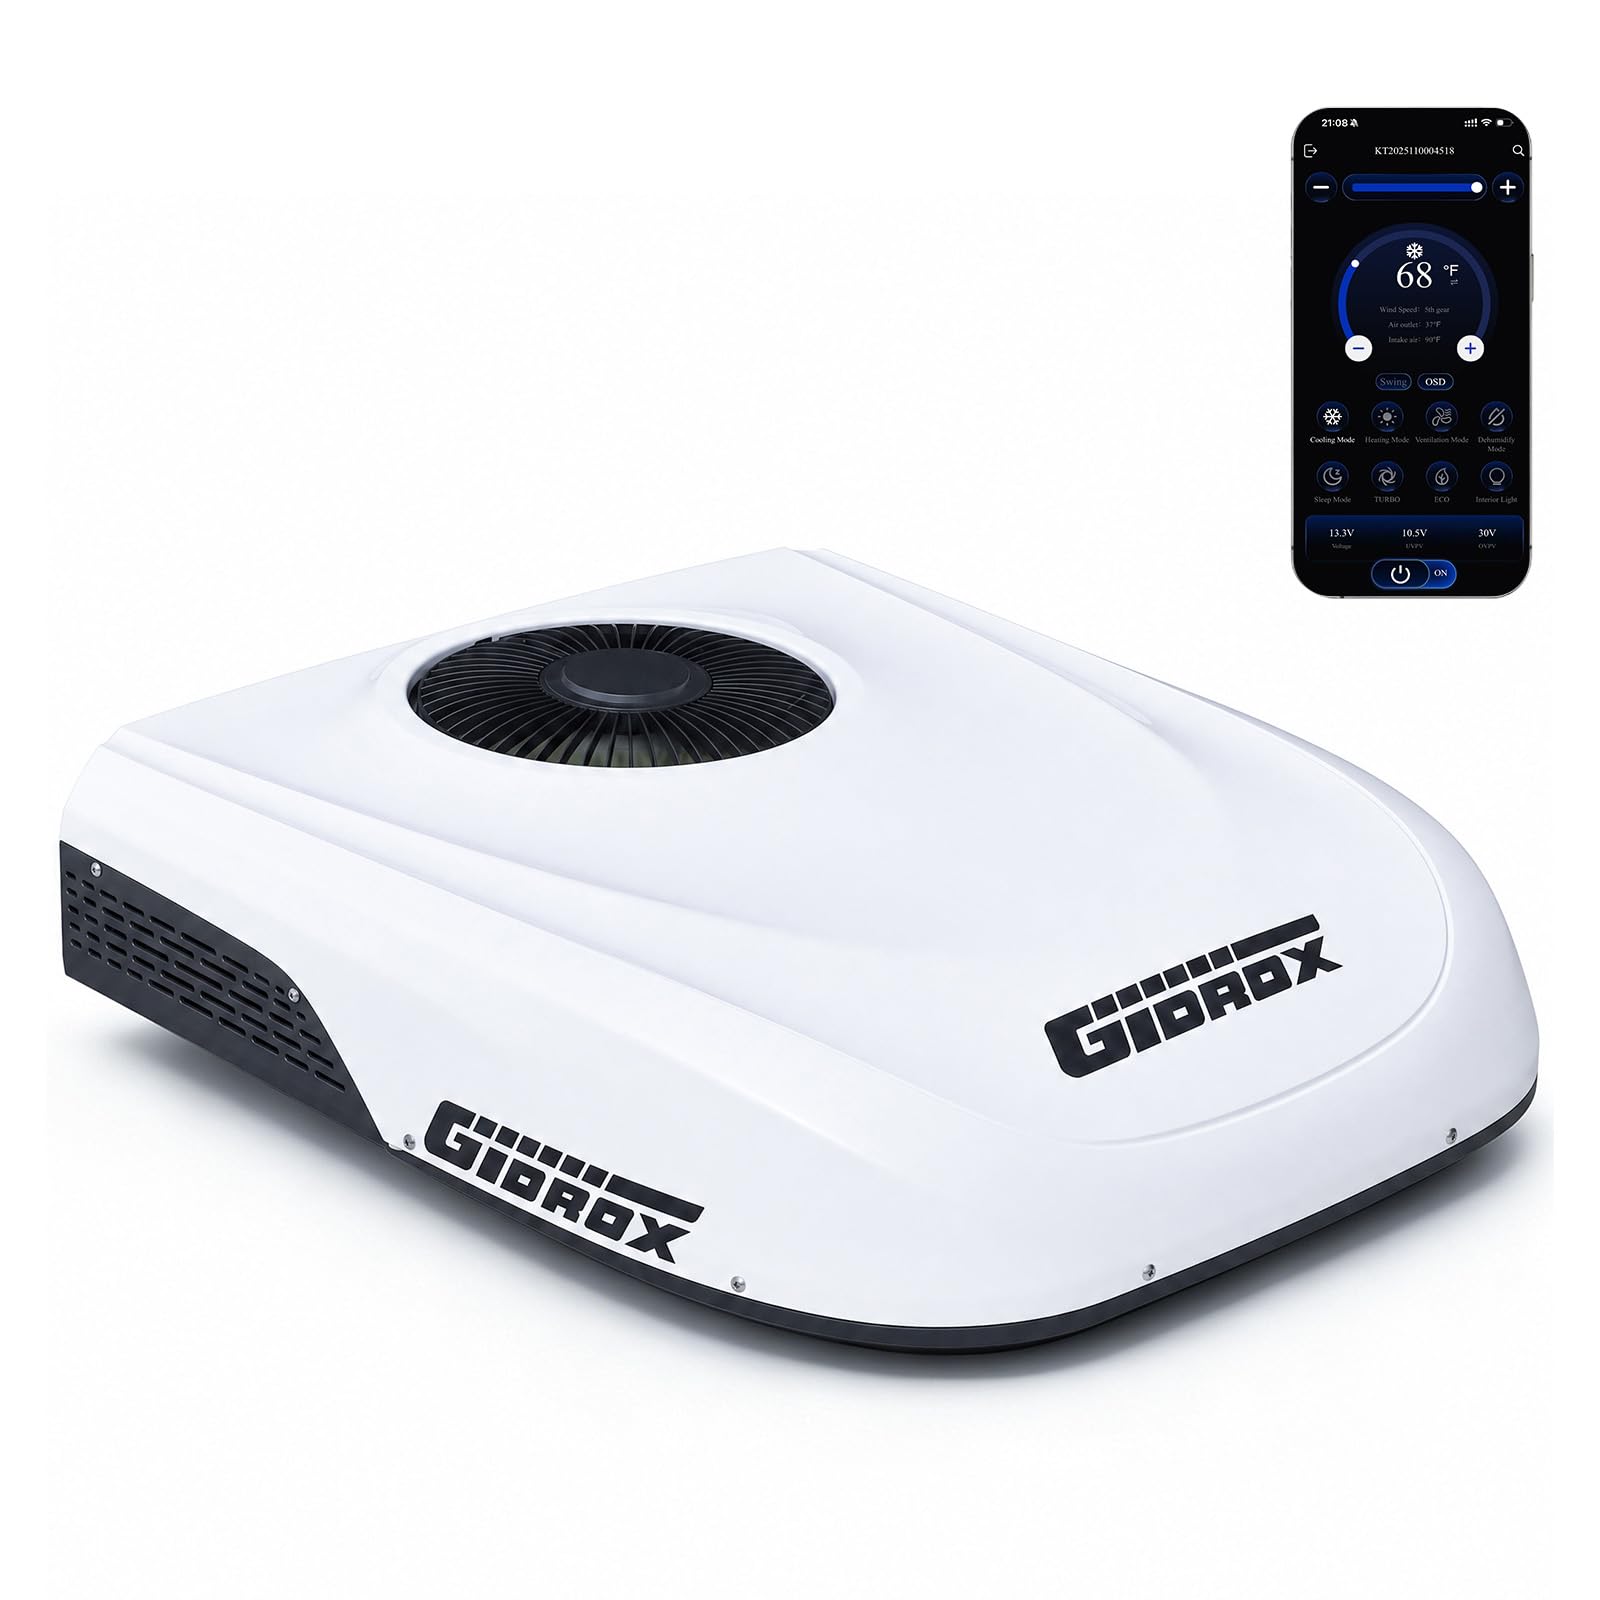
Figure 1: Gidrox 10000 BTU 12V DC RV Air Conditioner (Model RX55) installed on an RV rooftop.
2. Safety Information
Always adhere to the following safety precautions to prevent injury or damage to the unit and your vehicle.
- Electrical Safety: Ensure the power supply is disconnected before any installation, maintenance, or repair. This unit operates on 12V DC; verify your vehicle's electrical system compatibility.
- Professional Installation: Installation should be performed by a qualified technician or an individual with sufficient electrical and RV system knowledge to ensure proper wiring and sealing.
- Ventilation: Do not block air inlets or outlets on the unit. Proper airflow is essential for efficient operation and to prevent overheating.
- Structural Integrity: Ensure the RV roof structure can support the weight of the air conditioner (approximately 54 lbs) and that the mounting area is sealed correctly to prevent water leaks.
- Refrigerant: This unit contains refrigerant. Do not attempt to service the sealed refrigerant system yourself. Contact qualified personnel for any refrigerant-related issues.
- Children and Pets: Keep children and pets away from the unit during operation and maintenance.
3. Setup and Installation
The Gidrox RV Air Conditioner is designed for straightforward installation into standard 14" x 14" RV roof openings. The unit is lightweight at approximately 54 lbs, facilitating easier handling. It is compatible with roof thicknesses between 1.5 inches and 3.5 inches.
3.1 Package Contents
Before beginning installation, verify that all components are present in the package:

Figure 2: Included components for Gidrox RV Air Conditioner installation.
- Outdoor Unit
- Indoor Unit
- Power Cable (19.7 ft)
- Sealing Sponge
- Mounting Bracket
- Remote Control
- Screws and Fasteners
- Cable Ties
3.2 Installation Steps
Follow these general steps for installation. Refer to the detailed diagrams for visual guidance.

Figure 3: Overview of the 4-step quick installation process.
- Prepare Opening: Ensure your RV has a standard 14" x 14" roof opening. Clean the area around the opening.
- Install Sealing Sponge: Apply the provided sealing sponge around the perimeter of the roof opening to create a watertight seal.
- Position Outdoor Unit: Carefully lift and position the outdoor unit over the roof opening. Ensure it is centered and aligned.
- Connect Wires: From inside the RV, connect the power cable (19.7 ft provided) to the indoor unit and the vehicle's 12V DC power supply. Ensure correct polarity.
- Secure Indoor Unit: Mount the indoor unit to the ceiling, aligning it with the outdoor unit. Tighten the interior bolts to secure both units firmly to the roof. The unit accommodates roof thicknesses between 1.5 and 3.5 inches.

Figure 4: The unit is designed to fit standard 14" x 14" RV roof openings.

Figure 5: Interior unit installation showing power cable and roof thickness compatibility.
4. Operating Instructions
Your Gidrox RV Air Conditioner offers multiple control methods and operating modes for optimal comfort and energy efficiency.
4.1 Control Methods
The unit can be controlled via three interfaces:
- Smartphone APP: Connect your smartphone via Bluetooth to access full control features, including temperature settings, timers, and mode selection.
- Infrared Remote Control: Use the included remote for convenient adjustments from anywhere within the RV.
- Control Panel: Physical buttons and a display on the indoor unit allow direct control.

Figure 6: Multiple control options for the Gidrox RV Air Conditioner.

Figure 7: Smartphone app control interface.
4.2 Operating Modes
Select from the following modes to suit your cooling needs:
- Turbo Mode: Provides rapid cooling, delivering up to 10,000 BTU of power to cool your space within approximately 3 minutes. Ideal for quickly reducing high temperatures.
- ECO Mode: An energy-efficient mode designed to maintain a comfortable temperature with reduced power consumption. This mode is optimized for extended use, especially when relying on battery power.
- Sleep Mode: Operates at an ultra-quiet 40dB, ensuring minimal disturbance for restful sleep. This mode also optimizes energy usage for overnight operation.
- Fan Mode: Circulates air without engaging the compressor, providing ventilation.
- Dry Mode (Dehumidifier): Reduces humidity in the air, contributing to a more comfortable environment.

Figure 8: Quiet operation in Sleep mode for undisturbed rest.

Figure 9: Noise level comparison across different operating modes.
4.3 Power Consumption and Efficiency
The Gidrox RV Air Conditioner is designed for low power consumption, operating directly from your RV's 12V DC battery without the need for an inverter. This inverter technology ensures sustained efficiency and consistent comfort.
- Average power consumption in ECO mode during nighttime operation (at 30°C ambient) is approximately 350W.
- A 400Ah battery can support all-night use in ECO mode.
- Rated Power: 700W, Rated Current: 58A, Starting Current: 30A.

Figure 10: Power consumption across different modes.

Figure 11: Off-grid operation with solar and battery power.

Figure 12: Benefits of inverter technology.
4.4 Official Product Video
Video 1: Gidrox Upgraded 12V DC RV Air Conditioner. This video provides a visual overview of the product's features and operation.
5. Maintenance
Regular maintenance ensures optimal performance and longevity of your Gidrox RV Air Conditioner.
- Filter Cleaning: Periodically clean or replace the air filter (HEPA type) located in the indoor unit. A dirty filter can reduce airflow and cooling efficiency.
- Exterior Cleaning: Keep the outdoor unit free from debris, leaves, and dirt. Gently clean the coils and fan blades with a soft brush or cloth. Ensure the unit is off and disconnected from power before cleaning.
- Drainage: Check the condensate drain for blockages to ensure proper water drainage.
- Electrical Connections: Annually inspect all electrical connections for tightness and signs of corrosion.
- Roof Seal: Regularly inspect the roof seal around the unit for cracks or deterioration to prevent water leaks into the RV.
6. Troubleshooting
If you encounter issues with your air conditioner, refer to the following common troubleshooting steps. For problems not listed here, contact customer support.
| Problem | Possible Cause | Solution |
|---|---|---|
| Unit does not turn on | No power supply; Blown fuse; Loose wiring connection. | Check RV battery voltage; Inspect fuses; Verify all electrical connections are secure. |
| Insufficient cooling | Dirty air filter; Blocked air vents; Low refrigerant; Ambient temperature too high. | Clean or replace air filter; Ensure vents are clear; Contact service for refrigerant check; Allow unit to run longer in extreme heat. |
| Unit is noisy | Loose components; Debris in fan; Unit not level. | Check for loose screws; Inspect fan for obstructions; Ensure RV is parked on a level surface. |
| Water leakage | Blocked condensate drain; Improper roof seal. | Clear drain tube; Inspect and reseal roof mounting area. |
| Remote control not working | Dead batteries; Obstruction between remote and unit. | Replace remote batteries; Ensure clear line of sight to the indoor unit's receiver. |
7. Specifications
Detailed technical specifications for the Gidrox 10000 BTU 12V DC RV Air Conditioner (Model RX55).
| Feature | Detail |
|---|---|
| Brand | Gidrox |
| Model Name | RX55 |
| Cooling Power | 10,000 BTU |
| Voltage | 12 Volts DC |
| Rated Power | 700 Watts |
| Rated Current | 58 Amps |
| Starting Current | 30 Amps |
| Noise Level | 40 dB (Sleep Mode) |
| Product Dimensions (D x W x H) | 34.6" x 29.5" x 7" |
| Item Weight | 54 lbs (approx. 59 lbs shipping weight) |
| Installation Type | Rooftop (Split System) |
| Roof Opening Compatibility | Standard 14" x 14" |
| Roof Thickness Compatibility | 1.5" to 3.5" |
| Control Methods | App Control, Remote Control, Touch Control Panel |
| Operating Modes | Cooling (Turbo, ECO, Sleep, Fan, Dry) |
| Filter Type | HEPA Filter |
| Included Components | Installation Kit, Power Cord (19.7 ft) |
8. Warranty and Support
The Gidrox 10000 BTU 12V DC RV Air Conditioner (Model RX55) comes with a 2-year warranty. For warranty claims, technical assistance, or any questions regarding your product, please contact Gidrox customer support.

Figure 13: Gidrox customer support and warranty information.
Please have your model number (RX55) and purchase date available when contacting support to expedite service.
