
1. Introduction
This manual provides essential instructions for the safe and efficient operation of your ALIENTEK T90 series smart soldering iron. Please read this manual thoroughly before using the device to ensure proper function and to prevent damage or injury. The ALIENTEK T90 series includes models T90A, T90B, and T90C, each designed for precision soldering tasks with adjustable temperature control and smart features.
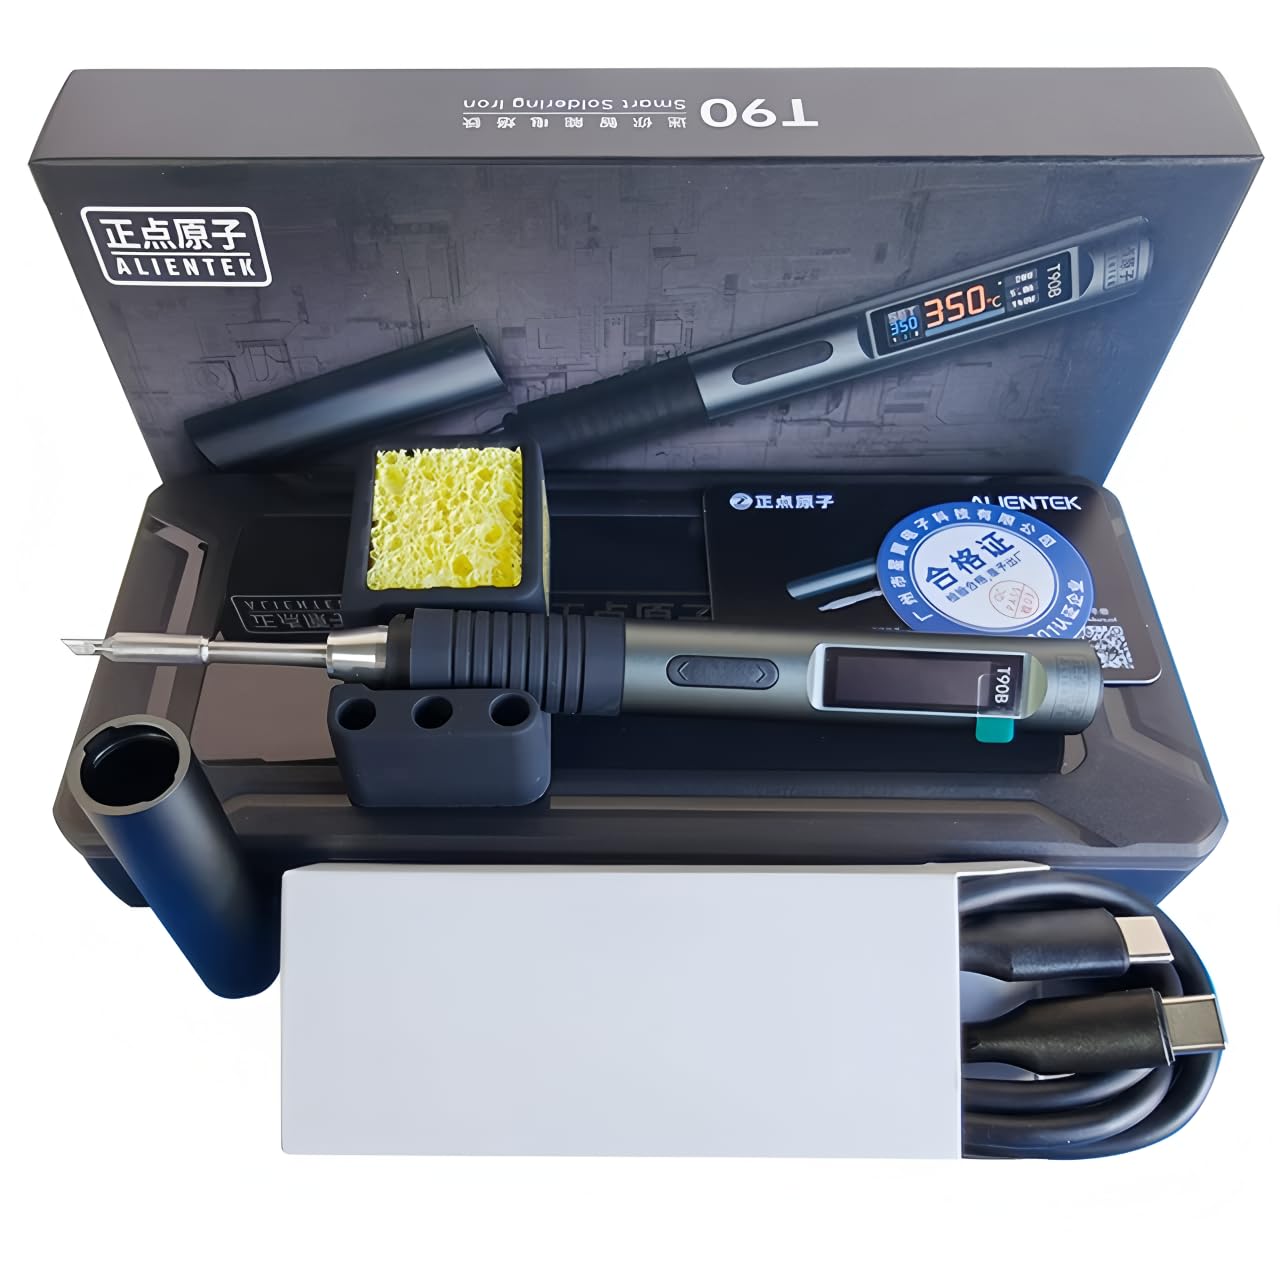
Figure 1: ALIENTEK T90B Smart Soldering Iron. This image displays the soldering iron with its digital display showing temperature and power, highlighting its smart features and compact design.
2. Safety Information
Always observe the following safety precautions to prevent electric shock, fire, or personal injury:
- Heat Hazard: The soldering iron tip reaches very high temperatures (up to 450°C). Avoid direct contact with the tip and allow it to cool completely before handling or storing.
- Fire Hazard: Keep flammable materials away from the soldering area. Use a heat-resistant mat and a stable soldering iron stand.
- Fume Hazard: Soldering produces fumes that can be harmful. Work in a well-ventilated area or use a fume extractor.
- Electrical Safety: Ensure the power supply is compatible with the soldering iron's requirements (DC 9-28V). Do not use the iron with damaged cables or if it shows signs of malfunction.
- Personal Protective Equipment: Wear safety glasses to protect your eyes from solder splashes.
- Children and Pets: Keep the soldering iron out of reach of children and pets.
- Proper Use: Use the soldering iron only for its intended purpose. Do not modify the device.
3. Package Contents
Verify that all items listed below are present in your package. If any items are missing or damaged, please contact customer support.
- ALIENTEK T90B Soldering Iron Unit
- 245-KU Soldering Tip (Standard configuration)
- USB-C to USB-C Cable (140W compatible)
- Mini Silicone Soldering Iron Stand (TH30)
- Instruction Manual Card

Figure 2: Included components. This image illustrates the ALIENTEK T90B soldering iron, a 245-KU tip, a USB-C cable, a silicone stand, and the instruction manual card.
4. Setup
- Insert Soldering Tip: Carefully insert the desired soldering tip into the front end of the soldering iron handle. Ensure it is fully seated and secure.
- Connect Power: Connect the USB-C cable to the Type-C power port on the soldering iron. Connect the other end of the cable to a compatible PD 3.1/QC 3.0 power adapter (DC 9-28V, 140W recommended for T90B).
- Placement: Place the soldering iron securely in the provided mini silicone stand when not in use.
5. Operating Instructions
5.1 Power On/Off
The soldering iron will automatically power on when connected to a compatible power source. To power off, navigate to the "Shut down" option in the menu and confirm.
5.2 Temperature Adjustment and Menu Navigation
The ALIENTEK T90 series features a multifunctional menu for various settings. Use the buttons on the handle to navigate and adjust parameters.

Figure 3: Multifunctional menu. This image shows the digital display with options like "Vol Info", "Temp Step", "Sleep" temperature, "Stdb" (standby) temperature, and "Shut down". It also indicates language and temperature unit settings.
- Temperature Setting: Adjust the target temperature using the navigation buttons. The display shows the set temperature and the current tip temperature.
- Sleep Temperature: Set the temperature the iron will drop to during sleep mode.
- Standby Time: Configure the duration before the iron enters standby mode.
- Voltage Information: View current voltage input.
- Language/Units: Select your preferred language and temperature units (Celsius/Fahrenheit).
5.3 Inductive Sleep Function
The soldering iron is equipped with an inductive sleep function to extend the service life of the heating core and conserve energy. When the iron is placed down, it automatically enters sleep mode, reducing the tip temperature to the preset sleep temperature. When picked up, it quickly heats back to the operating temperature.

Figure 4: Inductive sleep feature. This image illustrates how the display activates when the iron is picked up and deactivates when placed down, indicating the inductive sleep functionality.
6. Maintenance
- Tip Cleaning: Regularly clean the soldering tip using a damp sponge or brass wool to remove excess solder and oxidation. A clean tip ensures efficient heat transfer.
- Tip Tinning: After cleaning and before storage, tin the tip with a small amount of solder to prevent oxidation and prolong its life.
- Storage: Store the soldering iron in a dry, safe place when not in use. Ensure the tip is cool before storing.
- Inspection: Periodically inspect the power cable and the iron for any signs of damage. Do not use if damaged.
7. Troubleshooting
| Problem | Possible Cause | Solution |
|---|---|---|
| Iron does not heat up. | No power, faulty cable, or incompatible power adapter. | Check power connection. Ensure power adapter meets PD 3.1/QC 3.0 standards (DC 9-28V). Try a different cable or adapter. |
| Temperature is unstable or incorrect. | Poor tip contact, oxidized tip, or incorrect settings. | Ensure tip is fully inserted. Clean and tin the tip. Check temperature settings in the menu. |
| Iron enters sleep mode too quickly. | Sleep timer set too short. | Adjust the standby time setting in the multifunctional menu. |
| Display is blank or flickering. | Power issue or internal malfunction. | Verify power supply. If problem persists, contact customer support. |
8. Specifications
The following table outlines the key specifications for the ALIENTEK T90 series soldering irons:

Figure 5: Detailed specifications for T90A, T90B, and T90C models. This table compares power, tip types, and other technical details across the series.
| Feature | T90A | T90B | T90C |
|---|---|---|---|
| Power Port | Type-C | ||
| Operating Voltage | DC 9-28V | ||
| Fast Charging Protocol | PD3.1/QC3.0 | ||
| Temperature Range | 80-450°C | ||
| Heating Power | ≈18-65W | ≈18-140W | ≈18-130W |
| Screen | 0.99' IPS LCD (160*40 Pixel) | ||
| Handle Size | L178mm Ø16mm | ||
| Overall Weight | ≈55g | ||
| Tip Type | T210 | T245 | T65 |
| Resistance | 2.1Ω | 2.5Ω | 6.0Ω |
| Melting Time | ≈2.5S (65W) | ≈3.5S (140W) | ≈5.0S (130W) |

Figure 6: Model variations and dimensions. This image shows the physical differences between the T90A, T90B, and T90C models, including their respective tip types and overall dimensions.
9. Warranty Information
The ALIENTEK T90 Smart Soldering Iron comes with a 1-year warranty from the date of purchase. This warranty covers manufacturing defects and material faults under normal use. It does not cover damage caused by misuse, accidents, unauthorized modifications, or improper maintenance. Please retain your proof of purchase for warranty claims.
10. Support
For technical assistance, troubleshooting beyond this manual, or warranty inquiries, please contact your retailer or the manufacturer directly. Refer to the contact information provided with your purchase or visit the official ALIENTEK website for support resources.


