
Introduction
Welcome to your new OLIXIS Countertop Ice Maker Machine. This manual provides essential information for safe operation, maintenance, and troubleshooting to ensure you get the best performance from your appliance.
- High-Efficiency Ice Making: Produces 9 ice cubes in just 6 minutes, with a total capacity of 26 lbs in 24 hours from its 1.5L water tank.
- Portable & Space-Saving: Compact design (8.8 x 12.5 x 11.6 inches, 17.6 lbs) with a sturdy handle, ideal for kitchens, RVs, camping, parties, and dormitories.
- Effortless Self-Cleaning: Features an auto-cleaning function activated by a simple button press. The removable basket and scoop facilitate easy manual cleaning.
- Two Ice Cube Sizes: Offers small cubes for chilling seafood or beer, and large cubes for rapidly cooling coffee or soda. Bullet-shaped ice is designed for safety.
- Simple & Quiet Operation: Intuitive control panel with clear indicators for water refill and ice full alerts. Operates below 40dB for minimal disturbance.
Important Safety Information
Please read all instructions carefully before using the ice maker. Keep this manual for future reference.
- Ensure the appliance is properly grounded.
- Do not immerse the power cord, plug, or any part of the appliance in water or other liquids.
- Supervise children when the appliance is in use.
- Do not use the appliance near flammable materials or liquids.
- Keep ventilation openings clear of obstructions.
- Unplug the ice maker before cleaning or when not in use.
- Important: Use only mineral water for ice making. Sugar and other residues can block the pump and cause permanent damage to the unit.
Product Overview
Familiarize yourself with the components and control panel of your OLIXIS ice maker.

Image: The control panel features an ON/OFF button, a SELECT button for ice size, and indicator lights for Small Ice, Large Ice, Add Water, Ice Full, Clean, and Power status.
Control Panel Functions:
- ON/OFF Button: Press to turn the unit on or off. Press and hold for 5 seconds to activate the self-cleaning function.
- SELECT Button: Press to toggle between Small and Large ice cube sizes.
- SMALL Indicator: Lights up when small ice cube size is selected.
- LARGE Indicator: Lights up when large ice cube size is selected.
- ADD WATER Indicator: Lights up when the water reservoir needs refilling.
- ICE FULL Indicator: Lights up when the ice basket is full.
- CLEAN Indicator: Lights up during the self-cleaning cycle.
- POWER Indicator: Lights up when the unit is powered on and operating.
Setup
- Unpack the Ice Maker: Carefully remove all packaging materials and inspect the unit for any damage. Keep packaging for future transport if needed.
- Placement: Place the ice maker on a stable, level surface away from direct sunlight and heat sources. Ensure there is adequate ventilation around the unit.
- Initial Cleaning: Before first use, clean the interior of the ice maker. Refer to the 'Maintenance and Cleaning' section for detailed instructions.
- Fill Water Reservoir: Open the lid and fill the water reservoir with clean, mineral water up to the 'MAX' fill line. Do not overfill.

Image: The OLIXIS ice maker is designed to be compact and portable, fitting easily on a countertop.
Operating Instructions
Follow these steps to start making ice with your OLIXIS ice maker.
- Power On: Plug the ice maker into a grounded electrical outlet. Press the ON/OFF button to turn on the unit. The POWER indicator will light up.
- Select Ice Size: Press the SELECT button to choose your desired ice cube size. The corresponding SMALL or LARGE indicator will illuminate.
- Begin Ice Making: The machine will automatically start the ice making cycle. The first batch of ice cubes will be ready in approximately 6-10 minutes, depending on the selected size and ambient temperature.
- Ice Full / Add Water Alerts: The ICE FULL indicator will light up when the ice basket is full. The machine will pause operation. The ADD WATER indicator will light up when the water reservoir is low, and the machine will pause until refilled.
- Dispense Ice: Use the provided ice scoop to remove ice from the basket. Once ice is removed or water is refilled, the machine will resume operation automatically.

Image: A visual guide to operating the ice maker, from adding water to selecting ice size and enjoying the results.

Image: The ice maker efficiently produces 9 ice cubes in 6 minutes, capable of making 26 lbs of ice in 24 hours.

Image: The ice maker offers two distinct ice cube sizes: small for chilling items like seafood, and large for beverages.
Maintenance and Cleaning
Regular cleaning and maintenance will prolong the life of your ice maker and ensure hygienic ice production.
Self-Cleaning Function:
- Ensure the water reservoir is filled with clean water.
- Press and hold the ON/OFF button for 5 seconds. The CLEAN indicator will light up, and the machine will begin a self-cleaning cycle.
- Once the cycle is complete, drain any remaining water from the reservoir.
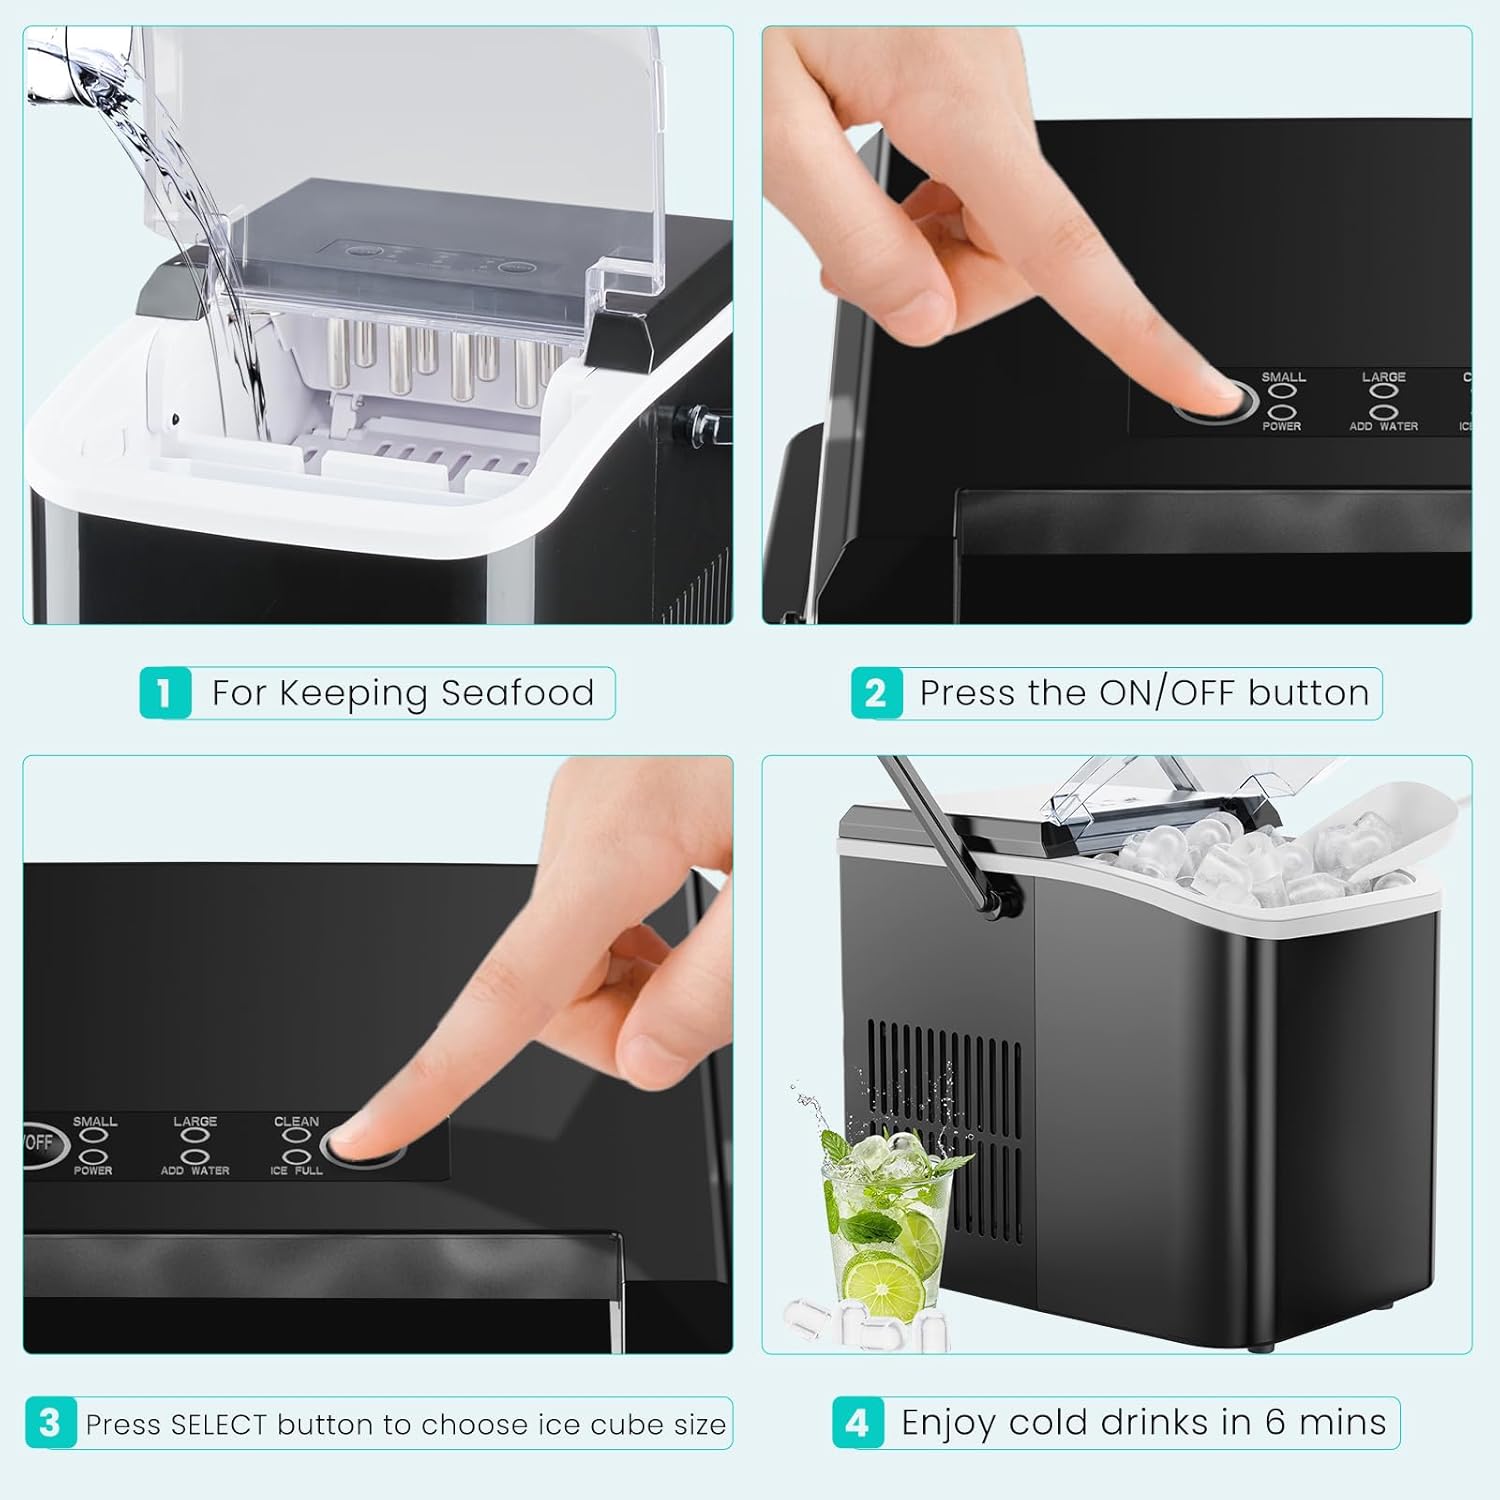
Image: The self-cleaning function circulates water to clean the internal components, activated by holding the ON/OFF button for 5 seconds.
Manual Cleaning:
- Unplug the ice maker from the power outlet.
- Remove the ice basket and any remaining ice.
- Drain all water from the water reservoir by removing the drain plug located at the bottom of the unit.
- Clean the interior of the water reservoir, ice basket, and ice scoop with a soft cloth and a mild, food-safe detergent.
- Rinse all components thoroughly with clean water to remove any detergent residue.
- Wipe the exterior of the unit with a damp cloth. Do not use abrasive cleaners or solvents.
- Ensure all parts are dry before reassembling and storing or using the ice maker again.
Note: Always use clean, mineral water to prevent mineral buildup and ensure optimal performance.
Troubleshooting
If you encounter any issues with your ice maker, please refer to the following table for common problems and solutions.
| Issue | Possible Cause | Solution |
|---|---|---|
| Machine not turning on. | No power supply. | Check if the power cord is securely plugged into a working outlet. Test the outlet with another appliance. |
| No ice production. | Water reservoir is empty. Ambient temperature is too high. | Refill the water reservoir (ADD WATER indicator will be lit). Ensure the ice maker is in a cool, well-ventilated area. |
| Ice cubes are small or melt quickly. | Water is not cold enough. High ambient temperature. | Use colder water for faster and firmer ice production. Operate the ice maker in a cooler environment. |
| ICE FULL indicator is on, but basket is not full. | Ice cubes are blocking the sensor. | Gently redistribute the ice cubes in the basket to clear the sensor. |
| Unusual noise during operation. | Normal compressor operation or ice dropping. Unit not level. | Some noise is normal. Ensure the unit is on a stable, level surface. If noise is excessive or unusual, contact customer support. |
Specifications
Detailed technical specifications for the OLIXIS Countertop Ice Maker Machine.
- Brand: OLIXIS
- Model Name: ZBJ-PP10A-BK
- Product Dimensions (D x W x H): 12.32" x 8.58" x 11.61"
- Water Tank Capacity: 1.5 liters
- Wattage: 150 watts
- Item Weight: 15.2 pounds
- Voltage: 115 volts
- Ice Production per Day: 26 pounds
- Refrigerant: R600a
- Material Type: Alloy Steel, Plastic
Official Product Video
Watch the official product video for a visual guide to the OLIXIS Countertop Ice Maker Machine.
Video: An official overview of the OLIXIS Countertop Ice Maker Machine with Handle, demonstrating its features and design.
Warranty and Support
For warranty information, technical assistance, or any questions not covered in this manual, please refer to the documentation included with your product or contact OLIXIS customer service directly. You can also visit the official OLIXIS store for more information: OLIXIS Store.
