
1. Introduction
Thank you for choosing the Huuger 102.4 Inch Behind Couch Table. This manual provides essential information for the safe assembly, proper operation, and effective maintenance of your new console table. Please read these instructions thoroughly before assembly and retain them for future reference.
This extra-long console table is designed to fit behind oversized sectional sofas, providing a convenient surface and integrated charging capabilities. It features 2 AC outlets, 1 USB port, and 1 USB-C port to keep your devices powered within reach. Protective anti-collision pads and adjustable feet ensure stability and protect your walls and floors.
2. Safety Information
- Always follow assembly instructions carefully.
- Do not overload the power outlets. Ensure total connected load does not exceed the specified limits (125V-12A for AC outlets, 5V-2A for USB/USB-C ports).
- Keep liquids away from the power outlets to prevent electrical shock.
- Ensure all connections are secure before using the charging features.
- Use the included anti-tip kit to secure the table to the wall, especially if children or pets are present, to prevent tipping.
- Do not stand or sit on the table.
- Place the table on a level surface to ensure stability.
3. Package Contents
Verify that all components are present before beginning assembly. If any parts are missing or damaged, please contact customer support.
| Component | Quantity |
|---|---|
| Tabletop Panels | Multiple (depending on length) |
| Metal Frame Legs | Multiple |
| Power Outlet Strip (with AC, USB, USB-C ports) | 2 |
| Adjustable Anti-Collision Pads | Set |
| Adjustable Feet | Set |
| Assembly Hardware (screws, bolts, etc.) | Set |
| Assembly Tools (Allen wrench, screwdriver) | Set |
| Anti-Tip Kit | 1 |
| Assembly Guide | 1 |
4. Setup and Assembly
Assembly typically takes approximately 30 minutes. It is recommended to have two people for easier assembly, especially when handling longer sections.
4.1 Unpacking and Preparation
- Carefully unpack all components and lay them out on a clean, soft surface to prevent scratches.
- Identify all parts against the package contents list.
- Ensure you have the provided tools (Allen wrench, screwdriver).
4.2 Assembling the Frame
- Attach the metal frame legs to the tabletop panels using the provided hardware. Ensure all screws are tightened securely.
- Connect the tabletop sections if your model consists of multiple panels.
4.3 Installing Power Outlets
- The power outlet panels can be installed in 6 adjustable positions along the tabletop. Choose your desired locations.
- Insert the power outlet strips into the designated openings on the tabletop. Secure them with the provided screws.
- Ensure the power cords are routed safely and do not pose a tripping hazard.
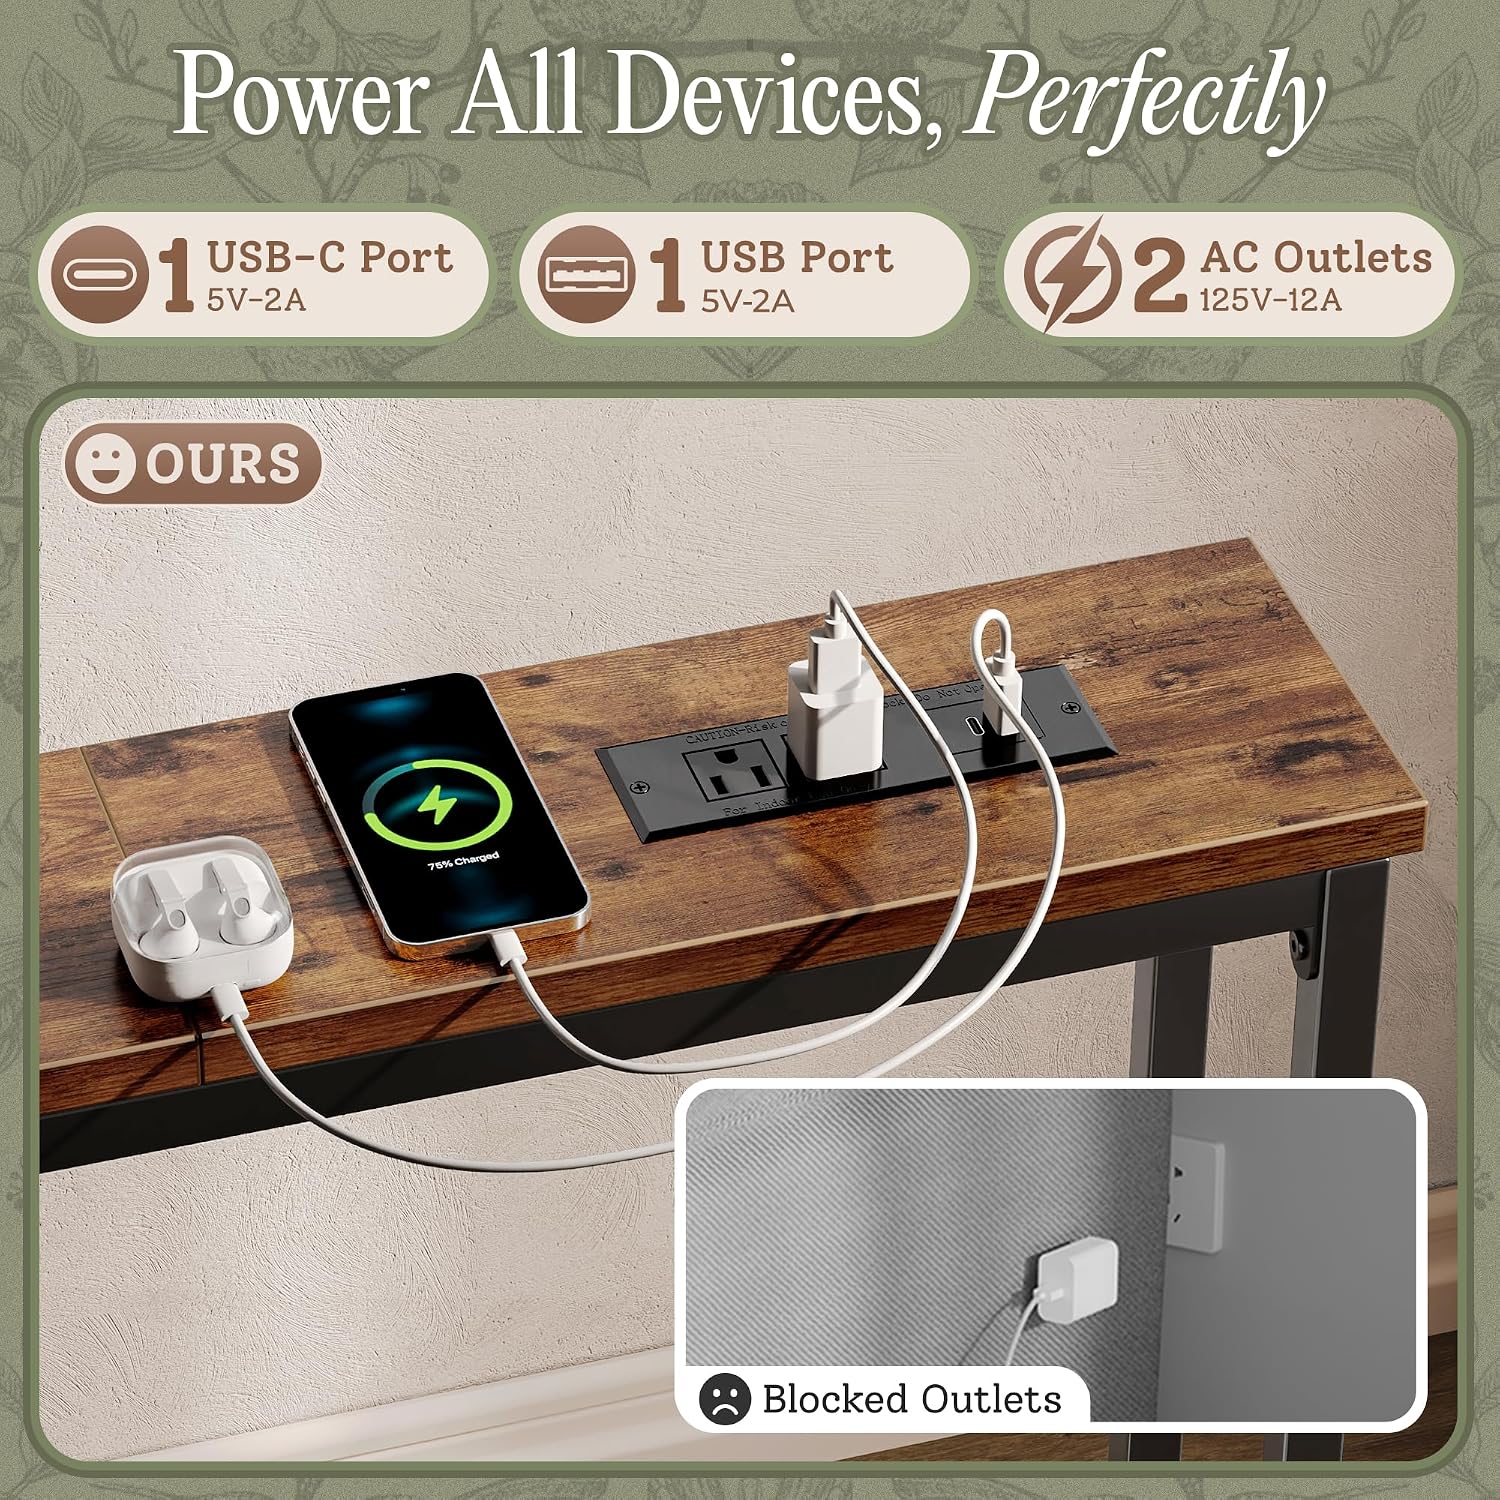
Figure 1: The table features 6 adjustable outlet positions for flexible use.
4.4 Attaching Anti-Collision Pads and Adjustable Feet
- Screw the adjustable anti-collision pads onto the back of the table legs. These pads help protect your wall and provide stability against baseboards. Adjust them to fit your specific baseboard thickness.
- Attach the adjustable feet to the bottom of the table legs. These feet allow you to level the table on uneven floors and prevent scratching.

Figure 2: Adjustable anti-collision pads ensure a snug fit against walls with baseboards.

Figure 3: Anti-tip design and adjustable feet for enhanced stability.
4.5 Securing the Table (Anti-Tip Kit)
- Using the provided anti-tip kit, secure the table to the wall. This is a crucial safety step to prevent accidental tipping.
- Follow the specific instructions included with the anti-tip kit for proper installation.
5. Operating Instructions
The Huuger Behind Couch Table is equipped with integrated power outlets for convenient device charging.
5.1 Using the Power Outlets
- Plug the table's main power cord into a standard wall outlet.
- To charge devices, plug them into the available AC outlets (125V-12A), USB port (5V-2A), or USB-C port (5V-2A).
- Ensure devices are compatible with the specified voltage and current ratings.
Figure 4: Integrated power outlets for convenient charging of multiple devices.
6. Maintenance
Regular maintenance will help prolong the life and appearance of your table.
- Cleaning: Wipe the tabletop and frame with a soft, damp cloth. Avoid harsh chemicals or abrasive cleaners, as they may damage the finish. The surface is waterproof and scratch-resistant for easy cleaning.
- Inspecting Connections: Periodically check all screws and bolts to ensure they remain tight. Retighten if necessary.
- Power Outlets: Keep the power outlets free from dust and debris. Do not insert foreign objects into the ports.
7. Troubleshooting
If you encounter issues with your Huuger Behind Couch Table, refer to the following common problems and solutions:
| Problem | Possible Cause | Solution |
|---|---|---|
| Devices not charging | Table not plugged in; wall outlet not working; device cable faulty; power strip overloaded. | Ensure the table's power cord is securely plugged into a functional wall outlet. Test the wall outlet with another device. Try a different charging cable. Reduce the number of devices connected to the power strip. |
| Table feels unstable/wobbly | Uneven floor; loose assembly hardware; anti-tip kit not installed. | Adjust the leveling feet on the bottom of the legs. Check and tighten all assembly screws. Install the anti-tip kit to secure the table to the wall. |
| Scratches on wall/baseboard | Anti-collision pads not adjusted or installed correctly. | Ensure the adjustable anti-collision pads are properly installed and adjusted to create a gap between the table and the wall/baseboard. |
If the problem persists after attempting these solutions, please contact Huuger customer support.
8. Specifications
| Feature | Detail |
|---|---|
| Model | 102.4 Inch Behind Couch Table |
| Dimensions (D x W x H) | 5.9" x 102.4" x 29.7" |
| Material | Engineered Wood (Top), Stainless Steel (Frame) |
| Color | Rustic Brown |
| AC Outlets | 2 (125V-12A) per power strip |
| USB Port | 1 (5V-2A) per power strip |
| USB-C Port | 1 (5V-2A) per power strip |
| Special Features | Charging Station, Adjustable Anti-Collision Pads, Adjustable Feet, Anti-Tip Design |
| Assembly Time | Approx. 30 minutes |

Figure 5: Product dimensions and key features.
9. Warranty and Support
9.1 Warranty Information
Huuger products typically come with a 3-year service warranty. Please refer to your purchase documentation or contact Huuger customer support for specific warranty terms and conditions applicable to your product.
9.2 Customer Support
For any questions, missing parts, assembly assistance, or warranty claims, please contact Huuger customer support through the retailer's platform or the official Huuger website. Please have your purchase details and model number (B0GVF174BV) ready when contacting support.