
Introduction
Thank you for purchasing the Leadjoy Xeno Plus Game Controller. This controller is designed to provide a versatile and high-performance gaming experience across multiple platforms. This manual will guide you through the setup, operation, and maintenance of your new controller to ensure optimal performance and longevity.
Product Overview and Components
The Leadjoy Xeno Plus controller offers advanced features such as multi-mode connectivity, TMR joysticks, microswitch buttons, and customizable triggers. Familiarize yourself with the controller's components and included accessories.
Package Contents:
- Leadjoy Xeno Plus Game Controller Unit
- Smart Charging Dock
- Replaceable Magnetic Cover (Clear Blue)
- Replaceable Cross D-pad
- Decoration Stickers
- USB-C Charging Cable
- Instruction Manual
Controller Layout:

Image: Overview of the Leadjoy Xeno Plus Game Controller highlighting its various features and components, including TMR sticks, microswitch buttons, dual triggers, and back buttons.

Image: The complete package contents of the Leadjoy Xeno Plus Game Controller, including the controller, charging dock, USB-C cable, and interchangeable parts.
Setup
1. Initial Charging
- Connect the USB-C charging cable to the smart charging dock and a power source.
- Place the Leadjoy Xeno Plus controller onto the smart charging dock. The controller will automatically power off and begin charging.
- Allow the controller to fully charge before first use. The LED indicators on the controller will show charging status.
2. Connecting to Devices
The Leadjoy Xeno Plus supports three connection modes: Wired, 2.4GHz Wireless, and Bluetooth.

Image: The Leadjoy Xeno Plus controller connected to various devices, illustrating its wired, 2.4G wireless, and Bluetooth connectivity options for PC, Switch, Android, and iOS.
Wired Connection:
- Connect the USB-C cable directly from the controller to your PC or compatible device.
- The controller will be automatically recognized.
2.4GHz Wireless Connection (via Dock):
- Plug the 2.4GHz wireless receiver (located in the smart charging dock) into a USB port on your PC or compatible device (e.g., Xbox Series S/X with R20 receiver, sold separately).
- The controller will automatically connect to the receiver.
Bluetooth Connection:
- Press and hold the Bluetooth pairing button on the controller until the LED indicator flashes rapidly.
- On your device (Nintendo Switch, PC, Mac, iOS, Android), go to Bluetooth settings and select "Leadjoy Xeno Plus" from the list of available devices.
- Once paired, the LED indicator will become solid.
- For Nintendo Switch, the controller supports one-click wake-up from sleep mode.
Operating Instructions
Power On/Off:
- To power on, press the Home button.
- To power off, press and hold the Home button for a few seconds, or place it on the smart charging dock.
TMR Joysticks and Microswitch Buttons:
The controller features advanced TMR joysticks for high precision and durability, minimizing drift over time. The ABXY buttons utilize microswitches for a tactile and responsive click.

Image: A detailed diagram showcasing the internal components and features of the TMR joysticks, emphasizing high-level sampling, resolution, linear feel, ultra-low latency, durability, and full customization.
Dual Trigger Modes:
The Xeno Plus controller features dual-mode triggers, allowing you to switch between Hair Trigger and Full Trigger modes based on your game type.
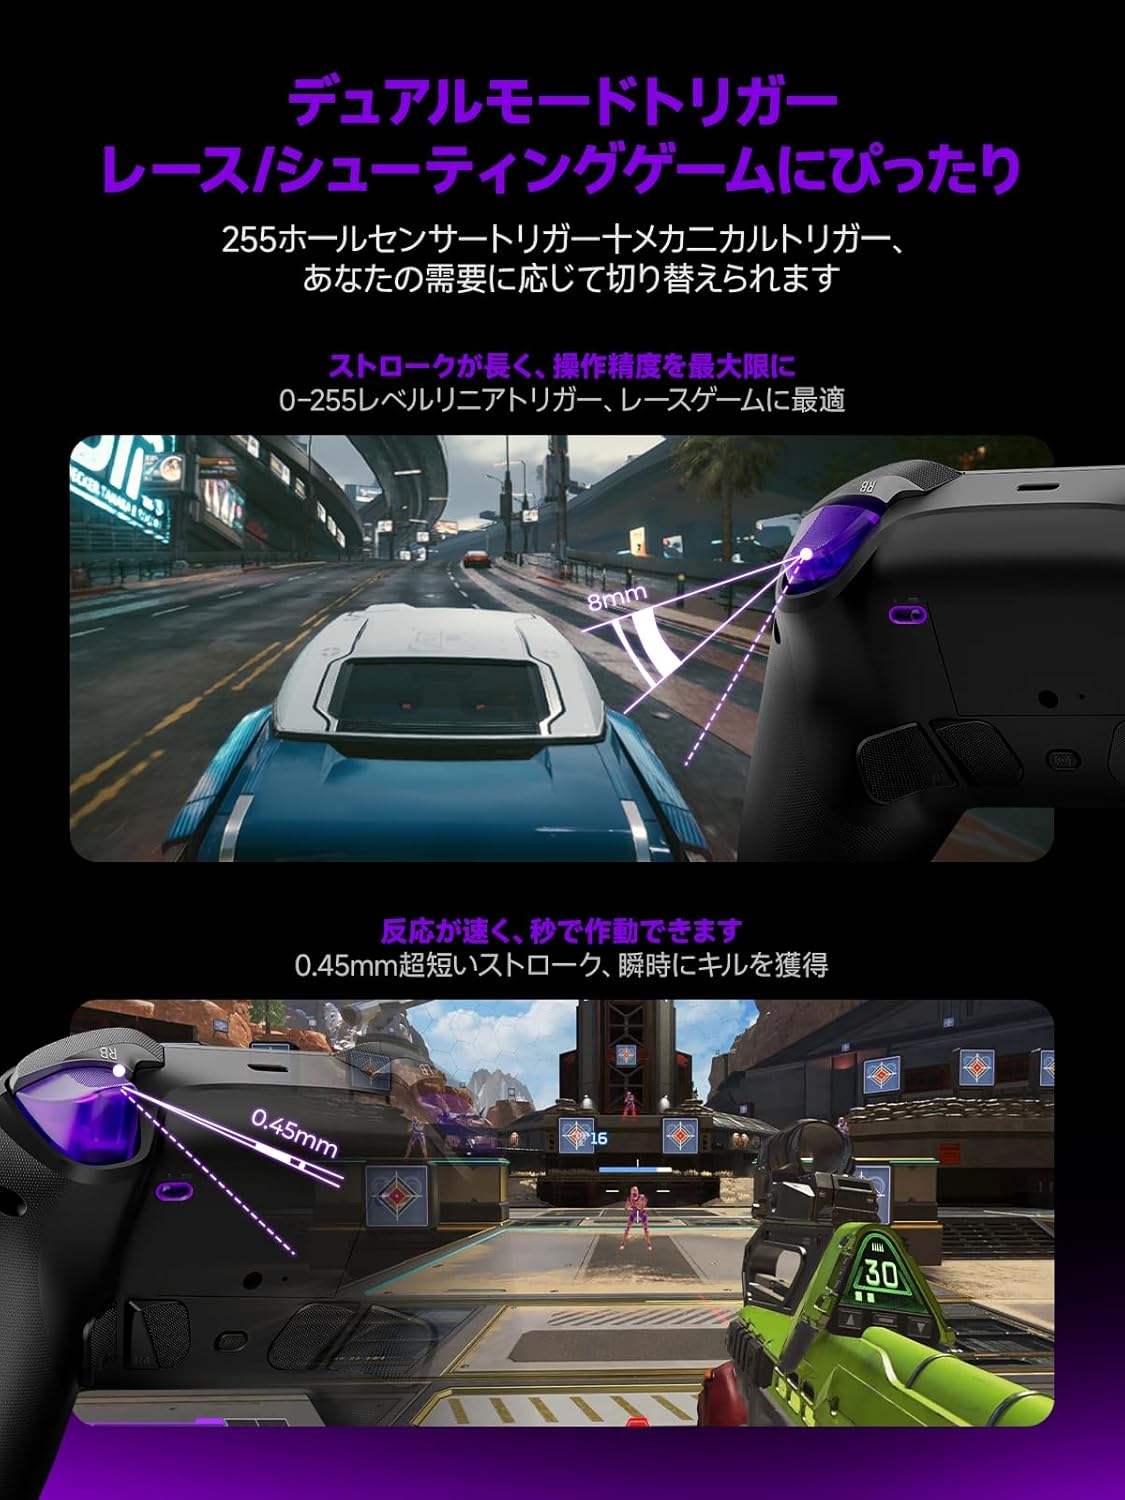
Image: Illustrations demonstrating the dual trigger modes. The top image shows a full trigger pull (8mm) ideal for precise throttle control in racing games. The bottom image shows a hair trigger pull (0.45mm) for rapid firing in shooting games.
- Full Trigger Mode: Ideal for racing games, providing analog input for precise throttle and brake control.
- Hair Trigger Mode: Optimized for FPS games, offering a short travel distance for instant firing and quicker reactions.
- To switch modes, use the dedicated switch located on the back of the controller.
Customizable Back Buttons:
The controller includes four customizable back buttons (R5, R4, L4, L5) that can be mapped to various functions or macros for enhanced gameplay.

Image: A view of the back of the Leadjoy Xeno Plus controller, highlighting the four customizable back buttons (R5, R4, L4, L5) and their mechanical microswitch design.
- Refer to the dedicated application for detailed instructions on mapping and creating macros for these buttons.
Motion Aim:
The controller supports motion aim, compatible with all games, offering precise control through gyroscope technology.
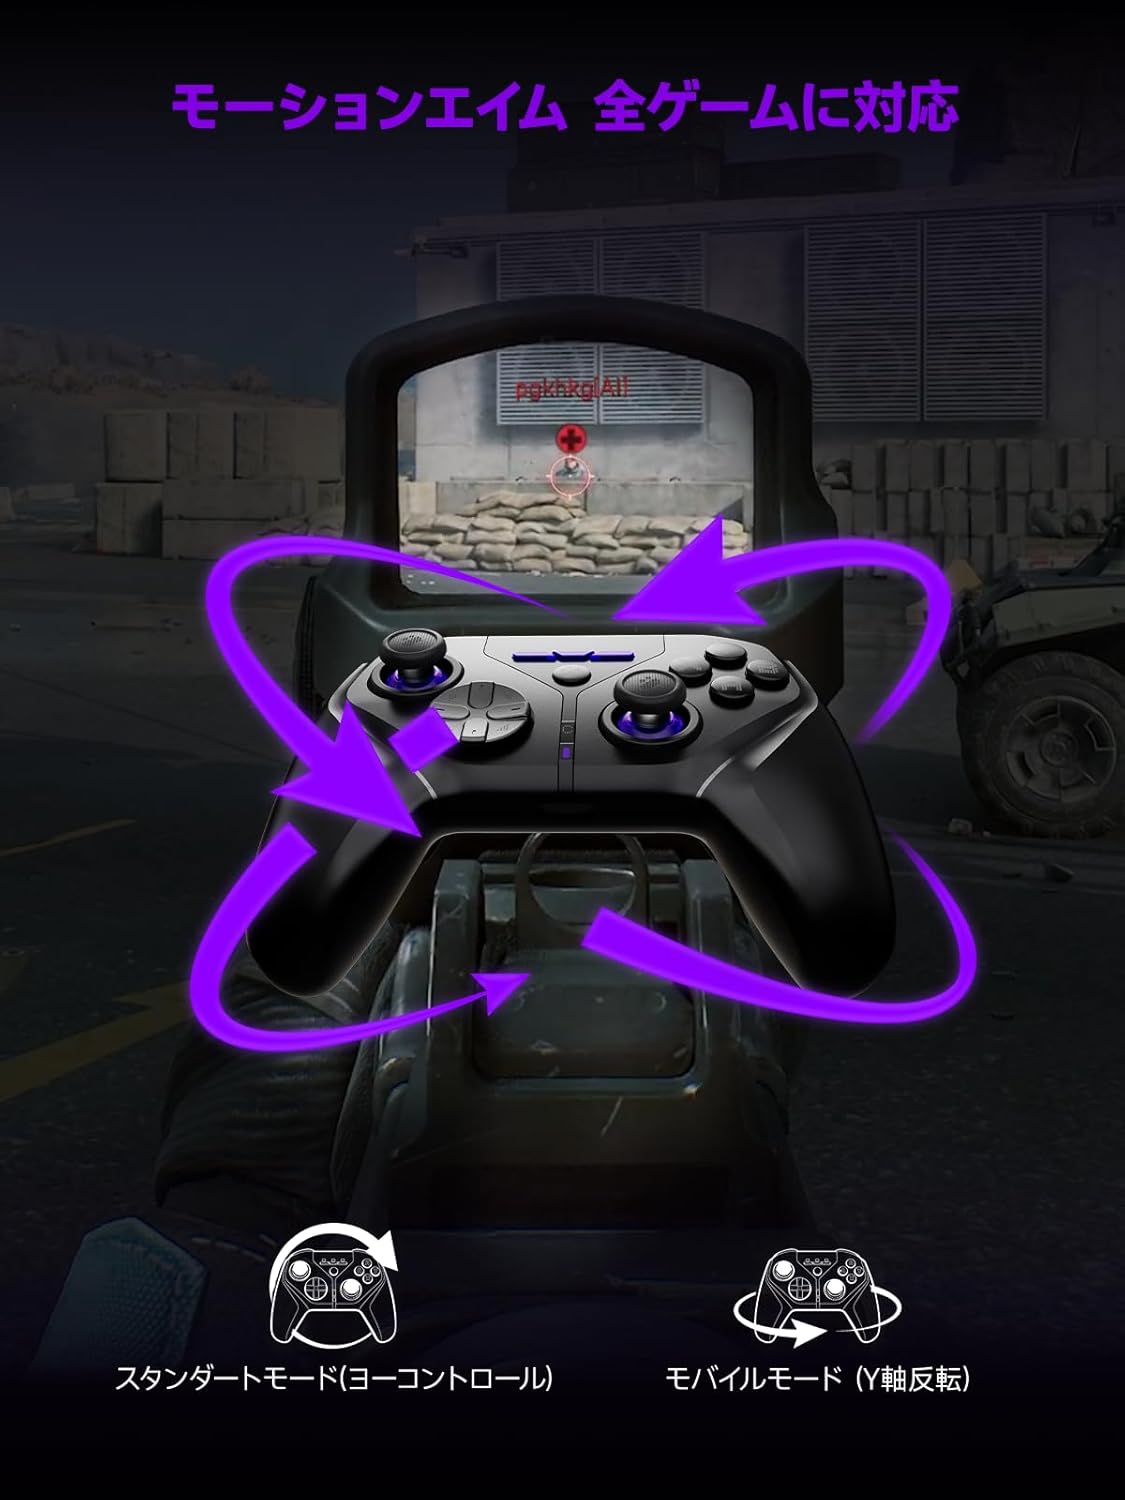
Image: A visual representation of the motion aim feature, showing how tilting the controller translates to in-game aiming, with options for standard (yaw control) and mobile (Y-axis inversion) modes.
- The controller features 1000Hz 6-axis gyroscope control for precise motion aiming.
- Settings for motion aim can be adjusted via the dedicated application.
NFC Function:
The controller is fully compatible with NFC functions, including amiibo for Nintendo Switch.
- To use NFC, place your amiibo figure or card on the designated NFC touchpoint on the controller.
- Ensure your game supports amiibo functionality.
Maintenance
Cleaning:
- Wipe the controller with a soft, dry cloth.
- Do not use abrasive cleaners or solvents.
Battery Care:
- Avoid exposing the controller to extreme temperatures.
- For long-term storage, charge the battery to approximately 50% and store in a cool, dry place.
- The smart charging dock includes overcharge protection to preserve battery life.
Troubleshooting
| Problem | Possible Cause | Solution |
|---|---|---|
| Controller does not power on. | Low battery. | Charge the controller using the smart charging dock or USB-C cable. |
| Cannot connect via Bluetooth. | Not in pairing mode; device Bluetooth off; interference. | Ensure controller is in pairing mode (flashing LED). Check device Bluetooth settings. Move closer to the device. |
| 2.4GHz wireless connection issues. | Receiver not properly connected; interference. | Ensure the 2.4GHz receiver is securely plugged into a USB port. Reduce distance between controller and receiver. |
| Buttons or joysticks unresponsive. | Software glitch; low battery; physical damage. | Restart the controller. Ensure battery is charged. If issues persist, contact support. |
| Controller not recognized by PC. | Driver issues; incorrect mode. | Ensure controller is in the correct mode (Xinput/Dinput if applicable). Try a different USB port. Update PC drivers. |
Specifications
- Model: Xeno Plus
- Connectivity: Wired (USB-C), 2.4GHz Wireless, Bluetooth
- Polling Rate: 1000Hz
- Joysticks: TMR (Magnetic Hall Effect)
- Buttons: Microswitch ABXY buttons, 4 customizable back buttons
- Triggers: Dual-mode (Hair Trigger / Full Trigger)
- Battery: 1000mAh (up to 30+ hours playtime)
- Charging: Smart Charging Dock (USB-C)
- Vibration: HD Vibration (ALPS linear motors)
- Lighting: Customizable RGB
- Special Features: NFC (amiibo support), One-click Switch wake-up
- Compatibility: Nintendo Switch (1/2/Lite/OLED), PC (Xinput/Dinput), iOS 13.4+, Android 10+, Steam Deck
- Product Dimensions: 17.5 x 17.5 x 10 cm
- Product Weight: 230 g
- Origin: China
Warranty and Support
Warranty:
The Leadjoy Xeno Plus Game Controller comes with a 12-month warranty covering initial defects and operational malfunctions. Please retain your proof of purchase for warranty claims.
Customer Support:
For any questions, technical assistance, or warranty claims, please contact Leadjoy customer support through the retailer where you purchased the product or visit the official Leadjoy website for support resources.


