
Vipbear OPT17
Vipbear Smart Toilet OPT17 Instruction Manual
Model: OPT17 | Brand: Vipbear
Introduction
This manual provides detailed instructions for the installation, operation, and maintenance of your Vipbear Smart Toilet, Model OPT17. Please read this manual thoroughly before installation and use to ensure proper function and safety. Keep this manual for future reference.
Important Safety Information
WARNING: To reduce the risk of injury or property damage, observe the following safety precautions:
- Ensure all electrical connections are properly grounded and meet local codes.
- Do not immerse the product in water or spray water directly onto electrical components.
- Unplug the unit before cleaning or performing any maintenance.
- Keep children and individuals with reduced physical, sensory, or mental capabilities away from the product unless supervised.
- Do not attempt to repair or modify the product yourself. Contact qualified service personnel.
- This product is designed for indoor use only.
The Vipbear Smart Toilet incorporates an 8-point Safety Shield System for user protection. Refer to the image below for a visual overview of these features.

Figure 1: 8 Safety Shield System Overview
Package Contents
Verify that all components are present before beginning installation:
- Vipbear Smart Toilet Unit (Model OPT17)
- Instruction Manual (this document)
- Remote Control
- Mounting Hardware (bolts, washers, seals)
- Water Supply Hose
- Toilet Cleaner Tablets (initial supply)
- Fragrance Tablet (initial supply)
Setup and Installation
1. Pre-Installation Checks
- Ensure a standard 1/2" NPT angle stop valve is available for water connection.
- An electrical outlet is necessary for power. The power cord length is approximately 59 inches (4.92 feet).
- Confirm the floor-mounted installation method is suitable for your bathroom.
- Refer to the dimensions image for proper space planning.

Figure 2: Product Dimensions and Power Cord Length
2. Water Connection
Connect the provided water supply hose to the toilet's water inlet and the angle stop valve. Ensure all connections are tight to prevent leaks.
3. Electrical Connection
Plug the toilet's power cord into a grounded electrical outlet. The unit will perform a power-on self-check.
4. Initial Flush
After connecting water and power, perform an initial flush to fill the built-in water tank and check for leaks. The toilet features a built-in water tank for consistent flushing performance, independent of household water pressure.

Figure 3: Built-in Water Tank and Flushing System
Operating Instructions
1. Power On/Off and Controls
The toilet can be controlled via the side control button or the wireless remote control. The LED display provides status information.

Figure 4: Control Features Overview

Figure 5: Remote and Side Button Controls
2. Automatic Lid and Seat Operation
- The lid and seat automatically open and close.
- The slow-close design prevents slamming and reduces noise.

Figure 6: Silent Soft-Close Lid and Night Light
3. Flushing Modes
The toilet offers multiple hands-free flushing options:
- Auto-Flush: Activates automatically when you leave the seat.
- Foot-Sensing Flush: Wave your foot near the sensor for flushing.
- Remote Control Flush: Use the remote to initiate a flush.
- Emergency Power-Off Flush: Maintains flushing capability during power outages.
The siphon flushing system operates at an ultra-quiet 45dB, using 4.8L of water for a 5-second quick flush.
4. Personalized Cleaning Modes (Bidet Function)
The bidet function provides instant warm water with adjustable temperature and pressure. The self-cleaning nozzle ensures hygiene, and UV-C light provides anti-bacterial sanitation.
- Feminine Wash: Gentle wash for women.
- Hip Wash: Standard posterior wash.
- Child Mode: A dedicated 90-second cleaning cycle with auto-flush and 240-second warm air drying for children.
- Oscillating Wash: Nozzle moves back and forth for wider cleaning.
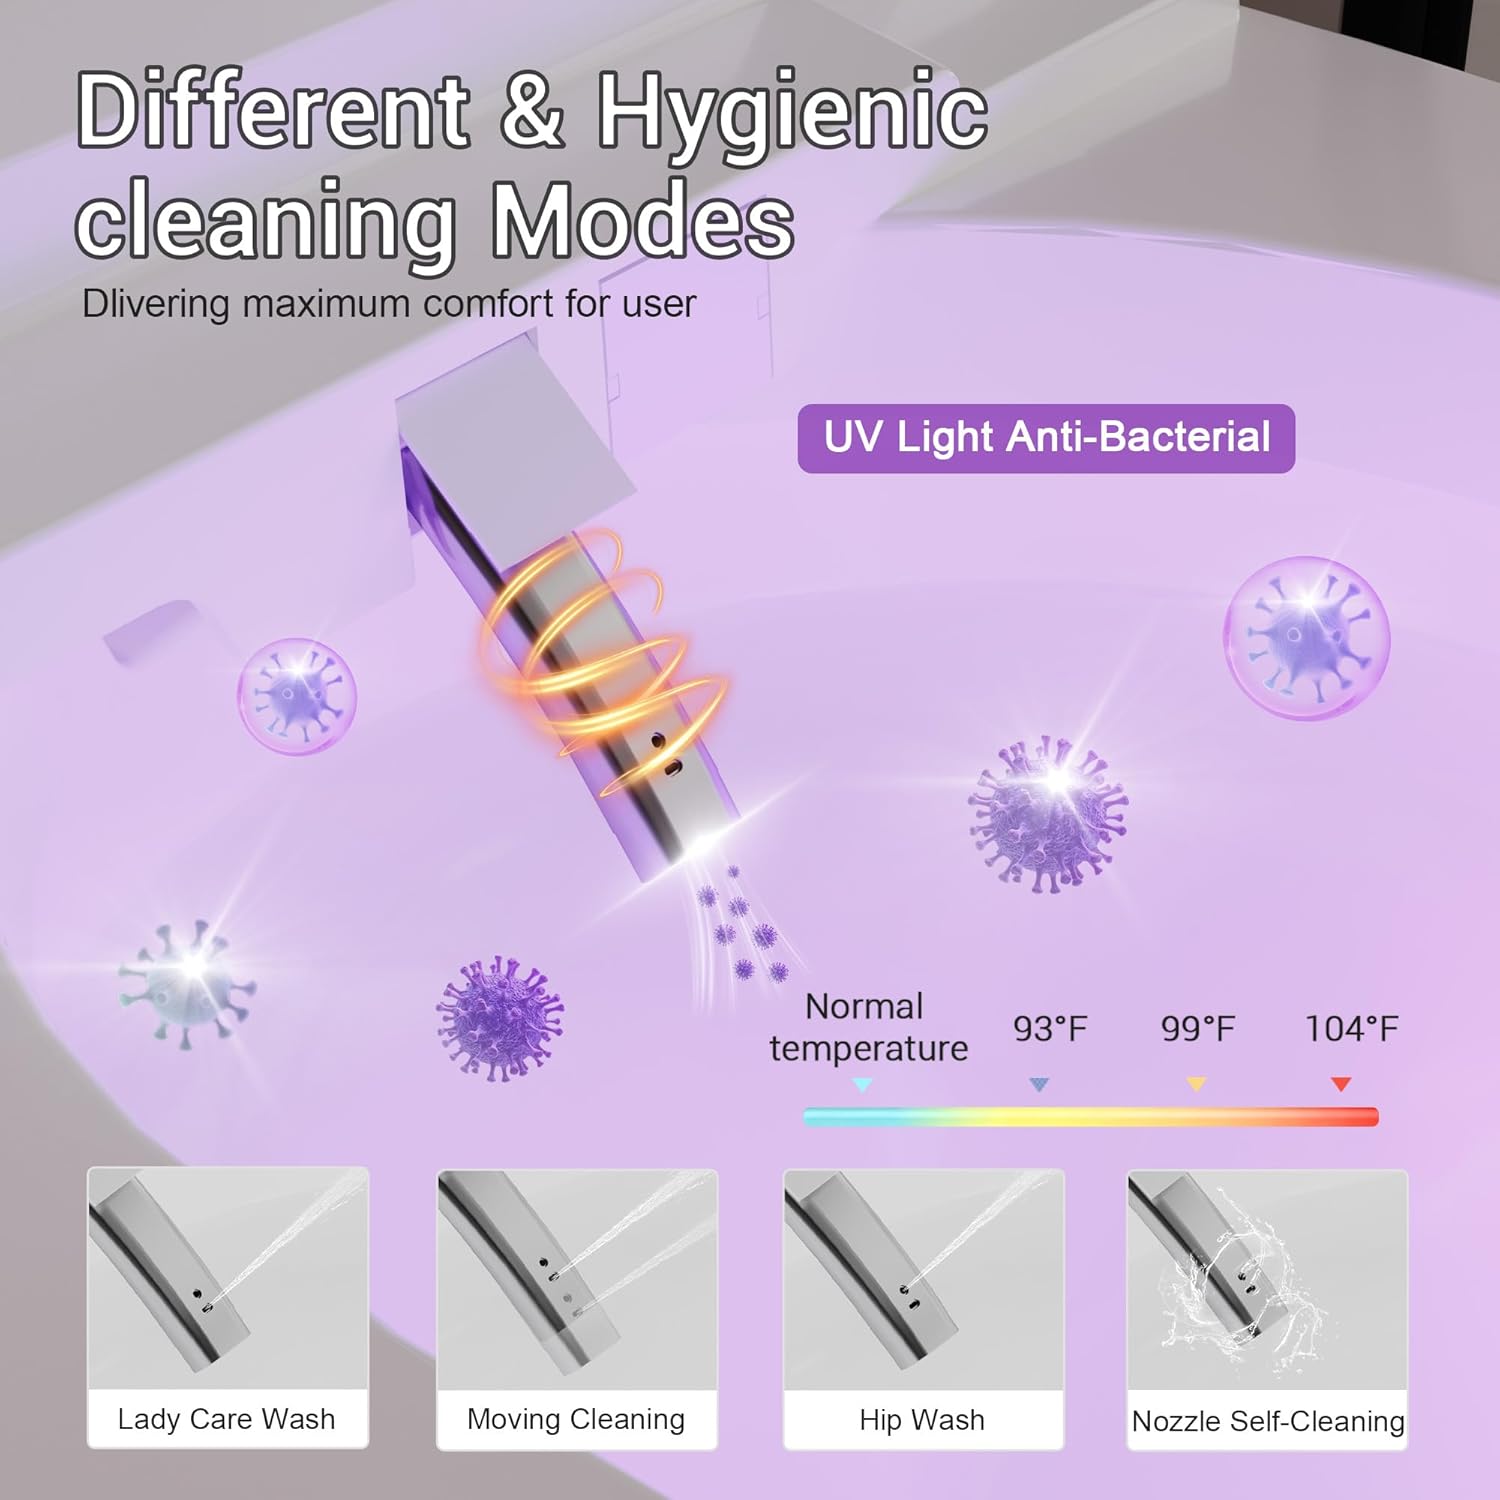
Figure 7: Cleaning Modes and UV Light

Figure 8: Child Mode for Cleaning
5. Temperature Adjustment
Adjust the temperature for the seat, wash water, and warm air dryer to your preference. The system can automatically adjust based on room temperature for year-round comfort.

Figure 9: Seasonal Temperature Control
6. Night Light and ECO Mode
- A soft blue ambient night light provides gentle illumination.
- The ECO energy-saving mode maintains a comfortable seat temperature while reducing energy consumption when not in use.
Maintenance and Cleaning
1. General Cleaning
- The diamond glaze ceramic surface is stain-resistant and easy to clean. Wipe with a soft, damp cloth and mild, non-abrasive cleaner.
- Do not use harsh chemicals, abrasive cleaners, or scouring pads, as these can damage the surface.
- Ensure the unit is unplugged before cleaning.
2. Nozzle Cleaning
The bidet nozzle has a self-cleaning function. For additional cleaning, gently pull out the nozzle and wipe it with a soft cloth. Do not use excessive force.
3. Toilet Bowl Cleaner Tablets
Insert the provided toilet cleaner tablets into the designated compartment to effectively clean the bowl with each flush, reducing bacterial growth and dirt buildup.

Figure 10: Inserting Toilet Cleaner Tablets
Video 1: Demonstration of Built-in Toilet Cleaner Tablets. This video shows how to insert the cleaner tablets and their effect on flushing.
4. Aromatherapy Deodorization
Insert fragrance tablets into the designated slot to maintain a fresh scent in your bathroom.

Figure 11: Aromatherapy Deodorization
Troubleshooting
| Problem | Possible Cause | Solution |
|---|---|---|
| No Power / Unit Unresponsive | Power cord unplugged; Circuit breaker tripped; Power outage. | Check power connection; Reset circuit breaker; Use emergency power-off flush during outage. |
| Water Leakage | Loose water connections; Damaged seals. | Tighten connections; Inspect and replace seals if damaged. Contact support if issue persists. |
| Bidet Water Not Warm | Heater element issue; Temperature setting too low. | Check temperature settings on remote; Allow time for water to heat. If problem persists, contact support. |
| Lid/Seat Not Opening/Closing Automatically | Sensor obstructed; Sensor malfunction. | Ensure sensors are clean and unobstructed. If issue continues, contact support. |
| Weak Flush | Water supply issue; Obstruction in siphon. | Check water supply valve is fully open. Clear any visible obstructions. |
For issues not listed here or if solutions do not resolve the problem, please contact Vipbear customer support.
Specifications
| Model Number | OPT17 |
| Brand | Vipbear |
| Color | White |
| Product Dimensions (D x W x H) | 15.3"D x 26.7"W x 17.9"H |
| Item Weight | 105 pounds |
| Material (Toilet) | Ceramic (Diamond Glaze) |
| Seat Material | Polypropylene (PP) |
| Installation Method | Floor Mounted |
| Water Volume per Flush | 4.8 Liters |
| Noise Level (Flush) | 45dB |
| Power Cord Length | 59 inches (4.92 feet) |
| Included Components | Smart Toilet, Instruction Manual, Remote Control, Mounting Hardware, Water Supply Hose, Toilet Cleaner Tablets, Fragrance Tablet |
Warranty and Support
For warranty information, technical support, or service inquiries, please contact Vipbear customer support. Keep your purchase receipt for warranty claims.
Customer Support: Refer to the contact information provided with your purchase or visit the official Vipbear website.
Return Policy: This product is eligible for a 30-day refund/replacement policy from the date of purchase. Please refer to your retailer's return policy for details.
Related documentsOPT17

Ask a question about this manual
Ask about setup, troubleshooting, compatibility, parts, safety, or missing instructions. Manuals+ will review the question and use this page’s manual context to help answer it.