
Important Safety Information
Please read all instructions carefully before assembly and use. Keep this manual for future reference.
- Do not exceed the maximum weight capacity specified for this TV stand. Overloading can cause injury or damage.
- Ensure all screws and fasteners are securely tightened before use. Periodically check and re-tighten as necessary.
- Keep small parts away from children during assembly to prevent choking hazards.
- Assemble the unit on a soft, clean surface to prevent scratches.
- If any parts are missing or damaged, do not proceed with assembly. Contact customer support immediately.
- Always use the anti-tip kit provided to secure the TV stand to a wall, especially in homes with children or pets, to prevent tipping accidents.
Package Contents
Verify that all components are present before beginning assembly. If any parts are missing, please contact customer service.
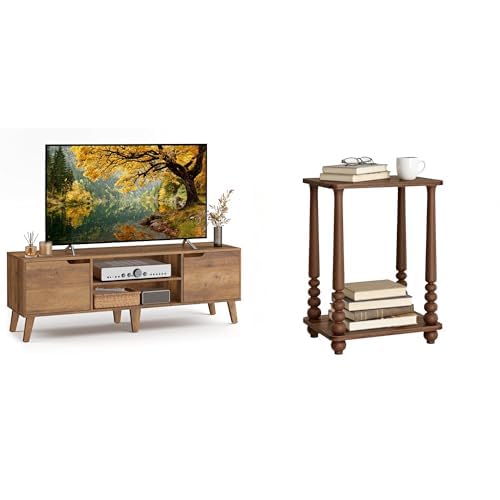
Image: An exploded view of the VASAGLE TV Stand showing all individual parts, including wooden panels, metal legs, screws, and assembly tools. This image helps users identify and count all components before starting assembly.
Hardware List:
- A: M6x30mm Screws (x12)
- B: M4x15mm Screws (x8)
- C: Dowels (x10)
- D: Allen Wrench (x1)
- E: Anti-tip Kit (x1 set)
Panel List:
- Top Panel (x1)
- Bottom Panel (x1)
- Side Panels (x2)
- Shelf Panels (x2)
- Back Panel (x1)
- Legs (x4)
Setup and Assembly
Follow these steps carefully to assemble your VASAGLE TV Stand.
-
Step 1: Attach Legs to Bottom Panel. Place the bottom panel (2) upside down on a soft surface. Secure the four legs (6) to the designated corners using M6x30mm screws (A). Tighten with the Allen wrench (D).
Description: Illustration showing the bottom panel with pre-drilled holes and the four legs being attached with screws and an Allen wrench.
-
Step 2: Assemble Side Panels. Insert dowels (C) into the pre-drilled holes on the side panels (3). Attach the side panels to the bottom panel, ensuring the dowels align. Secure with M6x30mm screws (A) from the underside of the bottom panel.
Description: Diagram illustrating the connection of side panels to the bottom panel using dowels and screws, highlighting proper alignment.
-
Step 3: Install Shelf Panels. Slide the shelf panels (4) into the grooves on the side panels. Ensure they are level and fully seated. Secure them using M4x15mm screws (B) through the pre-drilled holes on the side panels.
Description: Visual guide showing the shelf panels being inserted into the side panel grooves and secured with screws.
-
Step 4: Attach Top Panel. Place the top panel (1) onto the assembled structure, aligning the dowels and screw holes. Secure the top panel to the side panels using M6x30mm screws (A).
Description: Image depicting the top panel being placed and fastened to the rest of the TV stand frame.
-
Step 5: Install Back Panel. Position the back panel (5) against the rear of the unit. Secure it using M4x15mm screws (B) into the designated holes along the edges.
Description: Illustration showing the back panel being attached to the rear of the TV stand with screws.
-
Step 6: Attach Anti-Tip Kit. Locate a suitable wall stud. Attach one bracket of the anti-tip kit (E) to the back of the TV stand and the other to the wall using the provided hardware. Connect them with the strap. This step is crucial for safety.
Description: Diagram demonstrating how to properly install the anti-tip kit, showing the bracket attachment to both the TV stand and the wall.
Operating Instructions
Proper use ensures the longevity and safety of your TV stand.
- Placement: Position the TV stand on a flat, level surface to prevent wobbling and ensure stability.
- Weight Distribution: Distribute weight evenly across the top and shelves. Avoid placing heavy items on one side only.
- Cable Management: Utilize any built-in cable management features to keep wires tidy and prevent tripping hazards.
- Ventilation: Ensure adequate airflow around electronic devices placed on the stand to prevent overheating.
Maintenance and Care
Regular maintenance will help preserve the appearance and structural integrity of your TV stand.
- Cleaning: Wipe surfaces with a soft, damp cloth. Avoid harsh chemicals or abrasive cleaners, which can damage the finish.
- Spills: Clean up spills immediately to prevent staining or water damage.
- Sunlight Exposure: Avoid prolonged exposure to direct sunlight, which can cause fading or discoloration.
- Temperature and Humidity: Maintain a stable room temperature and humidity level to prevent warping or cracking of wood components.
- Fastener Check: Periodically check all screws and fasteners to ensure they remain tight. Re-tighten if necessary.
Troubleshooting
Refer to this section for solutions to common issues.
| Problem | Possible Cause | Solution |
|---|---|---|
| Stand is wobbly/unstable. | Loose fasteners; uneven floor; incorrect assembly. | Ensure all screws are tightened. Move to a level surface or use shims under legs. Review assembly steps. |
| Parts do not fit together. | Incorrect orientation of parts; wrong parts used. | Double-check part numbers and orientation against the assembly diagrams. Do not force parts. |
| Missing hardware/parts. | Packaging error. | Contact customer support with your model number and a list of missing items. |
Specifications
- Model: ULTV556K01
- Material: Engineered Wood, Steel
- Overall Dimensions: Approximately 59.1" L x 15.7" W x 19.7" H (150 cm x 40 cm x 50 cm)
- Max. Static Load Capacity of Top: 110 lbs (50 kg)
- Max. Static Load Capacity of Each Shelf: 33 lbs (15 kg)
- Recommended TV Size: Up to 65 inches
Warranty and Support
VASAGLE products are designed for quality and durability. This product comes with a standard manufacturer's warranty against defects in materials and workmanship.
- Warranty Period: Please refer to your purchase documentation or the official VASAGLE website for specific warranty terms and duration.
- Claim Process: To make a warranty claim, please retain your proof of purchase and contact VASAGLE customer support.
- Customer Support: For assembly assistance, missing parts, or any other inquiries, please visit the official VASAGLE website or contact their customer service team directly.
- Online Resources: Additional support, FAQs, and product information may be available on the VASAGLE official website: www.vasagle.com


