
1. Introduction
This manual provides essential information for the safe and efficient operation of your FOTING Sand Filter System, Model FT-CLP2502F-10in-FR. Please read these instructions thoroughly before installation and use. Proper installation, operation, and maintenance are crucial for optimal performance and longevity of the unit.
The FOTING Sand Filter System is designed to provide effective filtration for above-ground pools, ensuring clean and clear water. It features a powerful pump, a robust filter tank, and a versatile 7-way valve for various operational modes.
2. Important Safety Instructions
- Always disconnect power before performing any service or maintenance on the filter system.
- Ensure the electrical supply matches the specifications of the pump (220-240V / 50Hz).
- Do not operate the pump if the power cord or plug is damaged.
- Keep children away from the filter system during operation.
- Install the filter system on a firm, level surface to prevent tipping.
- Never change the 7-way valve position while the pump is running. Always turn off the pump first.
- Ensure all connections are secure and leak-free before starting the system.
3. Product Components and Overview
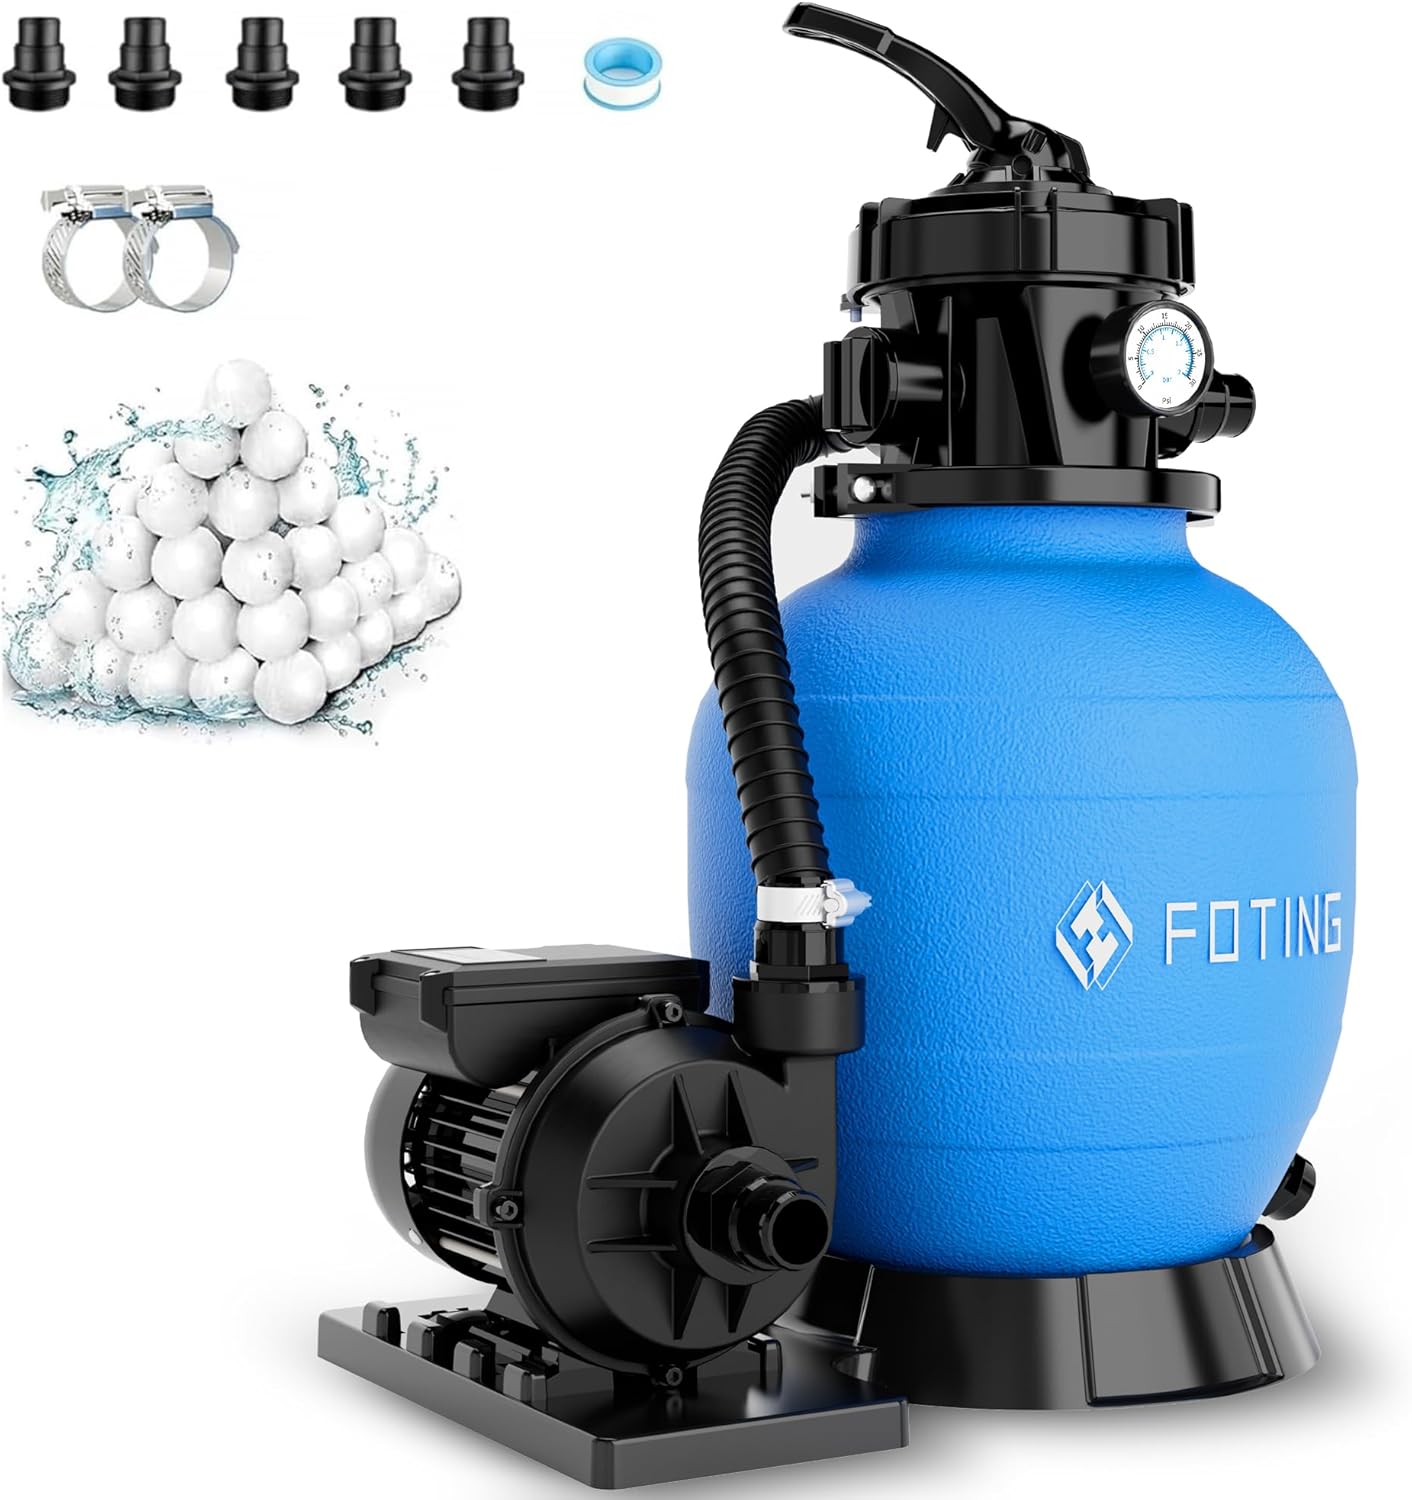
Your FOTING Sand Filter System includes the following main components:
- Filter Tank (blue)
- Pump Unit (black)
- 7-Way Multiport Valve
- Pressure Gauge
- 2-in-1 Adapters (Ø32mm and Ø38mm)
- Hose (45 cm Ø32mm)
- Filter Balls (200g, for initial use)
- Clamps, O-rings, Drain Plug, Filling Funnel

4. Setup and Installation
4.1 Site Selection
Choose a level, stable surface near your pool, protected from direct sunlight and harsh weather. Ensure adequate ventilation and easy access for maintenance.
4.2 Assembly
- Mount the Pump: Secure the pump unit to the base of the filter tank.
- Install the Multiport Valve: Carefully place the 7-way valve onto the top of the filter tank, ensuring the O-ring is correctly seated. Secure it with the provided clamp.
- Connect Pump to Valve: Use the short hose (45 cm Ø32mm) to connect the pump outlet to the "PUMP" port on the 7-way valve. Secure with clamps.

4.3 Filling with Filter Media
The system is compatible with filter sand (10 kg recommended) or filter balls (300g recommended). 200g of filter balls are included for initial use. Use the provided funnel to prevent media from entering the standpipe.
- Remove the 7-way valve from the tank.
- Place the funnel over the standpipe inside the tank.
- Carefully pour the filter media (sand or filter balls) into the tank.
- Ensure the media level does not exceed the maximum fill line.
- Reinstall the 7-way valve, ensuring a tight seal.

4.4 Connecting to the Pool
The system includes 2-in-1 adapters for Ø32mm (1 1/4") and Ø38mm (1 1/2") hoses.
- Connect the pool's skimmer hose to the "INLET" (or "PUMP") port on the pump.
- Connect the pool's return hose to the "RETURN" port on the 7-way valve.
- Use the provided adapters and clamps to ensure all connections are secure and leak-free.


5. Operating Instructions
The 7-way valve controls the flow of water through the filter system. Always turn off the pump before changing the valve position.

5.1 7-Way Valve Functions
- FILTER: Normal filtering mode. Water flows through the filter media and returns to the pool.
- BACKWASH: Reverses water flow to clean the filter media, discharging dirty water through the waste port.
- RINSE: Used after backwashing to flush out remaining dirt from the filter media before returning to FILTER mode.
- DRAIN: Drains water directly from the pool through the waste port, bypassing the filter.
- CLOSED: Shuts off all flow to the filter and pump. Do not use this setting while the pump is running.
- RECIRCULATE: Circulates pool water without filtering it, useful for chemical distribution.
- WINTER: Position for winterizing the valve, protecting it from frost.
5.2 Pressure Gauge Monitoring
The integrated pressure gauge displays the system's operating pressure. A rising pressure indicates that the filter media is becoming clogged and requires backwashing or cleaning. Refer to the "Maintenance" section for details.
6. Maintenance
6.1 Backwashing and Rinsing
Perform backwashing when the pressure gauge reading is 0.2-0.3 bar (3-5 psi) above the clean filter pressure, or when water flow to the pool decreases significantly.
- Turn off the pump.
- Set the 7-way valve to BACKWASH.
- Turn on the pump and run until the water flowing from the waste port is clear (typically 2-3 minutes).
- Turn off the pump.
- Set the 7-way valve to RINSE.
- Turn on the pump and run for 30-60 seconds.
- Turn off the pump.
- Set the 7-way valve back to FILTER.
- Turn on the pump to resume normal filtration.
6.2 Filter Media Replacement/Cleaning
Filter sand typically needs replacement every 3-5 years. Filter balls can be cleaned periodically by rinsing them thoroughly. Refer to the filter media manufacturer's guidelines for specific cleaning and replacement intervals.
6.3 Winterization
Before freezing temperatures, drain all water from the pump and filter tank. Disconnect hoses and store the system in a dry, frost-free location. Set the 7-way valve to WINTER to relieve pressure on internal components.
7. Troubleshooting
| Problem | Possible Cause | Solution |
|---|---|---|
| Low water flow / Poor filtration | Clogged filter media; Air in system; Clogged skimmer/pump basket; Low water level in pool. | Backwash and rinse filter; Bleed air from system; Clean skimmer/pump basket; Increase pool water level. |
| High pressure gauge reading | Clogged filter media. | Perform backwash and rinse cycle. |
| Water leaking from connections | Loose connections; Damaged O-rings/gaskets. | Tighten all hose clamps and connections; Inspect and replace O-rings/gaskets if damaged. |
| Pump not starting | No power; Motor overload; Impeller jammed. | Check power supply and circuit breaker; Allow motor to cool and reset; Inspect impeller for obstructions (disconnect power first). |
8. Technical Specifications
| Feature | Specification |
|---|---|
| Model Number | FT-CLP2502F-10in-FR |
| Max Flow Rate | 9,000 L/h (9 m³/h) |
| Power Consumption | 250 W |
| Voltage | 220-240 V / 50 Hz |
| Max Head | 7.5 m |
| Protection Class | IPX5 |
| Recommended Pool Volume | Up to 25,000 L |
| Filter Tank Volume | 10 L |
| Filter Media Capacity (Sand) | 10 kg |
| Filter Media Capacity (Filter Balls) | 300 g (200 g included) |
| Hose Connections | Ø32 mm (1 1/4") and Ø38 mm (1 1/2") |


9. Warranty and Support
For warranty information, please refer to the terms and conditions provided at the time of purchase or contact your retailer. In case of technical issues or questions not covered in this manual, please contact FOTING customer support or your authorized dealer for assistance.
Keep your purchase receipt as proof of purchase for any warranty claims.