
Jocisland YCP102
Jocisland 12x20x10.5 FT Metal Carport Instruction Manual
Model: YCP102
Introduction
Thank you for choosing the Jocisland 12x20x10.5 FT Metal Carport. This heavy-duty carport is designed to provide reliable protection for your vehicles and equipment against various weather conditions. Featuring a galvanized steel roof, waterproof removable sidewalls, and a reinforced structure, it offers a versatile solution for parking, storage, or as a temporary workspace. This manual provides essential information for safe assembly, operation, and maintenance to ensure long-lasting performance.
Safety Information
Please read and understand all safety instructions before assembly and use. Failure to follow these instructions may result in injury or damage to the product.
- For optimal results, prepare a 13x21 ft concrete or wooden foundation before installation.
- Protective edge strips are included to safeguard your hands during assembly. Always wear appropriate safety gloves.
- Ensure firm ground grip and wind resistance by using 4 expansion bolts per base support and 6 on side braces.
- Do not exceed wind resistance limits (Level 12). In severe weather conditions, consider disassembling the sidewalls or securing the structure further.
- In snowy climates, remove rooftop snow promptly to avoid overload and potential roof collapse.
- Always assemble the carport on a level surface.
Components Overview
Familiarize yourself with the main components of your Jocisland Metal Carport. Refer to the included parts list in your packaging for detailed identification.
- Galvanized Steel Frame: The primary support structure, designed for durability and stability.
- Galvanized Steel Roof Panels: Provides robust overhead protection.
- Waterproof Removable Sidewalls: Flexible tarp material for all-weather enclosure.
- Roll-up Door: Integrated into the sidewalls for easy vehicle access.
- Diagonal Braces: Three per side for enhanced stability and sway reduction.
- Top Crossbars: Prevents roof collapse.
- Reinforced Base Supports: Designed for secure anchoring.
- Expansion Bolts: For securing the base to a concrete or wooden foundation.
- Waterproof Sealing Tape: Applied at roof joints for leak prevention.
- Protective Edge Strips: For safer handling during assembly.
Setup and Installation
Pre-Installation Checklist
- Ensure all packages have arrived. The product is divided into 4 packages and may arrive separately.
- Verify all components listed in the parts manual are present and undamaged.
- Prepare a level surface, ideally a 13x21 ft concrete or wooden foundation.
- Gather necessary tools (e.g., wrenches, measuring tape, safety gloves).
Assembly Steps
Follow the detailed step-by-step instructions provided in the included manual. The general process involves:
- Frame Assembly: Construct the galvanized steel frame by connecting the various poles and crossbars. Ensure all connections are secure.
- Roof Installation: Attach the galvanized steel roof panels to the frame. Apply waterproof sealing tape at all roof joints to prevent leaks.
- Sidewall Attachment: Install the waterproof removable sidewalls. These are designed for easy attachment and removal for seasonal use.
- Anchoring: Secure the carport to the ground using the reinforced base supports and expansion bolts. Use 4 expansion bolts per base support and 6 on side braces for concrete foundations to ensure maximum stability and wind resistance.
- Final Checks: Double-check all bolts and connections for tightness. Ensure the structure is plumb and level.

Figure 1: Effortless Assembly, Easy DIY Setup. This image illustrates the sequential steps for assembling the carport, starting with the frame, then adding the roof, and finally the sidewalls.
Installation Video Guide
For a visual guide on the installation process, please refer to the official video below:
Video 1: How to install this metal carport with removable waterproof. This video provides a detailed walkthrough of the carport assembly, demonstrating each step for clear understanding.
Operating Instructions
Using Removable Sidewalls
The carport features flexible, removable waterproof sidewalls. These can be easily attached or detached depending on your needs and the weather conditions. For full enclosure and maximum protection, ensure all sidewalls are securely fastened. For open-air use or during warmer seasons, the sidewalls can be removed.
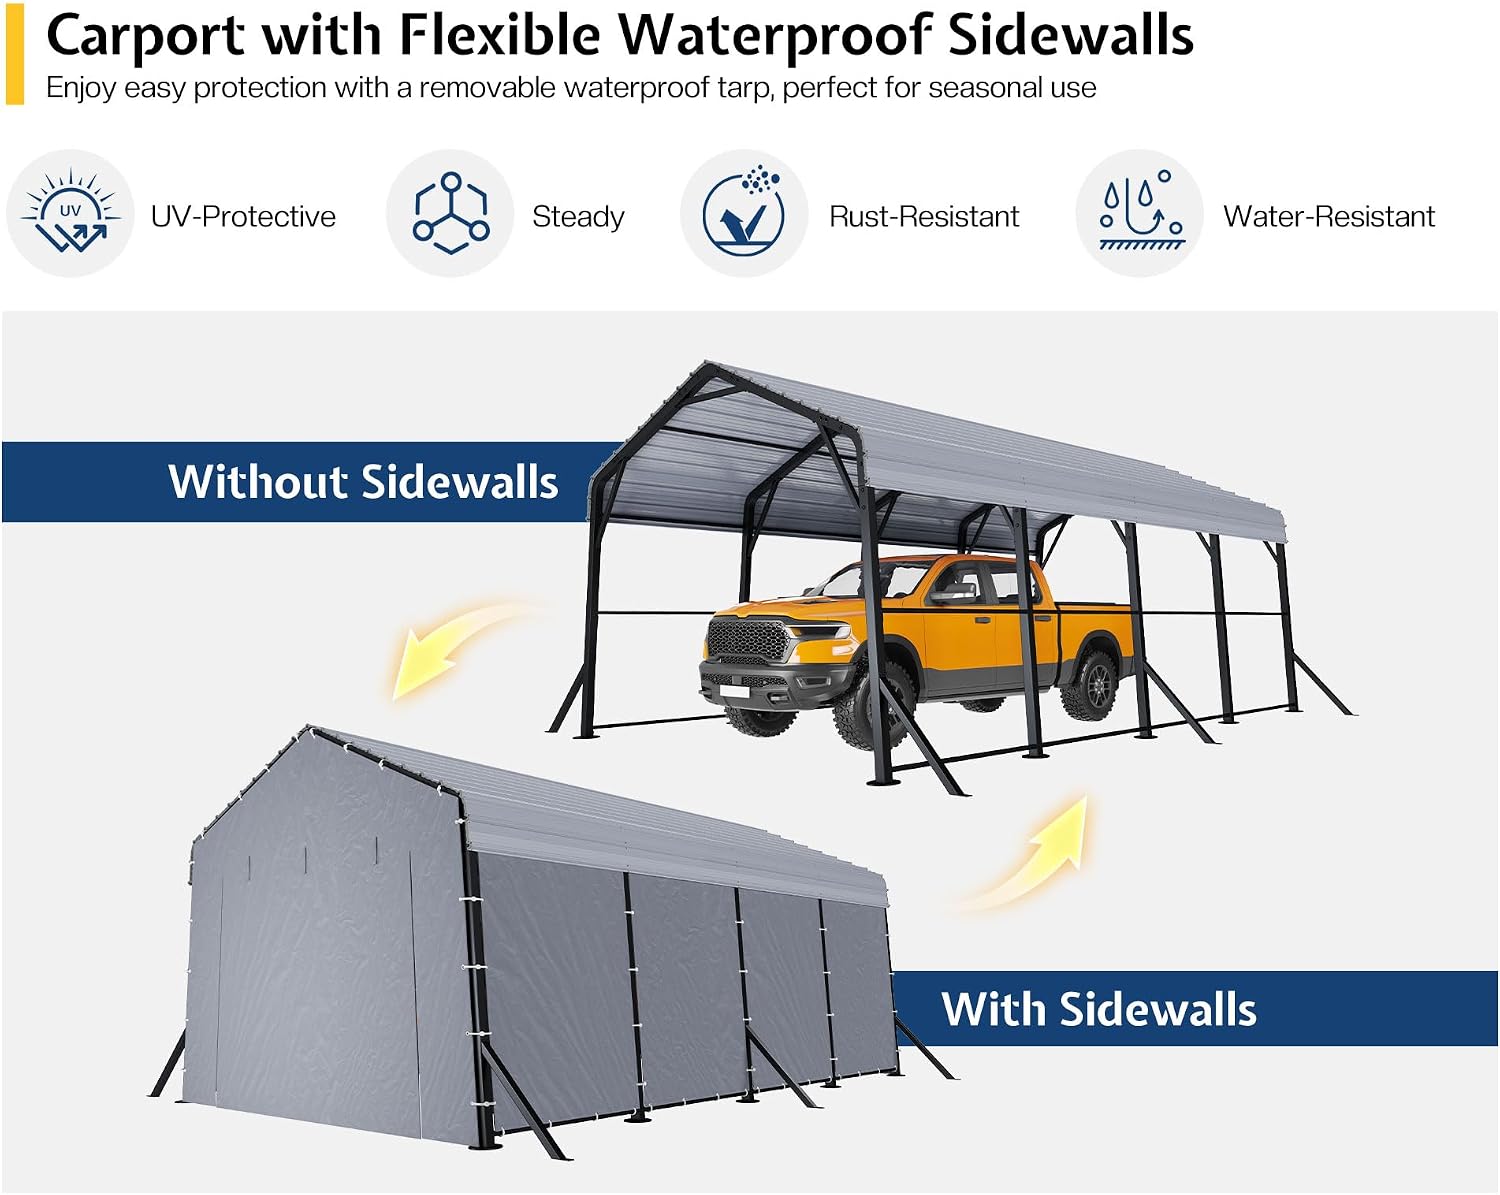
Figure 2: Carport with Flexible Waterproof Sidewalls. This image demonstrates the carport's adaptability, showing it both fully enclosed with sidewalls and open without them.
Roll-Up Door Operation
The integrated roll-up door provides convenient entry and exit for vehicles. To open, unfasten the bottom and side securing straps, then roll the door upwards and secure it in the raised position using the provided fasteners. To close, unroll the door and secure it firmly to the frame.
Maintenance
Regular maintenance will extend the lifespan of your carport and ensure its continued performance.
- Cleaning: Clean the waterproof tarp and steel panels with mild soap and water. Avoid using abrasive cleaners or tools that may scratch the surface.
- Snow Removal: In snowy climates, promptly remove accumulated snow from the rooftop to prevent excessive load and potential damage.
- Bolt Tightening: Periodically check and tighten all bolts and connections to maintain structural integrity, especially after strong winds or heavy precipitation.
- Tarp Inspection: Inspect the waterproof tarp for any tears or damage. Repair promptly to maintain its protective qualities.
Troubleshooting
This section addresses common issues you might encounter with your carport.
- Carport feels unstable or sways: Ensure all diagonal braces are correctly installed and tightened. Verify that the base supports are securely anchored to the ground with the recommended number of expansion bolts. Check if the carport is installed on a level surface.
- Water leakage from the roof: Confirm that the waterproof sealing tape is properly applied at all roof panel joints. Inspect for any gaps or damage to the roof panels or tarp.
- Difficulty with sidewall attachment/removal: Ensure all securing straps and fasteners are correctly aligned and engaged. Check for any obstructions or damage to the tarp material.
- Damage from heavy snow: Always remove snow from the roof promptly. If damage occurs due to excessive snow load, inspect the frame and roof panels for bending or breakage and contact customer support for replacement parts.
Specifications
| Feature | Detail |
|---|---|
| Brand | Jocisland |
| Model Number | YCP102 |
| Size | 12x20x10.5 FT (240"L x 144"W x 126"H) |
| Material | Metal (Frame), Galvanized Steel (Roof), Waterproof Tarp (Sidewalls) |
| Color | Gray |
| Item Weight | 409.2 pounds |
| Floor Area | 240 square feet |
| Water Resistance Level | Waterproof |
| UV Protection | Yes |
| Wind Resistance | Up to Level 12 |
| Recommended Uses | Parking, Storage, Temporary Workspace, Social Gathering |

Figure 3: Dimensions of the Carport. This diagram provides a clear visual representation of the carport's overall and internal dimensions.
Warranty and Support
For any questions, concerns, or to inquire about replacement parts, please contact Jocisland customer support. Refer to your purchase documentation for specific warranty details.
Customer Service: Please visit the Jocisland store page on Amazon or refer to the contact information provided in your product packaging.
Ask a question about this manual
Ask about setup, troubleshooting, compatibility, parts, safety, or missing instructions. Manuals+ will review the question and use this page’s manual context to help answer it.