
1. Introduction
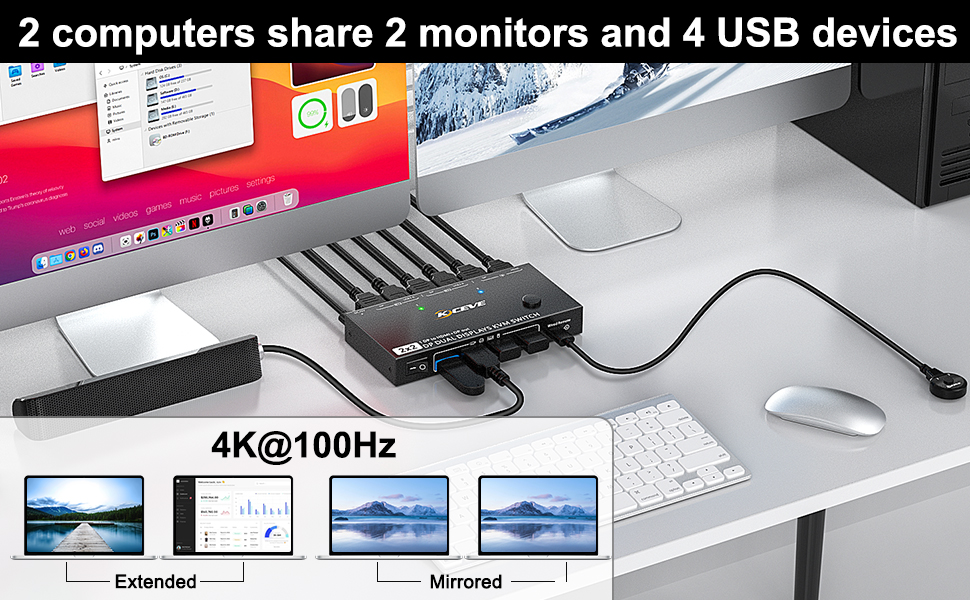
The Camgeet DisplayPort KVM Switch allows you to control two computers using a single set of keyboard and mouse, while sharing two monitors and four USB 3.0 devices. This device supports high-resolution video output and simplifies your workspace by reducing cable clutter.
Key Features:
- Control 2 computers with 1 keyboard, 1 mouse, and 2 monitors.
- Share 4 USB 3.0 devices (e.g., printer, U disk, webcam).
- Supports resolutions up to 8K@30Hz for a single monitor or 4K@100Hz for dual monitors.
- Utilizes MST DisplayPort technology, requiring only one DP1.4 cable input per PC for dual screen output (DP1.4 + HDMI2.0).
- Ultra-fast USB 3.0 data transfer up to 5Gbps.
- Driver-free compatibility with Windows and Mac OS.
- Switch between computers using a button on the panel or the included wired remote.

2. Package Contents
Please verify that all items are present in the package:
- 1x DisplayPort KVM Switch
- 2x DP1.4 Cables (1.5m)
- 2x USB 3.0 Cables (1.5m)
- 1x Wired Remote (1.52m)
- 1x USB-C Power Cable
- 1x User Manual

3. Product Diagram and Connections
Familiarize yourself with the ports and components of the KVM switch before setup.
Front Panel:
- Power Switch
- USB 3.0 Ports (x4) for keyboard, mouse, printer, U disk, etc.
- Wired Remote Port
- PC Selection Buttons with LED indicators
Rear Panel:
- Monitor Output Ports: 1x DisplayPort, 1x HDMI
- PC Input Ports (PC1, PC2): Each includes 1x DisplayPort and 1x USB 3.0 Type-B
- DC 5V Power Input (USB-C)
Note: The USB-C port labeled USB3.0 is for connecting USB devices and cannot be used for video output.
4. Setup Instructions
Follow these steps to connect your KVM switch:
- Connect Monitors: Connect your two monitors to the KVM switch's DisplayPort and HDMI output ports.
- Connect PCs:
- For PC1: Connect one DP1.4 cable from PC1's DisplayPort output to the KVM's PC1 DP input. Connect one USB 3.0 cable from PC1's USB port to the KVM's PC1 USB 3.0 Type-B input.
- For PC2: Connect one DP1.4 cable from PC2's DisplayPort output to the KVM's PC2 DP input. Connect one USB 3.0 cable from PC2's USB port to the KVM's PC2 USB 3.0 Type-B input.
Important: Ensure your computers have DP1.4 ports. USB-C/HDMI/DVI/VGA to DisplayPort adapters are not supported for input to the KVM switch.
- Connect USB Devices: Connect your keyboard, mouse, printer, U disk, or other USB 3.0 devices to the four USB 3.0 ports on the front panel of the KVM switch.
- Connect Wired Remote: Plug the wired remote into its dedicated port on the front panel.
- Power On: Connect the USB-C power cable to the KVM switch's DC 5V input. If using high-power USB devices, an external 5V adapter (not included) may be required. Turn on the KVM switch using the power switch.

5. Operating Instructions
The KVM switch offers two methods for switching between connected computers:
- Panel Button Switching: Press the "PC1" or "PC2" button on the front panel of the KVM switch to switch to the desired computer. The corresponding LED indicator will light up.
- Wired Remote Switching: Use the included wired remote control to switch between PC1 and PC2. Press the button on the remote to toggle between the active computers. The remote also has LED indicators.

6. Display Modes
The KVM switch supports both extended and mirror display modes for your dual monitor setup.
- Extended Mode: Each monitor displays different content, extending your desktop across both screens.
- Mirror Mode (Duplicate Mode): Both monitors display the same content, duplicating your desktop.
To set the output modes on your computer (Windows OS):
- Press the "Windows" key + "P" key simultaneously.
- A small window will pop up, allowing you to choose between "Mirror Mode" or "Extend Mode".


7. Troubleshooting
If you encounter issues, please refer to the following common solutions:
- No Display on Monitor:
- Ensure all DisplayPort and HDMI cables are securely connected.
- Verify that the KVM switch is powered on and the correct PC is selected (indicated by LED).
- Check your computer's display settings to ensure monitors are detected and configured for extended or mirror mode.
- Confirm that your computer's DisplayPort output is DP1.4 compatible.
- Keyboard/Mouse Not Responding:
- Ensure the USB 3.0 cables from your PCs to the KVM switch are properly connected.
- Try connecting the keyboard and mouse to different USB 3.0 ports on the KVM switch.
- If using a wireless keyboard/mouse, ensure the receiver is plugged into a USB 3.0 port on the KVM switch.
- Intermittent Connection/Flickering Display:
- Ensure all cables are high-quality DP1.4 and USB 3.0.
- Verify that the KVM switch is receiving adequate power. If using high-power USB devices, an external 5V adapter may be necessary.
- Reduce the display resolution or refresh rate to see if the issue persists.
- Switching Delay:
- A brief delay during switching is normal as the system re-establishes connections.
- Ensure all drivers for your graphics card and USB devices are up to date.
8. Specifications
| Feature | Detail |
|---|---|
| Model | DP MST 2 Monitor 2 PC |
| Brand | Camgeet |
| Connectivity Protocol | DisplayPort 1.4, HDMI 2.0, USB 3.0 |
| Max Resolution (Dual Monitor) | 4K@100Hz |
| Max Resolution (Single Monitor) | 8K@30Hz, 4K@144Hz |
| USB Data Transfer Rate | Up to 5Gbps (USB 3.0) |
| USB Ports | 4x USB 3.0 (Type-A) |
| Control Method | Push Button, Wired Remote |
| Operating Voltage | 5 Volts |
| Material | Metal |
| Item Dimensions (L x W x H) | 5.31 x 2.56 x 0.79 inches (13.49 x 6.50 x 2.01 cm) |
| Item Weight | 280 Grams |
| Compatibility | Windows, Mac OS (Driver-free) |


9. Maintenance
To ensure the longevity and optimal performance of your KVM switch, follow these maintenance guidelines:
- Cleaning: Use a soft, dry cloth to clean the exterior of the device. Avoid using liquid cleaners or aerosols, which may damage the unit.
- Storage: Store the KVM switch in a cool, dry place away from direct sunlight and extreme temperatures.
- Handling: Handle the device with care. Avoid dropping it or subjecting it to strong impacts.
- Cable Management: Ensure cables are not excessively bent or strained, which can lead to damage over time.
10. Warranty and Support
The Camgeet DisplayPort KVM Switch comes with a 1-year warranty from the date of purchase.
For technical support, troubleshooting assistance, or warranty claims, please contact Camgeet customer service. Refer to the contact information provided in your purchase documentation or visit the official Camgeet store on Amazon:
Visit the Camgeet Store on Amazon
Please have your product model (DP MST 2 Monitor 2 PC) and purchase details ready when contacting support.


