
UYIKOO S820
UYIKOO S820 Keyless Mini Camera Instruction Manual
Model: S820
Introduction
Thank you for purchasing the UYIKOO S820 Keyless Mini Camera. This device is designed for discreet recording with high-definition video, night vision, and motion detection capabilities. Please read this manual thoroughly before use to ensure proper operation and to maximize the product's potential. Keep this manual for future reference.
Product Overview
Package Contents
- UYIKOO S820 Keyless Mini Camera Body
- USB Cable
- Japanese Instruction Manual (Please refer to this English version for clarity)
Key Features
- 1080P High-Definition Video: Records clear video at 1920x1080 resolution.
- Infrared Night Vision: Equipped with invisible infrared LEDs for recording in low-light or dark conditions.
- Motion Detection: Automatically starts recording when movement is detected, conserving storage space.
- Timestamp Function: Adds date and time to recordings for evidentiary purposes.
- Loop Recording: Overwrites the oldest files when the memory card is full, ensuring continuous recording.
- Compact and Discreet Design: Resembles a car key, making it suitable for various covert recording scenarios.
- External Power Support: Allows for 24-hour continuous recording when connected to an AC adapter.
- Micro SD Card Support: Compatible with Micro SD cards up to 128GB (sold separately).

Image: The UYIKOO S820 Keyless Mini Camera, showcasing its compact and discreet design.
Versatile Placement and Use Cases
The camera's small size and keyless design allow for flexible placement in various environments without drawing attention. It can be used for:
- Pet monitoring
- Recording important negotiations or meetings
- Gathering evidence for harassment, workplace issues, bullying, or theft
- Documenting domestic disputes
- General home, office, or outdoor surveillance

Image: Various examples demonstrating discreet placement of the camera, such as on a bookshelf, TV table, or in a classroom.

Image: Illustrations of different scenarios where the camera can be utilized, such as pet care, elder care, recording business meetings, and capturing evidence of theft.
Setup
1. Charging the Device
Before first use, fully charge the camera. Connect the camera to a USB power source (e.g., computer USB port or USB wall adapter) using the provided USB cable. The indicator light will show charging status (refer to the LED indicator section for details in the full manual).
2. Inserting a Micro SD Card
The camera requires a Micro SD card (up to 128GB, sold separately) for recording. Follow these steps to insert the card:
- Press the button to release the key mechanism.
- Open the cover to reveal the card slot.
- Carefully insert the Micro SD card into the slot until it clicks into place.
- Close the cover securely.

Image: Detailed steps showing how to open the camera, insert the Micro SD card, and close the cover.
3. Setting the Date and Time (Timestamp)
To ensure accurate timestamps on your recordings, set the date and time:
- Connect the camera to your computer using the USB cable.
- The camera will appear as a removable disk. Open the disk.
- Create a new text file named TIME.TXT in the root directory of the Micro SD card.
- Open TIME.TXT and enter the current date and time in the format: YYYY-MM-DD HH:MM:SS (e.g., 2026-08-07 10:30:00).
- Save the file. Ensure the encoding is UTF-8 to avoid character corruption issues, especially on Windows 10/11. If issues occur, save as UTF-8 again.
- Safely eject the camera from your computer. The timestamp will now be applied to new recordings.
Note: You can disable the timestamp function by modifying the TIME.TXT file according to the specific instructions in the full Japanese manual, if desired.
Operating Instructions
Power On/Off
- Power On: Press and hold the power button for a few seconds until the indicator light illuminates.
- Power Off: Press and hold the power button for a few seconds until the indicator light turns off.
Video Recording (Continuous)
Once powered on, press the video recording button once to start continuous video recording. The indicator light will flash (or turn off, depending on the mode) to indicate recording is in progress. Press the button again to stop recording and save the file.

Image: The UYIKOO S820 camera discreetly recording in a classroom setting, demonstrating its 1080P video capability.
Motion Detection Recording
To activate motion detection recording, power on the device and then press the motion detection button (refer to the device diagram in the full manual for button identification). The camera will enter standby mode and begin recording automatically when movement is detected within its field of view. Recording stops when motion ceases, saving memory.

Image: Illustration of the motion detection feature, showing the camera in standby mode and then recording when a figure enters the scene.
Night Vision Mode
The camera automatically activates its infrared night vision in low-light conditions. The invisible infrared lights allow for clear recording even in complete darkness without emitting visible light.
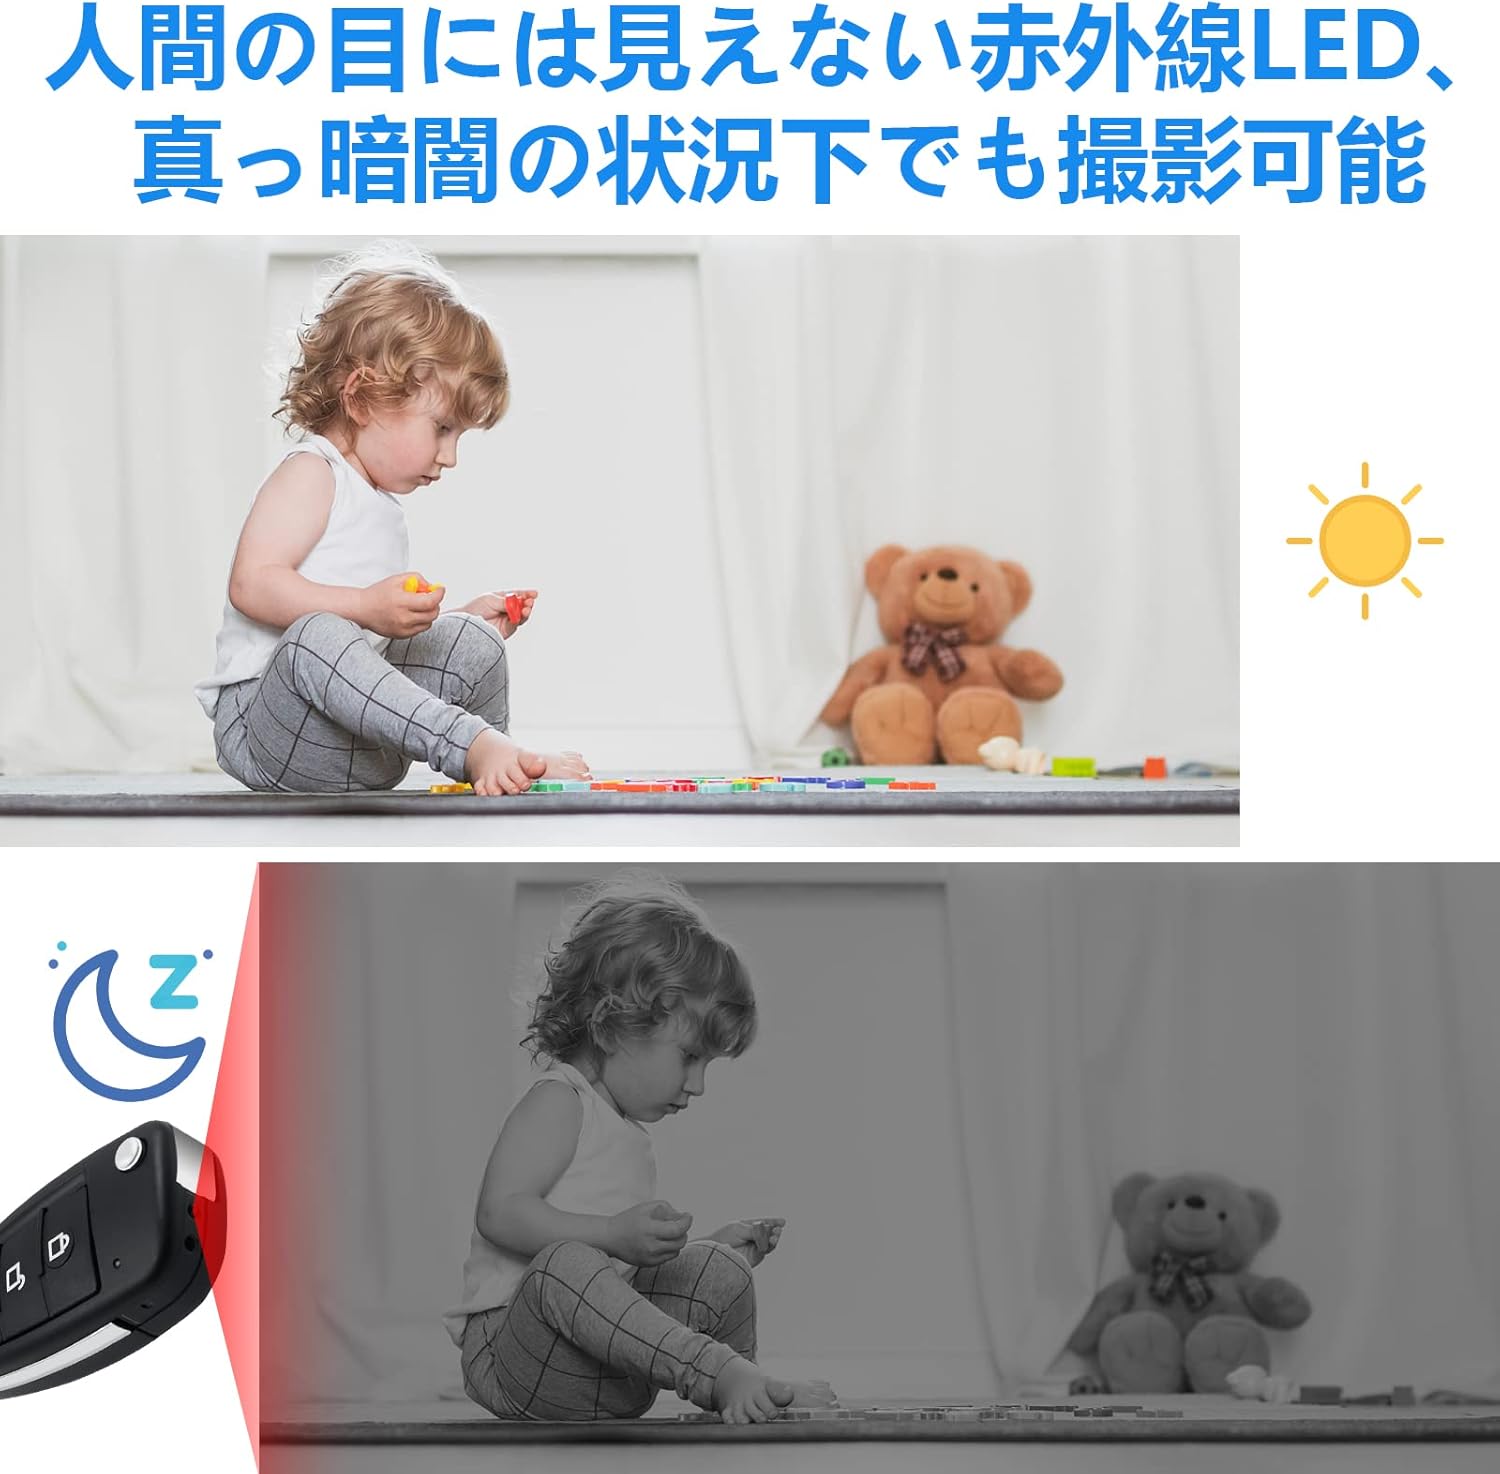
Image: Comparison of a scene in normal light and the same scene recorded in darkness using the camera's infrared night vision.
Timestamp Function in Recordings
Once the date and time are set (as described in the Setup section), all recorded videos and photos will include a timestamp, providing crucial information for evidence or record-keeping.

Image: A recorded scene showing a family, with a clear date and time timestamp (e.g., 2022/03/26 11:17:53) overlaid on the video.
Taking Photos
While the camera is powered on, press the photo button once to take a still image. The indicator light will flash briefly to confirm the photo has been taken.
Connecting to External Power for 24/7 Recording
For extended recording sessions, connect the camera to a continuous external power source (e.g., a USB wall adapter) using the provided USB cable. This allows for 24-hour continuous operation, bypassing the internal battery limit.
Maintenance
Charging
The internal lithium battery provides approximately 140 minutes of recording on a full charge. Recharge the device when the battery is low by connecting it to a USB power source. Avoid overcharging or completely draining the battery to prolong its lifespan.
Storage Management (Loop Recording)
The camera supports loop recording. When the Micro SD card is full, the oldest files will automatically be overwritten by new recordings. Regularly back up important files to your computer to prevent accidental deletion.

Image: Visual representation of the camera's support for 128GB Micro SD cards and its loop recording function, showing a film reel with various recorded scenes.
Cleaning
Use a soft, dry cloth to clean the camera body. Do not use liquid cleaners or solvents, as they may damage the device.
Troubleshooting
| Problem | Possible Cause | Solution |
|---|---|---|
| Camera does not power on. | Low battery. | Charge the camera fully. |
| Cannot record video. | No Micro SD card inserted or card is full/corrupted. | Insert a Micro SD card. Format the card if necessary. Back up and delete old files or allow loop recording to overwrite. |
| Timestamp is incorrect or garbled. | TIME.TXT file is incorrectly formatted or saved with wrong encoding. | Ensure TIME.TXT is in YYYY-MM-DD HH:MM:SS format and saved with UTF-8 encoding. Re-save if necessary. |
| Poor video quality. | Insufficient lighting, dirty lens, or recording from too far away. | Ensure adequate lighting. Clean the camera lens. Position the camera closer to the subject. |
| Camera freezes or becomes unresponsive. | Temporary software glitch. | Perform a reset (refer to the full manual for reset button location, usually a small pinhole). |
Specifications
| Model Number | S820 |
| Video Resolution | 1080P (1920x1080) |
| Video Format | AVI |
| Storage | Micro SD card up to 128GB (not included) |
| Battery Life | Approx. 140 minutes (continuous recording) |
| Connectivity | Wired (USB) |
| Dimensions | 6.7 x 3.2 x 2.5 cm |
| Weight | Approx. 35g |
| Features | Night Vision, Motion Detection, Loop Recording, Timestamp |
Warranty and Support
UYIKOO products undergo strict quality control. In case of initial defects or any issues during use, please contact our customer support. We offer a free exchange for initial defects.
Contact Method:
Please contact us through your Amazon account service: Go to "Order History" > "Purchased Product" > "Seller" > "Ask a Question". Our dedicated support team will respond promptly.

Image: UYIKOO brand logo, representing customer support.
Related documentsS820


Ask a question about this manual
Ask about setup, troubleshooting, compatibility, parts, safety, or missing instructions. Manuals+ will review the question and use this page’s manual context to help answer it.