
Introduction
Thank you for choosing the Mitlvge 35-Minute Fireproof Safe. This manual provides essential information for the safe and efficient operation of your new safe. Please read these instructions carefully before installation and use, and retain them for future reference.
Important Safety Information
- Do not store emergency keys or the external battery box inside the safe. Keep them in a secure, separate location.
- Ensure the safe is placed on a stable, level surface to prevent tipping.
- Keep children away from the safe and do not allow them to play with the keypad or keys.
- This safe is designed for fire protection and security. While it offers significant resistance, no safe is completely impervious to all forms of attack or extreme conditions.
Package Contents
Verify that all items listed below are included in your package:
- Mitlvge Fireproof Safe Unit
- Emergency Keys (x2)
- External Battery Box (x1)
- Removable Shelves (x3)
- User Manual

Specifications
| Feature | Detail |
|---|---|
| Model Number | ET |
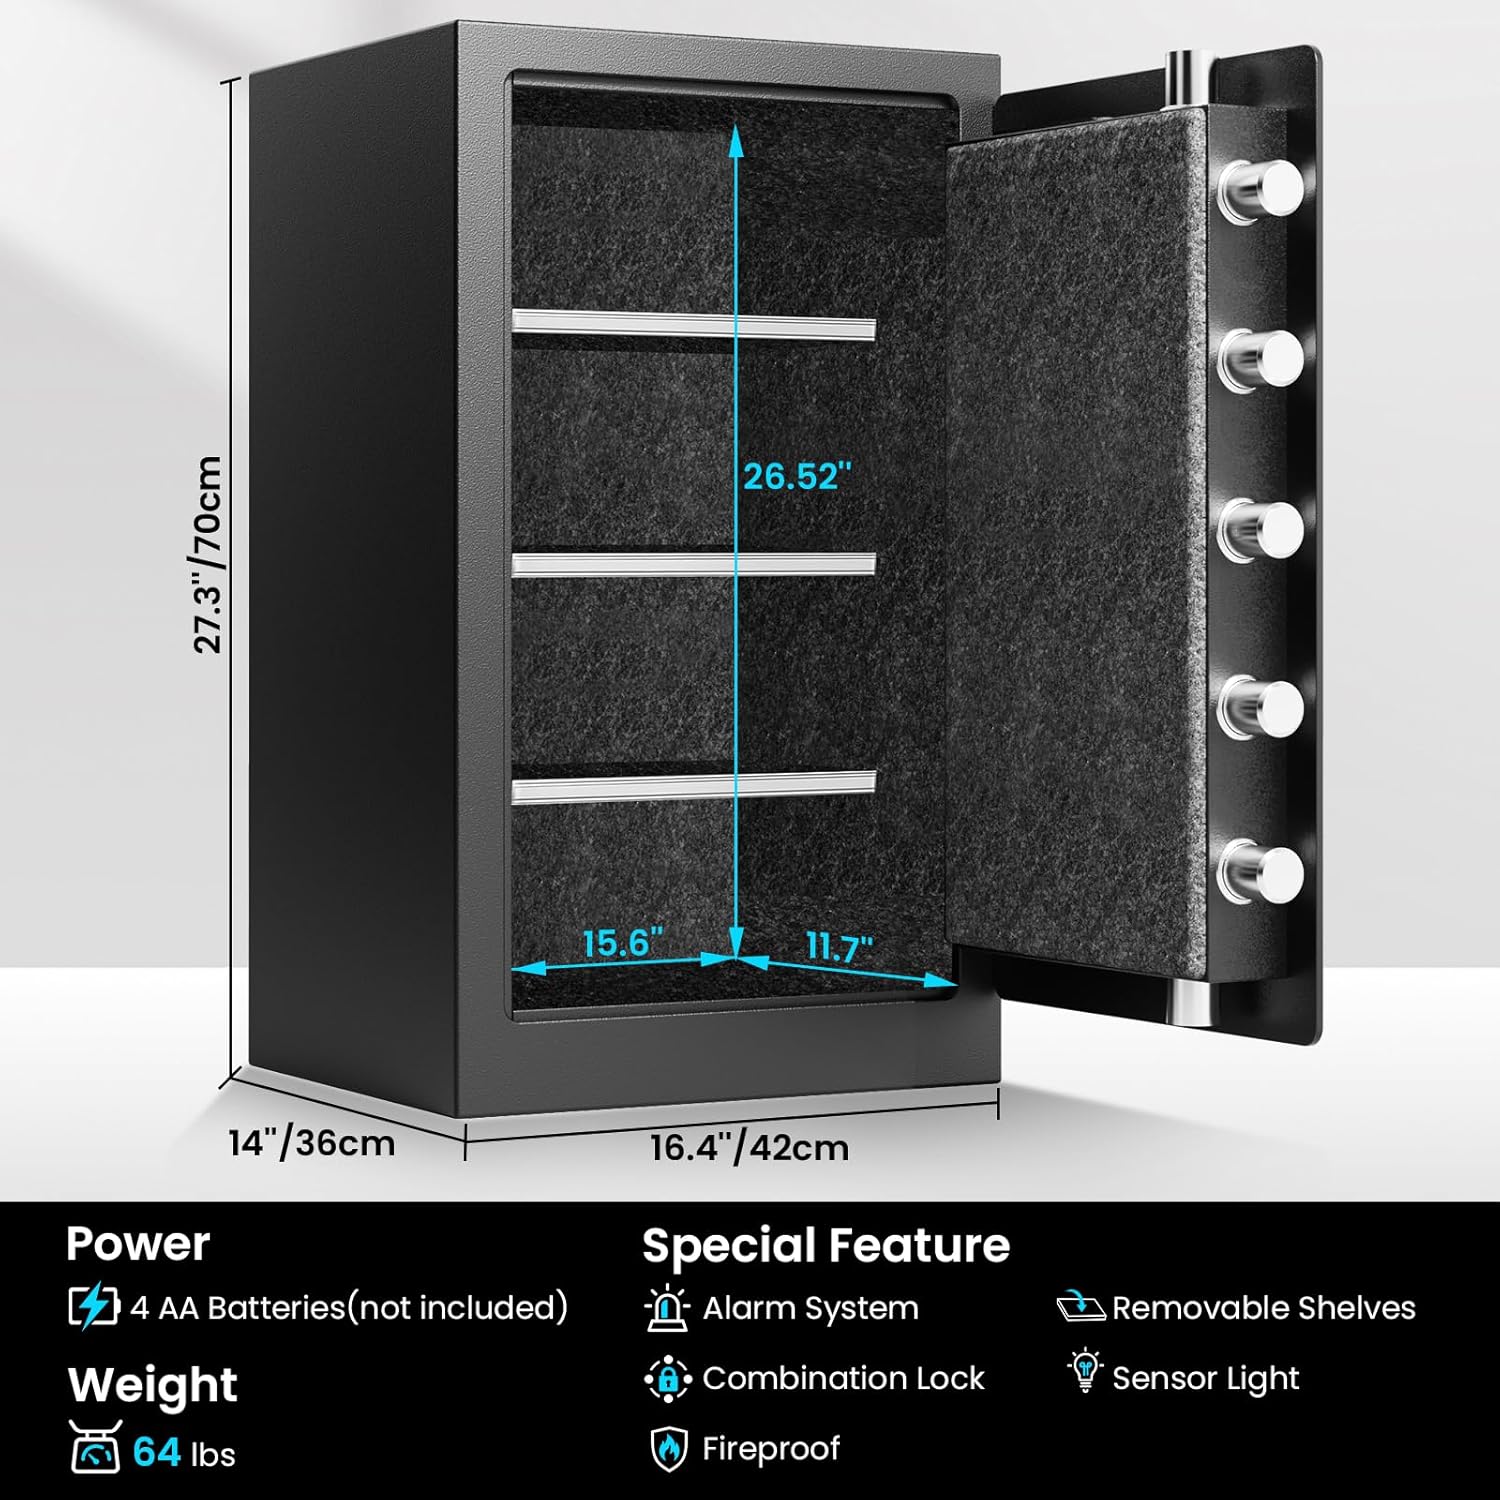
| Exterior Dimensions (W x D x H) | 16.4" x 14" x 27.3" (42cm x 36cm x 70cm) |
| Interior Dimensions (W x D x H) | 15.6" x 11.7" x 26.52" |
| Capacity | 6.5 Cubic Feet |
| Weight | 64 lbs |
| Fire Protection | 35 minutes at 1700°F (927°C), internal temperature below 350°F (177°C) |
| Locking Mechanism | Digital Keypad with Emergency Key Override |
| Power Source | 4 AA Batteries (not included) |
| Security Features | 7 solid 0.98" locking bolts, concealed anti-pry hinges, smart alarm, silent mode |

Setup
1. Unpacking
Carefully remove the safe from its packaging. Inspect the safe for any signs of damage. Retain packaging materials for potential future transport or returns.
2. Battery Installation
The safe requires 4 AA batteries (not included) to power the digital keypad. Locate the battery compartment on the inside of the safe door. Insert the batteries, ensuring correct polarity.

3. Initial Passcode Setting
With the safe door open, locate the red reset button on the inside of the door. Press the button. The keypad will beep, and the 'PROCEED' light will illuminate. Enter your desired 3-8 digit passcode, then press the '#' key. The 'PROCEED' light will flash, indicating the new passcode is set. Test the new passcode with the door open before closing it.

4. Shelf Installation
The safe includes three removable shelves for organizing your items. Position the shelves at desired heights by aligning them with the internal support ledges.

Operating Instructions
1. Opening the Safe
Method A: Using the Digital Keypad
- Enter your 3-8 digit passcode.
- Press the '#' key. The 'PROCEED' light will illuminate.
- Within 5 seconds, turn the knob clockwise to open the safe door.
Method B: Using Emergency Keys
- Locate the emergency keyhole cover on the keypad.
- Insert the emergency key and turn it counter-clockwise.
- While the key is turned, rotate the knob clockwise to open the safe door.
Method C: Using External Battery Box (if internal batteries are depleted)
- Connect the external battery box to the port located under the keypad.
- Enter your passcode on the digital keypad.
- Press the '#' key. The 'PROCEED' light will illuminate.
- Within 5 seconds, turn the knob clockwise to open the safe door.


2. Setting/Changing Passcode
With the safe door open, press the red reset button on the inside of the door. When the 'PROCEED' light illuminates, enter your new 3-8 digit passcode, then press '#'. Test the new passcode before closing the door.
3. Silent Mode Activation
To enable silent mode and disable keypad sounds, press '*633' on the keypad. To disable silent mode, repeat the process.


4. Alarm System
The safe features a built-in alarm system. Multiple incorrect passcode entries will trigger an alarm and temporarily lock out the keypad.
Maintenance
- Cleaning: Wipe the exterior of the safe with a soft, damp cloth. Avoid abrasive cleaners or solvents.
- Battery Replacement: Replace the AA batteries when the 'LOW BATTERY' indicator light illuminates on the keypad. Always use new, high-quality alkaline batteries.
- Key Care: Keep emergency keys clean and dry. Do not force keys into the lock.
Troubleshooting
| Problem | Possible Cause | Solution |
|---|---|---|
| Safe does not open with passcode. | Incorrect passcode entered; batteries are low or dead; knob not turned within 5 seconds. | Re-enter passcode carefully. Replace batteries or use external battery box. Ensure knob is turned promptly after entering code. |
| Keypad is unresponsive. | Batteries are dead; keypad is locked out due to multiple incorrect entries. | Replace batteries or use external battery box. Wait for the lockout period to expire (usually a few minutes). |
| Emergency key does not turn. | Key is not fully inserted; debris in keyhole. | Ensure key is fully inserted and aligned. Gently try to remove any obstruction. Do not force the key. |
| Alarm sounds unexpectedly. | Multiple incorrect entries; safe moved or tampered with (if equipped with motion sensor). | Enter correct passcode to disarm. Check for any unauthorized attempts to open or move the safe. |
Warranty and Support
Mitlvge provides lifetime technical support for your safe. For any inquiries or assistance, please contact our customer service team. We aim to provide a 24-hour response to all support requests.
Lifetime Fire Replacement: In the event your safe is damaged by fire, Mitlvge offers a lifetime fire replacement policy. Please submit details of the fire incident to our support team to receive a free replacement safe.


