
1. Introduction
The Yamnweo RX-8 is an 8-channel rack-mountable audio mixer designed for professional audio applications. It features 99 DSP effects, USB and Bluetooth connectivity, 48V phantom power, and a clear LCD display. This mixer is suitable for various environments including live stages, recording studios, conferences, and DJ setups.
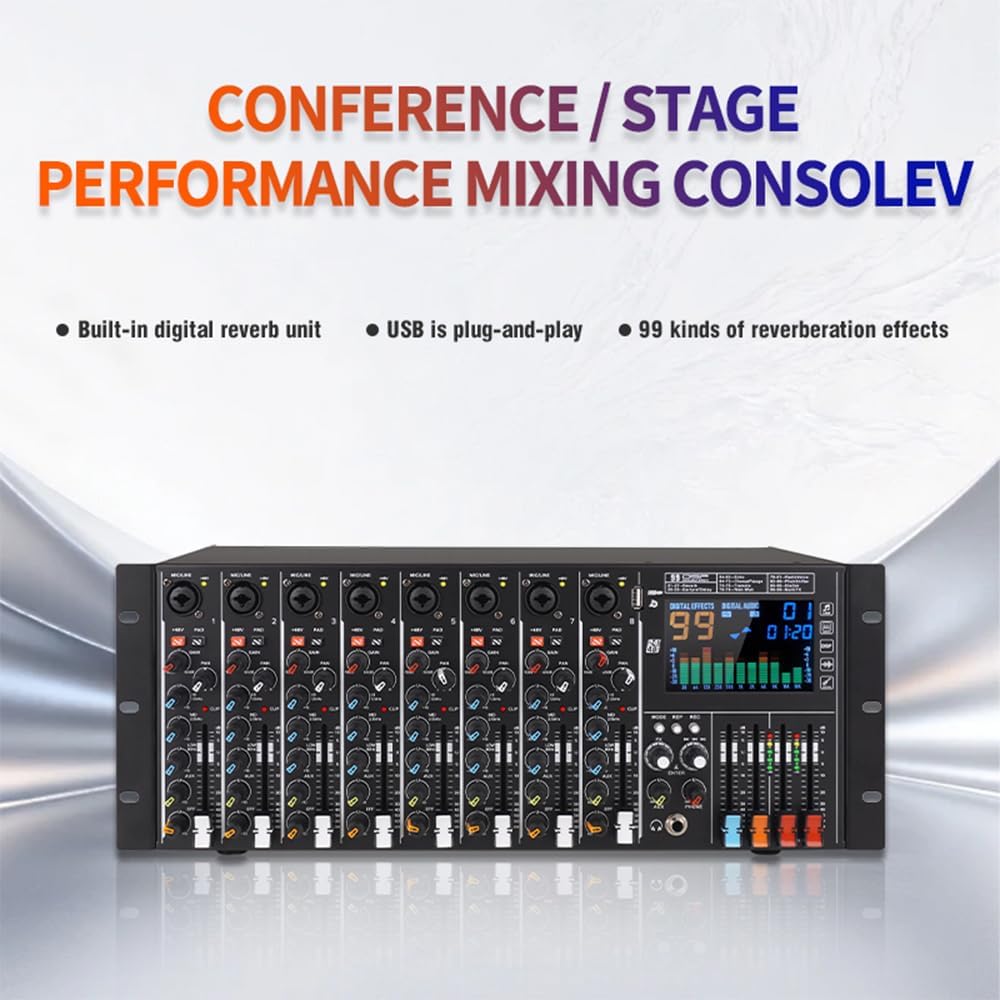
Image 1.1: The Yamnweo RX-8 DJ Console, highlighting its use for conference and stage performance, with features like a built-in digital reverb unit, USB plug-and-play, and 99 kinds of reverberation effects.

Image 1.2: The Yamnweo RX-8 DJ Console shown in various application scenarios, including music performance, bar DJing, large conference rooms, and recording studios, demonstrating its versatility.
2. Safety Information
- Read all instructions before operating the device.
- Keep this manual for future reference.
- Do not expose this equipment to rain or moisture.
- Do not block any ventilation openings.
- Ensure proper grounding for all electrical connections.
- Disconnect power before cleaning or servicing.
- Use only attachments/accessories specified by the manufacturer.
3. Product Overview
The RX-8 console features 8 input channels, each with dedicated controls for gain, 3-band EQ, effect send, pan, and a channel fader. The master section includes controls for main output, headphone monitoring, and digital effects management. A clear LCD provides visual feedback for effects and audio levels.
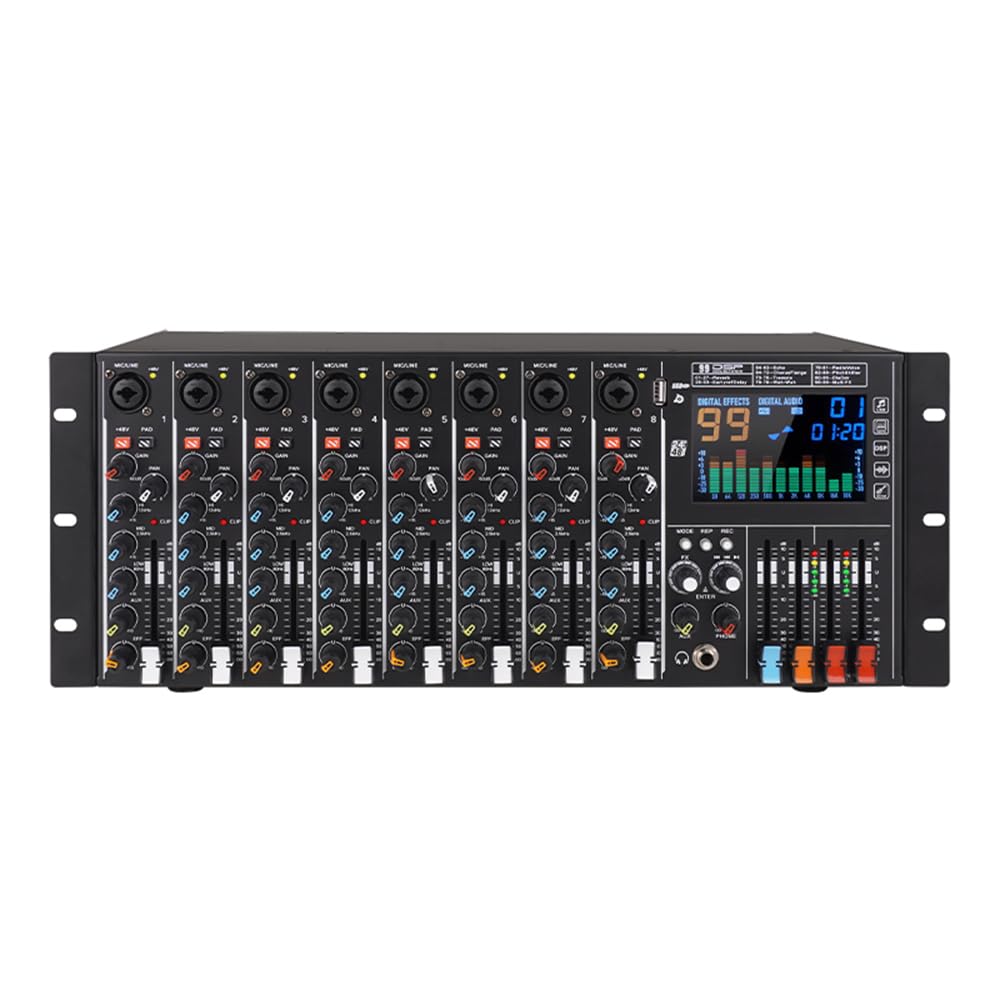
Image 3.1: Front view of the Yamnweo RX-8 8-Channel DJ Console, showing all input channels, faders, knobs, and the central LCD display for effects and audio information.
4. Setup
4.1 Power Connection
Connect the provided power adapter to the mixer's power input and then to a standard 110V AC power outlet.
4.2 Audio Input Connections
- Microphones: Connect XLR microphones to the XLR inputs on each channel.
- Line-Level Devices: Connect instruments or other line-level audio sources using 1/4-inch TRS/TS cables to the line inputs.
4.3 Audio Output Connections
- Main Output: Connect the main XLR or RCA outputs to your amplifier, powered speakers, or recording device.
- Headphones: Plug headphones into the 1/4-inch headphone jack for monitoring.
5. Operating Instructions
5.1 Powering On/Off
Press the power button located on the rear panel to turn the mixer on or off. Ensure all connections are secure before powering on.
5.2 Channel Controls
- GAIN: Adjusts the input sensitivity for each channel. Set this to an appropriate level to avoid clipping.
- 3-Band EQ: Each channel has HIGH, MID, and LOW controls to shape the tone of the input signal.
- FX: Controls the amount of signal sent from the channel to the internal digital effects processor.
- PAN: Adjusts the stereo position of the channel's signal (left to right).
- FADER: Controls the output level of the individual channel to the main mix.
5.3 48V Phantom Power
The mixer provides 48V phantom power for condenser microphones. Locate the +48V switch on the relevant channels. Activate this switch only when using condenser microphones that require phantom power. Ensure the microphone is connected before activating phantom power to prevent damage.

Image 5.1: Close-up of the +48V phantom power switch and PAD button on the mixer, indicating how to activate phantom power for condenser microphones.
5.4 99 DSP Effects
The RX-8 features 99 built-in digital signal processing (DSP) effects, including various reverbs, echoes, chorus, flanger, and pitch shifters. Use the dedicated FX section controls to select and apply effects to your mix. The LCD display will show the selected effect number.
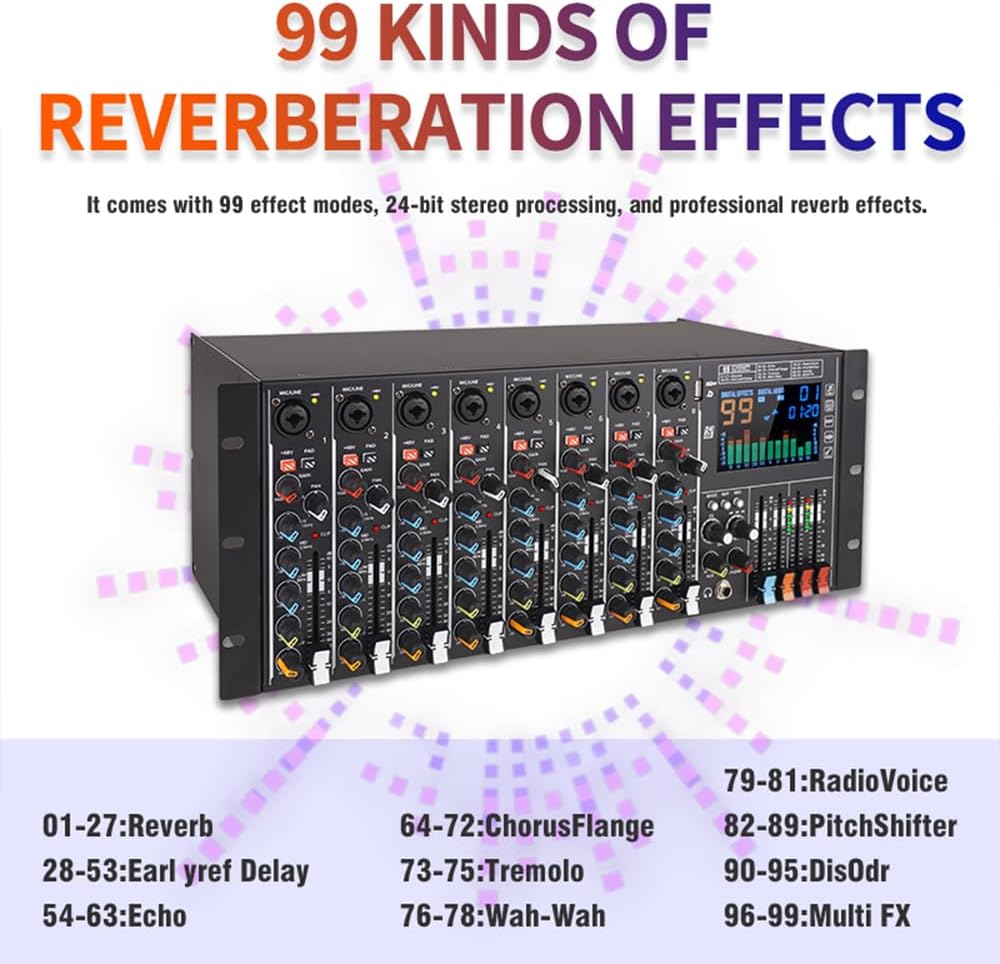
Image 5.2: Illustration of the 99 different reverberation effects available on the mixer, categorized by type such as Reverb, Delay, Echo, Chorus/Flange, Tremolo, Wah-Wah, RadioVoice, PitchShifter, DisOdr, and Multi FX.
5.5 USB Playback and Recording
The mixer includes a USB interface for direct connection to a computer or for playing audio files from a USB drive. Insert a USB drive into the USB port for playback. For recording, connect the mixer to a computer via USB and use appropriate audio recording software.

Image 5.3: The USB port on the mixer, demonstrating its plug-and-play functionality for meetings, weddings, recording performances, and music playback.
5.6 Bluetooth Connectivity
The built-in Bluetooth module allows wireless audio streaming from compatible devices such as smartphones or tablets. Activate Bluetooth on your device and pair it with the mixer. The mixer's LCD will indicate successful pairing.

Image 5.4: The mixer displaying its built-in Bluetooth capability, showing a smartphone wirelessly connected and streaming music to the console.
5.7 Real-Time Monitoring
Connect headphones to the dedicated headphone jack to monitor the audio signals of each channel and the main mix in real-time. The headphone volume can be adjusted independently.

Image 5.5: Headphones connected to the mixer, illustrating the real-time ear-coupled monitoring function which allows users to listen to channel level signals and adjust volume.
6. Maintenance
- Cleaning: Use a soft, dry cloth to clean the exterior of the mixer. Do not use liquid cleaners or solvents.
- Storage: Store the mixer in a cool, dry place away from direct sunlight and extreme temperatures.
- Ventilation: Ensure ventilation openings are clear to prevent overheating.
7. Troubleshooting
- No Sound Output: Check all cable connections, ensure power is on, and verify fader levels (channel and master) are up. Check input source levels.
- Distorted Sound: Reduce input gain (GAIN knob) to prevent clipping. Check cable integrity.
- Bluetooth Not Connecting: Ensure Bluetooth is enabled on both the mixer and your device. Try unpairing and re-pairing. Ensure no other devices are connected to the mixer via Bluetooth.
- Phantom Power Not Working: Ensure the +48V switch is engaged for the correct channel and that your microphone requires phantom power.
8. Specifications
| Feature | Specification |
|---|---|
| Brand | Yamnweo |
| Model | RX-8 |
| Number of Channels | 8 |
| Product Dimensions (D x W x H) | 8.66" x 19" x 7.09" (22cm x 48cm x 18cm) |
| Item Weight | 12.5 Pounds |
| Connectivity Technology | Bluetooth, RCA, USB, XLR |
| Power Source | Corded Electric |
| Output Connector Type | RCA, XLR |
| Audio Input | XLR |
| Voltage | 110 Volts (AC) |
| DSP Effects | 99 (Reverb, Echo, Chorus, Flange, Pitch Shifter, etc.) |

Image 8.1: Diagram illustrating the physical dimensions of the Yamnweo RX-8 mixer: 48cm (19in) width, 22cm (8.66in) depth, and 18cm (7.09in) height.
9. Warranty and Support
This product is covered by a 30-day return and exchange policy. For technical support or warranty inquiries, please contact your retailer or the manufacturer directly.