
1. Introduction
This manual provides detailed instructions for the assembly, operation, and maintenance of your COBIZI 10x20 FT Heavy Duty Portable Carport. Please read this manual thoroughly before installation and use to ensure proper setup and safe operation. Keep this manual for future reference.

Image 1.1: The COBIZI 10x20 FT Heavy Duty Portable Carport providing shelter for a vehicle.
2. Safety Information
Important Safety Precautions:
- Always secure the shelter to the ground using the provided wind ropes and sandbags.
- Do not use in high winds. Disassemble or secure the carport immediately if strong winds are anticipated.
- Keep away from heat sources and open flames. The tarp material is not fireproof.
- Avoid prolonged exposure to direct sunlight to maximize the lifespan of the tarp material.
- Ensure all connections are tight and secure before and during use.
- Clear snow accumulation from the roof promptly to prevent structural damage.
3. Product Features
The COBIZI 10x20 FT Heavy Duty Portable Carport is designed for durability and versatility. Key features include:
- Sturdy Structure: Features 1.5-inch steel pipes with a premium powder coating finish for enhanced rust and corrosion resistance. Equipped with large ground nails, wind ropes, and built-in sandbags for maximum stability.
- Good Ventilation: Includes four roller shutter mesh windows and two zippered doors on two side walls to enhance airflow and reduce moisture accumulation.
- Quality Fabric & All-Season Protection: The tarp is crafted from 180gPE material, offering excellent waterproof, ultraviolet-resistant, and tear-resistant properties for year-round protection.
- Large Space & Versatile Usage: With internal dimensions of 10x20ft, it accommodates small boats, pickups, SUVs, and family cars. It is also suitable for gatherings and banquets.
- Easy Assembly: Designed for convenience with clearly numbered parts and a detailed manual for quick and easy setup.

Image 3.1: Illustration of the carport's all-season protection capabilities against sun, rain, and snow.

Image 3.2: Close-up view demonstrating the waterproof nature of the carport's tarp material.
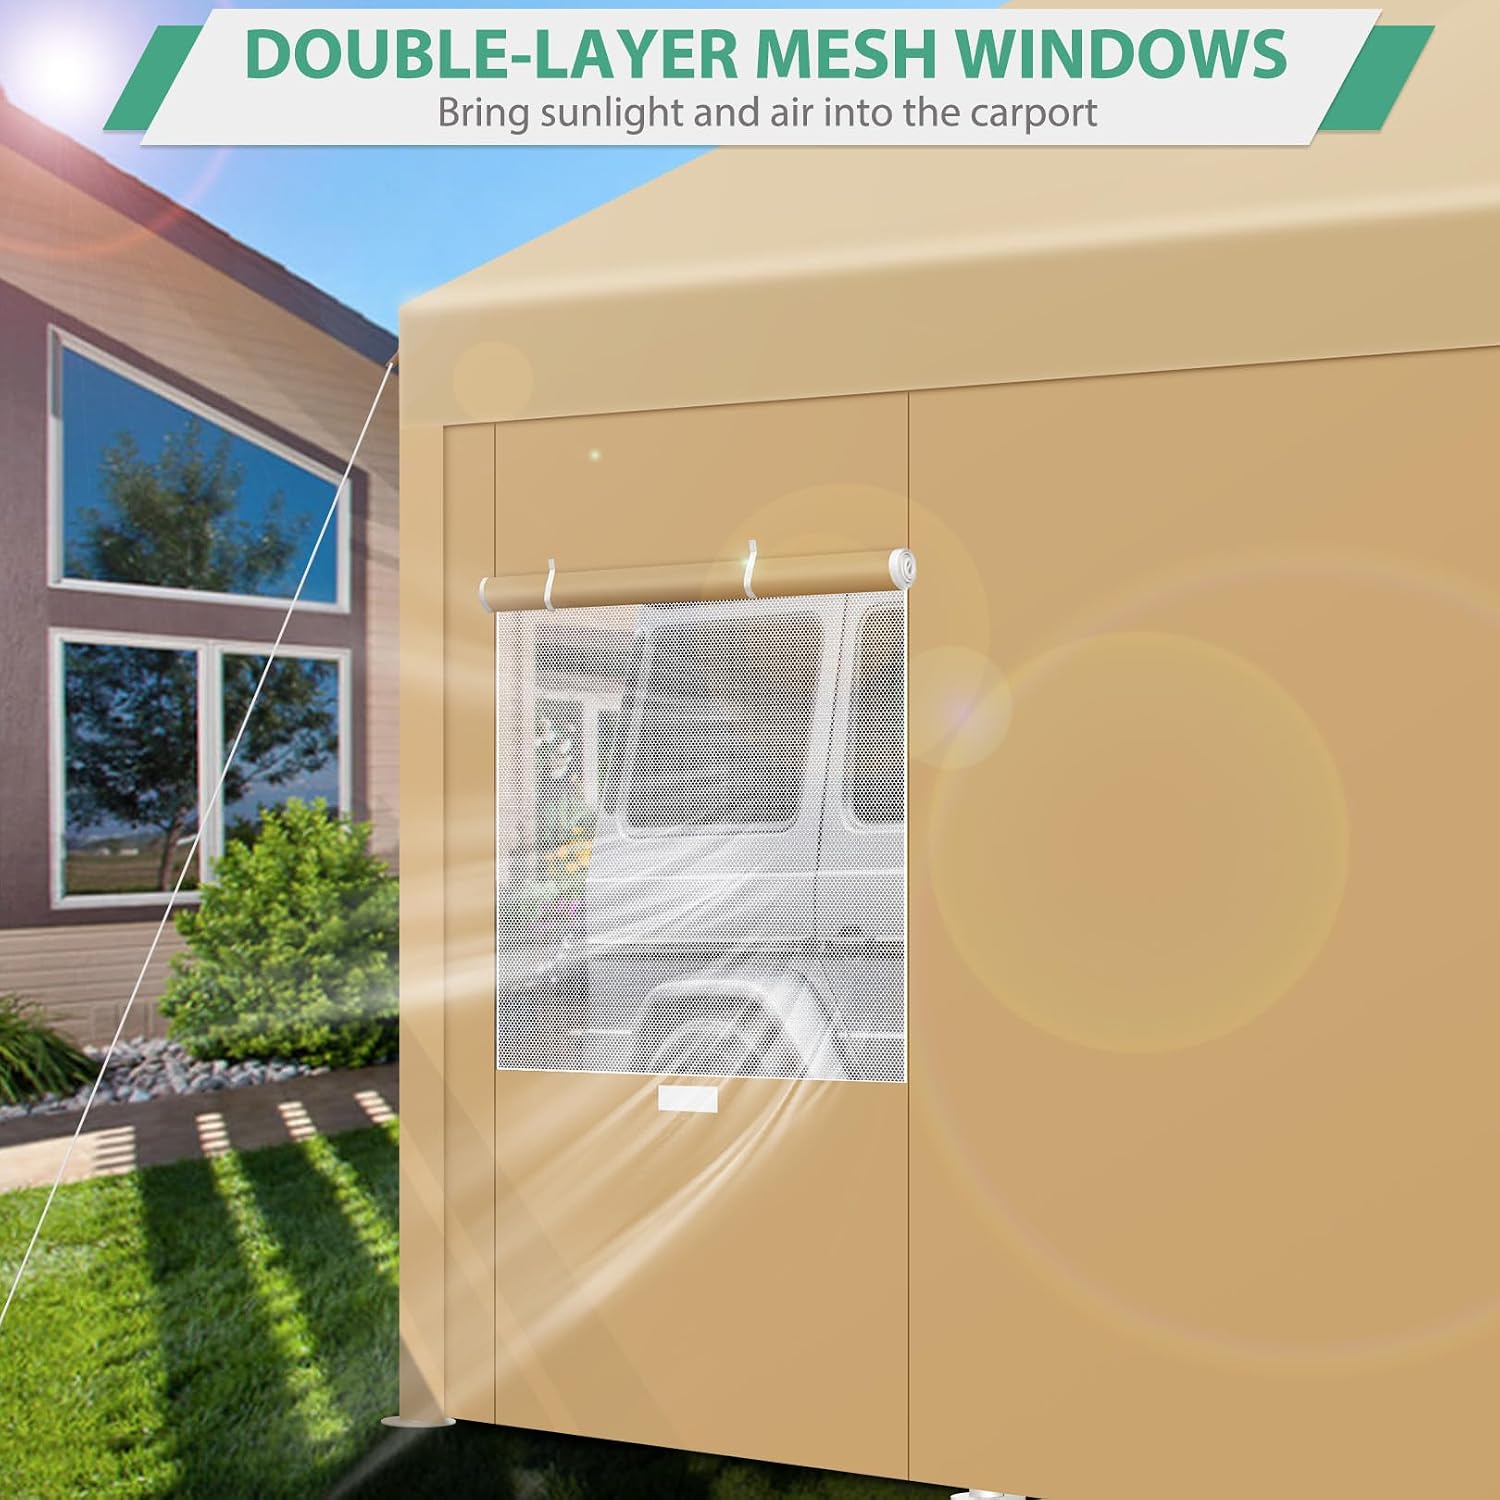
Image 3.3: A double-layer mesh window on the carport sidewall, designed for improved ventilation.
4. Setup & Assembly
Assembly of the COBIZI carport is designed to be straightforward. Follow these steps carefully. It is recommended to have at least two people for assembly.
4.1. Unpacking and Part Identification
Carefully unpack all components and verify against the parts list provided in your packaging. Each part is clearly numbered for easy identification.
4.2. Frame Assembly
Assemble the steel pipe frame by connecting the numbered pipes. The pipes feature a button-snap connection system for secure fitting. Ensure each connection clicks into place firmly.

Image 4.1: Example of the powder-coated steel pipes used for the carport frame.

Image 4.2: Detail of a pipe connection, showing the button-snap mechanism for secure assembly.

Image 4.3: Illustration of a corner joint, demonstrating how multiple pipes connect to form the frame structure.
4.3. Tarp and Sidewall Installation
Once the frame is complete, drape the 180gPE tarp over the roof structure. Secure it according to the instructions in your packaging, ensuring it is taut to prevent water pooling. Attach the sidewalls and zippered doors as indicated.
4.4. Securing the Carport
For maximum stability, especially in varying weather conditions, utilize the provided ground nails, wind ropes, and built-in sandbags. Anchor the carport firmly to the ground.

Image 4.4: Essential securing components including wind ropes, sandbags, and ground nails.
Video 4.1: An instructional video demonstrating the assembly process for a COBIZI Heavy Duty Portable Carport. This video provides a visual guide to help with setup.
5. Operating Instructions
Your COBIZI carport offers flexible usage options to suit various needs.
5.1. Using Sidewalls and Doors
The carport includes removable sidewalls and two zippered doors. These can be opened, closed, or removed to adjust the level of enclosure and access. The zippered doors can be rolled up and secured for open access.
5.2. Ventilation
Utilize the four roller shutter mesh windows for improved airflow. These windows help reduce heat and moisture buildup inside the carport, creating a more comfortable environment.
5.3. Versatile Configurations
The carport can be configured for various purposes:
- Fully Open: Remove all sidewalls for an open canopy, ideal for parties or events.
- Semi-Open: Keep some sidewalls for partial shelter, suitable for commercial events or market stalls.
- Single Door Open: Use as a garage with one main entry point.
- Fully Enclosed: All sidewalls and doors closed for maximum protection and privacy, functioning as a portable garage or storage unit.

Image 5.1: Various configurations of the carport, illustrating its adaptability for different uses.

Image 5.2: The carport configured for a social gathering, demonstrating its spacious interior.
6. Maintenance
Regular maintenance will extend the life of your carport.
- Cleaning the Tarp: Clean the tarp periodically with mild soap and water. Avoid harsh chemicals or abrasive cleaners that could damage the material. Rinse thoroughly and allow to air dry completely before storage.
- Frame Inspection: Regularly inspect the steel frame for any signs of rust, damage, or loose connections. Tighten any loose bolts or connections.
- Anchor Check: Periodically check the ground nails, wind ropes, and sandbags to ensure they are securely in place, especially after strong winds or heavy rain.
- Snow Removal: In snowy conditions, promptly remove snow accumulation from the roof to prevent excessive weight and potential collapse.
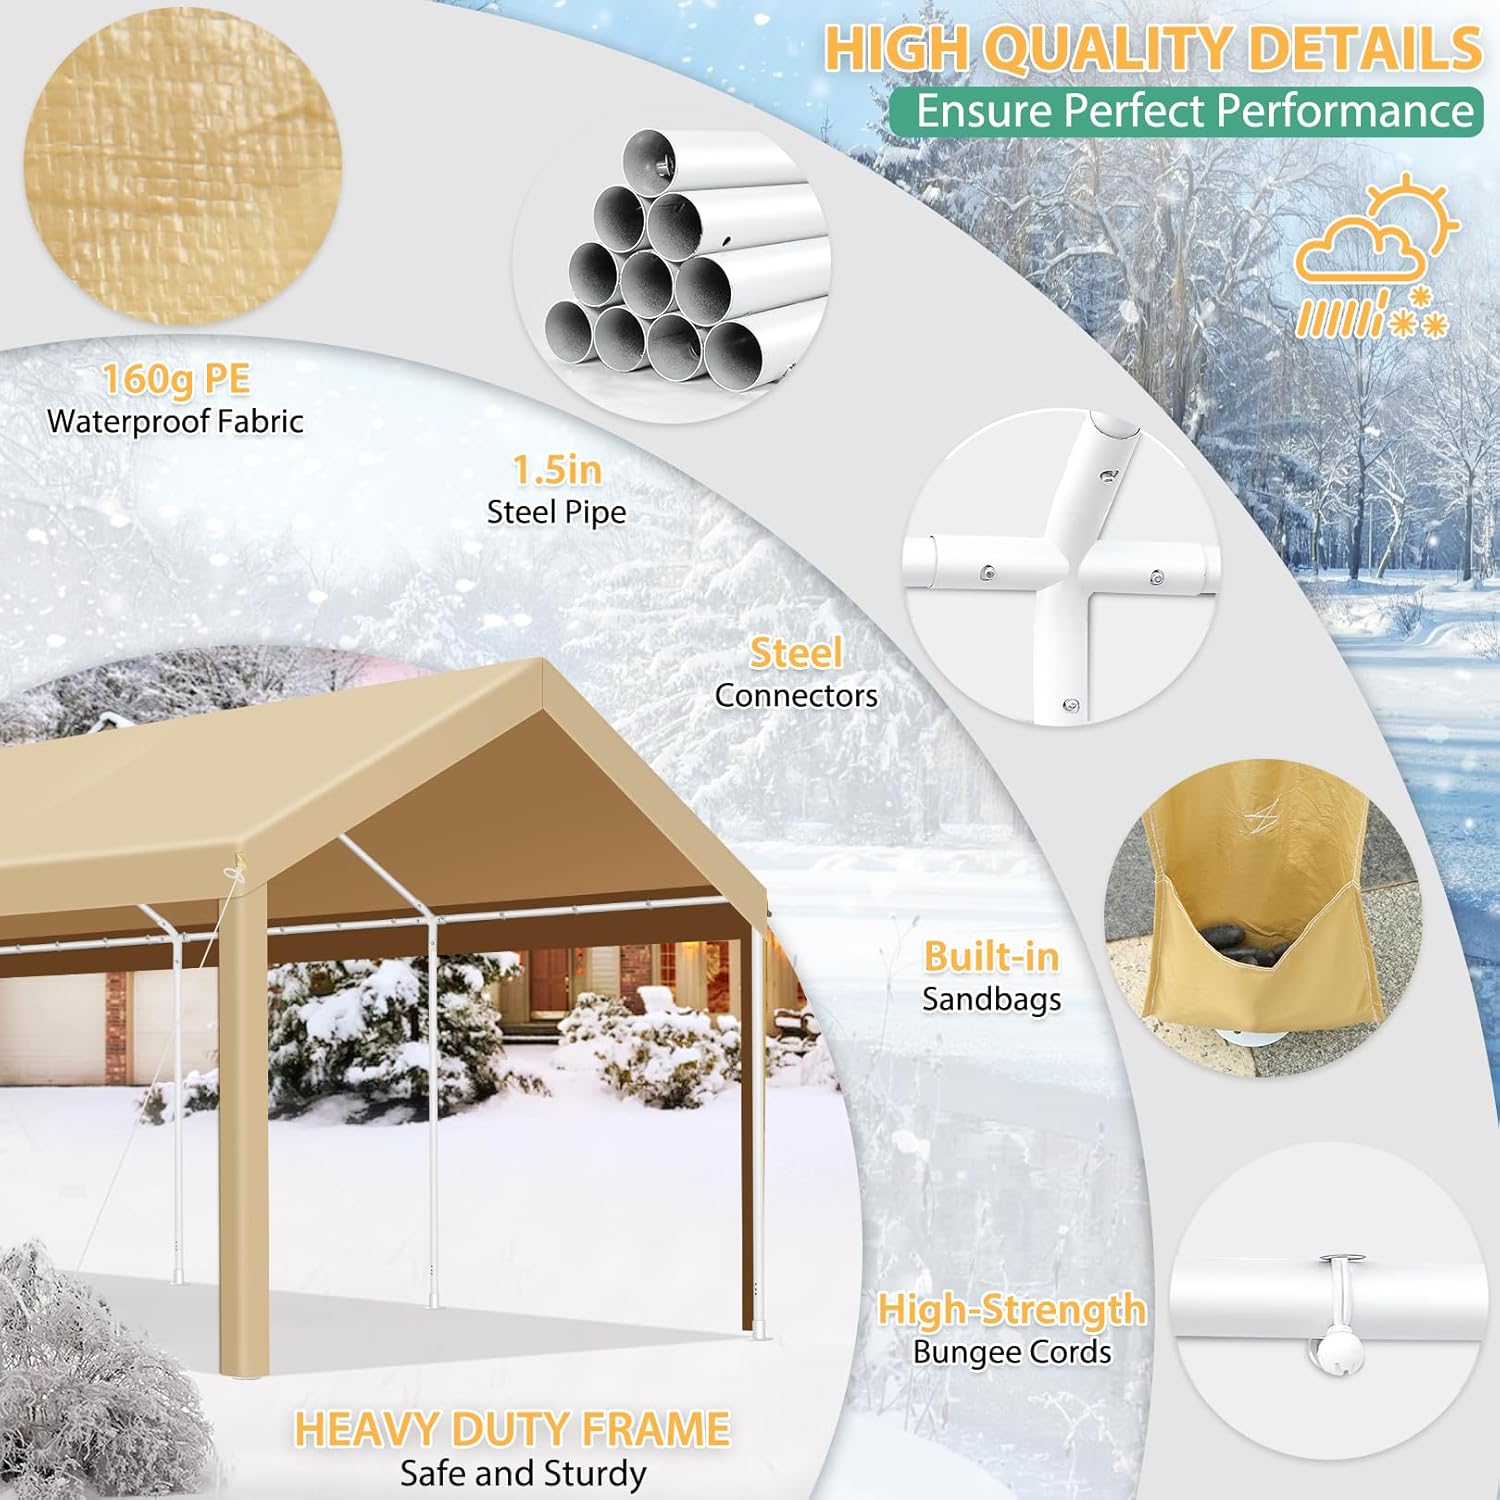
Image 6.1: The carport in winter conditions, emphasizing the need for proper securing and snow removal.
7. Troubleshooting
Here are solutions to common issues you might encounter:
| Problem | Possible Cause | Solution |
|---|---|---|
| Carport unstable or swaying in wind | Insufficient anchoring; loose connections | Ensure all ground nails are fully inserted, wind ropes are taut, and sandbags are filled and properly positioned. Check all frame connections for tightness. |
| Water pooling on roof | Tarp not taut enough; improper assembly | Re-adjust the tarp to ensure it is stretched tightly over the frame. Verify that the frame is assembled correctly and evenly. |
| Tears or damage to tarp material | Sharp objects; excessive tension; wear and tear | For small tears, use a tarp repair kit. For significant damage, contact customer support for replacement options. Avoid dragging the tarp over rough surfaces. |
| Difficulty with door zippers | Dirt in zipper; misalignment | Clean the zipper teeth. Ensure the fabric is not caught in the zipper. Apply a silicone-based lubricant if necessary. |
8. Specifications
Detailed specifications for the COBIZI 10x20 FT Heavy Duty Portable Carport:
| Attribute | Detail |
|---|---|
| Brand | COBIZI |
| Model Number | 10x20 ft |
| Product Dimensions (L x W x H) | 240"L x 120"W x 112"H (10x20 FT) |
| Floor Area | 200 square feet |
| Material | Alloy Steel (Frame), 180gPE (Tarp) |
| Frame Material | Powder Coated Steel |
| Color | Khaki |
| Water Resistance Level | Waterproof |
| Ultraviolet Light Protection | Yes |
| Recommended Uses | Car, Boat, SUV Shelter, Social Gathering, Storage |

Image 8.1: Visual representation of the carport's dimensions and its capacity for various vehicles.
9. Warranty & Support
COBIZI offers a 30-day easy return policy for this product. For any questions, concerns, or support needs regarding your COBIZI carport, please contact COBIZI Direct customer service. Refer to your purchase documentation for specific warranty details and contact information.


