
Introduction
This manual provides detailed instructions for the installation, operation, and maintenance of your VSYSTO Q3pro Motorcycle Dash Camera. Please read this manual thoroughly before using the product to ensure proper function and safety. The VSYSTO Q3pro is a dual 2K camera system designed for motorcycles, featuring 5G WiFi for high-speed video download, tire pressure sensors, an OLED wired controller, and parking monitoring capabilities.
What's in the Box
- Host with bracket
- 2 Cameras (Front and Rear)
- GPS Module
- Wired Controller
- Tire Pressure Sensors (2 units)
- ACC Power Cable
- USB Cable
- Camera Brackets
- Host Bracket
- USB Test Cable (0.5m/1.6ft)
- TF Card Slot Screw
- Cable Ties
- Cable Clips
- Wrench
Note: The memory card is not included and needs to be purchased separately.
Video: 2K Motorcycle Dash Camera Unboxing Video. This video demonstrates the unboxing process and lists all included components of the VSYSTO Q3pro dash camera system.
Setup and Installation
1. Memory Card Installation
The memory card is essential for recording. Please purchase a compatible microSD card (up to 512GB, U3 or above recommended).
- Open the cover of the main unit.
- Insert the front of the memory card into the card slot.
- Insert the provided screw and tighten it with the wrench to secure the cover.
Video: Memory Card Installation (part of Unboxing Video). This segment shows how to correctly insert and secure the memory card into the main unit.
2. Initial Connection and Testing
Before permanent installation, it is recommended to test all components.
- Connect the cameras, GPS, wired controller, and USB test cable to their corresponding ports on the main unit.
- Ensure all interfaces are tightened securely.
- Use a 5V 2A charger or power bank with the USB test cable to power the system.
- Verify that the system powers on and functions correctly. If it works properly, proceed with motorcycle installation.
Video: Initial Connection and Testing (part of Unboxing Video). This segment demonstrates connecting all components and performing a preliminary power-on test.
3. Host Bracket Installation
The main unit (host) can be installed using its bracket.
- Insert the small piece into the screw.
- Align the bracket with the bracket hole on the host.
- Insert the screw and tighten it with the wrench.
- Use adhesive tape to stick the host in an appropriate position on the motorcycle (e.g., under the seat or in the trunk).
Video: Host Bracket Installation (part of Unboxing Video). This segment illustrates how to attach the bracket to the main unit and secure it.
4. Camera Bracket Installation
Install the cameras using the provided brackets. Ensure the arrow label on the camera faces upwards and the arc side faces forward.
- Insert the small piece into the screw.
- Install the bracket onto the camera.
- Insert the base into the circular bracket.
- Insert the screw and tighten it with a wrench.
- Adjust the bracket angle as needed and tighten the screw.
- Attach the camera with its bracket to the appropriate position on the motorcycle using adhesive tape or screws.
Video: Camera Bracket Installation (part of Unboxing Video). This segment details the assembly and mounting of the camera brackets.
5. Wired Controller Bracket Installation
The wired controller can be installed using two methods:
- Method 1: Fasten the Velcro to the upper and lower sides of the controller with screws.
- Method 2: Select an appropriate gasket according to the handlebar condition, then fix the controller with screws.
Video: Wired Controller Bracket Installation (part of Unboxing Video). This segment shows two ways to install the wired controller on the motorcycle handlebar.
6. ACC Power Cable Connection
The ACC power cable connects the dash camera system to your motorcycle's power supply. The red wire connects to the positive pole of the motorcycle battery, the black wire to the negative pole, and the yellow wire to the ACC line.
Video: How to Find ACC Port of Motorcycle. This video provides guidance on locating the ACC line for proper power cable connection.
7. GPS Module Installation
Install the GPS module in an unobstructed place, keeping it about 30cm away from the camera to avoid signal interference.

Image: GPS Information. This image illustrates the GPS module and its recommended placement for optimal signal reception.
8. Tire Pressure Sensors Installation
The tire pressure sensors monitor your motorcycle's tire pressure. Install them on the front and rear tires as indicated (F for front, R for rear) using the provided wrench and gaskets.
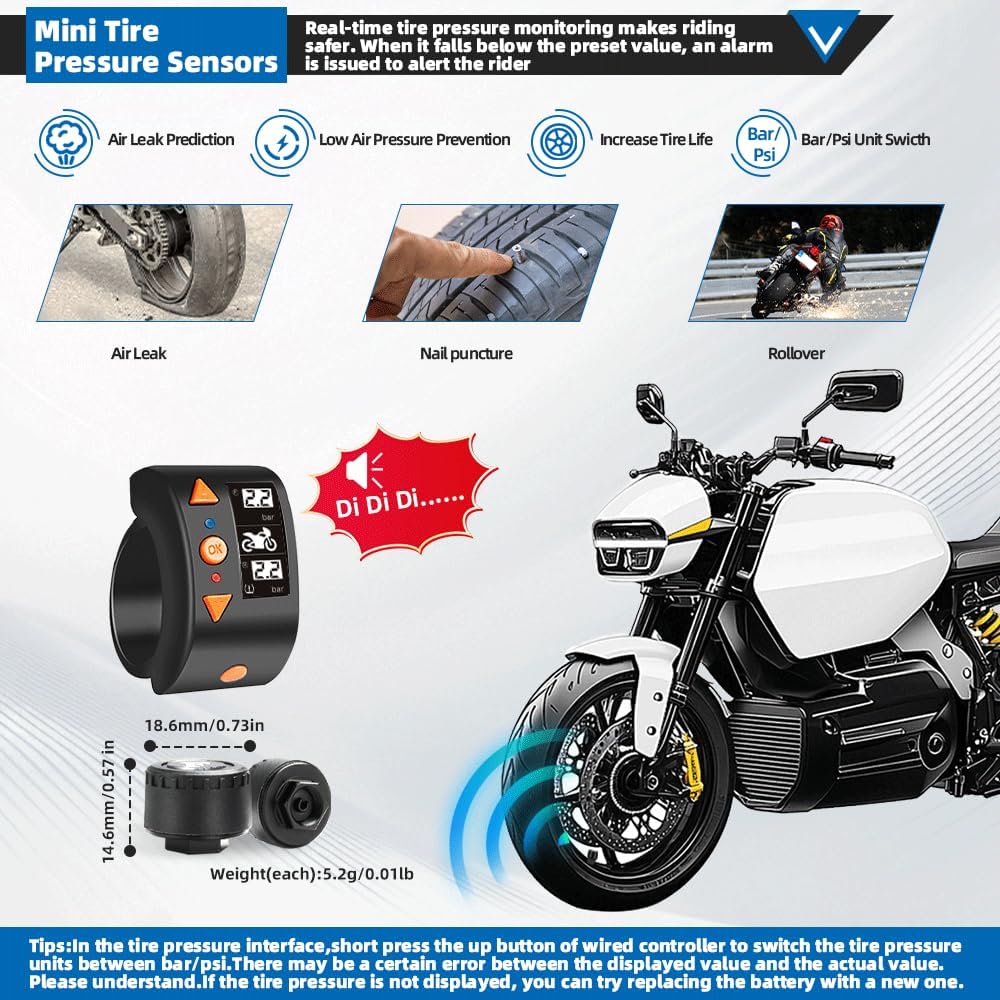
Image: Mini Tire Pressure Sensors. This image displays the tire pressure sensors, gaskets, and wrench, along with common tire issues they help prevent.
Operating Instructions
1. Wired Controller Operation
The OLED wired controller provides quick access to various functions and displays important information.
- Up Button: Short press to switch tire pressure units (Bar/Psi). Long press to enter/exit tire pressure threshold setting. Long press in main interface to reset WiFi password.
- OK Button: Short press in main interface to switch between tire pressure, speed, longitude/latitude, and main interfaces. Short press in tire pressure interface to start pairing front tire pressure sensor.
- Down Button: Short press to switch temperature units (°C/°F). Long press in tire pressure interface to enter tire pressure pairing interface. Long press after pairing is completed to exit.
- P Button: Short press to enter emergency recording mode. Long press in any interface to temporarily turn off motor vibration and tire pressure alarm sound.
- Red/Blue Indicator Light: Displays DVR recording status and GPS positioning status.
Video: 2K Motorcycle Dash Camera Operation Video. This video demonstrates the various functions and controls of the wired controller, including tire pressure unit switching, threshold setting, WiFi password reset, interface switching, emergency recording, and alarm sound control.

Image: Multifunctional OLED Wired Controller. This image details the OLED display and button functions of the wired controller.
2. Parking Monitoring Function
When the motorcycle is powered off, the recorder detects vibration and automatically activates the parking monitoring function, recording for 30 seconds. The system will not start parking monitoring if the battery voltage is below 11.5V to prevent vehicle starting issues.
Video: Parking Monitoring Function (part of Operation Video). This segment demonstrates how the parking monitoring feature is activated and functions.
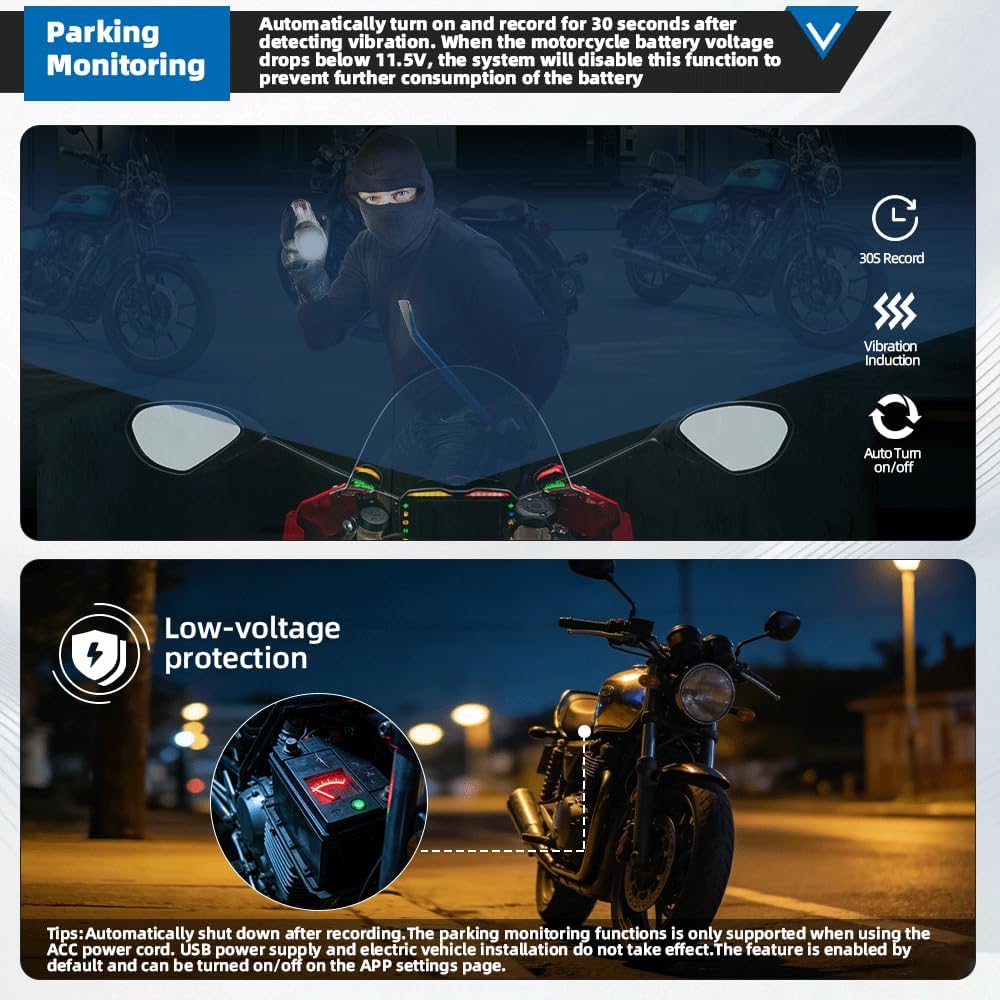
Image: Parking Monitoring. This image explains the parking monitoring and low battery voltage protection features.
3. APP Operation (WiFi Camera)
The "WiFi Camera" mobile application (available on Google Play and APP Store) allows you to view real-time video, download, edit, and share recordings.
- Search for and install "WiFi Camera" on your smartphone.
- Enter your phone's WiFi settings and connect to the network named starting with "MOTODV" or "VSYSTO".
- Open the APP and click "Enter recorder" to view the real-time image.
- Click the icon in the upper right corner to switch between different camera views. Click the icon in the bottom right corner to display in full screen, and click again to exit.
- Click "Online" to view files in the memory card (Normal, Event, Parking, Photo folders).
- Click the "Edit" button in the upper right corner to delete or download video files. Download speed can reach up to 10.7M/s.
- After downloading, go to the "Local" page to play videos.
- When checking driving trajectory, connect to WiFi with internet access or turn on mobile data to view place names on the map. You can also view it in full screen.
- Click on a video to edit it (up to 30 seconds). Edited videos can be shared.
- The settings page allows you to set loop video time, sound record, and other functions. After completing settings, restart the recorder for changes to take effect.
Video: APP Operation (part of Operation Video). This segment guides you through connecting to the app, viewing live footage, accessing recorded files, editing, and sharing.
Image: WiFi Connection. This image illustrates the 5G WiFi connection and app interface for video download and management.
4. Dual 2K Cameras
The system features well-made 120-degree wide-angle lenses with Starlight night vision. Dual 2K (2560*1440) 25FPS cameras provide clear video day and night. The MP4 video format ensures efficient compression and compatibility.

Image: Dual 2K Cameras. This image highlights the dual camera setup, wide-angle view, and 2K resolution capabilities.
5. Loop Recording and Emergency Recording
Choose to record video at 1/2/3/5 minute intervals. When the SD card is full, new video will overwrite the oldest. The built-in G-sensor detects collisions and automatically records emergency locked video, protecting important footage.

Image: Loop Recording and Emergency Recording. This image explains how loop recording manages storage and how the G-sensor triggers emergency recording.
Maintenance
- Cleaning: Use a soft, dry cloth to clean the camera lenses and main unit. Avoid abrasive cleaners or solvents.
- Firmware Updates: Periodically check the VSYSTO official website or the mobile app for firmware updates to ensure optimal performance and access to new features.
- Memory Card: Format the memory card regularly (e.g., once a month) through the app or device settings to maintain performance and prevent data corruption. Replace the memory card if it shows signs of degradation or errors.
- Cable Connections: Periodically check all cable connections to ensure they are secure and free from damage, especially after riding in harsh conditions.
Troubleshooting
- Device Not Powering On: Check all power connections, especially the ACC power cable to the battery and ACC line. Ensure the motorcycle battery has sufficient voltage.
- No Recording: Verify that a compatible memory card is inserted correctly and formatted. Check if loop recording is enabled.
- Poor Video Quality: Ensure camera lenses are clean. Check for proper camera angle and mounting stability.
- WiFi Connection Issues: Ensure the dash camera's WiFi is enabled. Try resetting the WiFi password via the wired controller. Ensure your phone is within range.
- Tire Pressure Sensor Alarms: Check the tire pressure readings on the OLED controller. If an alarm sounds, inspect the tires for leaks or damage. Re-pair sensors if readings are inconsistent.
- Wired Controller Vibration/Alarm: This indicates an abnormal memory card or camera. Check connections and card status. Long press the P button to temporarily silence the alarm.
Specifications
| Feature | Detail |
|---|---|
| Brand | VSYSTO |
| Model | Q3pro |
| Vehicle Service Type | Motorcycle |
| Connectivity Technology | Wi-Fi (5G) |
| Video Capture Resolution | 2K (2560*1440) 25FPS |
| Special Features | 2K Front and Rear Cameras, Starlight Night Vision, Rear Camera Mirror Image, Loop recording, Emergency recording, OLED Wired Controller, Tire Pressure Sensors, GPS, Parking Monitoring, Low Battery Voltage Protection, Waterproof, Temperature Display, Screen Saver, Fault Vibration Reminder |
| Included Components | Host with bracket, 2 Cameras, GPS, Wired controller, Tire pressure sensors, ACC power cable, USB cable |
| Mounting Type | Under the seat |
| Control Method | App |
| Product Dimensions | 2.2"D x 0.74"W x 2.2"H |
| Flash Memory Type | microSD (up to 512 GB) |
| Are Batteries Included | Yes |
| Battery Cell Type | Lithium Metal |
| Manufacturer | VSYSTO |
Warranty and Support
Warranty
The VSYSTO Q3pro Motorcycle Dash Camera comes with a 1-Year Manufacturer's Warranty.
Support
For any questions, technical assistance, or warranty claims, please contact VSYSTO customer support:
- Email: support01@vsysto.com
- Online Support: VSYSTO offers 24/7 support.

Image: VSYSTO Support Information. This image highlights key support services including 24/7 support and contact email.


