
Introduction
This manual provides detailed instructions for the installation, operation, maintenance, and troubleshooting of your new refrigerator ice maker. Please read this manual thoroughly before installation and use to ensure proper function and safety. Keep this manual for future reference.
Package Contents
Verify that all items are included in your package:
- Ice Maker Unit
- Instruction Manual (this document)
Compatibility
This ice maker is compatible with a wide range of refrigerator models. Below is a partial list of compatible models. If your model is not listed, please refer to your refrigerator's original documentation or contact customer support for verification.
- Amana: ARB2257CC, ARB2257CS0, ARB2257CSR, ARB2257CS1, ARB2257CW, ARB2257CW0, ARB2259CB, ARB2259CB0, ARB2259CC, ARB2259CC0, ARB2259CS, ARB2259CS0, ARB2259CW, ARB2259CW0, and many more.
- Gibson: PDS22LBNBB.
- GE: GBS22KBNCC, GBS22KBNWW.
- Sharp: HMG651580, HMG651581.
- White Westinghouse: OEMF3FRS26ZXHD1, OEMF3FRS26ZXHW1, FFSS2615TS1, FFSS2615TP1, FFSS2615TD1, FFSS2615TE1, and many more.
- Thermador: KBUDT4250A, KBUDT4260A, KBUDT4850A, KBUDT4860A, KBUDT4870A, and many more.
- Hoover: HRNS2015, HRNS2015A, HRNS2035A, HRNS2035V, HRNS2209, and many more.
- Inglis: IKQ224300, IKQ224303, IKQ224304, IMQ225300, INQ225300, and many more.
- Norge: NT173NA, NT173NW, NT173PA, NT173PW, NT177MA, and many more.
- Estate: TS22AFXKQ00, TS22AFXKQ01, TS22AFXKQ03, TS22AFXKQ04, TS22AFXKQ05, and many more.
- Roper: RS20AQXFN00, RS20AQXFN01, RS20AQXFW00, RS20AQXFW01, RS20AWXEN00, and many more.
- Electrolux: EI23BC30KS5A, EI23BC30KS7A, EI23BC30KW1, EI23BC30KW2, EI23BC30KW3, and many more.
Safety Information
Please observe the following safety precautions to prevent injury or damage to the product:
- Always disconnect power to the refrigerator before attempting any installation, maintenance, or repair.
- Wear appropriate personal protective equipment, such as gloves, during installation.
- Ensure all connections are secure and watertight to prevent leaks.
- If you are unsure about any step, consult a qualified technician.
- Keep children and pets away from the work area during installation.
Setup and Installation
Follow these steps to install your new ice maker. Refer to your refrigerator's specific service manual for detailed instructions on accessing the ice maker compartment.
- Disconnect Power: Unplug the refrigerator from the electrical outlet or turn off the circuit breaker supplying power to the refrigerator.
- Turn Off Water Supply: Locate and turn off the water supply valve to the refrigerator.
- Access Ice Maker Compartment: Open the freezer door and locate the existing ice maker or the designated area for installation. You may need to remove shelves or other components to gain access.
- Remove Old Ice Maker (if applicable): If replacing an existing ice maker, carefully disconnect any wiring harnesses and water lines. Unscrew or unclip the old ice maker from its mounting brackets and remove it.
- Install New Ice Maker:
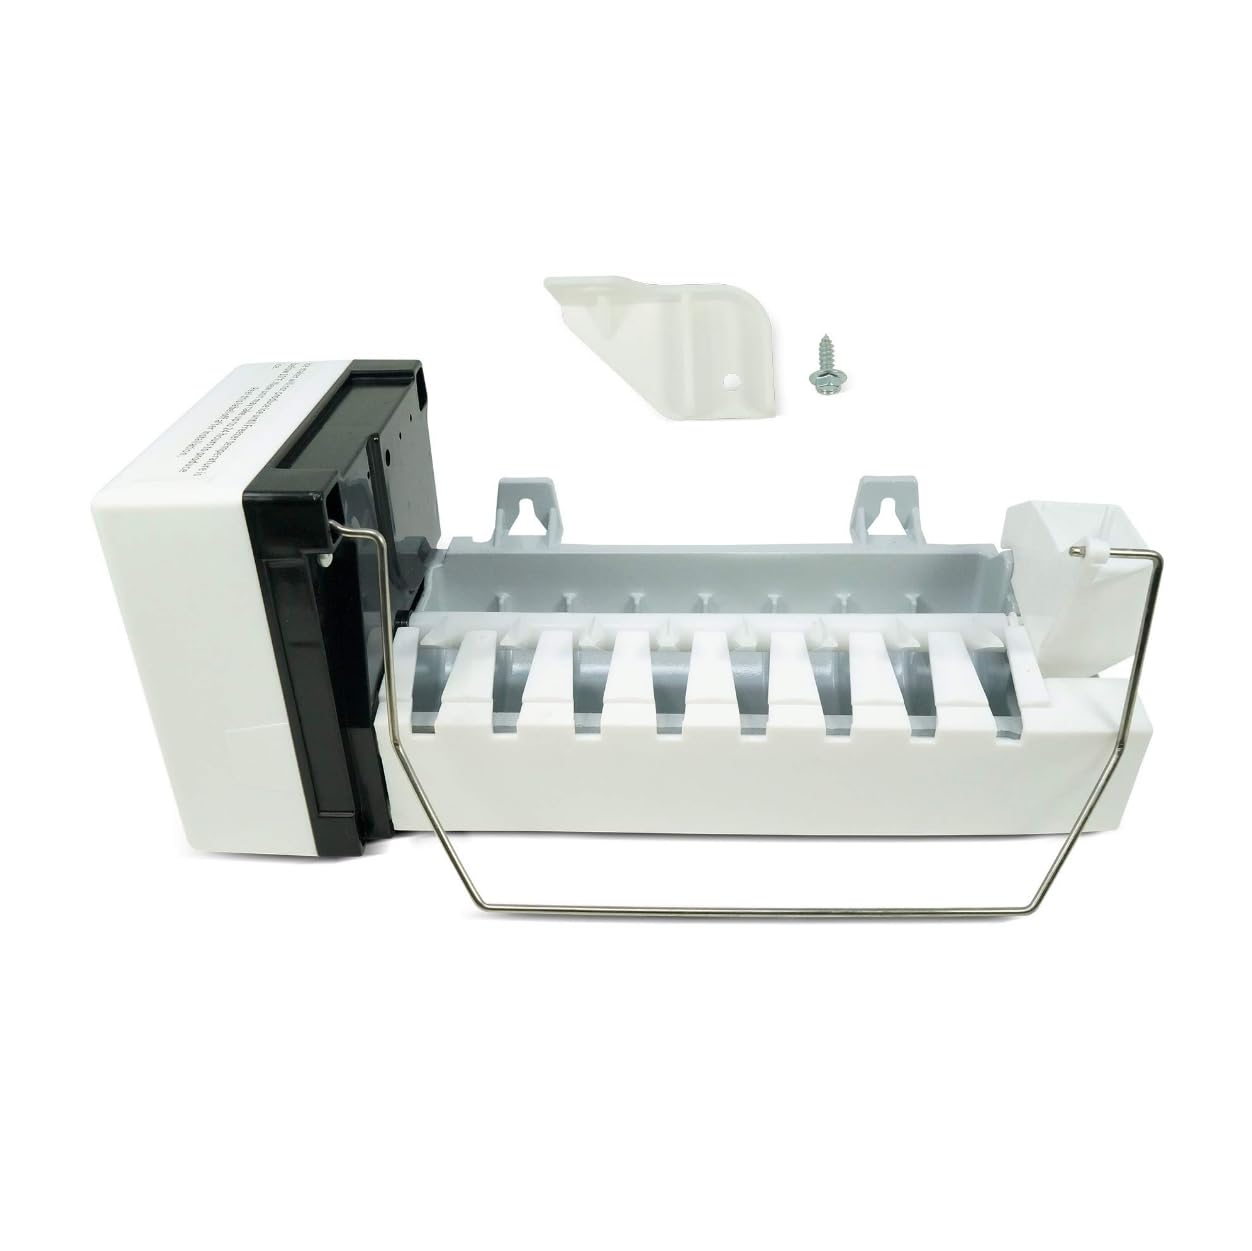
Image: Generic Refrigerator Ice Maker unit. This image shows the complete ice maker assembly, including the ice mold, motor, and control arm. - Carefully position the new ice maker unit into the designated mounting location.
- Secure the ice maker with screws or clips, ensuring it is firmly attached.
- Connect the electrical wiring harness to the ice maker. Ensure the connection is snug.
- Connect the water supply line to the ice maker's inlet valve. Hand-tighten, then use a wrench for a quarter turn, being careful not to overtighten.
- Restore Water and Power: Turn on the water supply valve. Check for any leaks around the water line connection. Plug the refrigerator back into the electrical outlet or turn on the circuit breaker.
- Initial Operation: The ice maker will typically perform an initial fill cycle within a few minutes. Discard the first few batches of ice to flush out any impurities from the new water line and ice maker components.
Operating Instructions
Once installed, your ice maker operates automatically. Here are some key operational aspects:
- Automatic Operation: The ice maker will automatically produce ice as needed, filling the ice bucket.
- Control Arm: The ice maker features a control arm (or bail arm). When the ice bucket is full, the control arm will rise, stopping ice production. When ice is removed and the arm drops, production will resume.
- Turning Off Ice Production: To temporarily stop ice production, manually lift the control arm into its upright (off) position. Ensure it clicks into place.
- First Ice Production: It may take 12-24 hours for the ice maker to produce its first full batch of ice after installation or extended periods of non-use.
Maintenance
Regular maintenance helps ensure optimal performance and longevity of your ice maker:
- Cleaning: Periodically clean the ice bucket and the ice maker components with a mild soap and warm water solution. Rinse thoroughly and dry completely before reinstallation. Do not use abrasive cleaners.
- Water Filter: If your refrigerator has a water filter, ensure it is replaced regularly according to the refrigerator manufacturer's recommendations. A clogged filter can affect ice production.
- Check Water Line: Occasionally inspect the water supply line for kinks, leaks, or damage.
- Clear Ice Bucket: Avoid overfilling the ice bucket, as this can interfere with the control arm and ice ejection mechanism.
Troubleshooting
| Problem | Possible Cause | Solution |
|---|---|---|
| Ice maker not producing ice. |
|
|
| Ice cubes are small or hollow. |
|
|
| Ice maker making unusual noises. |
|
|
| Water leaking from ice maker. |
|
|
If troubleshooting steps do not resolve the issue, please contact customer support or a qualified appliance technician.
Specifications
| Brand: | Generic |
| Model Name: | Ice Maker |
| Product Dimensions (D x W x H): | 1"D x 1"W x 1"H |
| Capacity: | 1 liters |
| Voltage: | 1V (Note: This value appears to be a placeholder or generic. Refer to your refrigerator's specifications for actual voltage requirements.) |
| Included Components: | Ice maker |
| ASIN: | B0GKQP7YRP |
Warranty and Support
For warranty information or technical support, please refer to the retailer's policy where the product was purchased or contact the manufacturer directly. Keep your proof of purchase for warranty claims.


