
Introduction
This manual provides detailed instructions for the setup, operation, and maintenance of your Vehipa Smart Fish Aquarium Kit (Model YYG380). Please read this manual thoroughly before operating the aquarium to ensure proper function and the well-being of your aquatic pets.
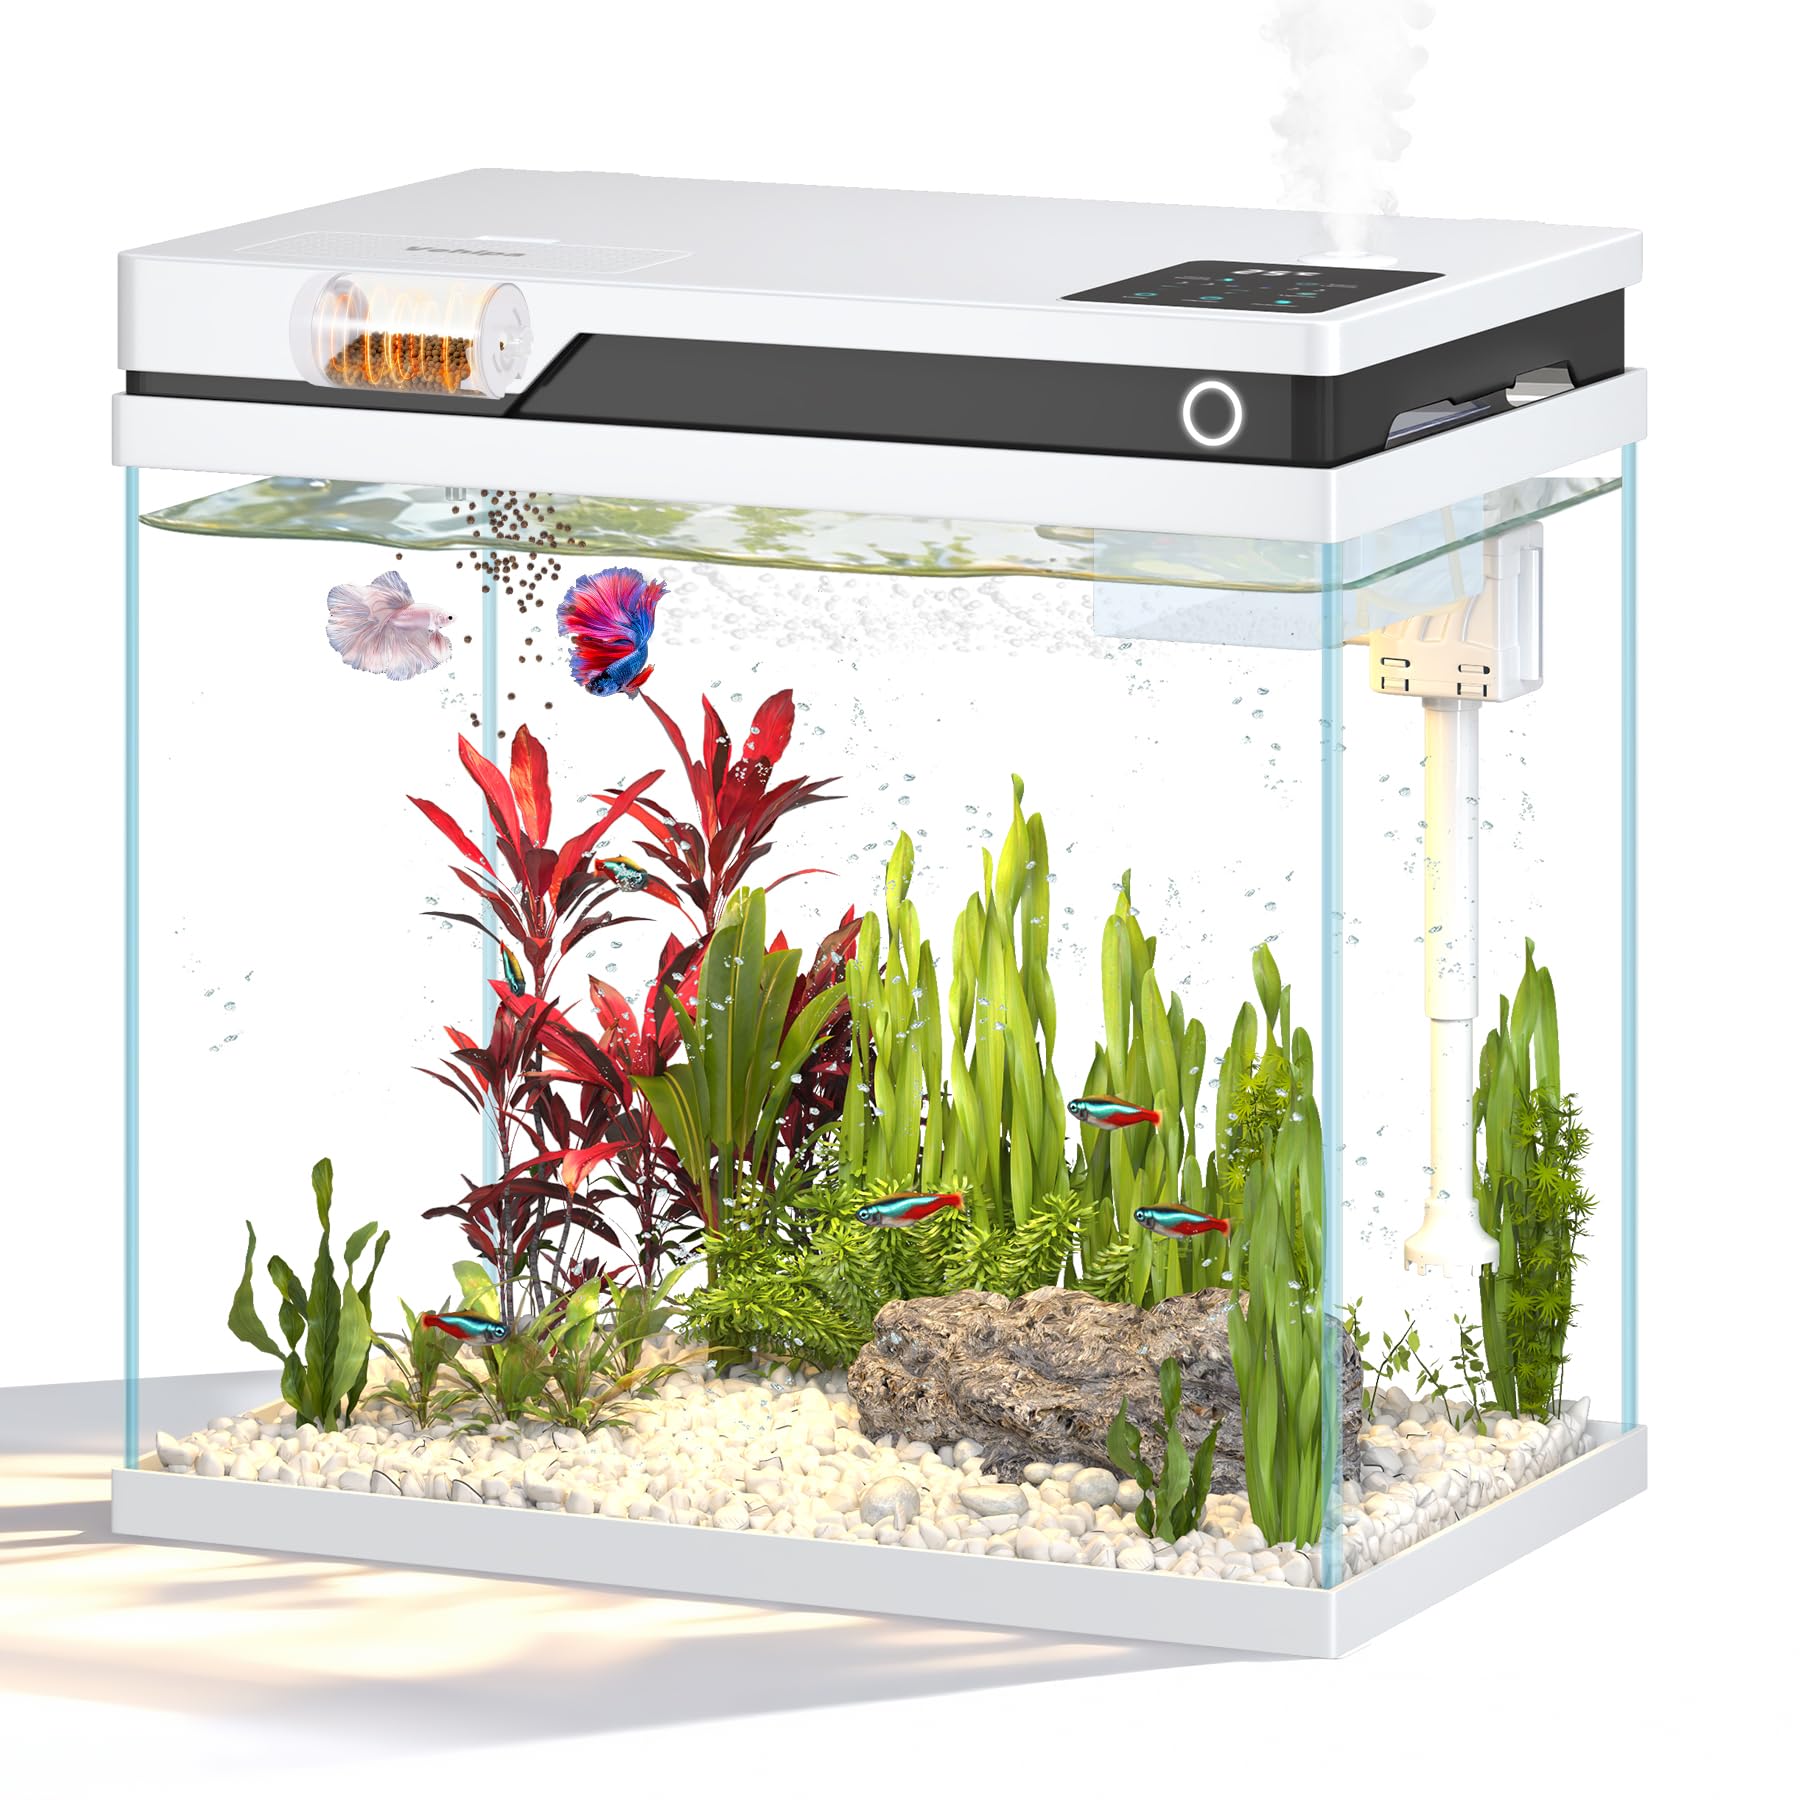
Image: The Vehipa Smart Fish Aquarium Kit, highlighting its compact design and integrated features.
Important Safety Information
Always follow basic safety precautions to reduce the risk of fire, electric shock, and injury to persons, including the following:
- Read and follow all safety instructions and all important notices on the appliance before using it.
- DANGER: To avoid possible electric shock, special care should be taken since water is used in the use of aquarium equipment. For each of the following situations, do not attempt repairs yourself; return the appliance to an authorized service facility for service or discard the appliance.
- If the appliance falls into the water, DO NOT reach for it. First, unplug it and then retrieve it.
- If the appliance shows any sign of abnormal water leakage, immediately unplug it from the power source.
- Carefully examine the appliance after installation. It should not be plugged in if there is water on parts not intended to be wet.
- Do not operate any appliance if it has a damaged cord or plug, or if it is malfunctioning or has been dropped or damaged in any manner.
- To avoid injury, do not contact moving parts or hot parts such as heaters, reflector, lamp bulbs, and the like.
- Always unplug an appliance from an outlet when not in use, before putting on or taking off parts, and before cleaning. Never yank cord to pull plug from outlet. Grasp the plug and pull to disconnect.
- Do not use an appliance for other than intended use. The use of attachments not recommended or sold by the appliance manufacturer may cause an unsafe condition.
- Do not install or store the appliance where it will be exposed to the weather or to temperatures below freezing.
- Ensure an aquarium is securely installed before operating it.
- Read and observe all the important notices on the appliance.
- If an extension cord is necessary, a cord with a proper rating should be used. A cord rated for less amperes or watts than the appliance rating may overheat. Care should be taken to arrange the cord so that it will not be tripped over or pulled.
- The water pump must be fully submerged in water before connecting to power to prevent pump burnout.
Package Contents
Please check the package to ensure all components are present:
- Aquarium Tank
- Pre-installed Feeder
- Filter Box
- Filter Sponge
- Aromatherapy Humidifier Box
- Filter Stones
- Pump Suspension Rod
- Pump Unit with Plug
- Airflow Control Valve
- Rainwater Drain Pipe and Suction Pipe
- Water Inlet Port
- Instruction Manual
- Connecting Pipe
- Aquarium Adapter
- Feeding Bin Lid
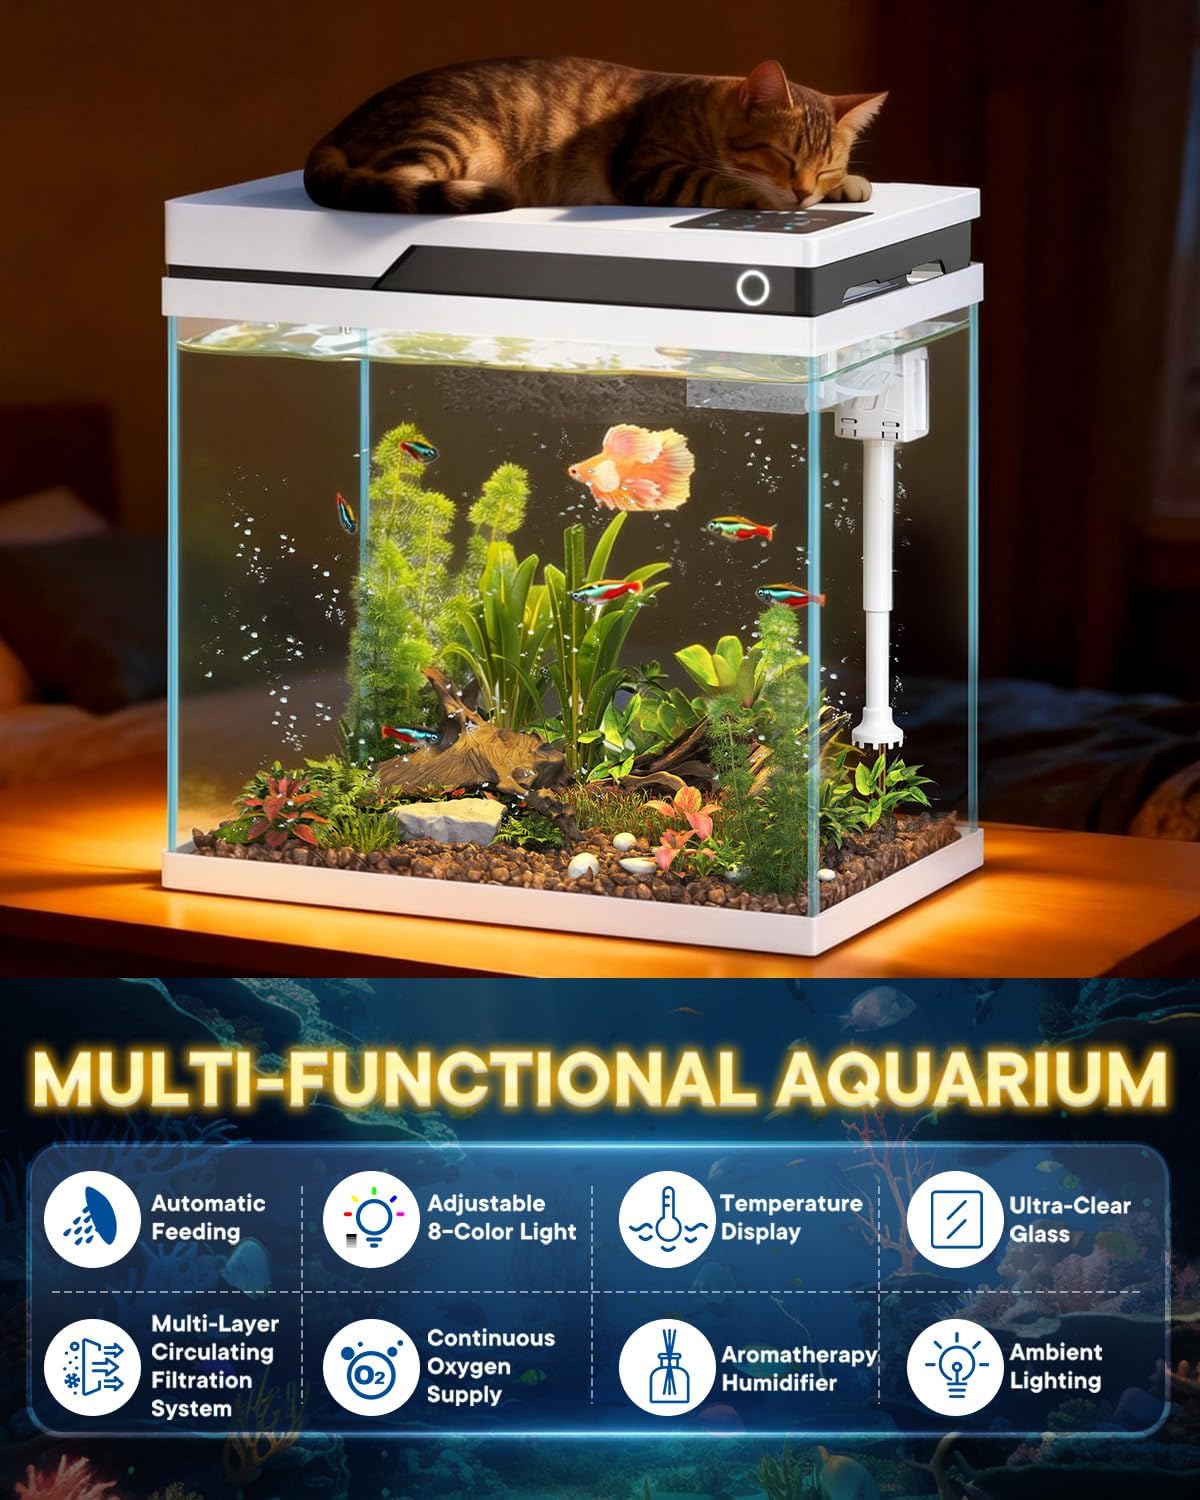
Image: All components of the aquarium kit, including the tank, filter parts, pump, and accessories.
Setup and Installation
Follow these steps to set up your Vehipa Smart Fish Aquarium Kit:
- Prepare the Filter Box: Open the top lid of the aquarium. Place the provided filter stones into the designated filter boxes. Then, place the filter sponge on top of the filter stones in the filter box.
- Install Water Pump Inlet and Suction Pipe: Assemble the water pump inlet and suction pipe components. Attach the suction pipe to the water pump unit.
- Install Pump Suspension Rod: Secure the pump suspension rod to the water pump unit.
- Install Airflow Control Valve: Connect the airflow control valve to the appropriate port on the water pump unit. Then, route the valve's tubing into the filter box area.
- Hang Water Pump: Carefully place the assembled water pump unit into the aquarium, ensuring it hangs securely within the designated area in the filter compartment. Ensure the pump is positioned to be fully submerged when the tank is filled with water.
- Install Rainwater Drain Pipe: Attach the rainwater drain pipe to its connection point within the filter system, ensuring it directs water flow correctly.
- Place Aromatherapy Humidifier Box: Insert the aromatherapy humidifier box into its designated slot on the top frame of the aquarium.
- Place Automatic Feeder and Cover: Ensure the pre-installed automatic feeder is correctly positioned. Place the feeding bin lid over the feeder.
- Connect Power: Plug the aquarium adapter into a power outlet. Ensure all components are correctly installed and the pump is submerged before powering on.
Installation Video Guide
Video: A step-by-step guide demonstrating the assembly and installation of the Vehipa Smart Fish Aquarium Kit components.
Operating Instructions
1. Lighting System
The aquarium features an 8-color adjustable LED lighting system with 10 brightness levels.
- Change Color: Tap the "Lighting" button to cycle through the 8 available colors (white, gradient, green, blue, red, cyan, yellow, purple).
- Turn On/Off: Long press the "Lighting" button to turn the light on or off.
- Adjust Brightness: Use the "+" and "-" buttons to adjust the light brightness. There are 10 brightness levels.
- Timed Lighting: Long press "Timed Lighting" to enter timer mode. Tap to select duration (e.g., 12h, 24h, 48h).
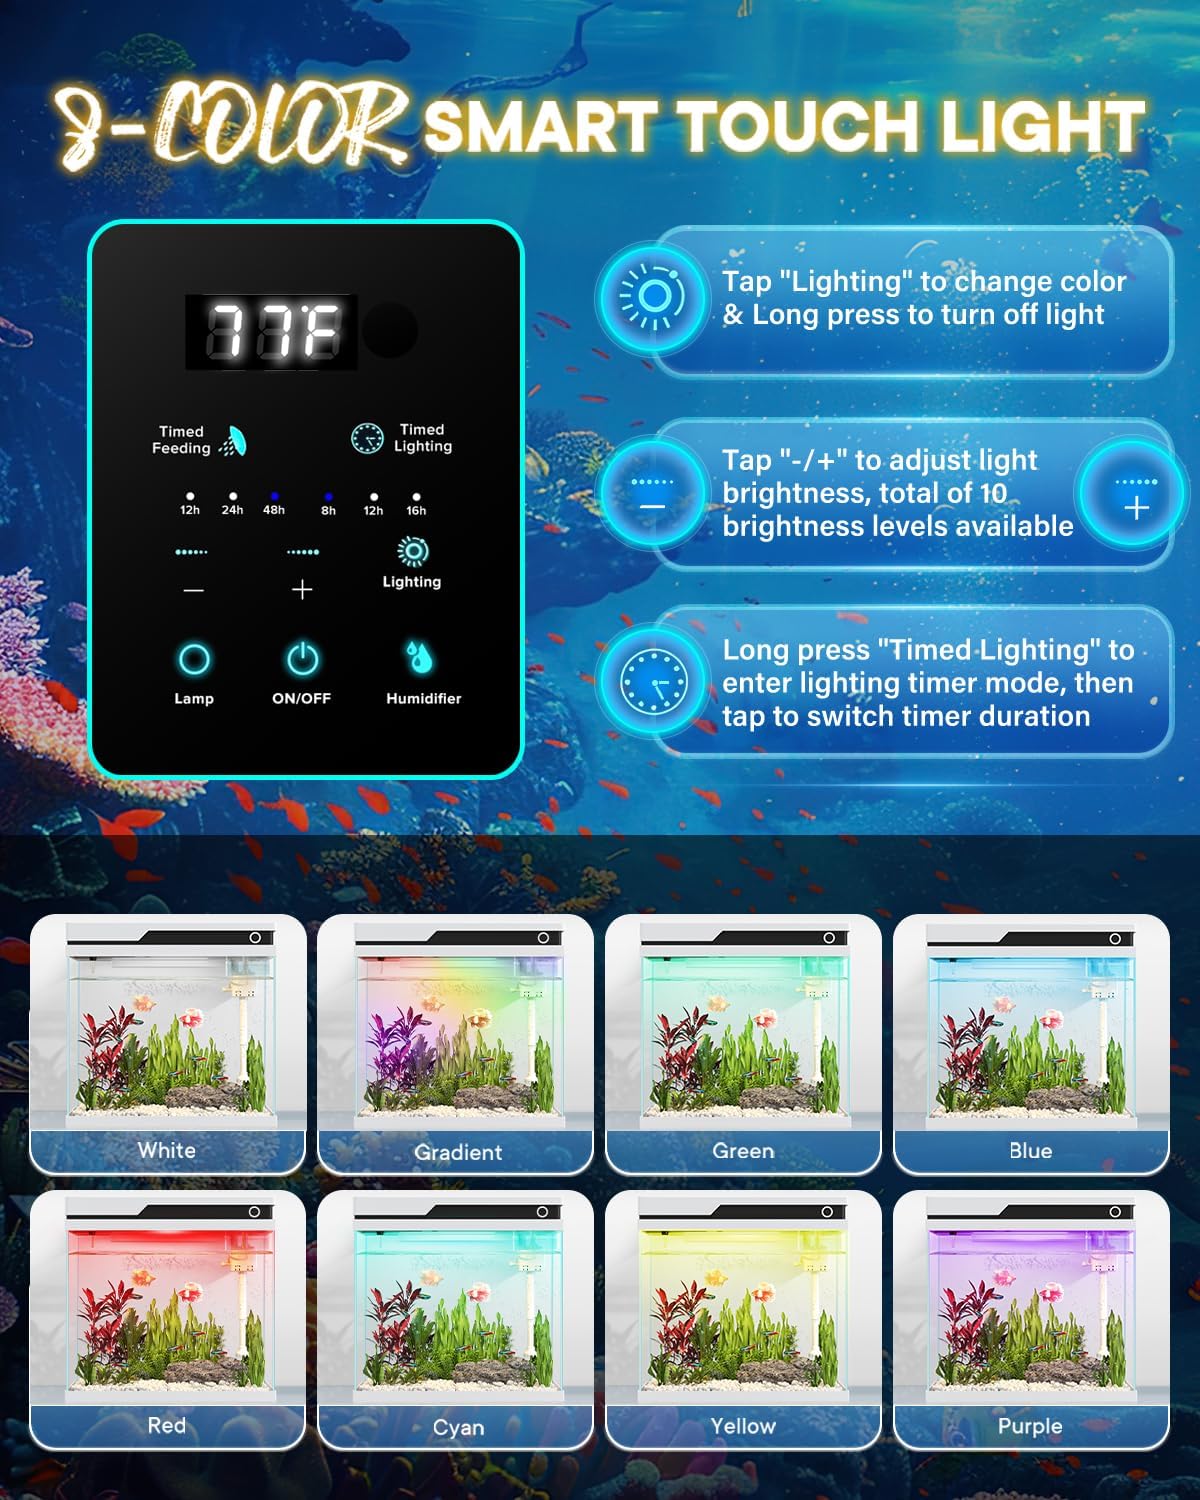
Image: The control panel for the aquarium's lighting system, illustrating touch controls for color, brightness, and timer settings.
2. Automatic Feeder
The 80ml capacity automatic feeder allows for scheduled feeding.
- Manual Feeding: Double-click the "Timed Feeding" button for an immediate feed.
- Set Feeding Interval: Long press the "Timed Feeding" button to enter timer selection mode. Tap to choose feeding intervals (12h, 24h, or 48h).
- Adjustable Opening: The feeder features an adjustable opening to control portion sizes and prevent overfeeding.
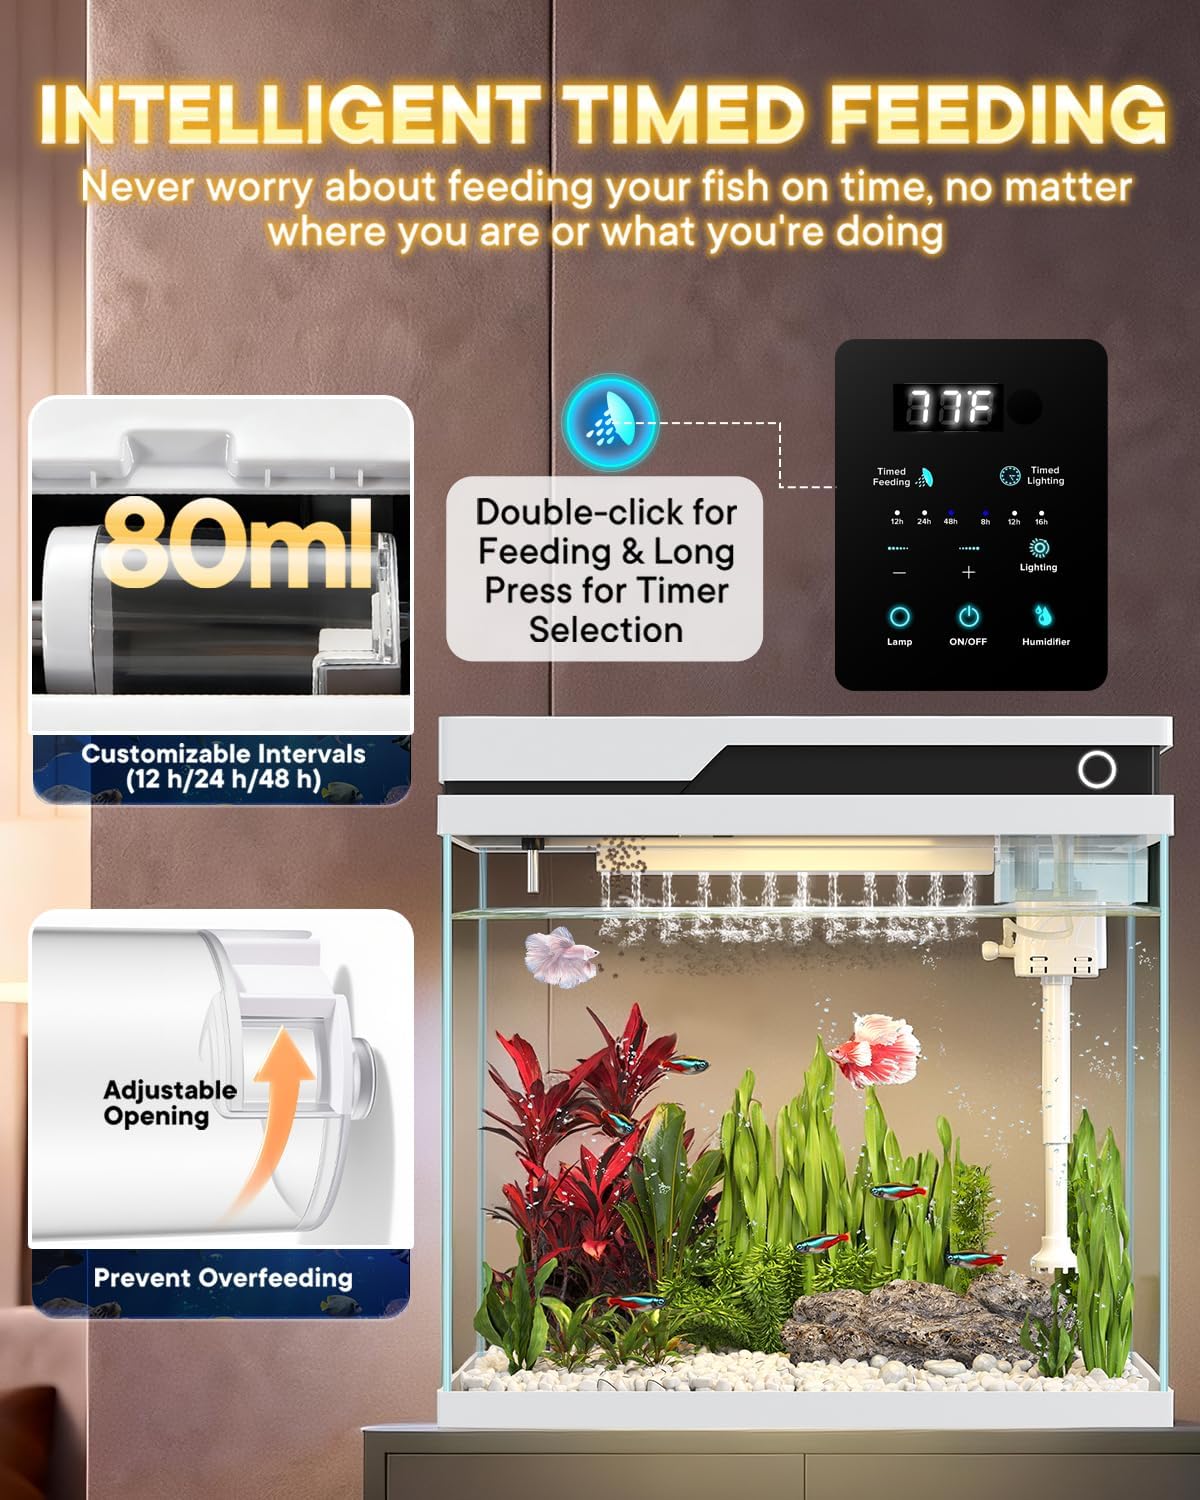
Image: The automatic feeder mechanism, demonstrating its capacity and adjustable opening for controlled feeding.
3. Humidifier and Aromatherapy
The built-in humidifier includes an independent aromatherapy compartment.
- Humidification: Add pure water to the humidifier compartment to increase ambient humidity.
- Aromatherapy: Add essential oils to the independent aromatherapy compartment for relaxation. Ensure essential oils do not mix with the aquarium water.
4. Temperature Display
The integrated temperature probe and LCD display provide real-time water temperature readings.
- Monitoring: The LCD screen on the control panel displays the current water temperature.
- Note: This aquarium does not include a heater. The display is for monitoring only.
5. 4-in-1 Silent Water Pump
The pump integrates multiple functions for a healthy aquatic environment.
- Functions: Provides filtration, oxygenation, water circulation, and wave creation.
- Silent Operation: Designed for quiet performance (<35dB).
- Airflow Control Valve: Adjust the water flow rate using the built-in airflow control valve to suit different fish species and preferences.
- Rain Pipe: The extended rain pipe enhances oxygenation and creates a visual waterfall effect.

Image: A visual representation of the 4-in-1 circulating filtration system, detailing water movement and filtration components.
Maintenance
Regular maintenance is crucial for a healthy aquarium environment.
- Water Changes: Perform regular partial water changes (e.g., 25% weekly) to remove nitrates and replenish essential minerals.
- Filter Cleaning: Periodically rinse the filter sponge in old aquarium water (not tap water) to remove accumulated debris without destroying beneficial bacteria. Replace filter media as needed.
- Tank Cleaning: The detachable lid allows for convenient access for routine cleaning and water changes. Use an aquarium-safe scraper to clean algae from the glass.
- Pump Maintenance: Ensure the water pump is free from debris and fully submerged during operation to prevent damage.
Troubleshooting
| Problem | Possible Cause | Solution |
|---|---|---|
| Pump not working | Not plugged in; not fully submerged; clogged impeller | Check power connection; ensure pump is fully submerged; clean impeller. |
| Water flow is weak | Airflow control valve closed; clogged filter media; pump needs cleaning | Adjust airflow control valve; clean or replace filter media; clean pump. |
| Lights not turning on | Not plugged in; light button not pressed correctly | Check power connection; long press the "Lighting" button to turn on. |
| Automatic feeder not dispensing | Feeder empty; opening blocked; incorrect timer setting | Refill feeder; clear any blockages; check and reset timer settings. |
| Humidifier not producing mist | Water reservoir empty; humidifier unit clogged | Refill with pure water; clean the humidifier unit. |
Specifications
- Model Number: YYG380
- Dimensions (L x W x H): 15" x 9.4" x 14.3" (38.1 cm x 23.9 cm x 36.3 cm)
- Capacity: 6.7 Gallons (25.4 Liters)
- Material: Ultra-Clear Glass
- Pump Voltage: 110V
- Pump Power: 5W
- Pump Flow Rate: 450L/H
- Lamp Power: 7W
- Lamp Input Power: DC5V
- Aquarium Thickness: 0.2" (0.5 cm)
- Special Features: 4-in-1 Silent Pump, Auto Feeder, Humidifier, Adjustable Lighting, Temperature Display
Warranty and Support
For warranty information or technical support, please refer to the contact details provided with your purchase or visit the official Vehipa website. Keep your purchase receipt as proof of purchase.