
Introduction
This manual provides essential information for the safe and efficient operation of your FOTING 16-inch Sand Filter Pump. Please read all instructions carefully before installation and use. Proper installation and maintenance are crucial for optimal performance and longevity of the unit.
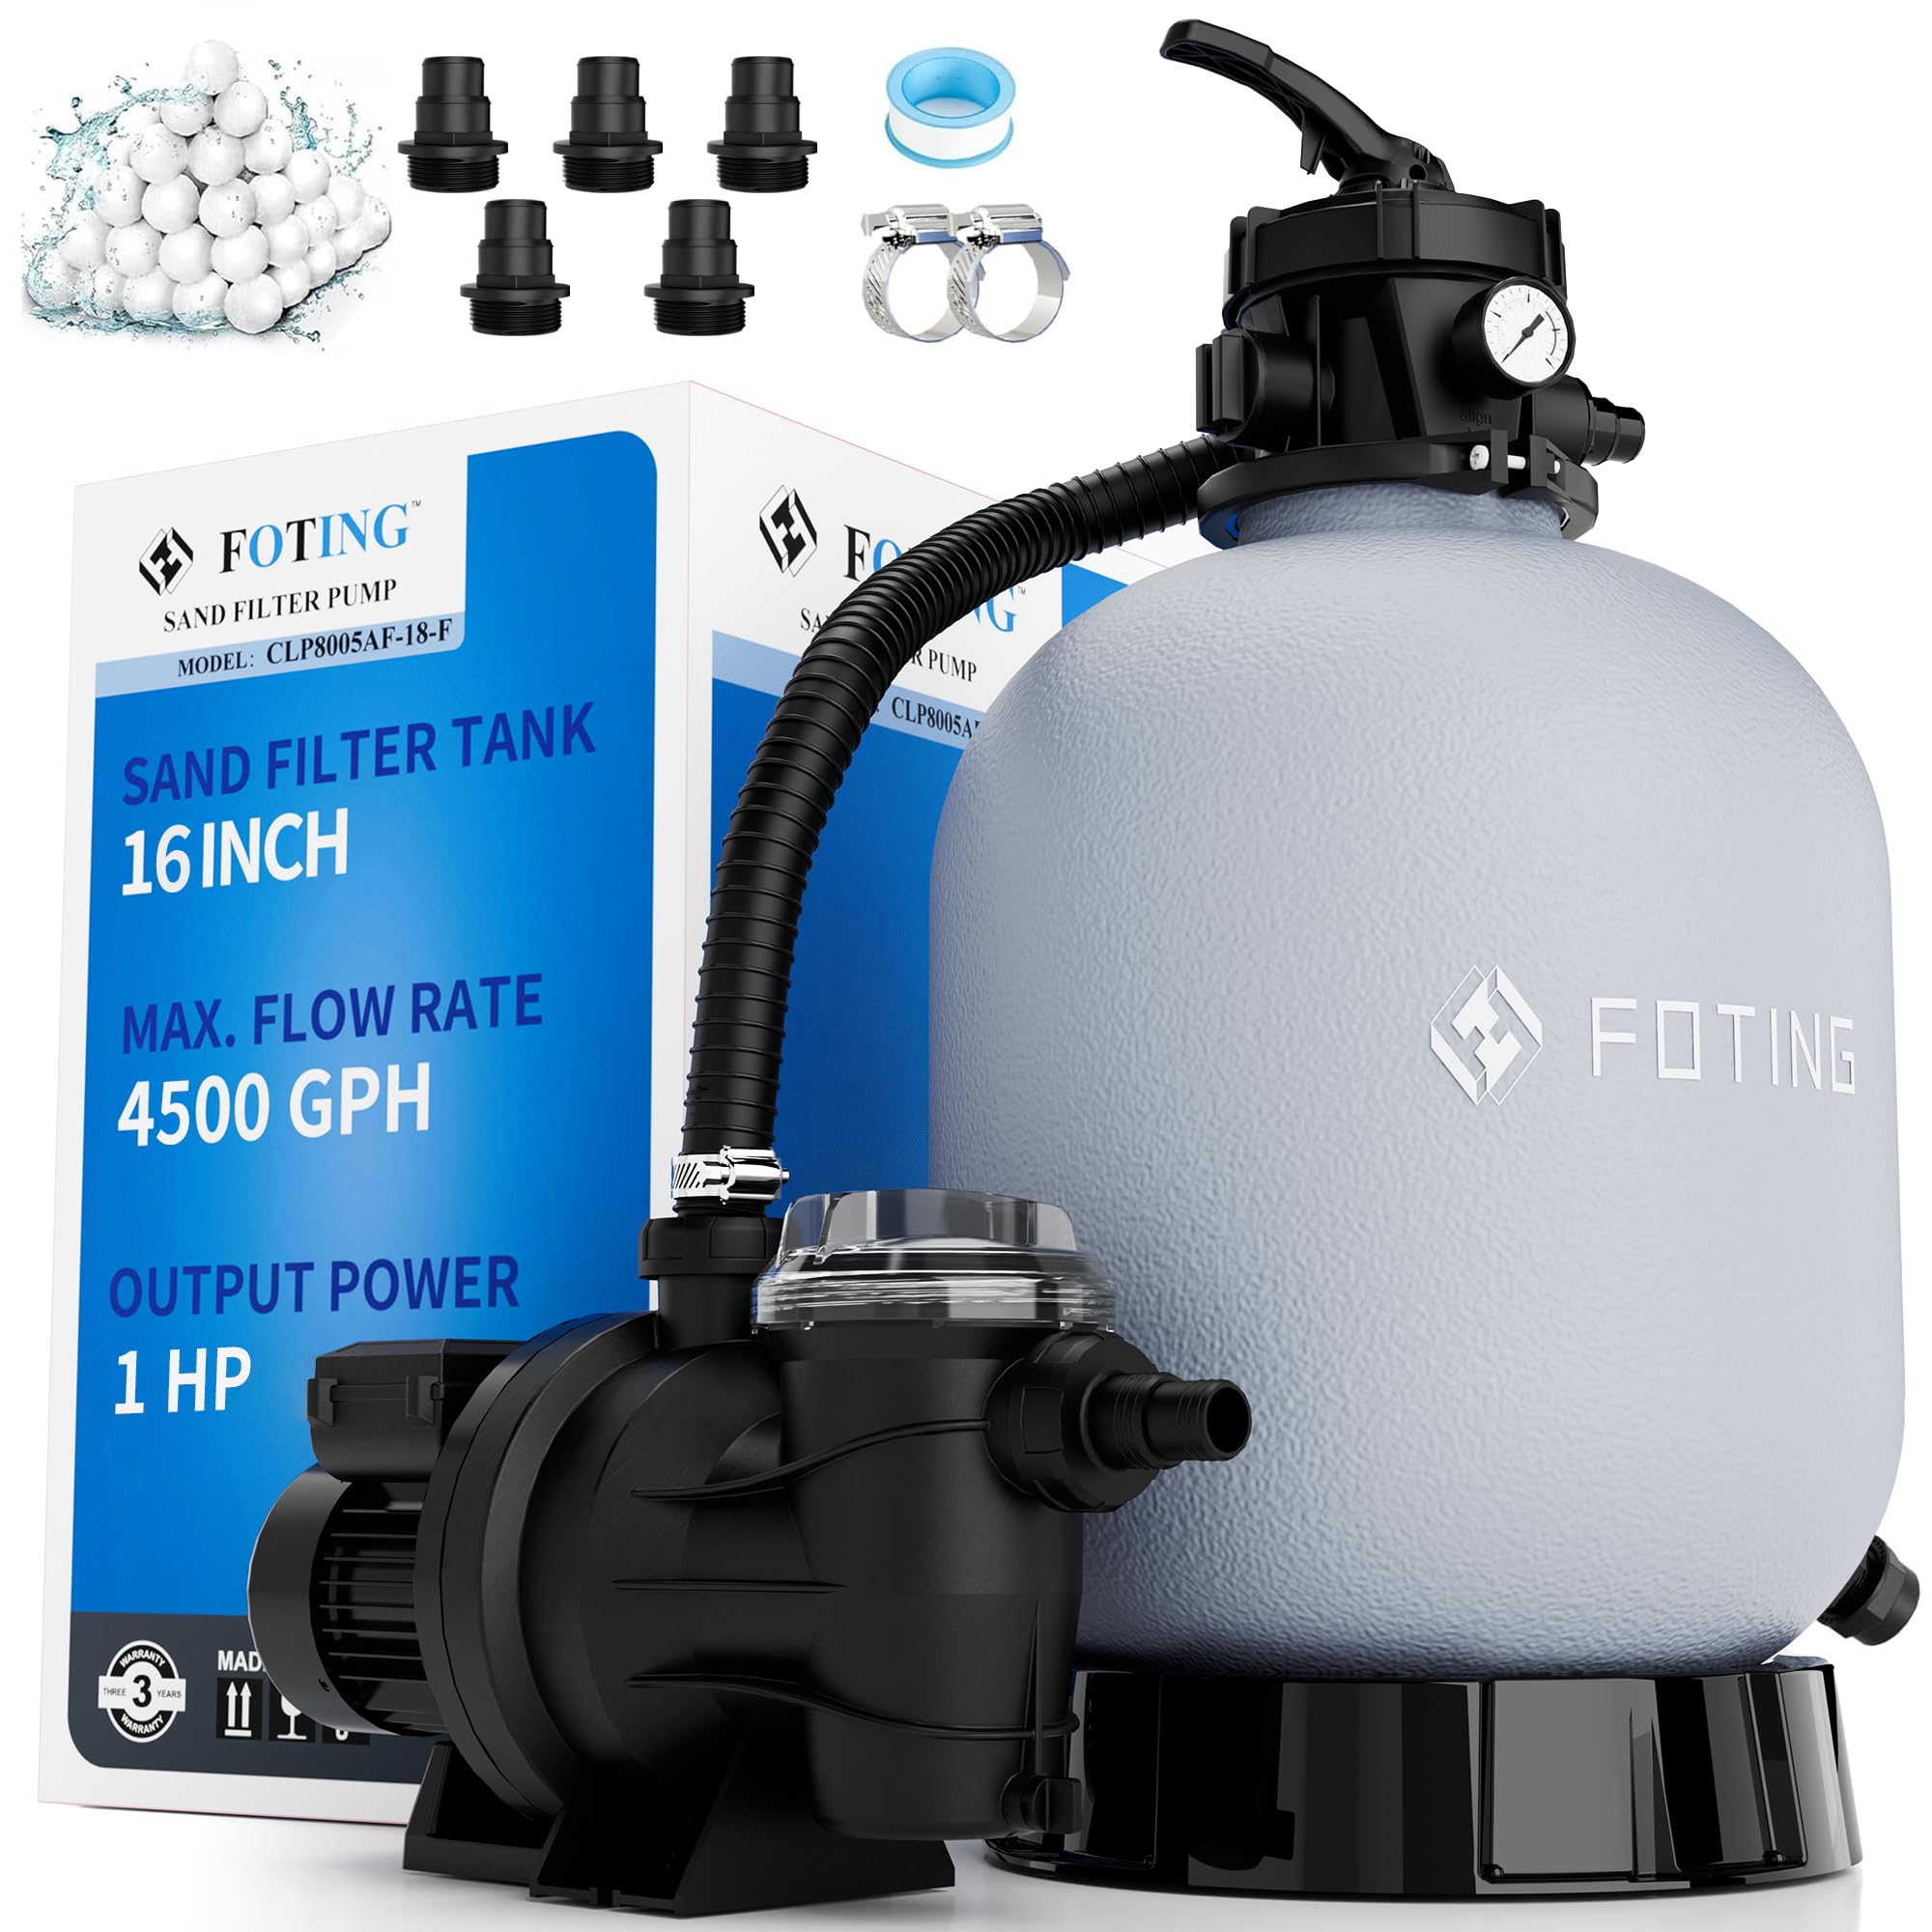
Figure 1: FOTING 16-inch Sand Filter Pump for Above Ground Pool.
Safety Information
- Always disconnect power before performing any service or maintenance.
- Ensure the pump is installed on a level, solid surface.
- Do not operate the pump if the power cord is damaged.
- Keep children and pets away from the pump during operation.
- Never change the 7-way valve position while the pump is running. Always turn off the pump first.
- Ensure proper ventilation around the pump to prevent overheating.
Setup and Installation
Follow these steps for proper assembly and installation of your FOTING Sand Filter Pump. For a visual guide, refer to the installation video below.
Video 1: FOTING Sand Filter Pump Installation Guide. This video demonstrates the step-by-step assembly and connection process for the sand filter pump.
- Check all parts and prepare all tools: Unpack all components and ensure all parts are present before beginning assembly.
- Secure the Base and Sand Filter Tank: Place the sand filter tank onto its designated base. Ensure it is stable and correctly seated.

Figure 2: Placing the sand filter tank onto its base.
- Secure the Drain Valve: Install the drain valve at the bottom of the sand filter tank. Ensure a tight seal.

Figure 3: Installing the drain valve on the sand filter tank.
- Put the Filter Assembly into the Sand Filter Tank: Carefully insert the internal filter assembly (standpipe with laterals) into the tank.
- Secure the Neck Fitting: Place the neck fitting over the standpipe to prevent filter media from entering the water pipe.
- Add Filter Media: Pour the appropriate amount of filter sand (120 lbs) or filter balls (4.6 lbs) into the tank. Ensure the neck fitting remains in place during this step.

Figure 4: Adding filter media (filter balls shown) into the tank.
- Put the O-ring on the Valve: Place the O-ring onto the valve assembly to ensure a watertight seal.
- Install the Valve on the Sand Filter Tank: Carefully place the 7-way valve onto the tank, aligning the arrows on the valve with the corresponding marks on the sand filter tank.
- Secure the Flange Clamp and tighten screws: Use the flange clamp to secure the valve to the tank. Tighten the screws evenly to ensure a firm connection.

Figure 5: Securing the 7-way valve with the flange clamp.
- Secure the Pressure Gauge: Install the pressure gauge into its port on the valve.
- Wrap all threaded connections with Teflon tape for a tight seal: Apply Teflon tape to all threaded connections before attaching hoses or adapters to prevent leaks.
- Install the Hose Adapter: Attach the appropriate hose adapters (1.25" or 1.5") to the valve ports.
- Install the Plug with O-ring: Insert the plug with its O-ring into any unused ports on the valve.
- Secure the pump on the base: Place the pump unit onto its base, ensuring it is stable.
- Connecting and fixing hoses: Connect the hoses from the pump to the valve and to your pool. Secure all connections with hose clamps.

Figure 6: Connecting hoses between the pump and the filter valve.
Operating Instructions
Your FOTING Sand Filter Pump features a versatile 7-way valve and a digital programmable timer for efficient pool maintenance.
Video 2: FOTING 16in 4500GPH Sand Filter Pump with Timer Overview. This video provides a general overview of the pump's features and operation.
7-Way Valve Functions
The 7-way valve allows for various operational modes. Always turn off the pump before changing the valve position.

Figure 7: Diagram illustrating the 7-way valve functions.
- 1. FILTER: Standard operation for cleaning pool water through the sand filter.
- 2. BACKWASH: Reverses water flow to clean the filter media.
- 3. RINSE: Used after backwashing to clear debris from the system before returning to filter mode.
- 4. WASTE: Drains water directly from the pool, bypassing the filter. Useful for vacuuming heavy debris or lowering water level.
- 5. CLOSED: Stops all water flow to and from the filter. Never use while the pump is on.
- 6. RECIRCULATE: Mixes pool water without filtering. Useful for chemical distribution.
- 7. WINTER: Position for winterizing the filter to prevent freezing.
Digital Programmer Timer
The built-in 24-hour timer allows for automated filtration schedules.

Figure 8: Swimming Pool Timing Plan diagram.
- Set Running Hours: Use the timer controls to select the desired operating duration.
- Turn on the Pump: The time you activate the timer becomes the daily start time for the programmed cycle.
Choose between single-cycle mode with 11 setting options or continuous-cycle mode based on your pool's needs.
Maintenance
Regular maintenance ensures the longevity and efficiency of your sand filter pump.
Strainer Filter Basket Cleaning
The pump features an oversized, removable strainer filter basket. Regularly check and clean the basket to remove collected debris such as hairs, leaves, and gravel. The see-through lid allows for easy visual inspection.

Figure 9: Close-up of the pump's strainer filter basket.
Backwashing and Rinsing
Perform backwashing when the pressure gauge reading is 8-10 PSI above the clean filter starting pressure, or when water flow significantly decreases. Follow these steps:
- Turn off the pump.
- Set the 7-way valve to BACKWASH.
- Turn on the pump and run until the water in the sight glass (if present) runs clear (typically 1-2 minutes).
- Turn off the pump.
- Set the 7-way valve to RINSE.
- Turn on the pump and run for 30-60 seconds.
- Turn off the pump.
- Set the 7-way valve back to FILTER.
- Turn on the pump to resume normal filtration.
Winterization
Before storing the pump for winter, ensure all water is drained from the unit to prevent freezing damage. Unscrew the bottom drain plug to remove all remaining water.

Figure 10: Unscrewing the bottom drain plug to drain water for winter storage.
Troubleshooting
This section provides solutions to common issues. For problems not listed, contact FOTING customer service.
| Problem | Possible Cause | Solution |
|---|---|---|
| Pump not starting | No power; tripped breaker; motor issue | Check power supply, reset breaker; contact support. |
| Low water flow | Clogged strainer basket; dirty filter media; air leak in suction line | Clean basket; backwash/rinse filter; check connections for leaks. |
| Water not clearing | Insufficient filtration time; incorrect chemical balance; dirty filter media | Increase run time; test and adjust pool chemicals; backwash/rinse filter. |
| Leaking connections | Loose fittings; worn O-rings/gaskets | Tighten connections; inspect and replace O-rings/gaskets as needed. |
Specifications
| Feature | Specification |
|---|---|
| Brand | FOTING |
| Model Number | FT-CLP8005AF-16in |
| Tank Size | 16 inches |
| Horsepower | 1 HP |
| Maximum Flow Rate | 4500 GPH (75 Gallons Per Minute) |
| Voltage | 115 Volts |
| Sand Capacity | 120 lbs |
| Filter Ball Capacity | 4.6 lbs |
| Valve Type | 7-Way Valve |
| Timer | Built-in 24-hour Digital Programmer Timer |
| Material | Plastic |
| Color | Gray |
| UPC | 747721089913 |

Figure 11: Key specifications of the FOTING 16-inch Sand Filter Pump.
Warranty
The FOTING 16-inch Sand Filter Pump comes with a 3-year manufacturer's warranty. Please retain your proof of purchase for warranty claims. The warranty covers defects in materials and workmanship under normal use.
Support
For technical assistance, troubleshooting, or any questions regarding your FOTING product, please contact FOTING customer service. Our team provides professional technical support to ensure your water system remains stable and worry-free.