
1. Introduction
This manual provides comprehensive instructions for the installation, operation, and maintenance of your Cecotec EnergySilence Aero 4222 Invisible Textile ceiling fan with light. Please read this manual thoroughly before use and retain it for future reference.
The Cecotec EnergySilence Aero 4222 Invisible Textile ceiling fan combines elegant design with advanced features to enhance your home's comfort and lighting. It features a 30W DC motor for efficient performance, powerful ventilation, and reduced energy consumption. Adjust the airflow intensity with its 6 speeds. The 3 retractable blades extend only when the fan is in operation, offering a sleek and discreet design with a 42-inch diameter. The integrated LED light provides efficient and long-lasting illumination with 3 intensity levels. All functions can be conveniently controlled via the included remote control, which also allows programming a 4-hour timer.

Figure 1: Cecotec EnergySilence Aero 4222 Invisible Textile ceiling fan in a living room setting.
2. Safety Instructions
WARNING: To reduce the risk of fire, electric shock, or personal injury, always follow these basic safety precautions:
- Ensure the main power supply is disconnected before installation or maintenance.
- Installation must be performed by a qualified electrician.
- Mount the fan to a ceiling structure capable of supporting at least 15 kg (33 lbs).
- Ensure the fan blades are at least 2.3 meters (7.5 feet) from the floor and 0.5 meters (1.6 feet) from any wall or obstruction.
- Do not insert objects into the path of the rotating blades.
- Do not use the fan in damp or wet locations.
- Use only the remote control provided with the fan.
3. Package Contents
Verify that all components are present and undamaged. If any parts are missing or damaged, contact customer support.
- 1 x Ceiling Fan Unit
- 1 x Remote Control
- 1 x Instruction Manual (this document)
- Mounting Hardware (screws, brackets, etc.)

Figure 2: Included remote control for the Cecotec ceiling fan.
4. Setup and Installation
Installation of this ceiling fan requires electrical wiring knowledge. If you are unsure, consult a qualified electrician.
- Power Disconnection: Before starting, ensure the power supply to the installation area is turned off at the circuit breaker.
- Mounting Bracket Installation: Securely attach the mounting bracket to a ceiling joist or a suitable electrical junction box rated for fan support. Use appropriate screws and anchors.
- Wiring: Connect the fan's electrical wires to the household wiring according to local electrical codes. Typically, this involves connecting live, neutral, and ground wires. Ensure all connections are secure.
- Fan Assembly: Carefully lift the fan motor assembly and attach it to the mounting bracket. Ensure all safety clips and screws are engaged.
- Blade Attachment: The fan features retractable blades. These blades are integrated into the design and will extend automatically when the fan operates. No manual attachment of individual blades is required.
- Light Kit Installation: Connect the light kit wiring to the fan motor assembly. Secure the light kit to the fan housing.
- Canopy Installation: Slide the canopy up to the ceiling and secure it with the provided screws, covering the wiring connections and mounting bracket.
- Power Restoration: Once installation is complete, restore power at the circuit breaker.
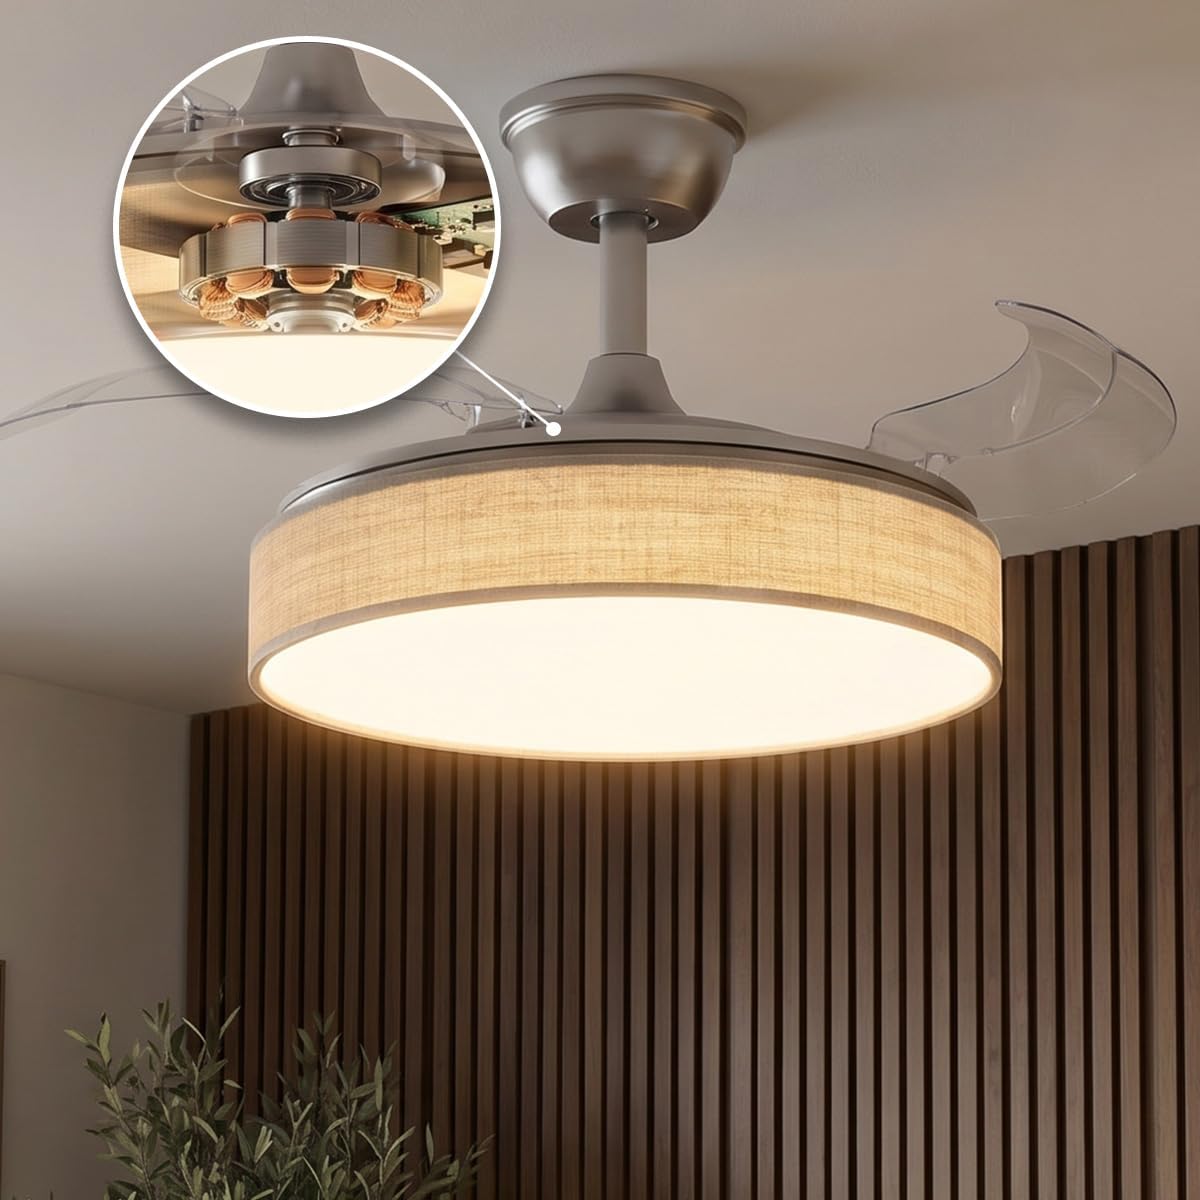
Figure 3: Detail of the fan's DC motor, highlighting its compact and efficient design.
5. Operating Instructions
Your Cecotec ceiling fan is operated using the included remote control.
5.1. Remote Control Functions
- Power On/Off: Press the FAN ON/OFF button to turn the fan on or off.
- Fan Speed: Use buttons 1 to 6 to select the desired fan speed. Speed 1 is the lowest, and Speed 6 is the highest.
- Light On/Off: Press the Light Bulb button to turn the light on or off.
- Light Color Temperature (CCT): Press the 3 CCT button to cycle through the three available light color temperatures (warm, neutral, cool).
- Light Brightness Adjustment: Use the K- and K+ buttons to decrease or increase the light brightness.
- Timer Function: Press the 2H or 4H button to set the fan to automatically turn off after 2 or 4 hours, respectively.
- Reverse Function (F/R): Press the F/R button to change the direction of the fan blades. This is useful for circulating warm air in winter.

Figure 4: The fan's integrated LED light offers three color temperature options.

Figure 5: The fan features a convenient timer function for automatic shut-off.

Figure 6: Illustration of the fan's effective airflow for optimal room comfort.
6. Maintenance
Regular maintenance ensures optimal performance and extends the lifespan of your ceiling fan.
- Cleaning: Before cleaning, ensure the power is turned off. Use a soft, damp cloth to wipe down the fan housing and blades. Do not use abrasive cleaners or solvents.
- Blade Cleaning: The retractable blades can be gently wiped when extended. Ensure they are clean to maintain balanced operation.
- Light Cover: The light cover can be removed for cleaning if necessary. Ensure it is securely reattached before restoring power.
- Tightening Screws: Periodically check all screws on the fan and mounting bracket to ensure they are tight. Loose connections can cause noise or wobbling.
7. Troubleshooting
If you encounter issues with your fan, refer to the following troubleshooting guide:
| Problem | Possible Cause | Solution |
|---|---|---|
| Fan does not start | No power supply; Remote control battery low; Incorrect wiring. | Check circuit breaker; Replace remote control batteries; Verify wiring connections (consult electrician). |
| Light does not work | No power supply; Loose wiring; LED failure. | Check circuit breaker; Verify light kit wiring; Contact customer support for LED replacement. |
| Fan wobbles | Loose mounting screws; Unbalanced blades. | Tighten all mounting screws; Ensure blades are clean and free of debris. |
| Remote control not working | Low battery; Obstruction; Remote not paired. | Replace batteries; Ensure clear line of sight to fan receiver; Refer to pairing instructions (if applicable, usually automatic). |
8. Specifications
| Feature | Detail |
|---|---|
| Brand | Cecotec |
| Model Name | EnergySilence Aero 4222 Invisible Textile |
| Model Number | A01_EU01_123703 |
| Color | Textile |
| Fan Design | Ceiling Fan |
| Power Source | Corded Electric |
| Style | Modern |
| Product Dimensions (Packaging) | 10P x 10l x 10H mm (Note: This refers to packaging or internal component dimensions, not the overall fan size.) |
| Room Type | Bedroom, Home Office, Dining Room |
| Special Features | Remote Controlled, Timer |
| Mounting Type | Ceiling Mount |
| Controller Type | Remote Control |
| Number of Speeds | 6 |
| Wattage | 30 watts |
| Number of Blades | 3 (Retractable) |
| Voltage | 240 Volts |
| Indoor/Outdoor Use | Indoor |
| Motor Type | DC Motor |
| Material | Fabric (Textile) |
| EU Spare Part Availability | 10 Years |
| Size (Diameter) | 106.7 cm (42 inches) |
| Components Included | 1 x Instruction Manual, 1 x Fan, Remote Control |
| Country of Origin | Spain |
| Year of Production | 2026 |
9. Warranty and Support
9.1. Product Warranty
This Cecotec product comes with a 3-year warranty from the date of purchase. Please retain your proof of purchase for warranty claims. The warranty covers manufacturing defects and malfunctions under normal use. It does not cover damage caused by misuse, improper installation, or unauthorized repairs.
9.2. Customer Support
For technical assistance, troubleshooting, or warranty inquiries, please contact Cecotec customer support. You can also refer to the official PDF instruction manual available online for additional details: Official User Manual (PDF).
The CecoCare team is dedicated to providing assistance at any time.
