
Introduction
These Earbay Wireless Headphones are designed for an immersive and private audio experience, particularly for TV watching. They feature Bluetooth 5.4 technology for ultra-low latency and a stable connection, ensuring audio-video synchronization. The included charging base provides convenience and extended usage time. This manual provides instructions for setup, operation, and maintenance to ensure optimal performance.

Image: The Earbay wireless headphones provide a private listening experience, allowing one person to watch TV without disturbing others.
What's in the Box
Verify that all items are present in the package:
- TV-Headphones (1 unit)
- Transmitter - Charging Station (1 unit)
- Optical cable
- AUX 3.5mm cable
- RCA cable
- USB-A to USB-C charging cable
- DC-5V power adapter

Image: All components included in the Earbay wireless headphones package.
Product Overview
Headphones
The over-ear headphones feature soft protein leather ear pads and high-density memory foam for comfort during extended use. They are designed with 180° rotatable adaptive foam cushions and an adjustable stainless steel headband for a secure and comfortable fit.

Image: Key comfort and adjustability features of the Earbay headphones.
Transmitter / Charging Base
The transmitter doubles as a charging base for the headphones. It features multiple audio input ports (Optical, AUX 3.5mm, RCA) and a power input. A switch on the base allows selection between AUX and Optical input modes.

Image: The Earbay transmitter and charging base with headphones.
Setup Guide
Follow these steps to set up your Earbay Wireless Headphones for TV watching.
1. Powering the Transmitter/Charging Base
- Connect the DC-5V power adapter to the transmitter's power input port.
- Plug the power adapter into a wall outlet. The indicator light on the base will illuminate.

Image: The transmitter/charging base connected to power.
2. Connecting to Your TV
The headphones offer multiple connection options: Optical, 3.5mm AUX, and RCA. Choose the method compatible with your TV.
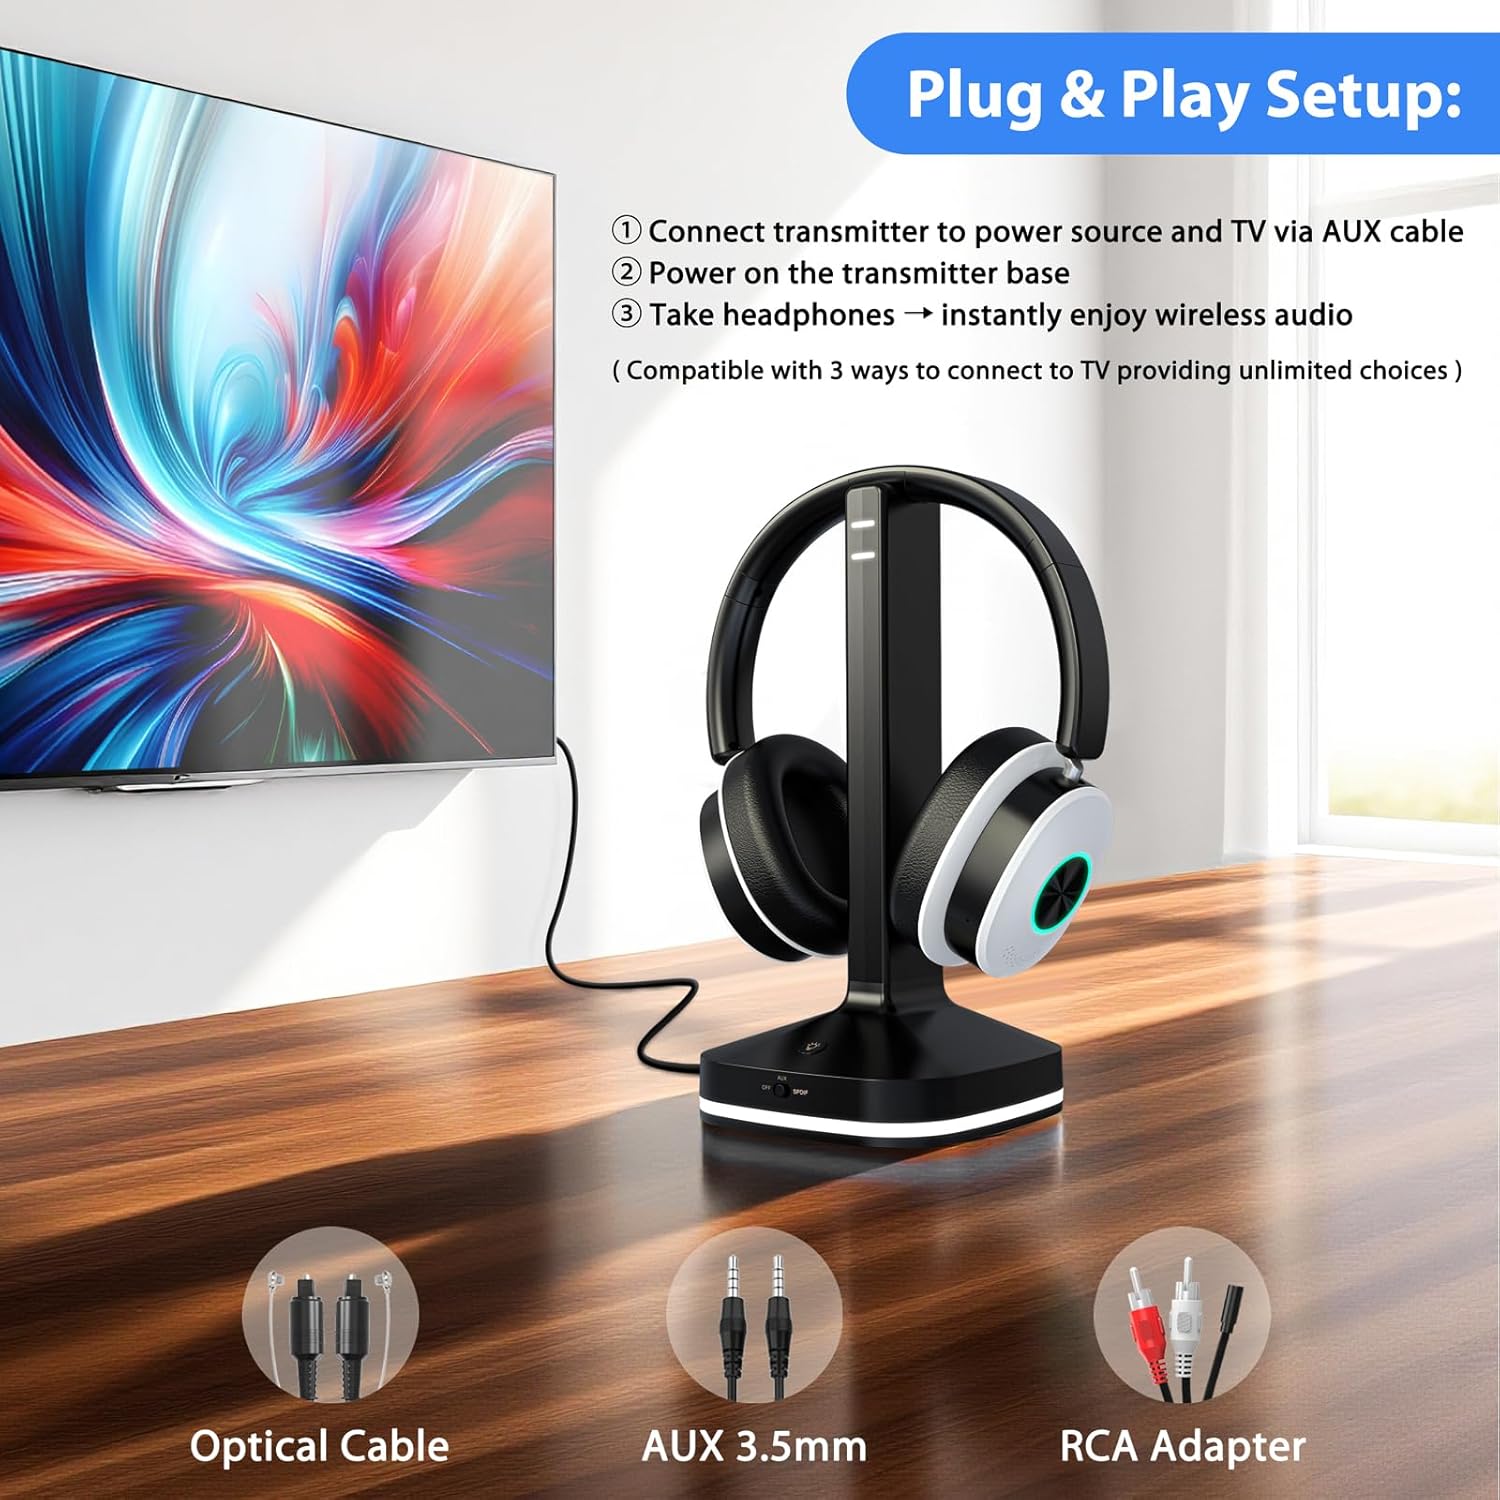
Image: Overview of connection options for the Earbay headphones.
Method A: Optical Audio Output
- Connect one end of the optical cable to the OPTICAL OUT port on your TV.
- Connect the other end of the optical cable to the OPTICAL IN port on the transmitter base.
- On the transmitter base, ensure the input switch is set to the "Optical" position.
- Important: Access your TV's audio settings. Navigate to "Sound" or "Audio Output" and set the "Digital Output Audio Format" to PCM. Refer to your TV's manual for specific steps.

Image: Example TV audio settings for Optical output (set to PCM).
Method B: 3.5mm AUX Audio Output
- Connect one end of the 3.5mm AUX cable to the HEADPHONE OUT or AUX OUT port on your TV.
- Connect the other end of the 3.5mm AUX cable to the AUX IN port on the transmitter base.
- On the transmitter base, ensure the input switch is set to the "AUX" position.

Image: Transmitter connected via AUX cable to a TV.
Method C: RCA Audio Output
- Connect the 3.5mm end of the RCA adapter cable to the AUX IN port on the transmitter base.
- Connect the red and white RCA plugs to the corresponding AUDIO OUT ports (red for right, white for left) on your TV. Ensure these are "AUDIO OUT" ports, not "AUDIO IN".
- On the transmitter base, ensure the input switch is set to the "AUX" position.
Video: Step-by-step guide for connecting the transmitter via RCA audio output.
Method D: Bluetooth Connection (Direct to TV)
If your TV has built-in Bluetooth, you can connect the headphones directly without the transmitter. Refer to your TV's Bluetooth pairing instructions. The headphones will appear as "Earbay JLS-TV966CD" in your TV's Bluetooth device list.
Image: Visual representation of various connection methods for the headphones.
3. Pairing Headphones with Transmitter
- Ensure the transmitter is powered on and connected to your TV's audio output.
- Power on the headphones by pressing and holding the power button until the indicator light flashes.
- The headphones and transmitter should automatically pair. A solid blue light on both devices indicates a successful connection.
- If pairing fails, place the headphones on the charging base, then remove them after a few seconds to re-initiate pairing.
Operation
Wearing the Headphones
Adjust the headband for a comfortable fit. The earcups are designed to rotate 180° for adaptive comfort. Ensure the ear pads fully cover your ears for optimal sound isolation and quality.
Controls
The headphones feature intuitive controls on the earcup:
- Power Button: Press and hold to power on/off.
- Volume Buttons (+/-): Adjust audio volume.
- EQ Button: Short-press to cycle through audio modes: Vocal, Cinema, Bass, Balanced.
- Multi-function Button: For calls, long-press for 1 second to mute the microphone.

Image: Headphone earcup controls and their functions.
Audio Modes
The headphones offer three distinct audio modes to enhance your listening experience:
- Vocal Mode: Optimizes clarity for dialogue and vocals.
- Cinema Mode: Enhances cinematic soundscapes with broader dynamics.
- Bass Mode: Boosts low frequencies for a richer, more impactful sound.
- Balanced Mode: Provides a neutral sound profile suitable for general listening.
Charging the Headphones
The headphones can be charged by placing them on the transmitter base. Ensure the base is connected to power. The headphones offer up to 40 hours of continuous use on a single charge.
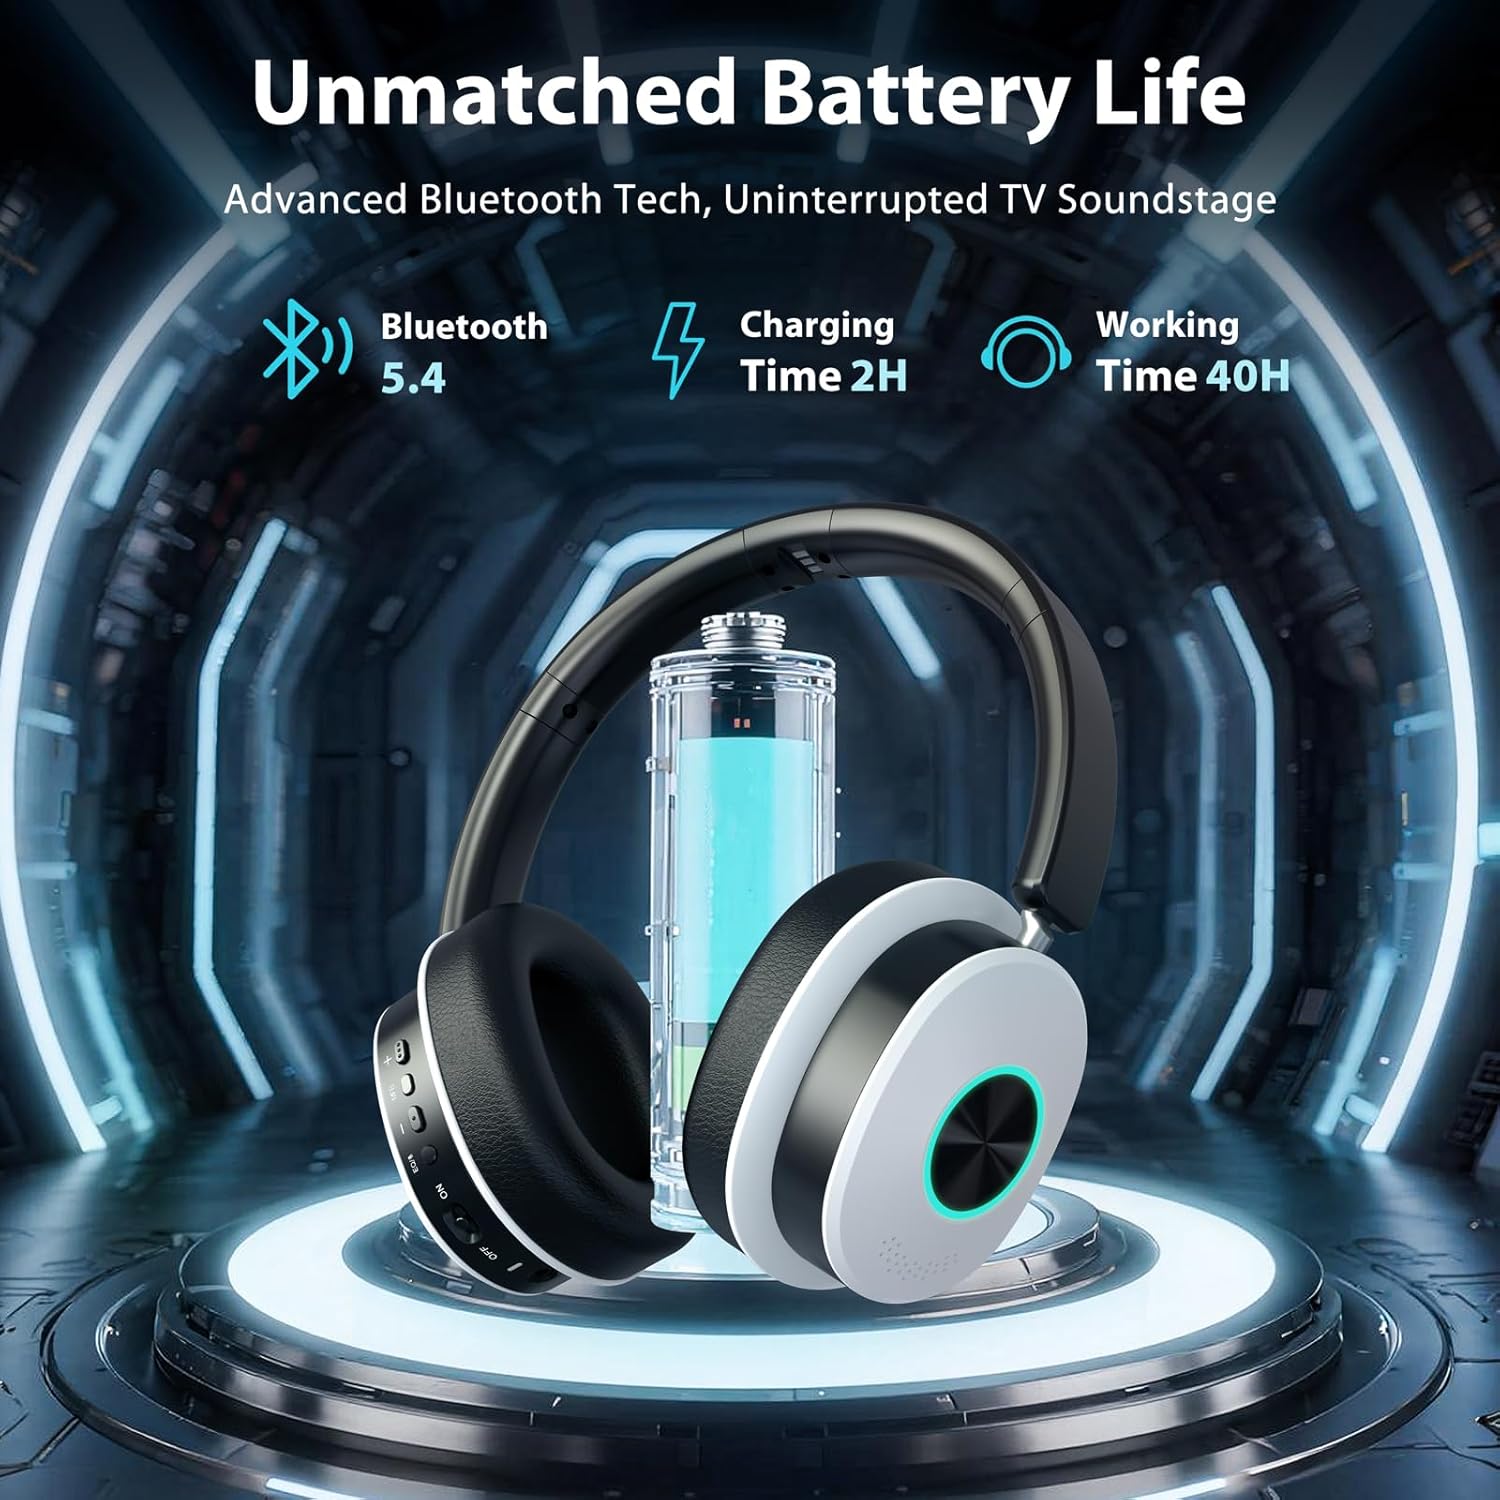
Image: Headphones charging on the base, highlighting battery life.
Maintenance
- Cleaning: Use a soft, dry cloth to clean the headphones and charging base. Do not use liquid cleaners or aerosols.
- Storage: When not in use, store the headphones on the charging base or in a cool, dry place away from direct sunlight and extreme temperatures.
- Avoid Moisture: Keep the devices away from water and high humidity to prevent damage.
- Cable Care: Handle cables gently. Avoid sharp bends or excessive pulling to prevent internal wire damage.
Troubleshooting
No Sound from Headphones
- Check Power: Ensure both the transmitter and headphones are powered on and charged.
- Verify Connection: Confirm the audio cable (Optical, AUX, RCA) is securely connected from the TV to the transmitter.
- Input Mode: Ensure the input switch on the transmitter base matches the connected cable type (AUX or Optical).
- TV Audio Settings: For Optical connection, verify your TV's digital audio output is set to PCM. For AUX/RCA, ensure your TV's audio output is active.
- Volume Levels: Increase the volume on both the headphones and your TV.
- Re-pair: If connected wirelessly, try re-pairing the headphones with the transmitter or TV.
Headphones Not Pairing
- Power Cycle: Turn off both the headphones and transmitter, then turn them back on.
- Proximity: Ensure the headphones are within close range of the transmitter during pairing.
- Reset: Place the headphones on the charging base for a few seconds, then remove them to attempt re-pairing.
Audio Delay (Latency)
- The headphones utilize Bluetooth 5.4 for ultra-low latency. Ensure no other strong wireless signals are interfering.
- If connecting directly to a TV via Bluetooth, some TVs may have higher inherent latency. Using the included transmitter is recommended for the lowest latency experience.
Specifications
| Feature | Detail |
|---|---|
| Brand | Earbay |
| Model Number | JLS-TV966CD |
| Connectivity Technology | Wireless (Bluetooth 5.4) |
| Bluetooth Range | Up to 100 feet (30 meters) |
| Ear Placement | Over Ear |
| Impedance | 32 Ohms |
| Battery Life (Average) | 40 Hours |
| Audio Driver Type | Dynamic Driver |
| Frequency Range | 20Hz - 20,000Hz |
| Noise Control | Environmental Noise Cancellation |
| Headphone Jack | Optical / 3.5mm (AUX) / RCA |
| Compatible Devices | TVs, Laptops, Desktops, Tablets, Telephones, Smartphones |
| Materials | Aluminum, Faux Leather, Plastic, Stainless Steel |
Warranty and Support
The Earbay Wireless Headphones (Model JLS-TV966CD) come with a 1-Year Warranty from the date of purchase. This warranty covers manufacturing defects and workmanship under normal use.
For technical support, warranty claims, or further assistance, please contact Earbay customer service through the retailer where the product was purchased or visit the official Earbay website.