
1. Safety Information and Warnings
Please read all safety instructions carefully before installation and use. Failure to follow these instructions may result in electric shock, fire, or serious injury.
1.1 General Safety Guidelines
- Qualified Installation: Installation must be performed by a qualified electrician in accordance with all local and national electrical codes and regulations.
- Power Verification: Verify that the voltage and power supply match the product specifications (380V AC, 32A, 22kW).
- Damage Inspection: Do not use the device if it is damaged. Inspect the wallbox, cable, and connectors for any signs of damage before each use.
- No Modification: Do not disassemble or modify the charging terminal. Unauthorized modifications will void the warranty and may pose safety risks.
- Child Safety: Keep the device out of reach of children.
- Malfunction: In case of malfunction, immediately discontinue use and contact technical service.
1.2 Manufacturer's Responsibility
The manufacturer cannot be held responsible for any material or personal damage resulting from incorrect installation, non-compliant use, unauthorized modification of the device, or non-compliance with safety regulations. Any intervention performed by an unqualified person voids the warranty.
2. Product Overview
The JATRHG K1 S1 EV Wallbox Kit is a robust and secure charging solution designed for electric vehicles, particularly suitable for outdoor public parking lots and similar high-traffic, weather-exposed environments. It features a 22kW, 32A three-phase charging terminal integrated into a support pole, along with a reinforced waterproof socket.
2.1 Key Features
- Integrated Design: Charging terminal integrated into a durable support pole for simplified installation and future expansion.
- High Power Output: 22kW, 32A three-phase charging for fast and efficient EV charging.
- Extended Cable: 8-meter charging cable for convenient reach.
- Reinforced Waterproof Socket: Provides an additional power outlet for outdoor electricity needs (e.g., garden tools, second EV charging).
- Smart Control: Wi-Fi app connectivity for managing charging sessions, tracking history, and customizing settings.
- Durable Construction: Designed for outdoor use with features like key lock, elasticity, waterproofing, LED indicators, and UV protection.
2.2 Product Components
The kit includes the wallbox charging terminal, support pole, 8-meter charging cable, and a reinforced waterproof auxiliary socket.
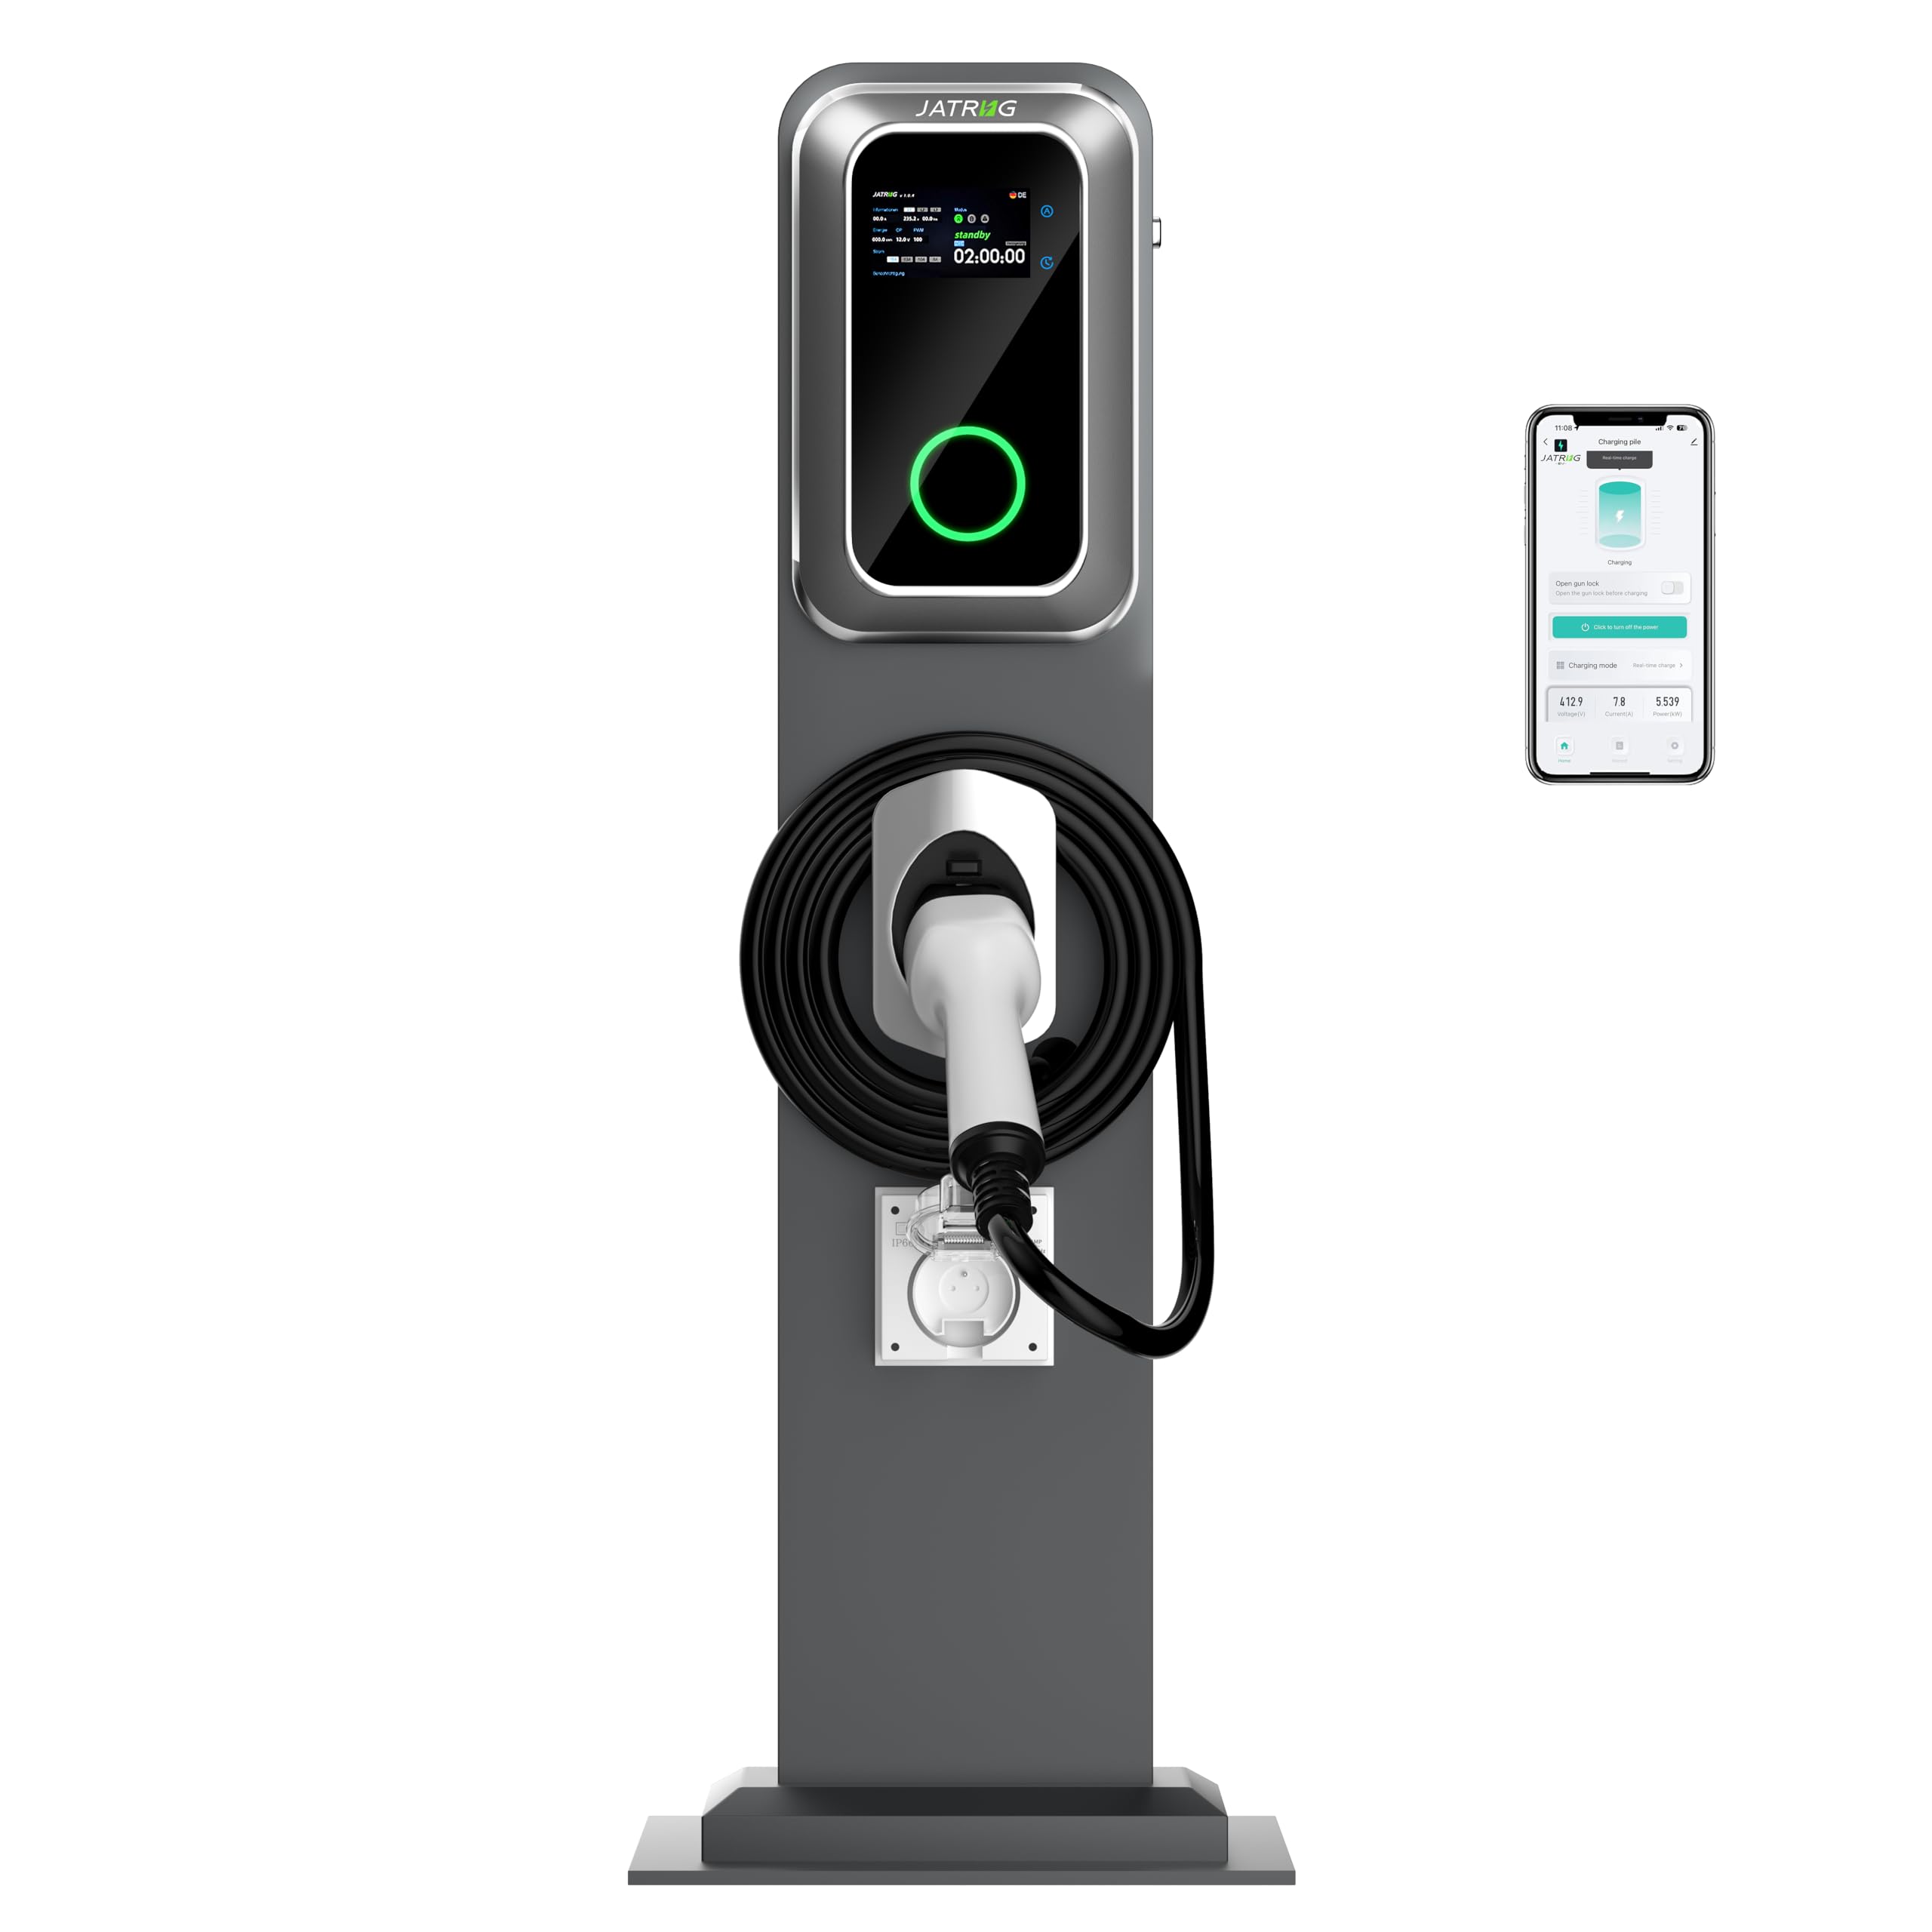
Image: The JATRHG K1 S1 EV Wallbox Kit, showing the integrated charging terminal, coiled 8-meter cable, and the auxiliary waterproof socket mounted on the support pole.

Image: The JATRHG K1 S1 EV Wallbox Kit installed in a residential driveway, demonstrating its aesthetic integration and practical use for home charging.
3. Setup and Installation
Installation of the JATRHG K1 S1 EV Wallbox Kit requires professional expertise. It must be carried out by a qualified electrician to ensure safety and compliance with electrical standards.
3.1 Pre-Installation Checklist
- Ensure the installation site is suitable for outdoor use and has adequate space.
- Verify that the electrical supply meets the 380V AC, 32A, 22kW three-phase requirements.
- Confirm all necessary tools and safety equipment are available.
- Review local building and electrical codes.
3.2 Installation Steps (Summary for Qualified Electricians)
- Mounting the Support Pole: Securely anchor the support pole to a stable surface using appropriate fasteners. Ensure it is level and plumb.
- Wiring Connection: Open the access panel on the wallbox. Connect the three-phase power supply (L1, L2, L3, Neutral, Ground) to the designated terminals inside the wallbox. Ensure all connections are tight and secure.
- Cable Management: Route the power cables and charging cable neatly within the pole structure.
- Auxiliary Socket Wiring: Connect the reinforced waterproof auxiliary socket to the internal wiring as per the electrical diagram.
- Testing: Before closing the panel, perform continuity and insulation resistance tests. Once confirmed safe, restore power and test the charging functionality.
- Final Assembly: Close and secure all access panels.

Image: Detailed view of the internal wiring and cable management within the wallbox and support pole, illustrating the connection points for power input and the charging cable.
4. Operating Instructions
The JATRHG K1 S1 EV Wallbox is designed for user-friendly operation, primarily controlled via its integrated display and a dedicated Wi-Fi app.
4.1 Starting a Charging Session
- Connect Vehicle: Plug the charging cable into your electric vehicle's charging port. Ensure a secure connection.
- Initiate Charging: The wallbox display will show charging status. You can initiate or schedule charging via the Wi-Fi app or, if available, directly from the wallbox interface.
- Monitor Progress: The display and app will show real-time charging information, including voltage, current, power, and session duration.
4.2 Using the Wi-Fi App
The dedicated Wi-Fi app allows for comprehensive management of your charging terminal.
- Download and Connect: Download the app (refer to product packaging for QR code or app store name) and follow the in-app instructions to connect to your wallbox via Wi-Fi.
- Manage Sessions: Start, stop, or schedule charging sessions remotely.
- Track History: View detailed charging session history, including dates, times, duration, and energy consumed (kWh).
- Customize Settings: Adjust charging modes, current limits, and other preferences.
- Real-time Data: Access live electrical information such as voltage, current, and power.

Image: Screenshots of the JATRHG Wi-Fi app interface, demonstrating features like real-time charging status, voltage, current, power display, and a detailed record of past charging sessions.
4.3 Using the Reinforced Waterproof Socket
The auxiliary socket can be used independently for other outdoor electrical needs or to charge a second electric vehicle with a compatible portable charger.
- Ensure the socket cover is securely closed when not in use to maintain its waterproof rating.
- Only use appliances or chargers that are compatible with the socket's electrical specifications.
5. Maintenance
Regular maintenance ensures the longevity and safe operation of your JATRHG EV Wallbox Kit.
- Cleaning: Clean the exterior of the wallbox and pole with a soft, damp cloth. Do not use abrasive cleaners or solvents.
- Cable Inspection: Periodically inspect the charging cable and connectors for any signs of wear, cuts, or damage. Replace immediately if damage is found.
- Socket Cover: Ensure the waterproof cover for the auxiliary socket is always properly closed when not in use.
- Professional Inspection: It is recommended to have a qualified electrician inspect the installation annually to ensure all electrical connections remain secure and the system operates safely.
6. Troubleshooting
This section provides solutions to common issues you might encounter. For problems not listed here, or if issues persist, contact technical support.
6.1 Common Issues and Solutions
- No Power to Wallbox:
- Check the circuit breaker in your main electrical panel.
- Ensure the wallbox is properly connected to the power supply.
- Charging Not Starting:
- Ensure the charging cable is securely plugged into both the wallbox and the vehicle.
- Check the vehicle's charging settings.
- Verify there are no error messages on the wallbox display or in the app.
- Slow Charging:
- Check the charging mode settings in the app; ensure it's not set to a lower power mode.
- Verify the vehicle's charging capacity and settings.
- Ensure the electrical supply is stable and providing the expected voltage and current.
- App Connectivity Issues:
- Ensure your mobile device is connected to a stable Wi-Fi network.
- Restart the app and/or your mobile device.
- Check if the wallbox's Wi-Fi module is active.
7. Specifications
Detailed technical specifications for the JATRHG K1 S1 EV Wallbox Kit.

Image: Diagram showing the key dimensions of the JATRHG K1 S1 EV Wallbox Kit, including the wallbox unit, support pole, and cable length.
| Specification | Value |
|---|---|
| Manufacturer | TAMITO SAS |
| Brand | JATRHG |
| Model Number (OEM) | K1 |
| Manufacturer Reference | K1_220_8M |
| Item Weight | 16 Kilograms |
| Product Dimensions | 20 x 37 x 135 cm (Wallbox: 24.5 x 8.5 x 36 cm) |
| Installation Location | Outdoor |
| Amperage | 32 Ampere |
| Voltage | 380 Volt (AC) |
| Wattage | 22 KW |
| Cable Length | 8 Meters |
| Special Features | Key Lock, Elastic, Waterproof, LED, UV Protection |
8. Warranty and Support
The JATRHG K1 S1 EV Wallbox Kit comes with a manufacturer's warranty. Please refer to your purchase documentation for specific warranty terms and duration.
8.1 Warranty Information
- The warranty covers defects in materials and workmanship under normal use.
- Any intervention or repair performed by an unqualified person will void the warranty.
- Damage resulting from incorrect installation, non-compliant use, or unauthorized modification is not covered by the warranty.
8.2 Technical Support
For technical assistance, warranty claims, or any questions regarding the operation or maintenance of your JATRHG EV Wallbox Kit, please contact the technical service department of JATRHG or your authorized dealer.
When contacting support, please have your product model number (K1_220_8M) and proof of purchase readily available.


