
1. Introduction
This manual provides essential information for the safe and effective operation of your AeternaSol 10-Amp Smart Battery Charger. This device is designed for charging and maintaining 12V and 24V lead-acid and LiFePO4 batteries, offering multiple charging modes and protection features. Please read this manual thoroughly before use and retain it for future reference.
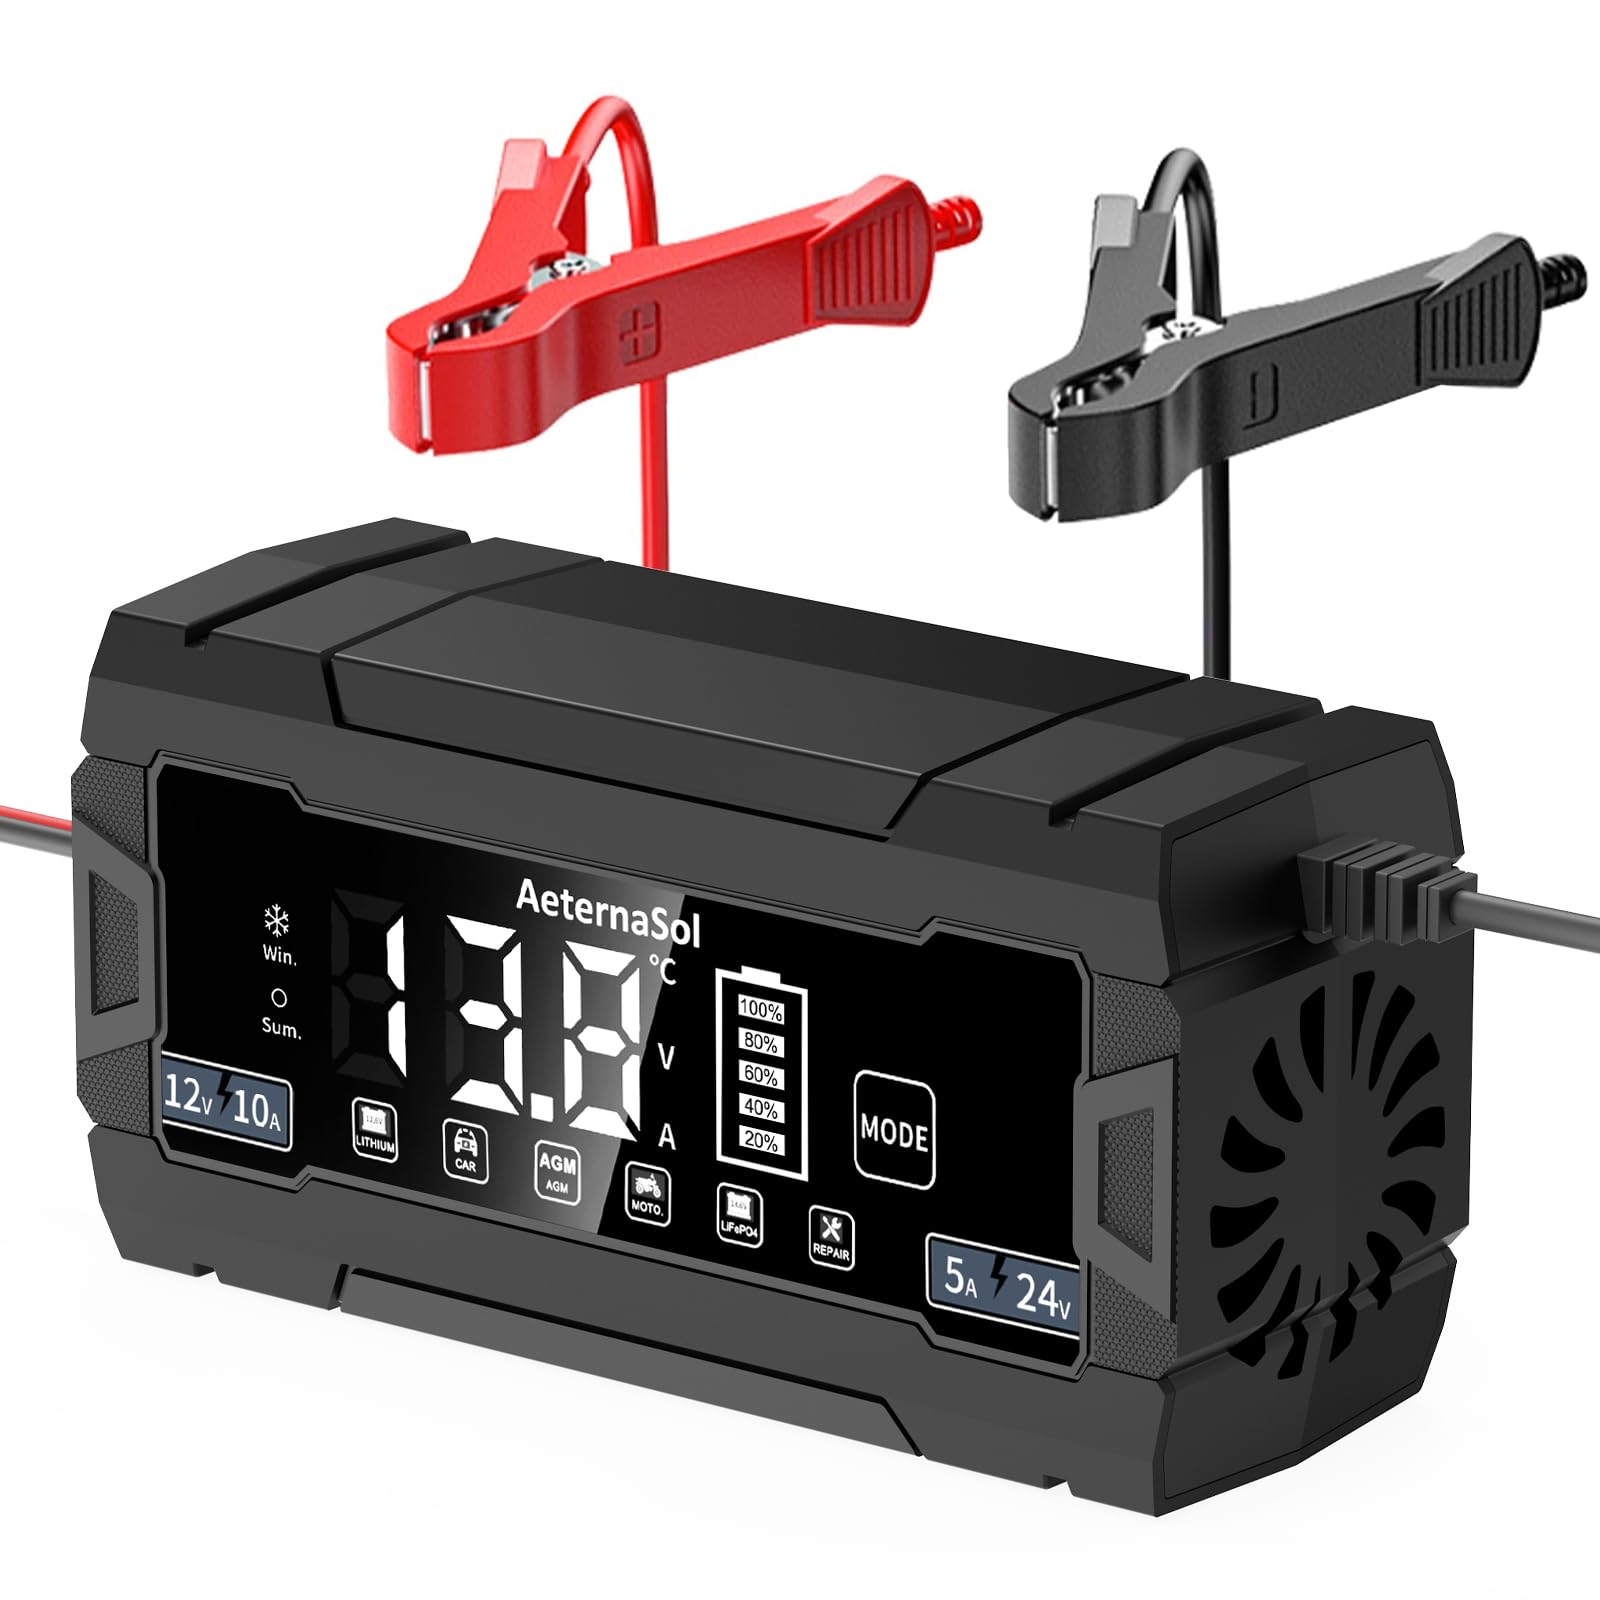
Image 1.1: AeternaSol 10-Amp Smart Battery Charger in operation.
2. Safety Instructions
Always prioritize safety when operating electrical equipment. Failure to follow these instructions may result in electric shock, fire, or serious injury.
- Read All Instructions: Before using the charger, read all instructions and cautionary markings on the charger, the battery, and the vehicle or device using the battery.
- Ventilation: Ensure adequate ventilation when charging batteries. Batteries can produce explosive gases.
- Eye Protection: Always wear eye protection and protective clothing when working near batteries.
- Avoid Sparks: Never smoke or allow a spark or flame in the vicinity of the battery or engine.
- Disconnect Power: Disconnect the AC power cord from the outlet before making or breaking the connections to the battery.
- Reverse Polarity Protection: This charger includes reverse polarity protection, but always ensure correct connection (red clamp to positive, black clamp to negative).
- Damaged Equipment: Do not operate the charger if it has received a sharp blow, been dropped, or otherwise damaged.
- Children: Keep out of reach of children. This appliance is not intended for use by persons (including children) with reduced physical, sensory or mental capabilities, or lack of experience and knowledge, unless they have been given supervision or instruction concerning use of the appliance by a person responsible for their safety.

Image 2.1: The charger features 8 levels of protection for safe operation.
3. Product Features
The AeternaSol Smart Battery Charger is equipped with advanced features for efficient and safe battery charging and maintenance.
- 10-Amp Quick Charging: Offers 12V 10-Amp and 24V 5-Amp 10-stage charging, significantly faster than standard chargers.
- Wide Compatibility: Compatible with all 12-volt and 24-volt lead-acid batteries (AGM, GEL, SLA, Flooded) and Lithium (LiFePO4) batteries. Suitable for cars, trucks, motorcycles, SUVs, lawn mowers, and boats.
- Winter & Summer Smart Trickle Charging: Automatically adjusts charging based on ambient temperature, providing optimal charging in both hot and cold conditions. Functions as a maintainer to prevent self-discharge during long periods of inactivity.
- 8 Multiple Protections: Includes smart control, temperature compensation, reverse polarity, cooling, overcurrent, fireproof design, overcharge, and short circuit protection.
- Pulse Repair Function: Utilizes high-efficiency pulse repair technology to detect and restore sulfated or acid-stratified batteries, extending battery life and improving performance. Note: This function cannot activate or charge totally dead batteries.
- Visualized Charging with LCD Display: A large LCD screen provides real-time information on charging status, battery health, voltage, current, internal temperature, and charge percentage.
- Plug and Play Operation: Simple to use with no complex setup steps. Combines functions of a charger, maintainer, trickle charger, and desulfator.

Image 3.1: Wide battery compatibility for various types.

Image 3.2: Visual display of battery information on the LCD screen.
4. Setup and Connection
Follow these steps to safely connect your charger to a battery.
- Prepare the Battery: Ensure the battery terminals are clean and free of corrosion. If necessary, clean them with a wire brush and baking soda solution.
- Connect Red Clamp: Connect the RED (+) positive charger clamp to the RED (+) positive battery terminal.
- Connect Black Clamp: Connect the BLACK (-) negative charger clamp to the BLACK (-) negative battery terminal.
- Plug into Power: Plug the charger's AC power cord into a standard electrical outlet. The charger will power on and display current battery status.
- Select Mode: Press the "MODE" button to select the appropriate charging mode for your battery type (see Section 5 for details).
- Start Charging: The charger will automatically begin the charging process.
- Disconnecting: To disconnect, first unplug the AC power cord, then remove the black clamp, followed by the red clamp.
5. Operating Instructions
5.1. Charging Modes Selection
Press the MODE button to cycle through the available charging modes. Select the mode that matches your battery type.

Image 5.1: Six selectable charging modes.
- Lithium: For 12.6V Lithium-Ion batteries.
- Car: Standard mode for 12V lead-acid batteries (Flooded, SLA, WET, EFB).
- AGM: Specifically for 12V AGM batteries.
- Moto: For 12V motorcycle batteries and smaller capacity 12V lead-acid batteries. Also used for trickle charging after a full charge for long-term maintenance.
- LiFePO4: For 14.6V Lithium Iron Phosphate batteries.
- Repair: Pulse repair mode for desulfating and restoring old or sluggish lead-acid batteries.
5.2. 10-Stage Charging Process
The charger employs a sophisticated 10-stage charging process to optimize battery health and longevity.

Image 5.2: The 10-stage intelligent charging process.
- Battery Diagnosis
- Battery Desulphation
- Pre-charging
- Soft Start Charging
- Bulk Charging
- Constant Current Charging
- 1/2 Constant Current Charging
- Absorption Charging
- Float Charging
- Re-start Charge after Battery Discharged
5.3. Temperature Compensation
The charger automatically adjusts the charging voltage based on the ambient temperature to ensure optimal and safe charging.
- Summer Mode: Automatically activated above 28°C for safety charging in warmer conditions.
- Winter Mode: Automatically activated below 10°C for powerful charging in colder conditions.

Image 5.3: Automatic temperature compensation for optimal charging.
6. Maintenance
Proper maintenance ensures the longevity of your charger and batteries.
- Charger Cleaning: Disconnect the charger from power before cleaning. Wipe the exterior with a soft, dry cloth. Do not use harsh chemicals or abrasives.
- Cable Inspection: Regularly inspect the charging cables and clamps for any signs of damage, fraying, or corrosion. Replace if damaged.
- Storage: Store the charger in a cool, dry place when not in use. Avoid extreme temperatures and direct sunlight.
- Battery Maintenance: For long periods of inactivity (e.g., winter storage), fully charge the battery in the appropriate mode until "FUL" is displayed, then switch to "MOTORCYCLE" mode for automatic float/trickle charge maintenance.
7. Troubleshooting
If you encounter issues, refer to the table below for common problems and solutions.
| Problem | Possible Cause | Solution |
|---|---|---|
| Charger does not turn on. | No AC power; Faulty outlet; Damaged charger. | Check power outlet; Ensure charger is plugged in correctly; Inspect power cord for damage. |
| Charger displays "ERR" or error code. | Reverse polarity connection; Short circuit; Over-temperature; Battery fault. | Check clamp connections; Inspect cables for shorts; Allow charger to cool; Test battery condition. |
| Battery not charging. | Incorrect mode selected; Battery is completely dead; Poor connection. | Select correct mode; Note: Charger cannot activate totally dead batteries; Ensure clamps are securely connected. |
| Pulse Repair function not working. | Battery is beyond repair; Incorrect battery type for repair mode. | Pulse repair is for lead-acid batteries only; Some batteries may be too damaged to be restored. |
8. Specifications
Detailed technical specifications for the AeternaSol 10-Amp Smart Battery Charger.
| Specification | Value |
|---|---|
| Brand | AeternaSol |
| Model | 12V 10A |
| Product Dimensions | 6.29"D x 2.16"W x 3.14"H |
| Output Voltage | 12 Volts |
| Input Voltage | 12 Volts (AC Input 100-240V) |
| Current Rating | 10 Amps (12V), 5 Amps (24V) |
| Compatible Devices | 12V and 24V lead-acid batteries (AGM, GEL, SLA, Flooded), Lithium (LiFePO4) batteries |
| Connector Type | Clamp/Alligator Clip |
| Certifications | UL, CE, FCC |
9. Warranty and Support
This product comes with a 1-year warranty. For warranty claims or technical support, please contact AeternaSol customer service through the retailer where the product was purchased or visit the official AeternaSol website for contact information.
Please have your model number (12V 10A) and purchase details ready when contacting support.
