
1. Introduction
This manual provides detailed instructions for the assembly, installation, and proper use of your Urban Deco Motorcycle Helmet Holder Wall Mount Rack. This product is designed to organize various types of helmets and related gear, maximizing storage space and reducing clutter. Please read all instructions carefully before proceeding with assembly and installation.
2. Safety Information
- Ensure all components are present and undamaged before assembly. Do not use if any parts are missing or broken.
- Always wear appropriate safety gear, such as gloves and eye protection, during assembly and installation.
- Mount the rack securely to a sturdy wall surface, preferably into wall studs, to support the weight of helmets and gear. Drywall anchors alone may not provide sufficient support for heavy items.
- Do not overload the rack beyond its intended capacity.
- Keep small parts and packaging materials away from children and pets to prevent choking hazards.
3. Package Contents
Verify that all the following components are included in your package:
- Helmet Holder (Main Frame)
- Wooden Storage Boards (Shelves)
- Hat Stands / Helmet Support Frames
- Hanging Rails / Bottom Clothes Rod
- Glove Clips
- Mounting Hardware (Screws, Wall Anchors)
- Assembly Tools (e.g., Allen wrench)

Image: All components included in the Urban Deco Helmet Holder package.
4. Assembly Instructions
Follow these steps to assemble your Urban Deco Helmet Holder. Refer to the provided diagrams and video for visual guidance.
- Step 1: Attach Top Shelf. Secure the top wooden storage board to the upper frame using the provided screws.
- Step 2: Attach Bottom Shelf. Secure the bottom wooden storage board to the lower frame using the provided screws.
- Step 3: Install Vertical Supports. Connect the vertical metal support rods between the top and bottom shelf frames.
- Step 4: Attach Helmet Stands. Insert the helmet support frames (hat stands) into the designated slots on the vertical support rods. These can often be adjusted or rotated.
- Step 5: Install Hanging Rail. Attach the bottom clothes rod to the underside of the lower shelf frame.
- Step 6: Add Glove Clips. Attach the glove clips to the bottom clothes rod as desired.

Image: Step-by-step assembly diagram for the helmet holder.
Video: Official Urban Deco installation guide for the Motorcycle Helmet Holder. This video demonstrates the assembly process and how to mount the unit to a wall.
5. Installation
Once assembled, the helmet holder is ready for wall mounting.
- Choose Location: Select a suitable wall in your garage, entryway, or storage room. Ensure the wall material can support the weight of the rack and its contents. Identifying wall studs is recommended for maximum stability.
- Mark Drilling Points: Hold the assembled rack against the wall at the desired height and use a pencil to mark the drilling points for the mounting screws. Use a level to ensure the rack is straight.
- Drill Pilot Holes: Drill pilot holes at the marked locations. If mounting into drywall without studs, insert the appropriate wall anchors before inserting screws.
- Mount the Rack: Align the rack with the pilot holes and secure it to the wall using the provided screws. Tighten all screws firmly but do not overtighten.
6. Usage
The Urban Deco Helmet Holder is designed for versatile storage of various gear:
- Helmet Storage: The four hat stands are suitable for motorcycle helmets, baseball helmets, football helmets, ski helmets, bicycle helmets, safety helmets, and other headgear like cowboy hats and baseball caps.
- Jacket and Coat Hanging: The widened distance from the wall allows for hanging motorcycle jackets, coats, and other apparel on the main frame or the bottom clothes rod.
- Shelf Storage: The wooden shelves at the top and bottom can hold shoes, keys, small accessories, or decorative items.
- Accessory Hooks: The six hanging rails and four clips can be rearranged or removed to hang gloves, keys, goggles, or other small items.
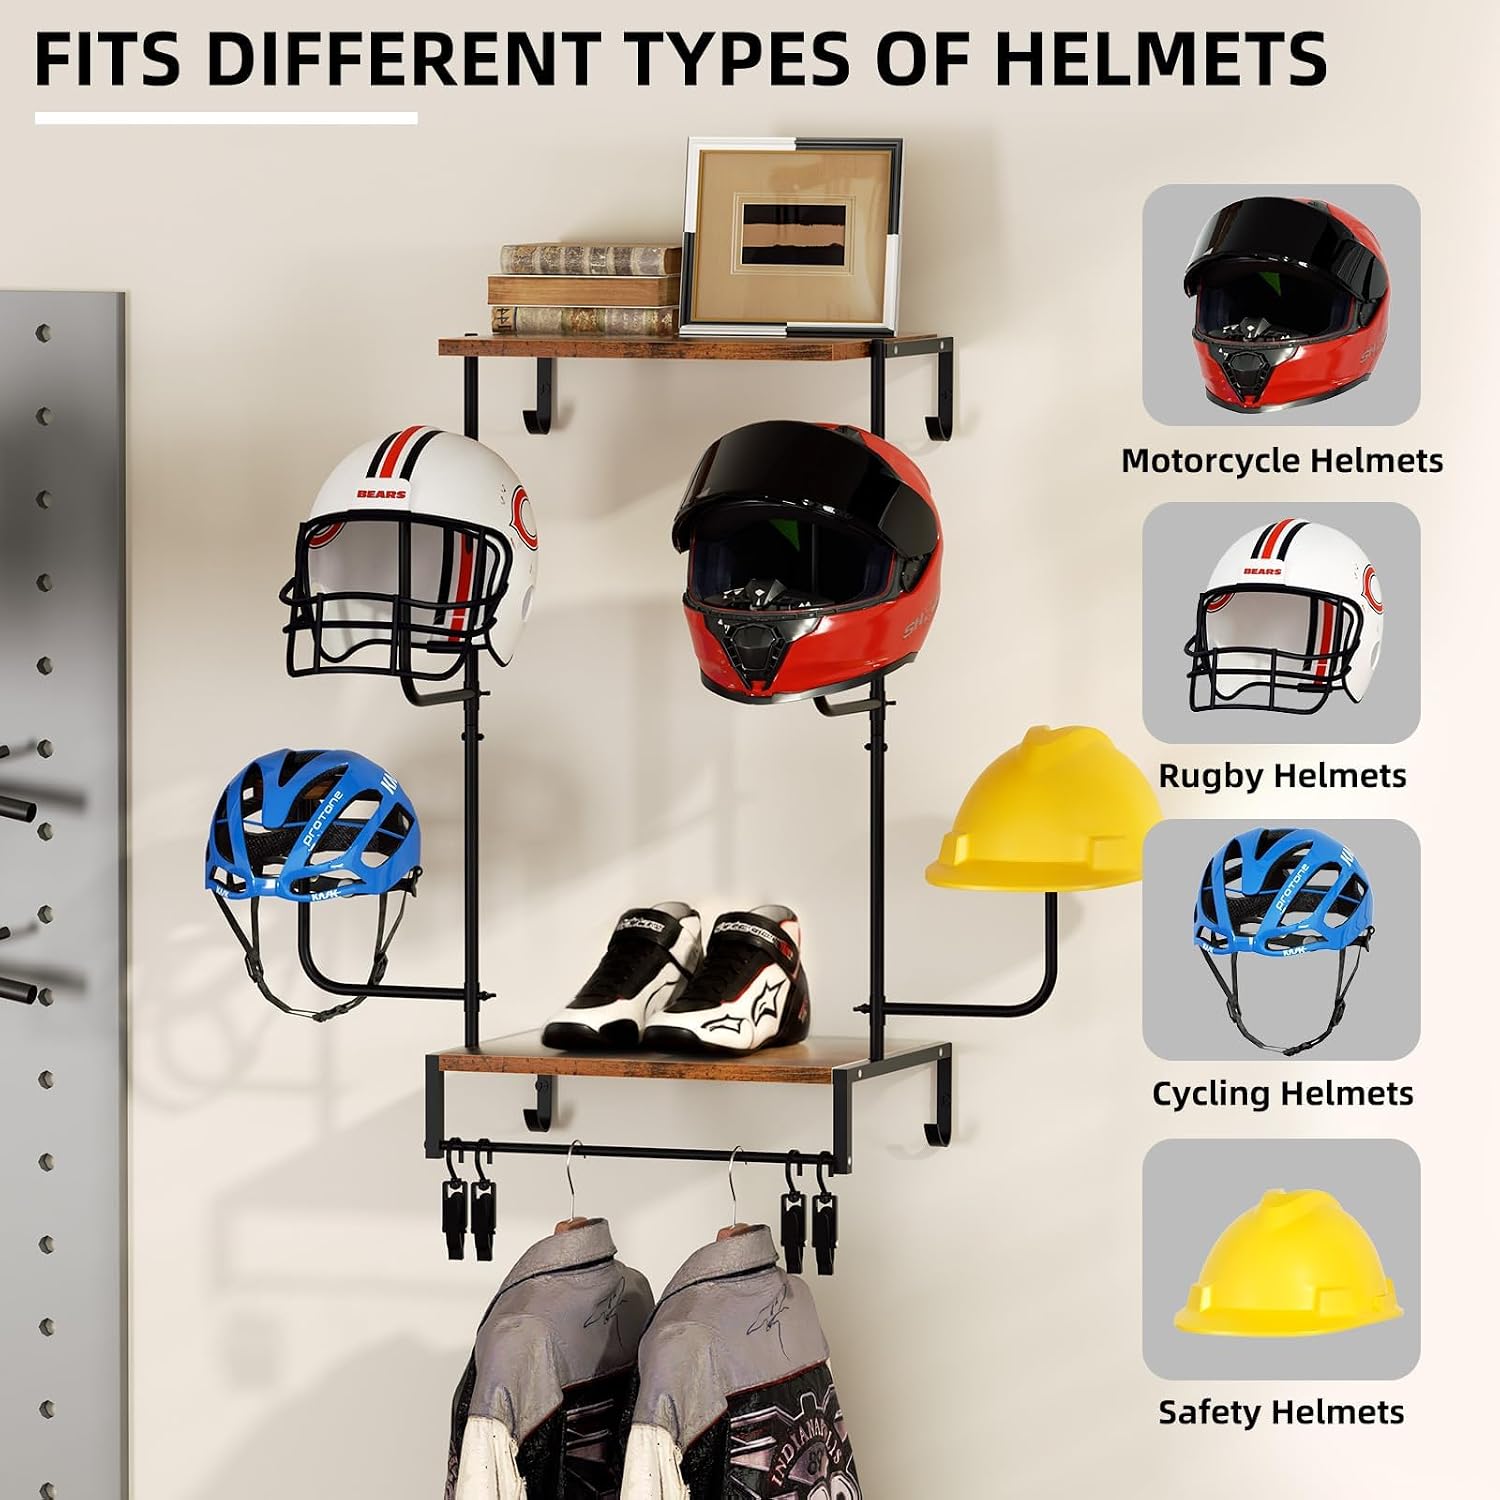
Image: The helmet holder accommodates various helmet types.

Image: Multi-functional use of the helmet holder for various sports and tactical equipment.
7. Maintenance
To ensure the longevity and appearance of your helmet holder:
- Cleaning: Wipe the metal frame with a soft, damp cloth. For the wooden shelves, use a dry or slightly damp cloth. Avoid abrasive cleaners or harsh chemicals.
- Inspection: Periodically check all screws and connections to ensure they remain tight. Retighten if necessary.
- Environment: While the metal frame has good water and rust resistance, it is recommended for indoor use to prolong its lifespan.
8. Troubleshooting
- Rack feels unstable after installation: Ensure the rack is mounted directly into wall studs. If mounting into drywall, use heavy-duty wall anchors appropriate for the weight of the rack and its intended contents. Verify all screws are tightened.
- Difficulty assembling parts: Double-check the assembly diagrams and ensure all parts are oriented correctly. Do not force components together. If a part seems misaligned, re-examine the instructions.
- Missing parts: Refer to the 'Package Contents' section. If any parts are missing, contact customer support for assistance.
9. Specifications
| Brand Name | Urban Deco |
| Model Number | UD-DHTKJ457NEW |
| Product Dimensions (D x W x H) | 12"D x 17"W x 30"H (approx. 30.7*11.8*15.7 inches for the current variant) |
| Mounting Type | Wall Mount |
| Special Feature | With Adjustable Shelves |
| Included Components | Helmet Holder (Main Frame, Wooden Boards, Hat Stands, Hanging Rails, Glove Clips, Mounting Hardware) |
| Indoor/Outdoor Usage | Indoor |
10. Warranty and Support
Urban Deco products are manufactured to high-quality standards. For warranty information, missing parts, or technical support, please refer to the contact information provided with your purchase or visit the official Urban Deco website. Please retain your proof of purchase for any warranty claims.