
1. Introduction
Thank you for choosing the Techwood 1300W Electric Roaster Oven. This versatile 3-in-1 appliance is designed for grilling, roasting, and toasting, making it ideal for preparing a variety of dishes such as steak, chicken, fish, shrimp, and pizza. Its user-friendly design includes simple knob controls for adjustable timer and temperature settings, ensuring consistent results with double-sided heating and a 3-layer odor-free filter for a smoke-free indoor cooking experience. Please read this manual thoroughly before first use to ensure proper operation and maintenance.
2. Important Safety Instructions
When using electrical appliances, basic safety precautions should always be followed to reduce the risk of fire, electric shock, and injury to persons, including the following:
- Read all instructions before operating the appliance.
- Do not touch hot surfaces. Use handles or knobs.
- To protect against electrical shock, do not immerse cord, plugs, or the appliance body in water or other liquid.
- Close supervision is necessary when any appliance is used by or near children.
- Unplug from outlet when not in use and before cleaning. Allow to cool before putting on or taking off parts.
- Do not operate any appliance with a damaged cord or plug, or after the appliance malfunctions or has been damaged in any manner. Contact customer service for examination, repair, or adjustment.
- The use of accessory attachments not recommended by the appliance manufacturer may cause injuries.
- Do not use outdoors.
- Do not let cord hang over edge of table or counter, or touch hot surfaces.
- Do not place on or near a hot gas or electric burner, or in a heated oven.
- Extreme caution must be used when moving an appliance containing hot oil or other hot liquids.
- Always attach plug to appliance first, then plug cord into the wall outlet. To disconnect, turn any control to "off", then remove plug from wall outlet.
- Do not use appliance for other than intended use.
- Ensure the appliance is placed on a stable, heat-resistant surface during operation.
- Always ensure the drip tray contains water before cooking to prevent smoke.
3. Product Components
The Techwood Electric Roaster Oven comes with several components designed for versatile cooking:
- Main Unit: The primary housing with heating elements and control panel.
- Lid: Covers the cooking area, featuring a viewing window and handle.
- Drip Tray: Collects excess fats and liquids during cooking. Must be filled with water before use.
- Grill Plate: Flat cooking surface for grilling.
- Wire Rack (Roasting Rack): Used for roasting and elevating food.
- Roasting Basket: Ideal for smaller items or air frying.
- Ceramic Filter: Located in the lid to reduce smoke and odor. Includes 10 replacement filter cottons.
- Power Cord: Detachable power supply.

Image: The Techwood Electric Roaster Oven shown with its main unit, lid, and various cooking accessories including the grill plate, wire rack, and roasting basket.

Image: Close-up view of the three interchangeable cooking accessories: Roasting Rack, Roasting Basket, and Grill Plate, highlighting their distinct designs for different cooking methods.
4. Setup and First Use
Before using your Techwood Electric Roaster Oven for the first time, please follow these steps:
- Unpack: Carefully remove all packaging materials and inspect the appliance for any damage.
- Clean: Wash all removable parts (drip tray, grill plate, wire rack, roasting basket) with warm, soapy water. Wipe the main unit with a damp cloth. Ensure all parts are completely dry before assembly.
- Assemble: Place the drip tray into the base of the unit. Ensure it is properly seated.
- Add Water: Fill the drip tray with water up to the indicated level. This is crucial for smoke reduction during cooking.
- Insert Cooking Accessory: Place your desired cooking accessory (Grill Plate, Wire Rack, or Roasting Basket) onto the base, above the drip tray.
- Close Lid: Carefully close the lid, ensuring it latches securely.
- Power Connection: Plug the power cord into a grounded electrical outlet.

Image: A visual guide demonstrating the four steps for cooking: 1. Add water to the drip tray, 2. Place food on the grill plate/wire rack, 3. Set the timer, 4. Enjoy the cooked food.
5. Operating Instructions
The Techwood Electric Roaster Oven features simple knob controls for easy operation.
5.1 Cooking Process
- Prepare Appliance: Ensure the drip tray is filled with water and the desired cooking accessory is in place.
- Preheat (Optional): For best results, you may preheat the appliance for 5-10 minutes with the lid closed.
- Place Food: Open the lid and carefully place your food onto the cooking accessory. Close the lid securely.
- Set Timer: Use the control knob to set the desired cooking time, ranging from 5 to 30 minutes. The appliance will begin heating once the timer is set.
- Monitor Cooking: The appliance features a viewing window to monitor your food without opening the lid. The double-sided heating ensures even cooking without the need for flipping.
- Finish Cooking: Once the timer reaches zero, the appliance will automatically turn off. If you need to stop cooking earlier, turn the timer knob to "OFF" before opening the lid.
- Remove Food: Carefully open the lid and use heat-resistant utensils to remove your cooked food.
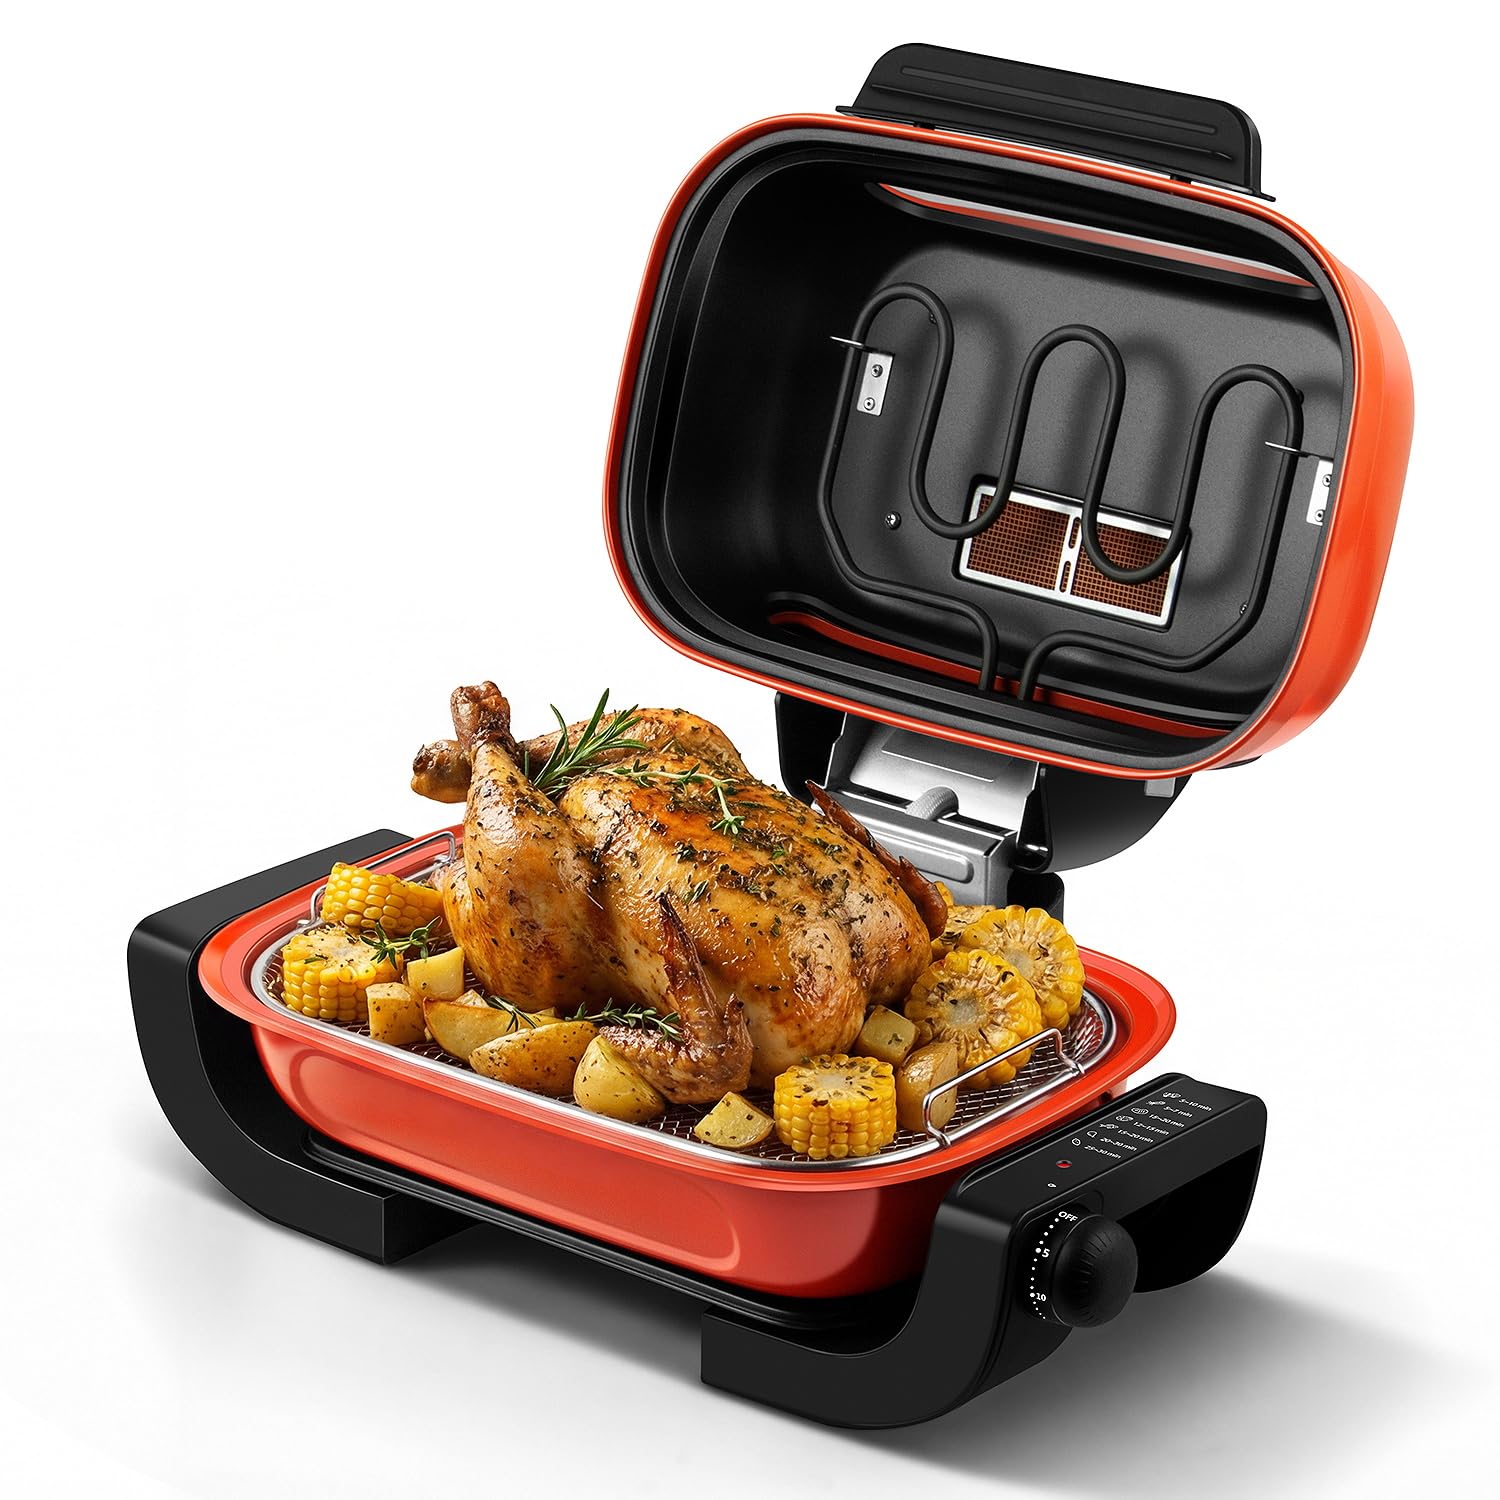
Image: The control knob with timer settings (5-30 minutes) and visual examples of various dishes like fish, chicken, shrimp, and steak that can be prepared.
5.2 Temperature and Timer Settings
- Temperature: The appliance reaches high heat up to 450°F (232°C) for effective searing and cooking. Temperature is automatically regulated based on the timer setting.
- Timer: The timer can be set from 5 to 30 minutes. Refer to cooking charts for recommended times for different foods.

Image: A visual representation of the 30-minute timer function, illustrating the control dial for setting cooking duration.
5.3 Dual Heating and Odor Filtration
- Dual Heating: Top and bottom heating elements ensure food is cooked evenly from all sides, eliminating the need to flip or rotate.
- Odor-Free Filter: The built-in 3-layer ceramic filter system helps to minimize smoke and cooking odors, making it suitable for indoor use.

Image: An internal view of the roaster oven, illustrating the dual heating elements and the circulation of heat for even cooking of a whole chicken.
6. Maintenance and Cleaning
Regular cleaning and maintenance will ensure the longevity and optimal performance of your appliance.
- Unplug and Cool: Always unplug the appliance from the power outlet and allow it to cool completely before cleaning.
- Disassembly: The appliance is designed for easy disassembly. Disengage the fixing pin from the hole to remove the lid. Remove the cooking accessory and drip tray.
- Clean Removable Parts: The grill plate, wire rack, roasting basket, and drip tray are dishwasher safe or can be washed by hand with warm, soapy water. Avoid abrasive cleaners or scouring pads.
- Clean Main Unit: Wipe the exterior of the main unit with a damp cloth. Do not immerse the main unit, cord, or plug in water or any other liquid.
- Clean Ceramic Filter: The ceramic filter can be gently cleaned or replaced. The product comes with 10 replacement filter cottons.
- Dry Thoroughly: Ensure all parts are completely dry before reassembling and storing the appliance.

Image: A visual guide demonstrating the easy disassembly process and showing the removable parts (lid, grill plate, roasting basket) placed in a dishwasher for cleaning.

Image: A hand demonstrating the replacement of the ceramic filter cotton, highlighting the appliance's odor reduction feature.
7. Troubleshooting
If you encounter any issues with your Techwood Electric Roaster Oven, please refer to the following common problems and solutions:
| Problem | Possible Cause | Solution |
|---|---|---|
| Appliance does not turn on. | Not plugged in; power outlet malfunction; timer not set. | Ensure the power cord is securely plugged into a working outlet. Check if the timer knob is set to a cooking duration. |
| Excessive smoke during cooking. | Drip tray empty or insufficient water; food too fatty; filter needs cleaning/replacement. | Ensure the drip tray is filled with water before cooking. Trim excess fat from food. Clean or replace the ceramic filter. |
| Food not cooking evenly. | Lid not closed properly; incorrect cooking time/temperature. | Ensure the lid is securely closed. Adjust cooking time as needed for specific recipes. The dual heating system is designed for even cooking, so ensure food is placed centrally. |
| Appliance smells during first use. | Normal for new appliances. | A slight odor during the first few uses is normal as manufacturing residues burn off. Ensure good ventilation. The smell should dissipate with subsequent uses. |
8. Specifications
- Model Number: TWGF-008
- Brand: Techwood
- Power: 1300W
- Voltage: Standard household voltage (e.g., 120V AC, 60Hz for US market) - (Assumed based on typical appliances, not explicitly stated in JSON)
- Product Dimensions: 12"D x 10"W x 7"H
- Capacity: 8 Pounds
- Material: Stainless Steel
- Control Type: Knob Control (Timer)
- Temperature Range: Up to 450°F (232°C)
- Special Features: Adjustable Rack, Timer, Double-Sided Heating, 3-Layer Odor-Free Filter
- Included Components: Grill, Wire Rack, Roasting Basket, Drip Tray, Ceramic Filters
- UPC: 735279782653

Image: A diagram illustrating the dimensions of the Techwood Electric Roaster Oven, showing its length (19.7 inches), width (12.6 inches), and height (10.2 inches).
9. Warranty and Support
Techwood is committed to providing high-quality products and customer satisfaction.
- Return Policy: Enjoy a 30-day hassle-free return policy from the date of purchase.
- Product Promise: The product is covered by a 12-month promise, ensuring quality and efficiency.
- Product Liability Insurance: Our products are covered by Product Liability Insurance of the United States.
- Customer Support: For any questions, concerns, or warranty claims, please contact Techwood customer service. Refer to the official Techwood website or your purchase documentation for contact details.