
Introduction
This manual provides instructions for the installation, operation, and maintenance of your SEAFLO 21 Series 12V DC Water Pressure Diaphragm Pump. This compact pump is designed for reliable water delivery in various applications, including RVs, marine vessels, and off-grid systems. It features a 1.2 GPM flow rate, 35 PSI shut-off pressure, and a durable, self-priming design.
Safety Information
- Always disconnect power before installing, servicing, or performing maintenance on the pump.
- Ensure the pump is installed in a dry, well-ventilated area, protected from extreme temperatures and direct sunlight.
- Use appropriate wire gauges and fuses as specified in the electrical requirements.
- Do not pump flammable liquids. This pump is designed for water transfer only.
- Ensure all plumbing connections are secure to prevent leaks.
- This pump is built to NSF/ANSI/CAN 61 & 372 (Potable Water Safety), NSF 24 (RV Plumbing), and UL 778 (Motor-Operated Water Pumps) standards, making it safe for drinking water.
Specifications
| Feature | Specification |
|---|---|
| Model | SFDP1-012-035-21 |
| Voltage | 12V DC |
| Open Flow | 1.2 GPM (4.5 LPM) |
| Shut-Off Pressure | 35 PSI (2.4 BAR) |
| Current Draw | 4.0A |
| Self-Priming | Up to 4 ft (1.2 m) |
| Ports | 3/8" Hose Barb |
| Max Temperature | 140°F (60°C) |
| Leads | 18 AWG, 13" (33 cm) |
| Duty Cycle | Intermittent |
| Ignition Protected | Yes |
| Certifications | RoHS, SGS, ISO, NSF/ANSI/CAN 61 & 372, NSF 24, UL 778 |
| Housing Material | Nylon / Polypropylene |
| Diaphragm Material | Santoprene |
| Valves/Seals Material | EPDM / Viton |
| Dimensions (L x W x H) | 6.65" x 3.94" x 2.44" (169mm x 100mm x 62mm) |
| Weight | 1.3 lbs (0.59 kg) |
Note: Specifications are subject to change without notice.
Setup
1. Mounting the Pump
The pump should be mounted in a secure, dry location. Utilize the integrated rubber mounting feet to minimize vibration and noise. Ensure there is adequate space around the pump for ventilation and access for maintenance.
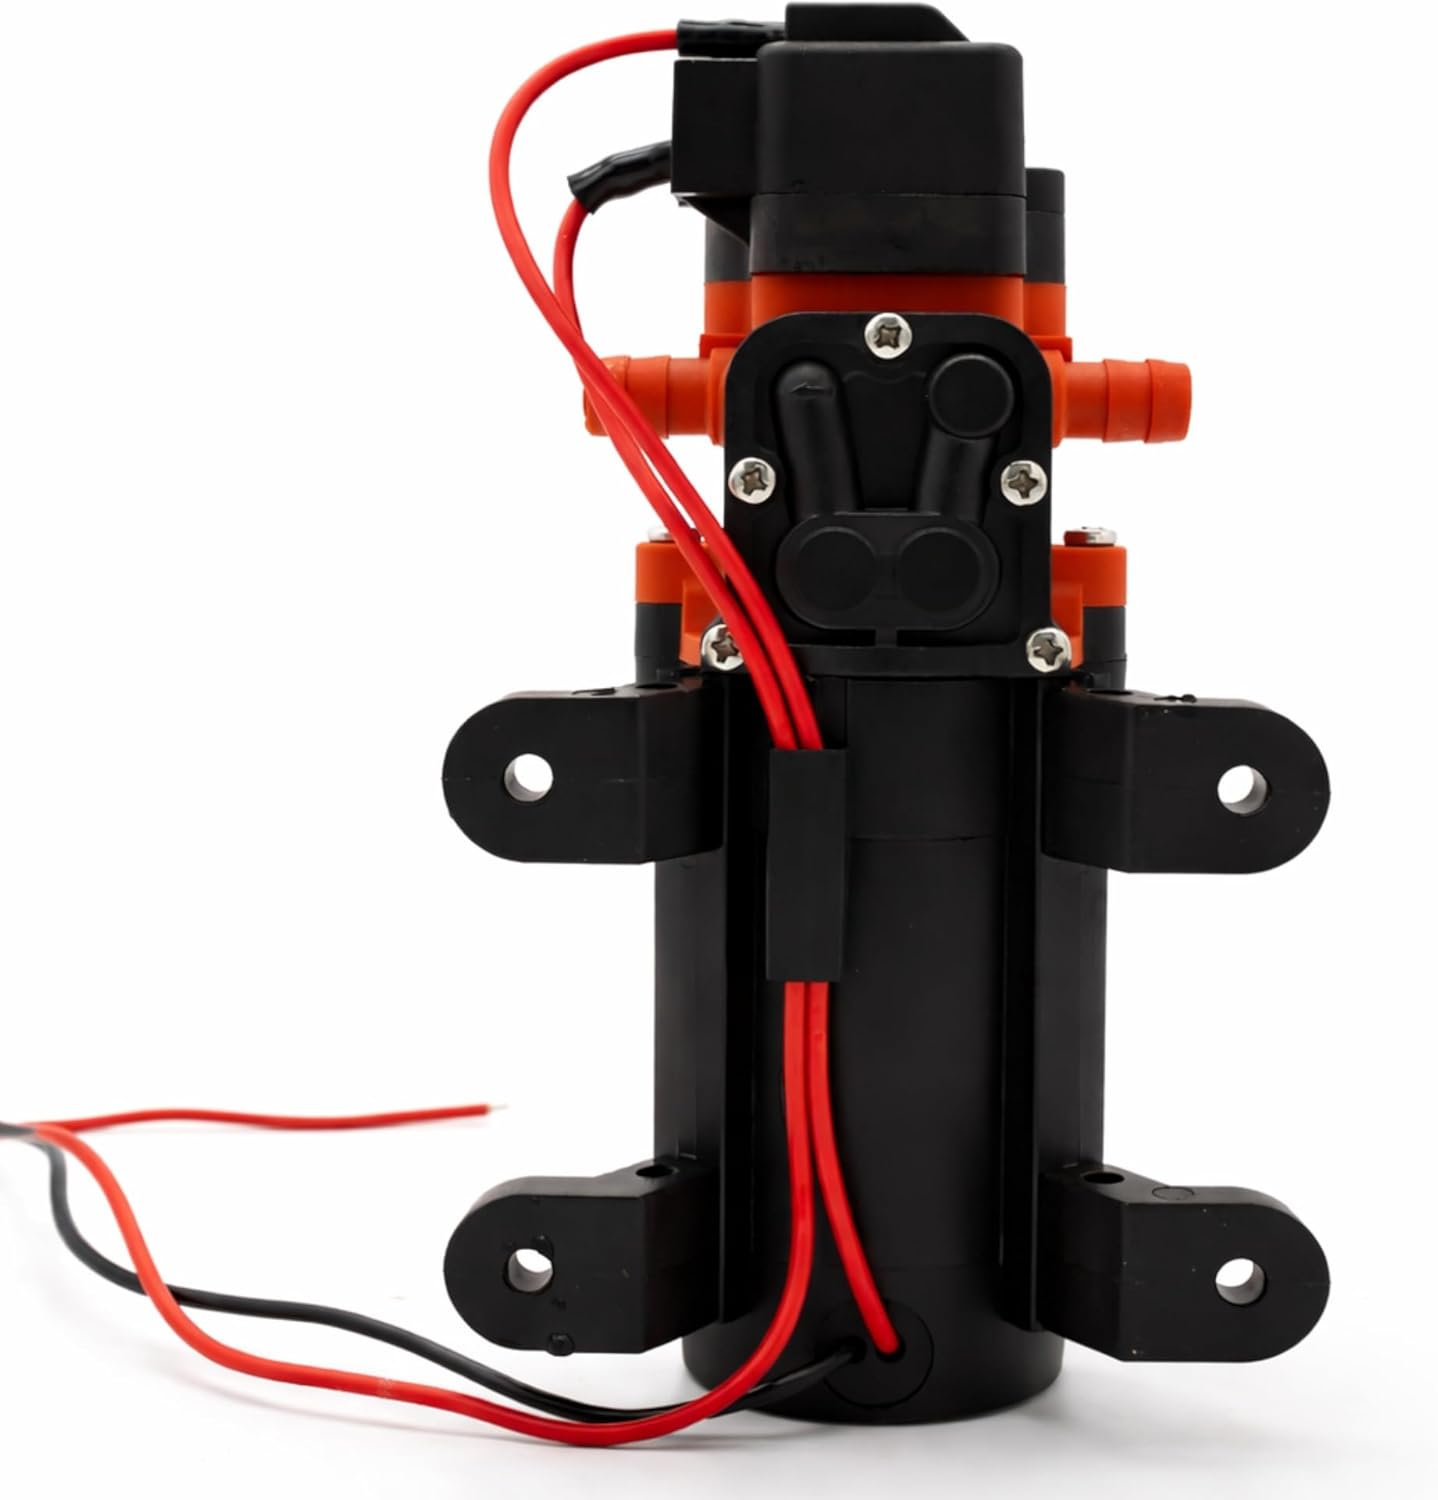
Image: Back view of the SEAFLO 21 Series pump, highlighting the mounting holes for secure installation.

Image: Diagram illustrating the rubber base design, which minimizes vibration and contributes to quieter operation.
2. Plumbing Connections
Connect 3/8" ID (Inner Diameter) hose to the pump's barb inlet and outlet ports. Use hose clamps to ensure all connections are tight and leak-free. The pump is self-priming up to 4 feet (1.2 meters), allowing for flexible installation above or below the water tank. Ensure the inlet hose is submerged in the water source and free of air leaks.
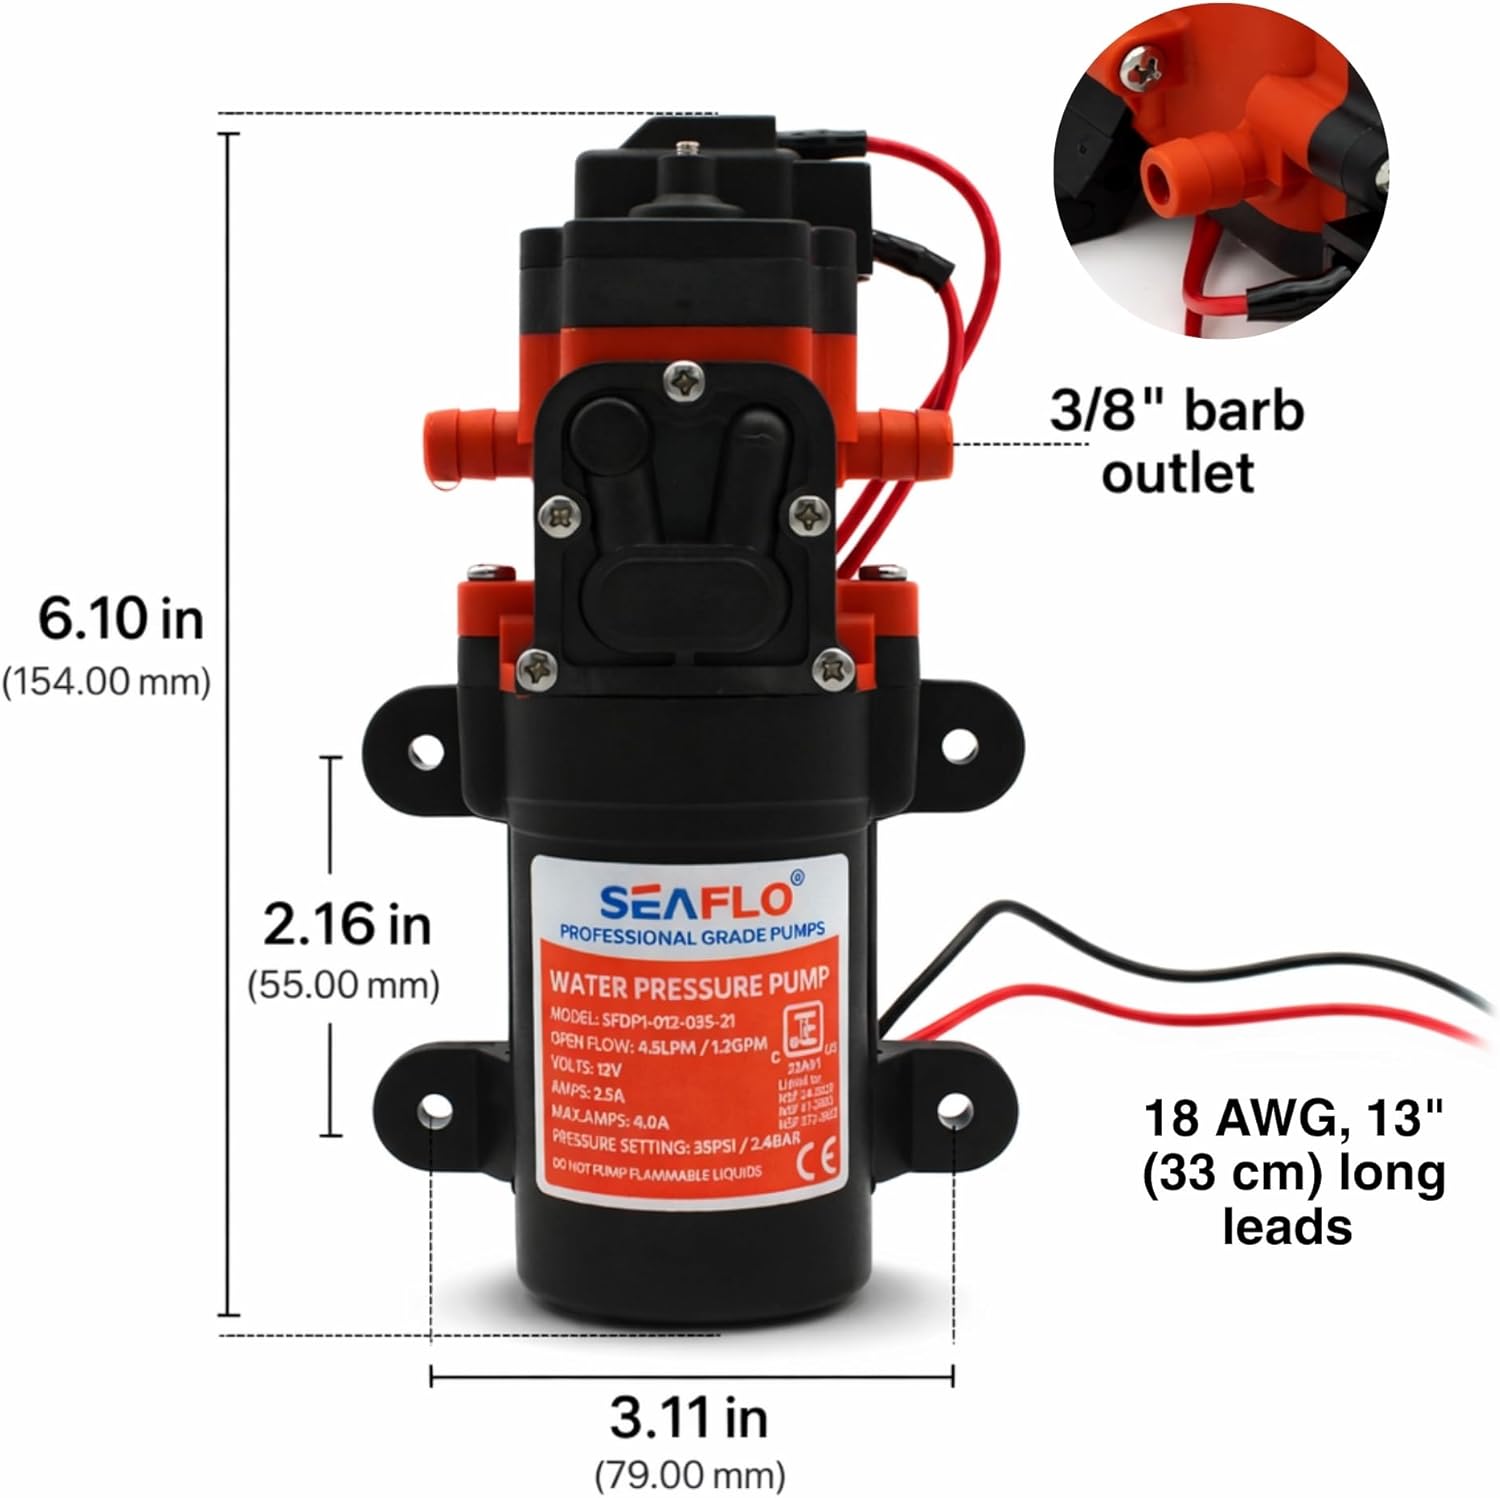
Image: Front view of the SEAFLO 21 Series pump, clearly showing the 3/8 inch hose barb inlet and outlet ports.
3. Electrical Wiring
Connect the pump to a 12V DC power source. The pump comes with 18 AWG, 13" (33 cm) long leads. The red wire is positive (+), and the black wire is negative (-). It is recommended to install an appropriate fuse (not included) in the positive line close to the power source to protect the circuit. Ensure all electrical connections are secure and insulated.

Image: The SEAFLO 21 Series pump, showing the red and black electrical leads for connection to a 12V DC power source.
Operating Instructions
1. Initial Start-Up and Priming
Once plumbing and electrical connections are complete, open a faucet in your system. Turn on the power to the pump. The pump will begin to draw water and self-prime. Allow the pump to run until a steady stream of water flows from the faucet, indicating that all air has been purged from the system. Close the faucet; the pump should shut off automatically.
2. On-Demand Operation
The SEAFLO 21 Series pump features a built-in automatic pressure switch. When a faucet or fixture is opened, the pressure in the system drops, and the pump automatically turns on to supply water. When the faucet is closed, the pressure builds up, and the pump automatically turns off. This eliminates the need for an accumulator tank in many single-fixture applications.

Image: A close-up of the pump highlighting the adjustable smart pressure switch, which controls automatic on/off functionality.
3. Adjustable Pressure Setting
The pump's shut-off pressure can be fine-tuned to match your specific plumbing system requirements. This adjustment helps optimize performance and can reduce pump cycling. Refer to the pump label for the pressure adjustment screw location and range (typically 17-80 PSI). Turn the screw clockwise to increase pressure and counter-clockwise to decrease it.

Image: Diagram detailing the adjustable pressure switch, explaining how it allows for fine-tuning of the pump's shut-off pressure.
4. Quiet Operation
The SEAFLO 21 Series pump is engineered for minimal noise, running no louder than a typical room fan. The rubber isolation feet further reduce vibration transfer, ensuring a comfortable environment, especially in sleeping areas or enclosed spaces.

Image: The SEAFLO 21 Series pump with a graphic indicating its quiet operation, suitable for noise-sensitive environments.
5. Dry Run Safe
The pump can run dry without damage during intermittent use, and built-in thermal protection prevents overheating, extending its service life under demanding conditions.
Maintenance
- Regular Inspection: Periodically check all plumbing connections for leaks and electrical connections for corrosion or damage.
- Filter Cleaning: If an inlet strainer is installed (recommended), clean it regularly to prevent debris from entering the pump and affecting performance.
- Winterization: In freezing conditions, drain all water from the pump and plumbing system to prevent damage. Running RV antifreeze through the system is also an option.
- General Cleaning: Keep the exterior of the pump clean and free of dirt or debris.
Troubleshooting
| Problem | Possible Cause | Solution |
|---|---|---|
| Pump does not turn on | No power, blown fuse, loose wiring, faulty switch. | Check power supply, replace fuse, tighten connections, test switch. |
| Pump runs but no water flows | Air in system, dry tank, clogged inlet, kinked hose, pump not primed. | Ensure water source is available, open faucet to purge air, check/clean inlet strainer, straighten hoses, re-prime pump. |
| Low flow or pressure | Partially clogged filter, low voltage, air leak on inlet side, worn pump head. | Clean filter, check voltage, inspect inlet connections for leaks, consider pump head replacement if worn. |
| Pump cycles on and off rapidly (chattering) | Small leak in system, pressure switch setting too low, no accumulator tank (for multi-fixture systems). | Check for leaks, adjust pressure switch, consider adding an accumulator tank for smoother operation in complex systems. |
| Water leaks from connections | Loose hose clamps, improper hose size, damaged barb fittings. | Tighten hose clamps, ensure correct 3/8" ID hose is used, inspect barb fittings for damage and replace if necessary. |
Product Overview Video
Video: An official overview of the SEAFLO 21 Series 1.2 GPM 35psi On Demand Water Pressure Pump, demonstrating its features and functionality.
Warranty and Support
The SEAFLO 21 Series Water Pressure Diaphragm Pump is backed by a 4-Year Limited Warranty. This warranty covers defects in materials and workmanship under normal use. For warranty claims, technical assistance, or any questions regarding your product, please contact SEAFLO customer support directly. Keep your proof of purchase for warranty validation.
For further assistance, please visit the official SEAFLO website or contact their customer service department.


