
1. Introduction
Thank you for purchasing the ZYWUOY Wireless Remote Control. This device is designed to provide convenient and versatile control over your Insta360, GoPro, and other compatible action cameras, as well as smartphones. Please read this manual carefully before use to ensure proper operation and to maximize the product's lifespan.
2. Product Overview
The ZYWUOY Wireless Remote Control is a compact and lightweight device featuring intuitive buttons for easy operation. It comes with a wrist strap for convenient portability and attachment to various accessories.
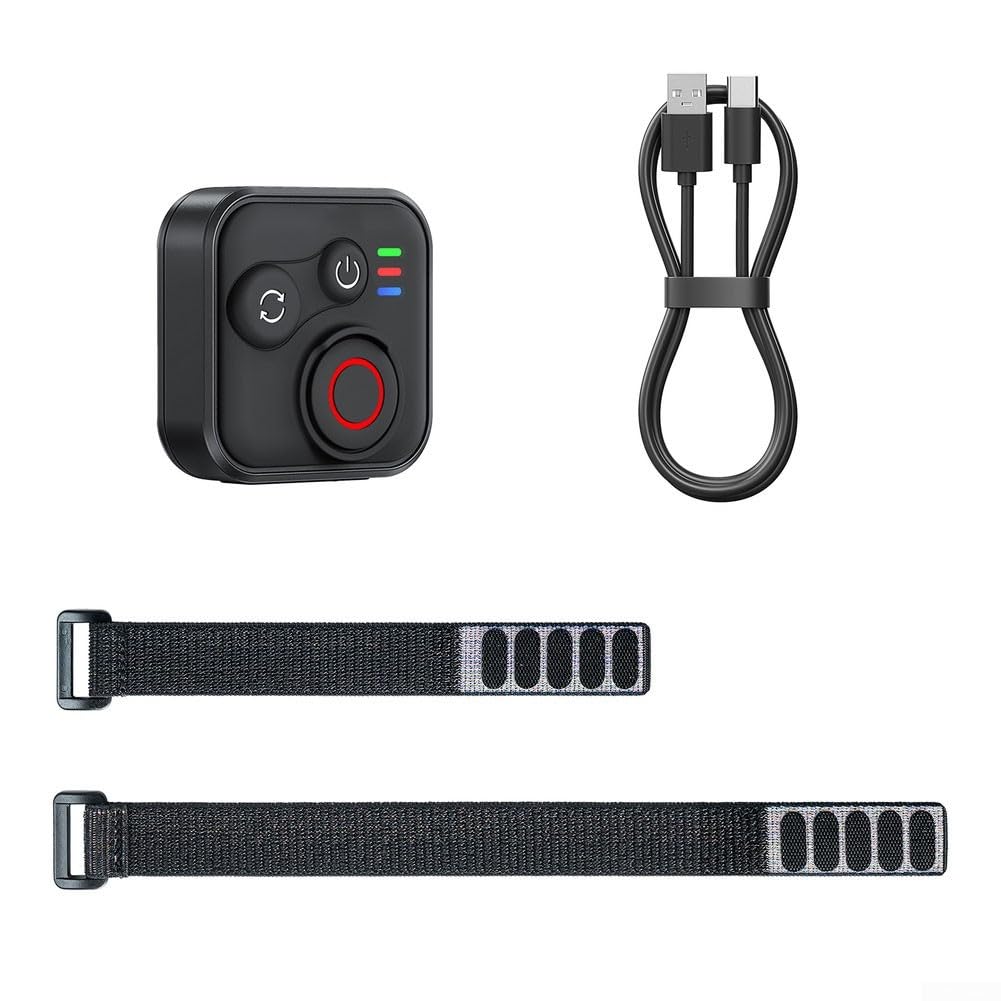
Figure 2.1: Front view of the remote control, showing the power button, mode switch button, and shutter button, along with the wrist strap and USB-C charging cable.

Figure 2.2: Side view of the remote control, highlighting the USB-C charging port for power input.
Button Functions:
- Power Button (⏻): Press and hold to power on/off. Short press to check battery status.
- Mode Switch Button (↻): Short press to cycle through different camera modes (e.g., photo, video).
- Shutter/Record Button (◯): Press to take a photo or start/stop video recording.
- Indicator Lights: Provide status feedback for power, connection, and mode.
3. Package Contents
Please check the package for the following items:
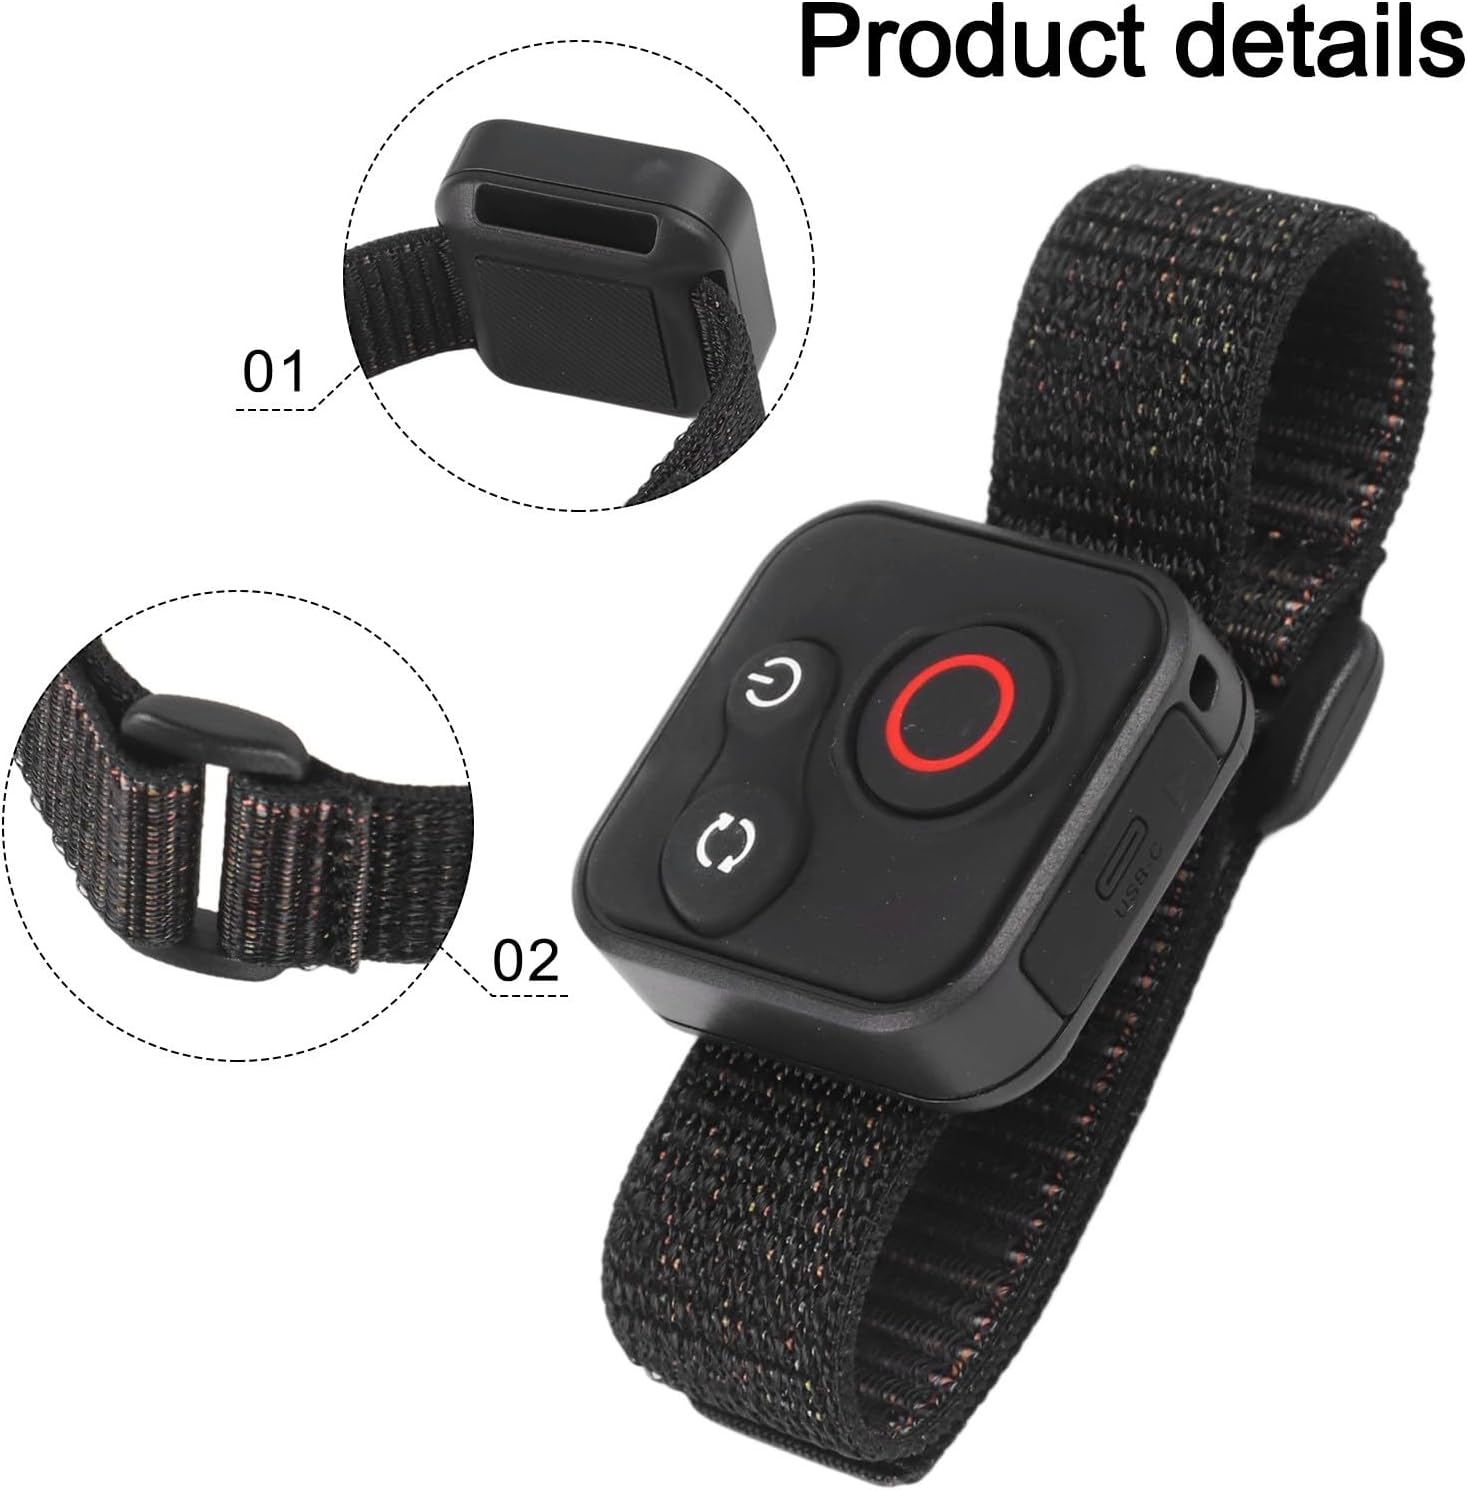
Figure 3.1: All items included in the package: the remote control, two wrist straps of different lengths, and a USB-C charging cable.
- 1 x ZYWUOY Wireless Remote Control
- 1 x USB-C Charging Cable
- 2 x Adjustable Wrist Straps (one short, one long)
4. Setup
4.1 Initial Charging
Before first use, fully charge the remote control. Connect the provided USB-C cable to the remote's charging port and plug the other end into a 5V/100mA USB power source (e.g., computer USB port, wall adapter). The indicator light will show charging status and turn off or change color when fully charged.
4.2 Pairing with Your Device
To pair the remote control with your camera or smartphone:
- Ensure the remote control is sufficiently charged.
- Power on the remote control by pressing and holding the Power Button (⏻) until the indicator lights activate.
- On your camera or smartphone, enable Bluetooth and enter pairing mode. Refer to your device's manual for specific instructions.
- The remote control should appear in the list of available Bluetooth devices. Select it to initiate pairing.
- Once paired, the indicator light on the remote will confirm a successful connection (e.g., solid blue light).
Note: Some cameras may require specific settings or apps to enable remote control functionality. Consult your camera's user manual for details.
5. Operating Instructions
5.1 Power On/Off
- To Power On: Press and hold the Power Button (⏻) for approximately 3 seconds. The indicator lights will illuminate.
- To Power Off: Press and hold the Power Button (⏻) for approximately 3 seconds. The indicator lights will turn off.
5.2 Taking Photos and Recording Videos
After successful pairing:
- Switching Modes: Short press the Mode Switch Button (↻) to cycle through available modes on your connected device (e.g., Photo, Video, Time-lapse). The remote's indicator lights may change to reflect the selected mode.
- Taking a Photo: In photo mode, short press the Shutter/Record Button (◯).
- Starting Video Recording: In video mode, short press the Shutter/Record Button (◯) to start recording.
- Stopping Video Recording: While recording, short press the Shutter/Record Button (◯) again to stop recording.

Figure 5.1: The remote control comfortably worn on a wrist, allowing for easy access to controls during activities.

Figure 5.2: The remote control attached to a selfie stick, illustrating its versatility for controlling cameras from a distance.
6. Compatibility
The ZYWUOY Wireless Remote Control is designed for broad compatibility with various devices, including:
- Insta360 X5/X4/X3/Go 3S/ACE Pro 2/ACE Pro/ONE X2 series cameras
- GoPro Hero series cameras
- Smartphones (iOS and Android)
Note: Compatibility may vary depending on specific device models and firmware versions. Ensure your device's Bluetooth is enabled and updated.
7. Charging
The remote control features an efficient charging system:
- Charging Input: 5V/100mA
- Battery Capacity: 3.7V/120mAh
- Full Charging Time: Approximately 3 hours
Connect the remote to a standard USB power source using the provided USB-C cable. The indicator light will typically show red during charging and turn off or blue when fully charged.
8. Maintenance
- Keep the remote control dry. Do not expose it to moisture or liquids.
- Clean the device with a soft, dry cloth. Do not use harsh chemicals or abrasive cleaners.
- Store the remote in a cool, dry place when not in use.
- Avoid extreme temperatures and direct sunlight.
9. Troubleshooting
9.1 Remote Not Powering On
- Ensure the remote is fully charged. Connect it to a power source and allow it to charge for at least 30 minutes before attempting to power on again.
- Press and hold the Power Button (⏻) for 3-5 seconds.
9.2 Unable to Pair with Device
- Ensure both the remote and your device (camera/smartphone) have sufficient battery.
- Make sure Bluetooth is enabled on your device and it is in pairing mode.
- Keep the remote control within close proximity (e.g., 1 meter) to the device during pairing.
- Try restarting both the remote control and your device.
- Clear previous Bluetooth connections on your device and attempt pairing again.
9.3 Remote Not Responding
- Check if the remote is still connected to your device (indicator light status).
- Ensure the remote is within the operating range (up to 50 meters). Obstacles can reduce this range.
- Verify that your camera or smartphone app is active and ready to receive commands.
- Re-pair the remote control with your device.
10. Specifications
| Model Number | 117VGLO6F0A2L634ET60 |
| Dimensions (Remote) | 37 x 37 x 18.9 mm |
| Weight (Remote) | 23 g |
| Material | ABS |
| Operating Range | Up to 50 meters |
| Battery Capacity | 3.7V/120mAh |
| Charging Input | 5V/100mA |
| Charging Time | Approx. 3 hours |
11. Warranty and Support
This product is covered by a standard manufacturer's warranty. For specific warranty terms and conditions, please refer to the documentation provided at the time of purchase or contact your retailer. If you encounter any issues or require technical assistance, please contact the seller or manufacturer's customer support.